Firebase login functionality from scratch with React + Redux
Firebase offers a free spark plan with no credit card required so anyone can follow along and setup their own firebase web app. The full code is linked at the bottom. It would make great starter code for your future app!
I’ll assume you have a familiarity with npm, javascript, and React, but little or no Redux or Firebase experience.
Setting up your Firebase project.Login to the
Firebase Console and add a new project. Follow the steps until you arrive at your project home screen. Click the authentication tab from the menu and click the Set up sign in method button.
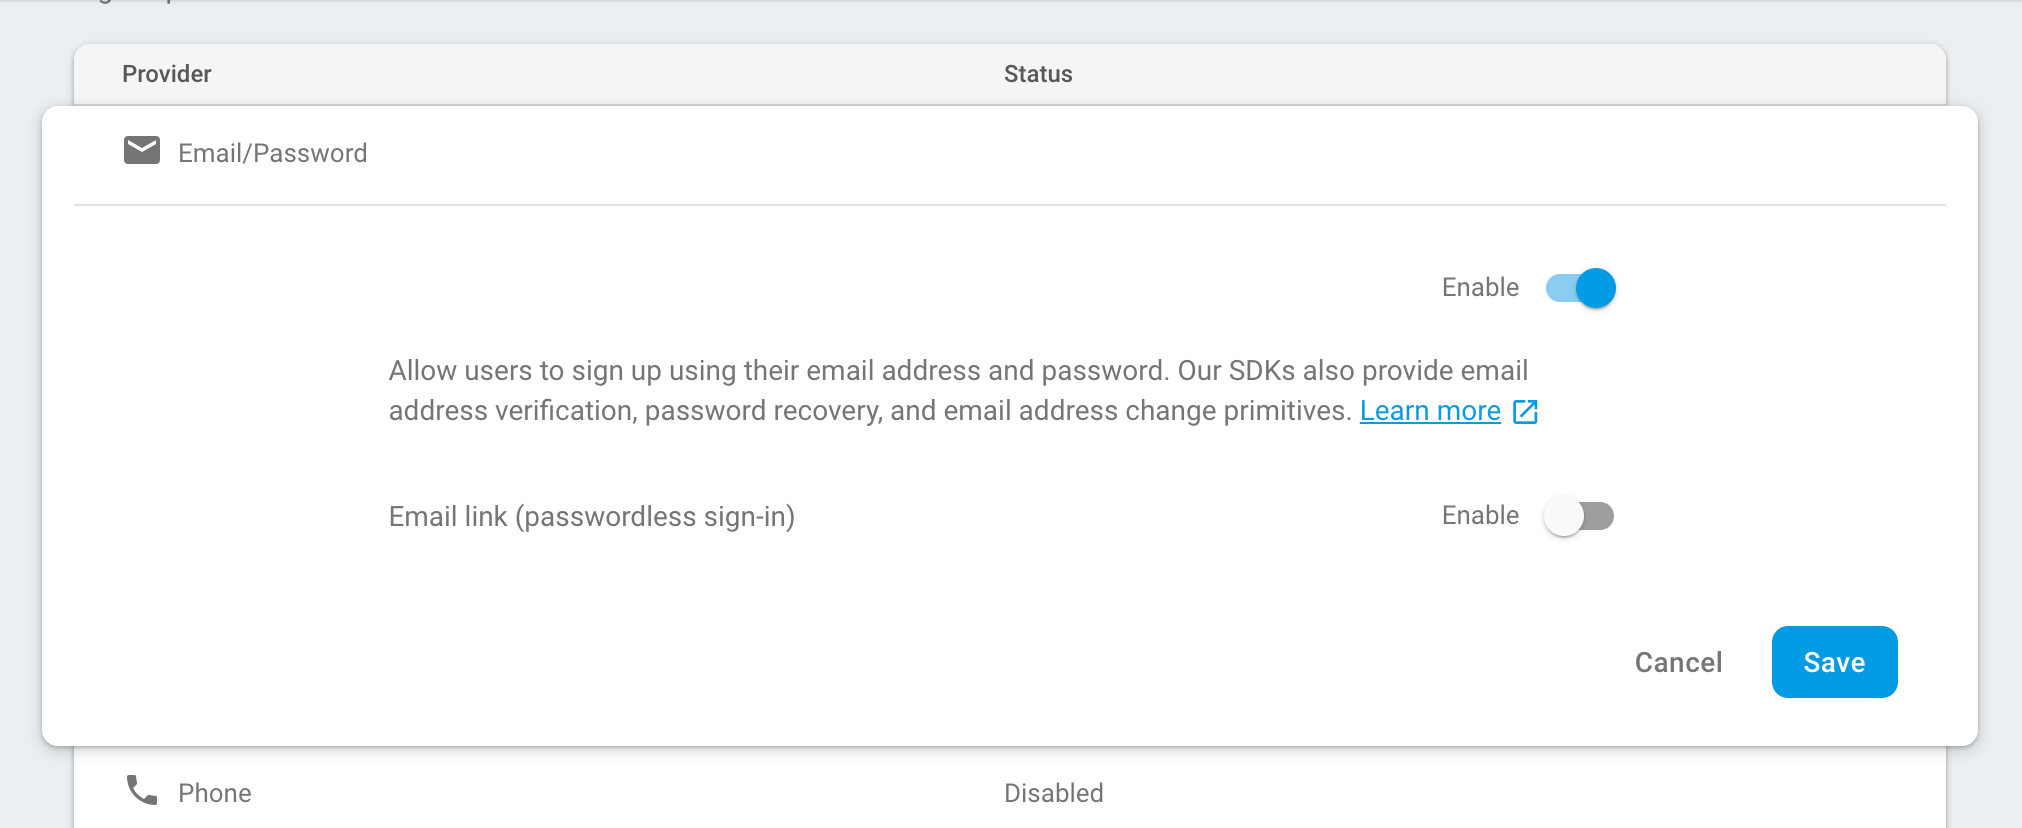
For this tutorial, we’ll be setting up the **Email/Password **authentication method. Click edit and toggle on the first switch.
After enabling authentication, click the **Database **menu link and click Create Database in the cloud Firestore section.
For this project we’re going to be setting up Firestore. If you would like to use the realtime database, this tutorial will be basically identical since authentication is handled separately from the database you choose.

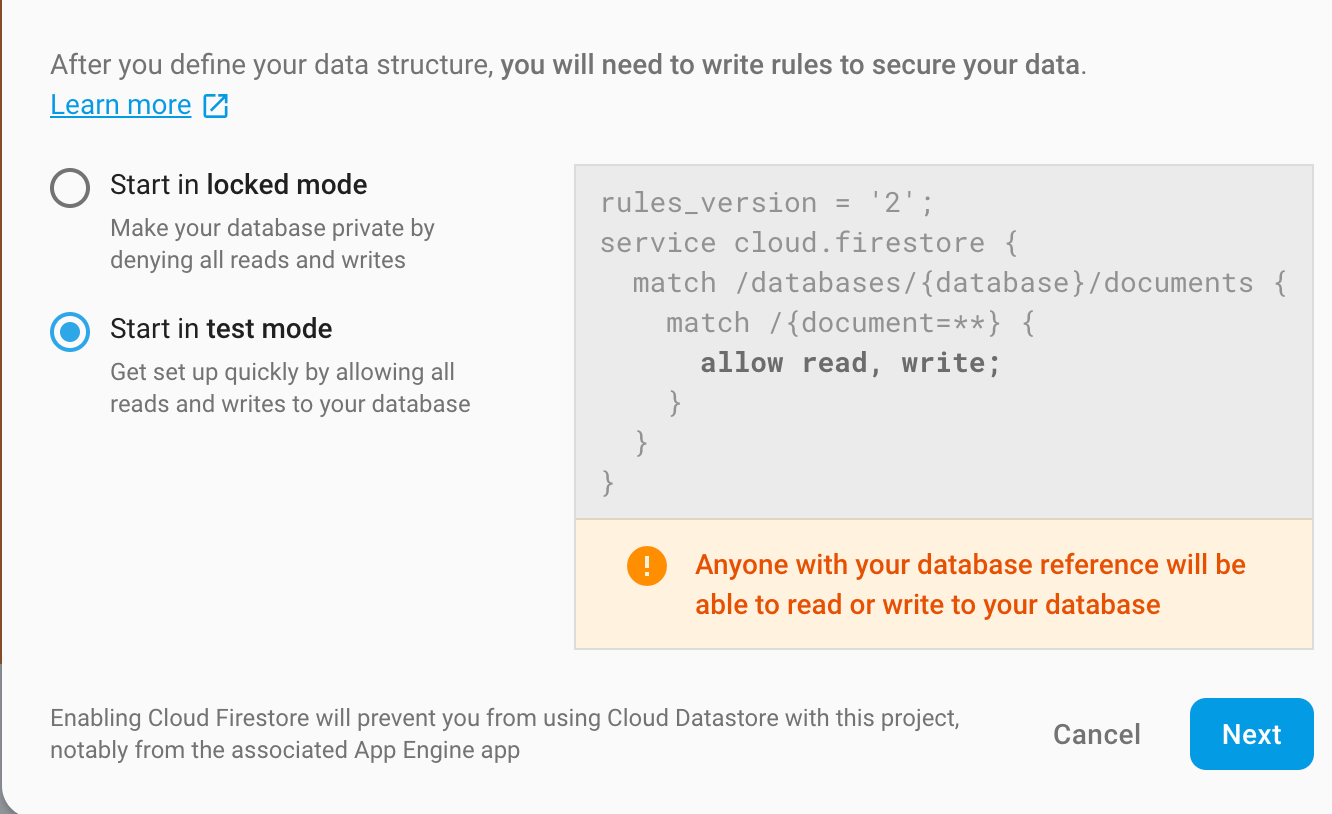
Select Start in test mode
Next, choose the location for your database host that best applies to your project. One of the multi-region choices is usually perfect.

Click done and firebase will be all setup for what we’re planning to do.
Setting up your react app.First, install create-react-app. When thats finished, run this command in the directory where you want your app to live:
create-react-app your-project-name
When thats finished, let’s make sure everything is working. Open your new project directory that create-react-app generated in your terminal/command line and run the following command:
npm run start
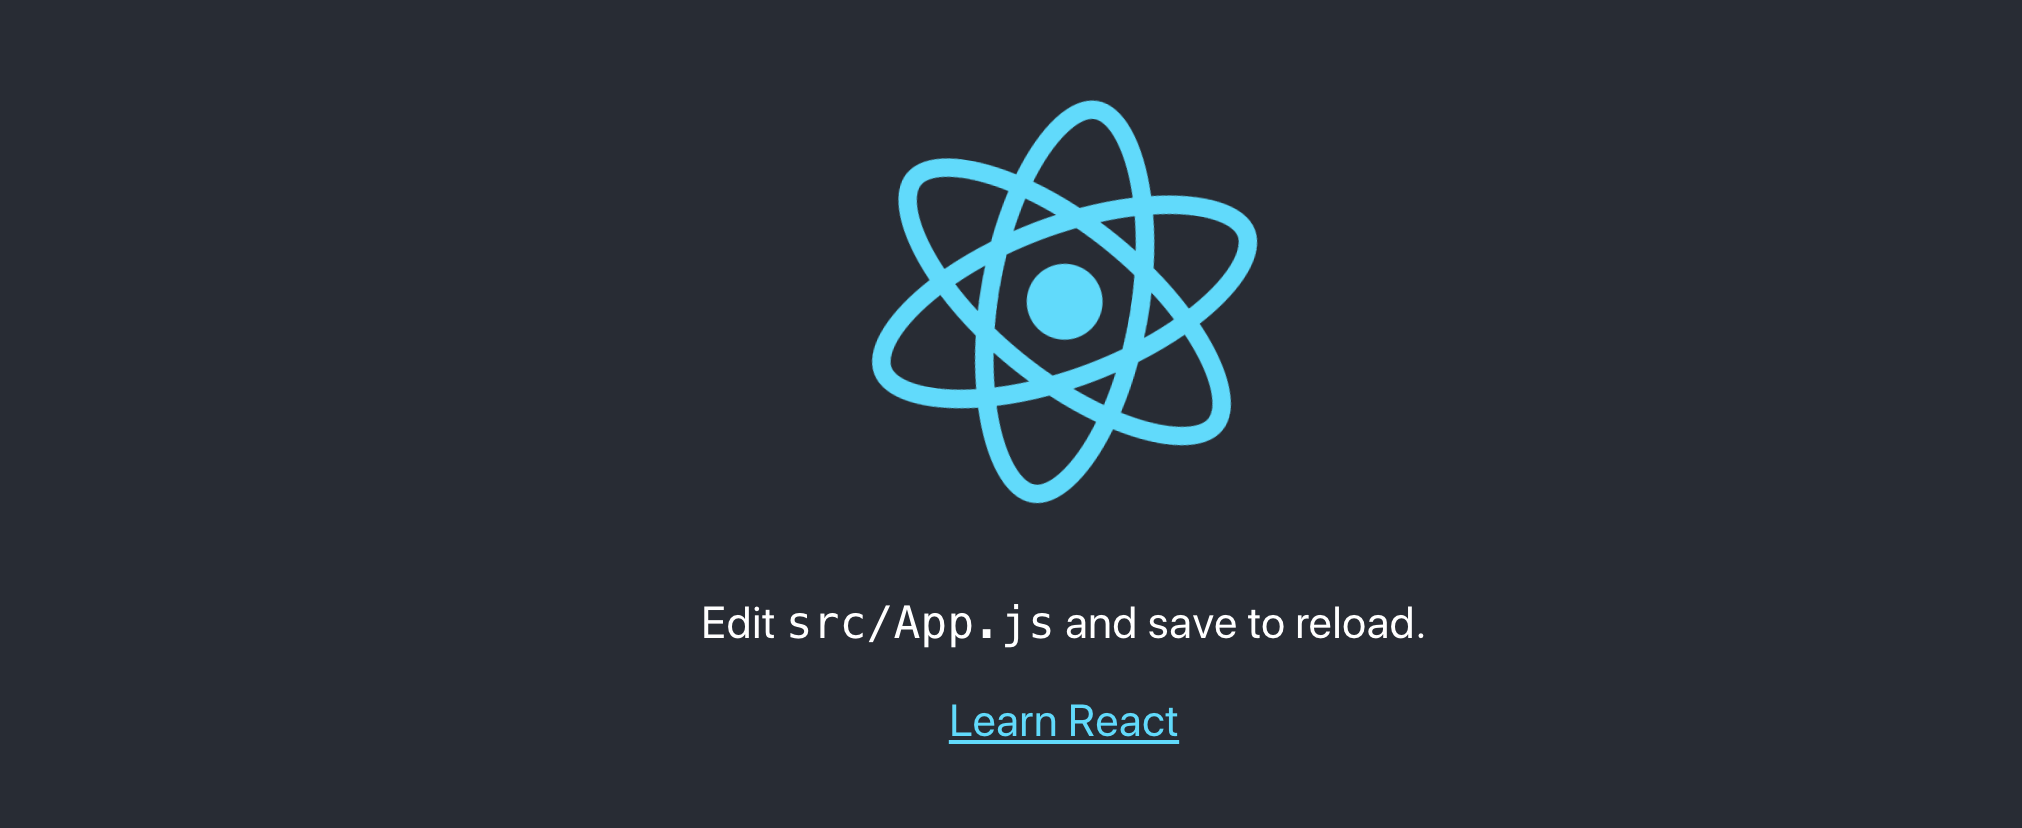
Your browser should open and you should see a page that looks like this:
Initializing firebase in your react app
Run the following command to install firebase-tools.
npm install -g firebase-tools
When thats finished, run the following command to login to firebase
firebase login
Follow the steps. After you’ve successfully logged in run this command to initialize firebase in your react-app (make sure you’re in your project directory):
firebase init
We’re going to setup hosting and firestore for this project, if you would prefer firebase’s realtime database feel free to choose that option instead as this tutorial will work for both, but be sure to setup the realtime database prior to selecting it here.

Hit Enter, then you should be presented with a list of your firebase projects. Choose the one you created earlier.If you get an error, make sure you follow the earlier steps on setting up Firestore before continuing.
Choose the default filenames for Firestore rules and Firestore indexes.
Choose **build **as your default public directory as this is the directory where our project compiles.
Do not choose public.

Type **y **to confirm that this will be a single-page app.Type **N **
to decline overwriting index.html as create-react-app gave us what we need already.Let’s confirm that we setup firebase correctly. First, build your react app for deployment.
npm run build
Then, run the following command to serve a a local version of your app to see how it would look if you deployed it to firebase:
npm run build
Then, run the following command to serve a a local version of your app to see how it would look if you deployed it to firebase:
firebase serve
You should see your react app at http://localhost:5000
Installing necessary packages.
Create-react-app comes with almost everything we need, but we still need to add a few more things to get going.For Redux, lets run the following command:
npm install redux
For React-Redux
npm install react-redux
Let’s also install Redux Thunk. It is a very useful middleware that allows you easily create async actions:
npm install redux-thunk
For our client side routing let’s install React Router. It will allow us to setup our login page and protected sign-in area:
npm install react-router-dom
And finally, lets install firebase which allows us to interact with firebase within our react app.
.And finally, lets install firebase which allows us to interact with firebase within our react app.
npm install firebase
Choose a UI library for your project (or don’t).
I’ll be using Material Ui, but feel free to choose bootstrap or whatever library you like. I’m not going to go into too much detail on styling or basic component setup.
npm install @material-ui/core
Paste the following into the header of your **public/index.html **page to get the Roboto Font.
<link rel="stylesheet" href="https://fonts.googleapis.com/css?family=Roboto:300,400,500,700&display=swap" />
Install the material icon library:
npm install @material-ui/icons
And thats it for our setup!
Setting up our auth actions.
That was a lot of setup, but now we’re ready to start coding! We’ll begin by making three folders in our **src **directory: actions, reducers, firebase.
Then, create these five empty files: actions/index.js, actions/auth.js, reducers/index.js, reducers/auth.js,firebase/firebase.js.
Getting our firebase config file setup.Go back to the firebase console and hit the gear icon at the top:
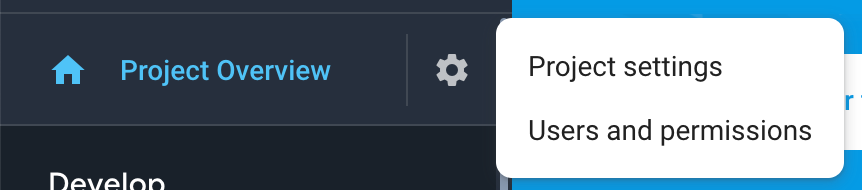
Click the Project settings link and scroll to the bottom. Then, lets add firebase to our web app:
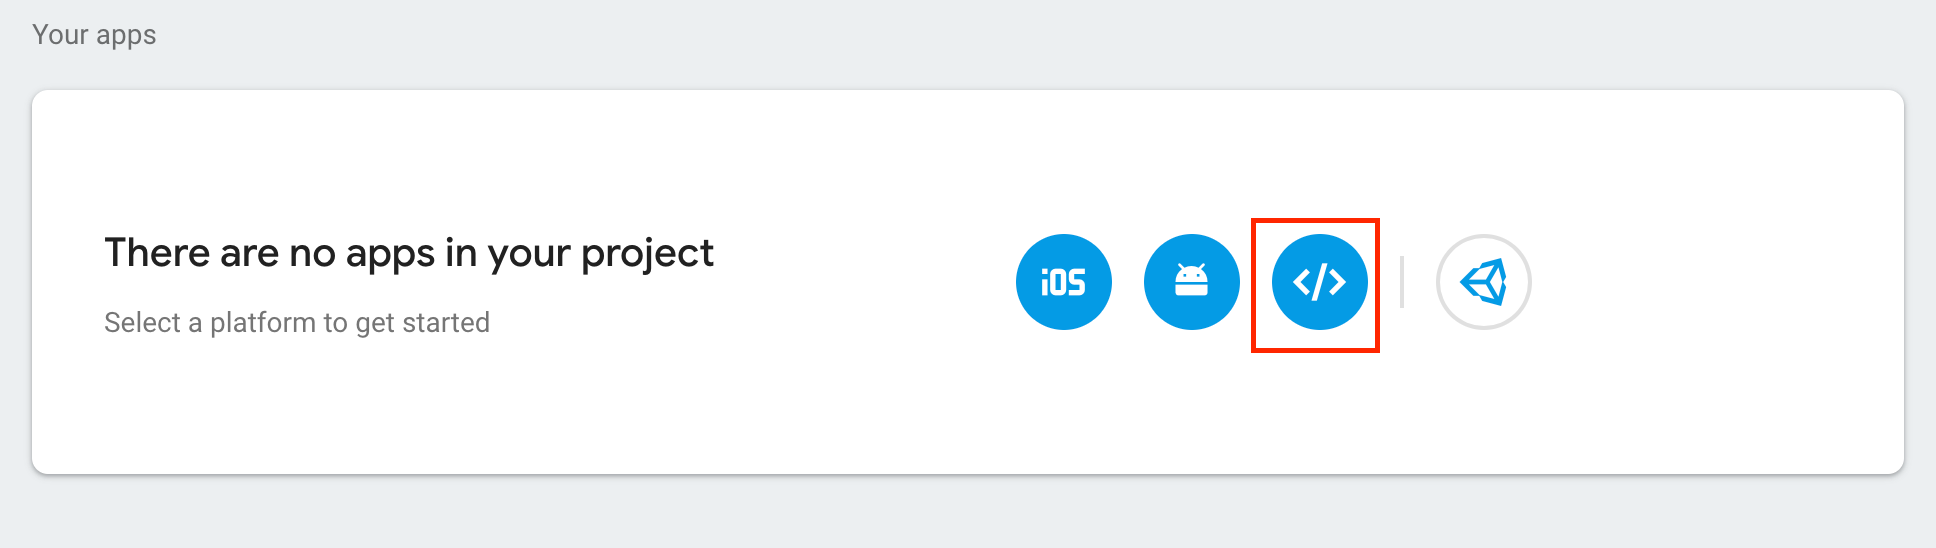
Then register it with your project:
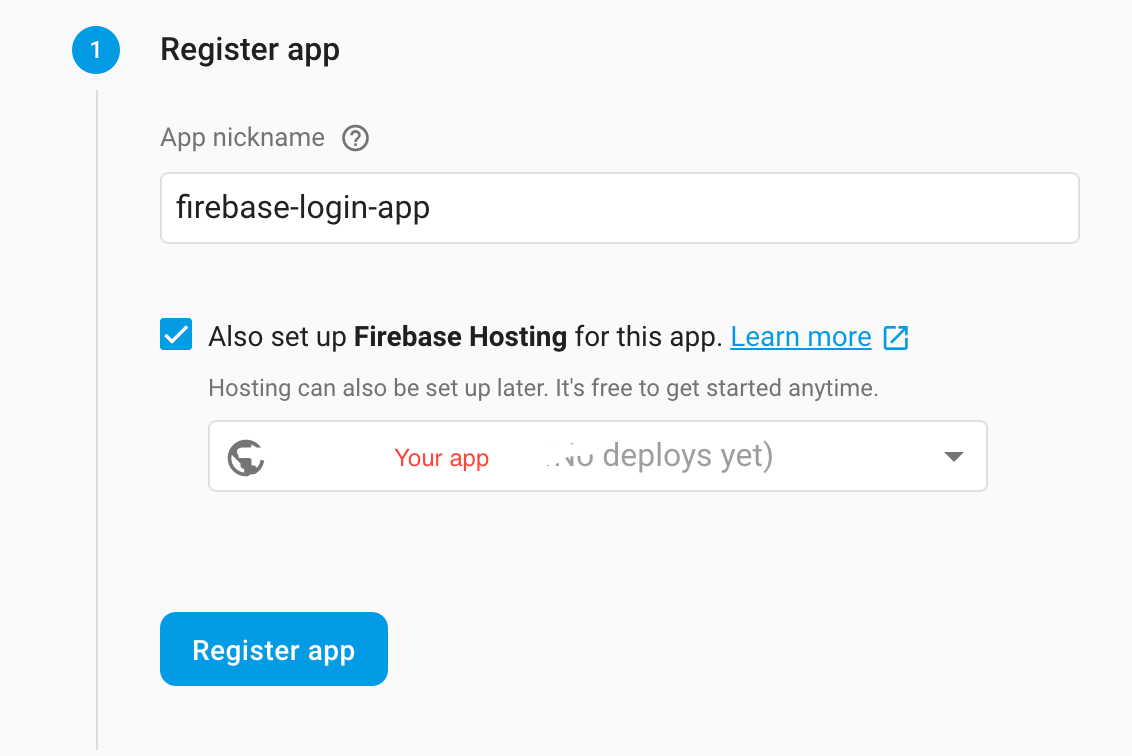
After clicking Register app, you can leave this form wizard and go back to the project settings page and scroll to the bottom. You should see your app there now. Let’s get the **config **values like so:

Copy and paste the firebaseConfig variable into
firebase/firebase.js:
const firebaseConfig = { Your config values }
Add the following imports:
import firebase from "firebase/app";
import "firebase/auth";
import "firebase/firestore";
Then let’s initialize the app and the database and export them for use in our actions file:
export const myFirebase = firebase.initializeApp(firebaseConfig);
const baseDb = myFirebase.firestore();
export const db = baseDb;
Here is the full file code of firebase/firebase.js
import firebase from "firebase/app";
	import "firebase/auth";
	import "firebase/firestore";


	const firebaseConfig = {
	//Your config values
	};


	export const myFirebase = firebase.initializeApp(firebaseConfig);
	const baseDb = myFirebase.firestore();
	export const db = baseDb;
Creating our actions.
Open **actions/auth.js **and add the following import to get our firebase instance:
import { myFirebase } from "../firebase/firebase";
We need to create actions to do the following: logging in, logging out, and re-establishing a session on page refresh. To do this we should create the following action types (feel free to adjust the naming):
export const LOGIN_REQUEST = "LOGIN_REQUEST";
export const LOGIN_SUCCESS = "LOGIN_SUCCESS";
export const LOGIN_FAILURE = "LOGIN_FAILURE";

export const LOGOUT_REQUEST = "LOGOUT_REQUEST";
export const LOGOUT_SUCCESS = "LOGOUT_SUCCESS";
export const LOGOUT_FAILURE = "LOGOUT_FAILURE";
export const VERIFY_REQUEST = "VERIFY_REQUEST";
export const VERIFY_SUCCESS = "VERIFY_SUCCESS";
As you can see we’ve broken each action up into three parts to track the asynchronous state within our application. We want to know when a request is made, when a request is successful, and when a request fails. The only exception is verifying as this doesn’t need a failure state.
Next, we need to create the functions that return our action types and the necessary parameters that our reducer will read. Let’s start with the actions for logging on.For a user requesting to login:
const requestLogin = () => {
  return {
    type: LOGIN_REQUEST
  };
};
For a successful login that takes in a firebase user object:
const receiveLogin = user => {
  return {
    type: LOGIN_SUCCESS,
    user
  };
};
And finally, one for a failure:
const loginError = () => {
  return {
    type: LOGIN_FAILURE
  };
};
Using the previous function as a template, create the action functions for our remaining five action types. All five take in no parameters. If you want to take the extra time, a robust app should store the failure messages in our reducer so we can indicate to the user what types of errors have occurred, but to keep it simple for this tutorial we’ll simply use a boolean value that we set when an error occurs.
Now we can create our thunks*** ***that will interact with firebase to perform all the actions we need.
A thunk is another word for a function. But it’s not just any old function. It’s a special (and uncommon) name for a function that’s returned by another.
We can start with logging a user into firebase. We’ll be using the firebase signInWithEmailAndPassword*** ***function. We want our thunk to take in credentials from our future Login component and also still take in the dispatch function that is passed to all our actions we initiate from our components:
export const loginUser = (email, password) => dispatch => {}
As you can see the first function will take in our username and password which we will provide when we make our *Login *component and return a function that takes in a dispatch function which will be implicitly passed by the dispatch function itself when we call it in our component.
We want to structure our loginUser() thunk like this:
export const loginUser = (email, password) => dispatch => {
	  dispatch(requestLogin());
	  myFirebase
	    .auth()
	    .signInWithEmailAndPassword(email, password)
	    .then(user => {
	      dispatch(receiveLogin(user));
	    })
	    .catch(error => {
	      //Do something with the error if you want!
	      dispatch(loginError());
	    });
	};
Let’s break that code down into each step. First, we dispatch ***requestLogin()***which will tell our app a user is logging in. Then, we get our firebase auth instance by calling myFirebase.auth().
Then we call the authentication method we want to use which in this case is signInWithEmailAndPassword()* *and we pass in our user credentials. After, we use a then() that will be passed the firebase user object when login is successful to dispatch ***receiveLogin(user).***We pass the user because want to store the firebase user object in redux so we can use it later in our app. We won’t be using it in this tutorial, but you’ll thank me when you start trying to interact with your Firestore database in future actions you’re going to write!
And finally, we catch any errors that occur and dispatch ***loginError() ***so we can let our users know that something went wrong.
Our remaining two thunks are structured almost exactly the same, logoutUser() calls the firebase signOut()*** ***method:
export const logoutUser = () => dispatch => {
	  dispatch(requestLogout());
	  myFirebase
	    .auth()
	    .signOut()
	    .then(() => {
	      dispatch(receiveLogout());
	    })
	    .catch(error => {
	      //Do something with the error if you want!
	      dispatch(logoutError());
	    });
	};
And ***verifyAuth() calls the firebase onAuthStateChanged() ***method which looks for a preexisting user session and re-establishes it. In our case this will happen on refresh. This method also sets up a listener while the app is running to change user session tokens when they expire.
export const verifyAuth = () => dispatch => {
	  dispatch(verifyRequest());
	  myFirebase.auth().onAuthStateChanged(user => {
	    if (user !== null) {
	      dispatch(receiveLogin(user));
	    }
	    dispatch(verifySuccess());
	  });
	};
You can see here that we also dispatch ***receiveLogin() ***so we can repopulate the user object in our reducer if a user “logs in” with a preexisting session. We check if user is null because we only want to log someone in if firebase finds a user session.
Thats it for actions/auth.js! Here is the complete file:
import { myFirebase } from "../firebase/firebase";


	export const LOGIN_REQUEST = "LOGIN_REQUEST";
	export const LOGIN_SUCCESS = "LOGIN_SUCCESS";
	export const LOGIN_FAILURE = "LOGIN_FAILURE";


	export const LOGOUT_REQUEST = "LOGOUT_REQUEST";
	export const LOGOUT_SUCCESS = "LOGOUT_SUCCESS";
	export const LOGOUT_FAILURE = "LOGOUT_FAILURE";


	export const VERIFY_REQUEST = "VERIFY_REQUEST";
	export const VERIFY_SUCCESS = "VERIFY_SUCCESS";


	const requestLogin = () => {
	  return {
	    type: LOGIN_REQUEST
	  };
	};


	const receiveLogin = user => {
	  return {
	    type: LOGIN_SUCCESS,
	    user
	  };
	};


	const loginError = () => {
	  return {
	    type: LOGIN_FAILURE
	  };
	};


	const requestLogout = () => {
	  return {
	    type: LOGOUT_REQUEST
	  };
	};


	const receiveLogout = () => {
	  return {
	    type: LOGOUT_SUCCESS
	  };
	};


	const logoutError = () => {
	  return {
	    type: LOGOUT_FAILURE
	  };
	};


	const verifyRequest = () => {
	  return {
	    type: VERIFY_REQUEST
	  };
	};


	const verifySuccess = () => {
	  return {
	    type: VERIFY_SUCCESS
	  };
	};


	export const loginUser = (email, password) => dispatch => {
	  dispatch(requestLogin());
	  myFirebase
	    .auth()
	    .signInWithEmailAndPassword(email, password)
	    .then(user => {
	      dispatch(receiveLogin(user));
	    })
	    .catch(error => {
	      //Do something with the error if you want!
	      dispatch(loginError());
	    });
	};


	export const logoutUser = () => dispatch => {
	  dispatch(requestLogout());
	  myFirebase
	    .auth()
	    .signOut()
	    .then(() => {
	      dispatch(receiveLogout());
	    })
	    .catch(error => {
	      //Do something with the error if you want!
	      dispatch(logoutError());
	    });
	};


	export const verifyAuth = () => dispatch => {
	  dispatch(verifyRequest());
	  myFirebase
	    .auth()
	    .onAuthStateChanged(user => {
	      if (user !== null) {
	        dispatch(receiveLogin(user));
	      }
	      dispatch(verifySuccess());
	    });
	};
Now we can setup our **actions/index.js **file to export everything we just did for easy importing.
All we need is one line:
export * from "./auth";
Setting up our reducer.
Open up **reducers/auth.js **and import from actions all of the action types we just created. The reducer takes these in and passes them into a switch statement.
import {
  LOGIN_REQUEST,
  LOGIN_SUCCESS,
  LOGIN_FAILURE,
  LOGOUT_REQUEST,
  LOGOUT_SUCCESS,
  LOGOUT_FAILURE,
  VERIFY_REQUEST,
  VERIFY_SUCCESS
} from "../actions/";
Then, we can create our reducer function. We can structure it as follows:
export default (state = {}, action) => {
  switch (action.type) {
    default:
      return state;
  }
};
Then we can create some default state for all the flags and objects we will need:
export default (
  state = {
    isLoggingIn: false,
    isLoggingOut: false,
    isVerifying: false,
    loginError: false,
    logoutError: false,
    isAuthenticated: false,
    user: {}
  },
  action
) => {
  switch (action.type) {
OK, we can work on our switch cases now. When a user is trying to login we want to let our app know that yes, they are logging in and we also want to clear any errors that may have previously occurred:
case LOGIN_REQUEST:
      return {
        ...state,
        isLoggingIn: true,
        loginError: false
      };
When a successful login occurs, we want to tell our app that it is no longer trying to log a user in, that a user is now authenticated, and we want to store that user that our action passes:
case LOGIN_SUCCESS:
      return {
        ...state,
        isLoggingIn: false,
        isAuthenticated: true,
        user: action.user
      };
And finally, when a login failure occurs, we want to tell our app that it is also no longer trying to log a user in, that no user is authenticated, and that a failure has occurred:
case LOGIN_FAILURE:
      return {
        ...state,
        isLoggingIn: false,
        isAuthenticated: false,
        loginError: true
      };
The remaining five cases are structured similarly. Try to do these yourself before checking your work with the code below.Here is the full file:
import {
	  LOGIN_REQUEST,
	  LOGIN_SUCCESS,
	  LOGIN_FAILURE,
	  LOGOUT_REQUEST,
	  LOGOUT_SUCCESS,
	  LOGOUT_FAILURE,
	  VERIFY_REQUEST,
	  VERIFY_SUCCESS
	} from "../actions/";


	export default (
	  state = {
	    isLoggingIn: false,
	    isLoggingOut: false,
	    isVerifying: false,
	    loginError: false,
	    logoutError: false,
	    isAuthenticated: false,
	    user: {}
	  },
	  action
	) => {
	  switch (action.type) {
	    case LOGIN_REQUEST:
	      return {
	        ...state,
	        isLoggingIn: true,
	        loginError: false
	      };
	    case LOGIN_SUCCESS:
	      return {
	        ...state,
	        isLoggingIn: false,
	        isAuthenticated: true,
	        user: action.user
	      };
	    case LOGIN_FAILURE:
	      return {
	        ...state,
	        isLoggingIn: false,
	        isAuthenticated: false,
	        loginError: true
	      };
	    case LOGOUT_REQUEST:
	      return {
	        ...state,
	        isLoggingOut: true,
	        logoutError: false
	      };
	    case LOGOUT_SUCCESS:
	      return {
	        ...state,
	        isLoggingOut: false,
	        isAuthenticated: false,
	        user: {}
	      };
	    case LOGOUT_FAILURE:
	      return {
	        ...state,
	        isLoggingOut: false,
	        logoutError: true
	      };
	    case VERIFY_REQUEST:
	      return {
	        ...state,
	        isVerifying: true,
	        verifyingError: false
	      };
	    case VERIFY_SUCCESS:
	      return {
	        ...state,
	        isVerifying: false
	      };
	    default:
	      return state;
	  }
	};
Now we can create our default reducer using the ***combineReducers()***function from the redux library.
Open **reducers/index.js **and add the following imports:
import { combineReducers } from "redux";

import auth from "./auth";
Then, call the combine function. You’ll add your other reducers here as well as you expand your app.
export default combineReducers({ auth });
And now we have everything we need for our reducer!
Setting up our Redux plumbing.
So we’ve created the actions and reducer we needed, now we have to actually provide our Redux state to the app.
Create a new file in the **src **folder called configureStore.js
This file is going to initialize our store, setup our thunk middleware, call our **verifyAuth() **action, and export our function so we can provide it to the root of our app. We can start with our imports:
import { applyMiddleware, createStore } from "redux";
import thunkMiddleware from "redux-thunk";

import { verifyAuth } from "./actions/";
import rootReducer from "./reducers";
We’re importing our ***verifyAuth() ***action, and the output of ***combineReducers() ***which is really just a big object composed of all the state from our reducers, but at the moment we only have one.
Then, we can create and export the function that will return our configured store.
export default function configureStore(persistedState) {
  const store = createStore(
    rootReducer,
    persistedState,
    applyMiddleware(thunkMiddleware)
  );
  store.dispatch(verifyAuth());
  return store;
}
The function will be called every time our app starts up, which also happens when the user refreshes the page. I like to dispatch ***verifyAuth() ***here because it ensures it will be the first thing happens to our redux store, and if a user session exists it will authenticate our user before the rest of the app loads which will let us route to our secure route without our login page showing.
Create another file in the src folder called Root.js
This component is going to provide our store to
App
. We’re also going to initialize react-router here as well. We’ll be adding the actual routes to
*App. *
Here are the imports we will need:
import React from "react";

import { Provider } from "react-redux";
import { BrowserRouter as Router } from "react-router-dom";
import App from "./App";
import configureStore from "./configureStore";
Next we need to initialize our configured store.
const store = configureStore();
Then, we need to provide that store to the rest of our App and initialize our router.
function Root() {
  return (
    <Provider store={store}>
      <Router>
        <App />
      </Router>
    </Provider>
  );
}

export default Root;
Here is the full file:
import React from "react";


	import { Provider } from "react-redux";
	import { BrowserRouter as Router } from "react-router-dom";


	import App from "./App";
	import configureStore from "./configureStore";


	const store = configureStore();


	function Root() {
	  return (
	    <Provider store={store}>
	      <Router>
	        <App />
	      </Router>
	    </Provider>
	  );
	}


	export default Root;
As the name implies, Root will be the root component of our app. Right now, create-react-app has defined the root component as App. To change this, open **src/index.js **remove the *App *import and replace it with Root. Your completed file should look like this:
import React from "react";
	import ReactDOM from "react-dom";
	import "./index.css";
	import Root from "./Root";
	import * as serviceWorker from "./serviceWorker";


	ReactDOM.render(<Root />, document.getElementById("root"));


	// If you want your app to work offline and load faster, you can change
	// unregister() to register() below. Note this comes with some pitfalls.
	// Learn more about service workers: https://bit.ly/CRA-PWA
	serviceWorker.unregister();
Setting up our routing.
We’ve already initialized the router in Root, but our app still has no routes. We can create normal routes right now, but we need the ability to create protected routes that can only be accessed after a user logs in. If they aren’t logged in, they should be redirected to the login page.
Create a new folder in src called **components **and add three new files named ProtectedRoute.js, Home.js, and Login.js
Open **components/ProtectedRoute.js **and add the following imports:
import React from "react";
import { Route, Redirect } from "react-router-dom";
Then lets add the component code:
const ProtectedRoute = ({
  component: Component,
  isAuthenticated,
  isVerifying,
  ...rest
}) => (
  <Route
    {...rest}
    render={props =>
      isVerifying ? (
        <div />
      ) : isAuthenticated ? (
        <Component {...props} />
      ) : (
        <Redirect
          to={{
            pathname: "/login",
            state: { from: props.location }
          }}
        />
      )
    }
  />
);

export default ProtectedRoute;
Understanding this component goes beyond the scope of this tutorial. Tyler McGinnis created an excellent tutorial on his site if you would like to know how this works!
Now we can create all of our Routes. Open **App.js **and remove all the template code create-react-app gave us. We can add the following imports:
import React from "react";
import { Route, Switch } from "react-router-dom";
import { connect } from "react-redux";
import ProtectedRoute from "./components/ProtectedRoute";
import Home from "./components/Home";
import Login from "./components/Login";
As you can see, we’ve imported ***connect() ***from react-redux which lets us link up our component to our redux store to pull out the data we need. To do this we want to define a ***mapStateToProps() ***function at the bottom of our component and pass it to connect().
Lets do it like this:
function mapStateToProps(state) {
  return {
    isAuthenticated: state.auth.isAuthenticated,
    isVerifying: state.auth.isVerifying
  };
}

export default connect(mapStateToProps)(App);
We pull out the pieces of state we need for this component from our auth reducer and return an object that is mapped to our components props.Now we can add our component code where we define our routes and use our *ProtectedRoute *component to protect the root route.
function App(props) {
  const { isAuthenticated, isVerifying } = props;
  return (
    <Switch>
      <ProtectedRoute
        exact
        path="/"
        component={Home}
        isAuthenticated={isAuthenticated}
        isVerifying={isVerifying}
      />
      <Route path="/login" component={Login} />
    </Switch>
  );
}
The *Switch *will exclusively select only one of these routes, we don’t technically need it here since we don’t have conflicting routes, but it is good practice and it will also prevent you from adding additional routes here that may bypass our *ProtectedRoute. *Any route you put under our *ProtectedRoute *say in the home component will automatically be protected as well without you needing to use the component since they are sub-routes.
Here is the full code for App.js:
import React from "react";


	import { Route, Switch } from "react-router-dom";
	import { connect } from "react-redux";


	import ProtectedRoute from "./components/ProtectedRoute";
	import Home from "./components/Home";
	import Login from "./components/Login";


	function App(props) {
	  const { isAuthenticated, isVerifying } = props;
	  return (
	    <Switch>
	      <ProtectedRoute
	        exact
	        path="/"
	        component={Home}
	        isAuthenticated={isAuthenticated}
	        isVerifying={isVerifying}
	      />
	      <Route path="/login" component={Login} />
	    </Switch>
	  );
	}


	function mapStateToProps(state) {
	  return {
	    isAuthenticated: state.auth.isAuthenticated,
	    isVerifying: state.auth.isVerifying
	  };
	}


	export default connect(mapStateToProps)(App);
Now we can make the login page.
Open **components/Login.js **and we can start adding our code. I’m going to include my code with Material Ui, but feel free to create this page however you like. We need it to have the following: inputs for email and password, a submit button, some of our redux state, and a function that dispatches our ***loginUser() ***action with the username and password.
However you choose to do this, these imports are required:
import React, { Component } from "react";
import { connect } from "react-redux";
import { Redirect } from "react-router-dom";
import { loginUser } from "../actions";
Then lets get the state from Redux that we will need:
function mapStateToProps(state) {
  return {
    isLoggingIn: state.auth.isLoggingIn,
    loginError: state.auth.loginError,
    isAuthenticated: state.auth.isAuthenticated
  };
}
export default connect(mapStateToProps)(Login);
We want to setup a redirect that only renders when a user becomes authenticated:
const { classes, loginError, isAuthenticated } = this.props;
if (isAuthenticated) {
   return <Redirect to="/" />;
} else {
   return ( //Your Login component JSX
And lastly, we want to have a submit function to call our redux ***loginUser() ***action.
handleSubmit = () => {
    const { dispatch } = this.props;
    const { email, password } = this.state;
    dispatch(loginUser(email, password));
};
Here is my *Login *component using Material Ui:
import React, { Component } from "react";
	import { connect } from "react-redux";
	import { Redirect } from "react-router-dom";
	import { loginUser } from "../actions";
	import { withStyles } from "@material-ui/styles";


	import Avatar from "@material-ui/core/Avatar";
	import Button from "@material-ui/core/Button";
	import TextField from "@material-ui/core/TextField";
	import LockOutlinedIcon from "@material-ui/icons/LockOutlined";
	import Typography from "@material-ui/core/Typography";
	import Paper from "@material-ui/core/Paper";
	import Container from "@material-ui/core/Container";


	const styles = () => ({
	  "@global": {
	    body: {
	      backgroundColor: "#fff"
	    }
	  },
	  paper: {
	    marginTop: 100,
	    display: "flex",
	    padding: 20,
	    flexDirection: "column",
	    alignItems: "center"
	  },
	  avatar: {
	    marginLeft: "auto",
	    marginRight: "auto",
	    backgroundColor: "#f50057"
	  },
	  form: {
	    marginTop: 1
	  },
	  errorText: {
	    color: "#f50057",
	    marginBottom: 5,
	    textAlign: "center"
	  }
	});


	class Login extends Component {
	  state = { email: "", password: "" };


	  handleEmailChange = ({ target }) => {
	    this.setState({ email: target.value });
	  };


	  handlePasswordChange = ({ target }) => {
	    this.setState({ password: target.value });
	  };


	  handleSubmit = () => {
	    const { dispatch } = this.props;
	    const { email, password } = this.state;


	    dispatch(loginUser(email, password));
	  };


	  render() {
	    const { classes, loginError, isAuthenticated } = this.props;
	    if (isAuthenticated) {
	      return <Redirect to="/" />;
	    } else {
	      return (
	        <Container component="main" maxWidth="xs">
	          <Paper className={classes.paper}>
	            <Avatar className={classes.avatar}>
	              <LockOutlinedIcon />
	            </Avatar>
	            <Typography component="h1" variant="h5">
	              Sign in
	            </Typography>
	            <TextField
	              variant="outlined"
	              margin="normal"
	              fullWidth
	              id="email"
	              label="Email Address"
	              name="email"
	              onChange={this.handleEmailChange}
	            />
	            <TextField
	              variant="outlined"
	              margin="normal"
	              fullWidth
	              name="password"
	              label="Password"
	              type="password"
	              id="password"
	              onChange={this.handlePasswordChange}
	            />
	            {loginError && (
	              <Typography component="p" className={classes.errorText}>
	                Incorrect email or password.
	              </Typography>
	            )}
	            <Button
	              type="button"
	              fullWidth
	              variant="contained"
	              color="primary"
	              className={classes.submit}
	              onClick={this.handleSubmit}
	            >
	              Sign In
	            </Button>
	          </Paper>
	        </Container>
	      );
	    }
	  }
	}


	function mapStateToProps(state) {
	  return {
	    isLoggingIn: state.auth.isLoggingIn,
	    loginError: state.auth.loginError,
	    isAuthenticated: state.auth.isAuthenticated
	  };
	}


	export default withStyles(styles)(connect(mapStateToProps)(Login));
Final pieces.
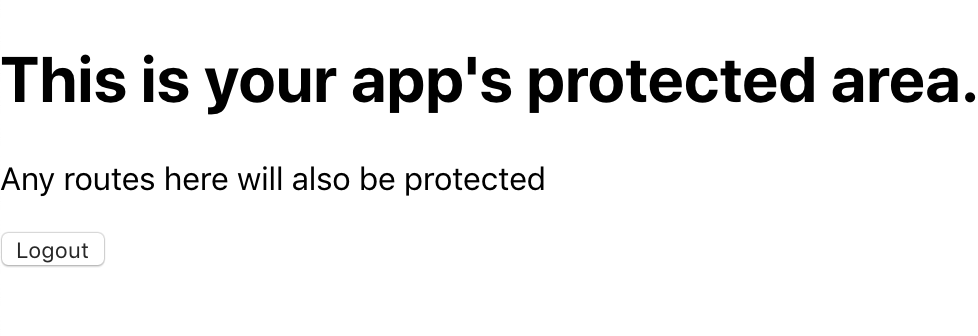
Open component/Home.js and create what you want in your protected area! I’ve created some basic code you can use below to test the functionality.
import React, { Component } from "react";
import { connect } from "react-redux";
import { logoutUser } from "../actions";

class Home extends Component {
  handleLogout = () => {
    const { dispatch } = this.props;
    dispatch(logoutUser());
  };
  render() {
    const { isLoggingOut, logoutError } = this.props;
    return (
      <div>
        <h1>This is your app's protected area.</h1>
        <p>Any routes here will also be protected</p>
        <button onClick={this.handleLogout}>Logout</button>
        {isLoggingOut && <p>Logging Out....</p>}
        {logoutError && <p>Error logging out</p>}
      </div>
    );
  }
}
function mapStateToProps(state) {
  return {
    isLoggingOut: state.auth.isLoggingOut,
    logoutError: state.auth.logoutError
  };
}
export default connect(mapStateToProps)(Home);
It’s finally time! Start the app!
npm run start
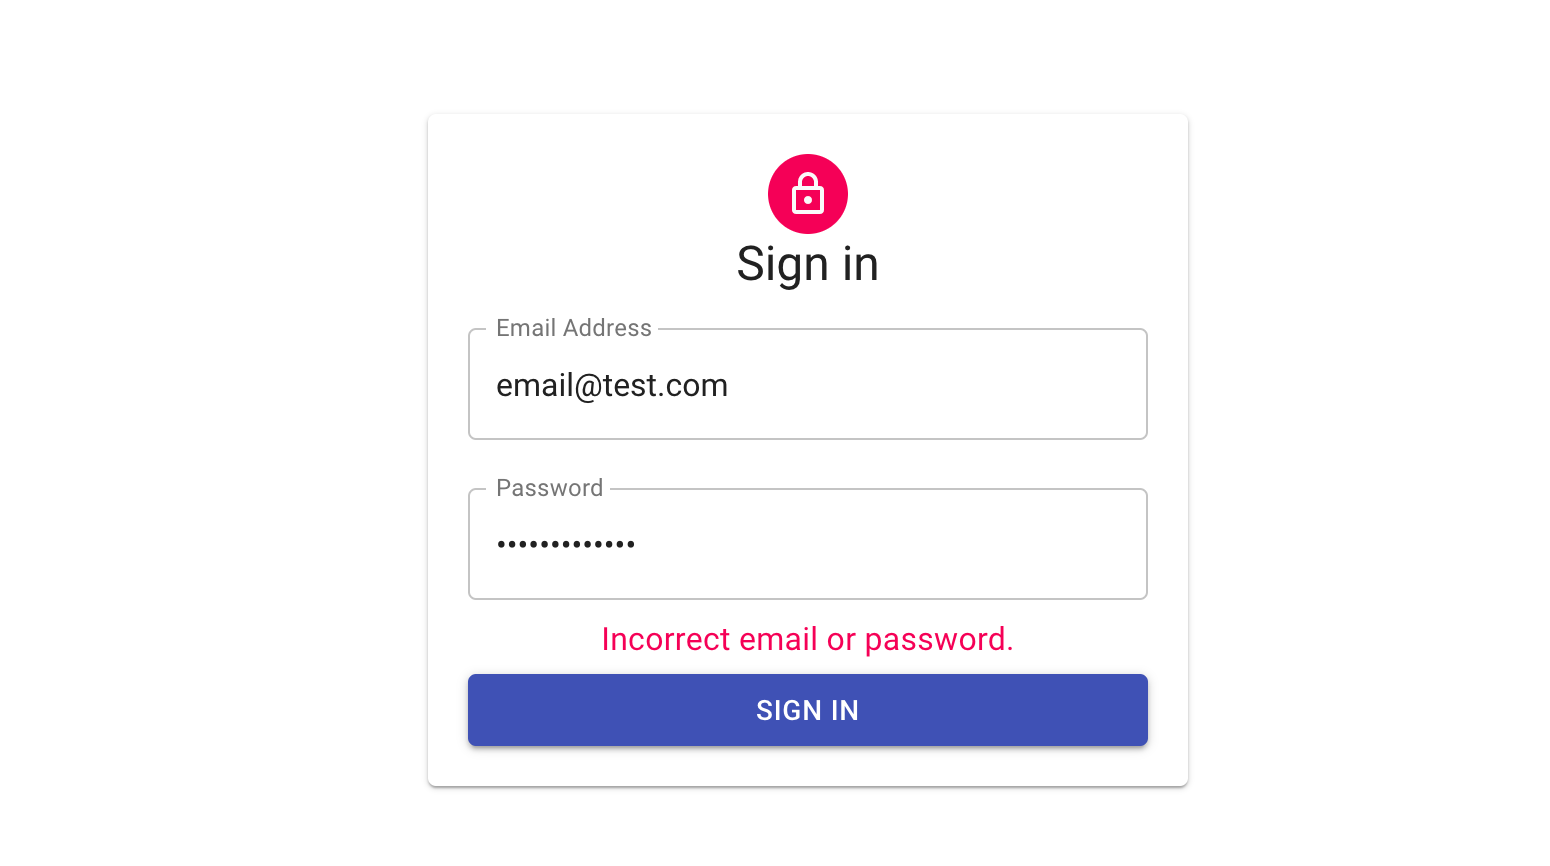
Because we’re using the firebase package, firebase will work perfectly in webpack’s dev server environment. When the app starts you should be immediately redirected to the /login and be greeted with the form you created.
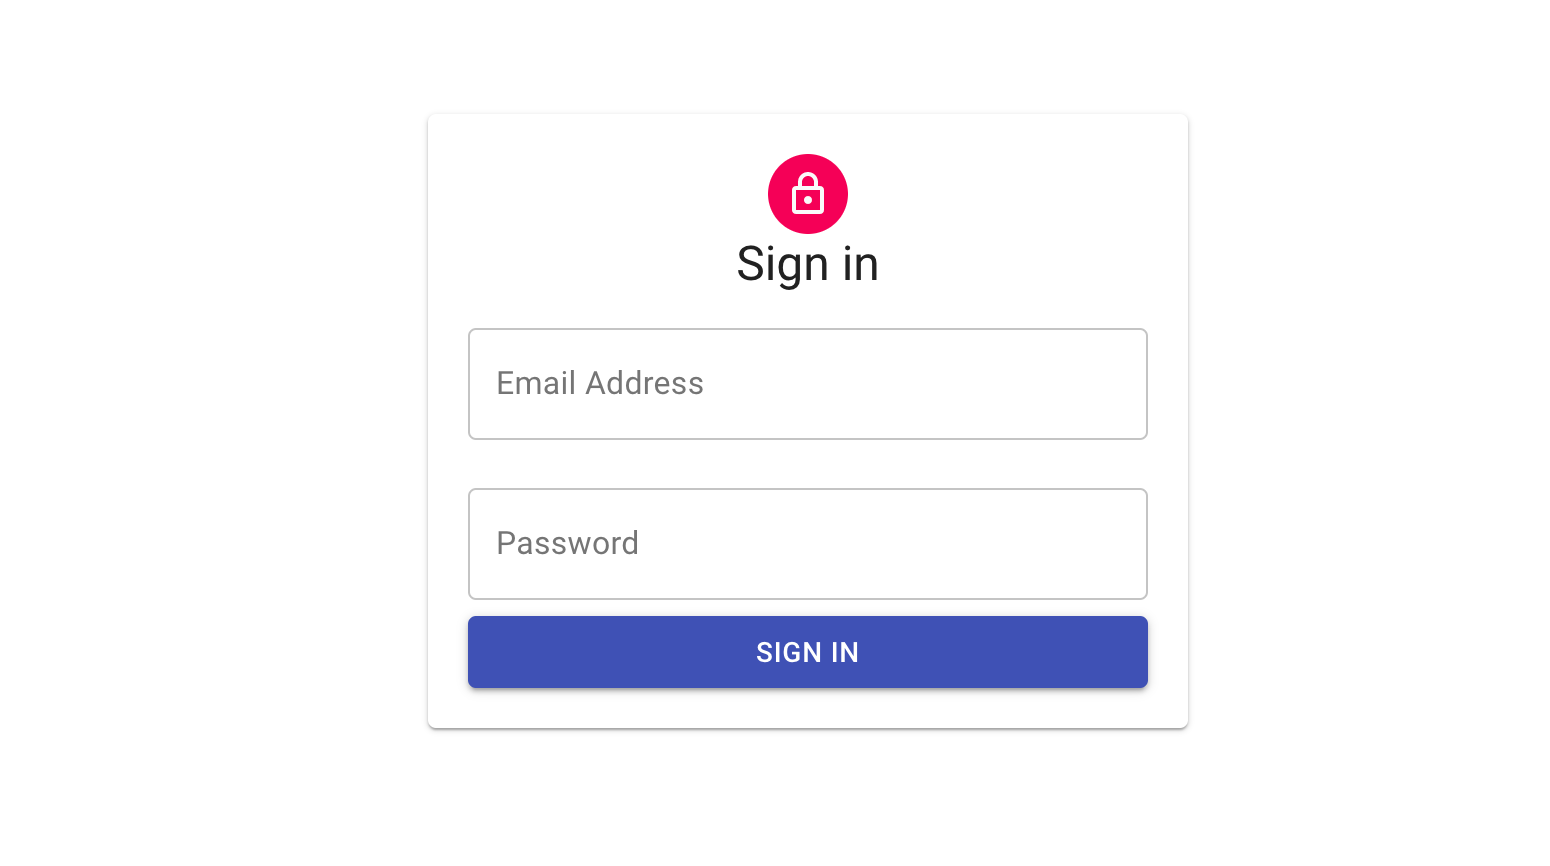
Attempting to sign in should give you an error as we have not added any users in Firebase.
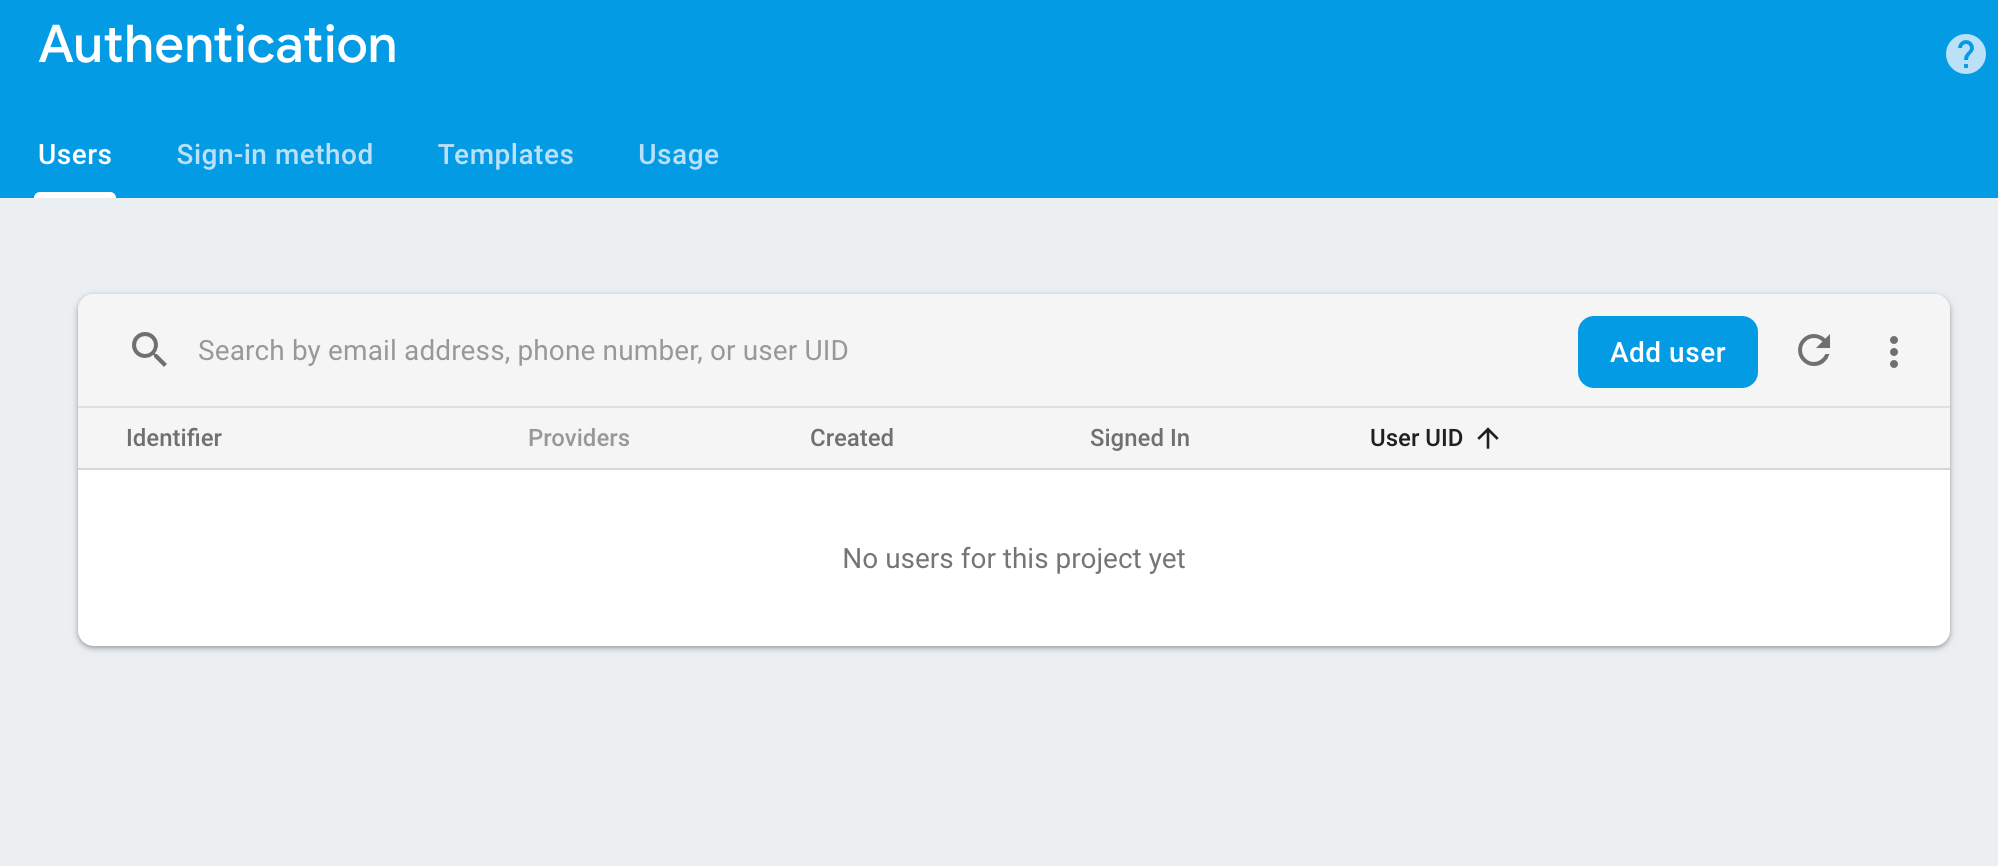
Open up the Firebase Console and click the Authentication link from the menu. We want to add a user:
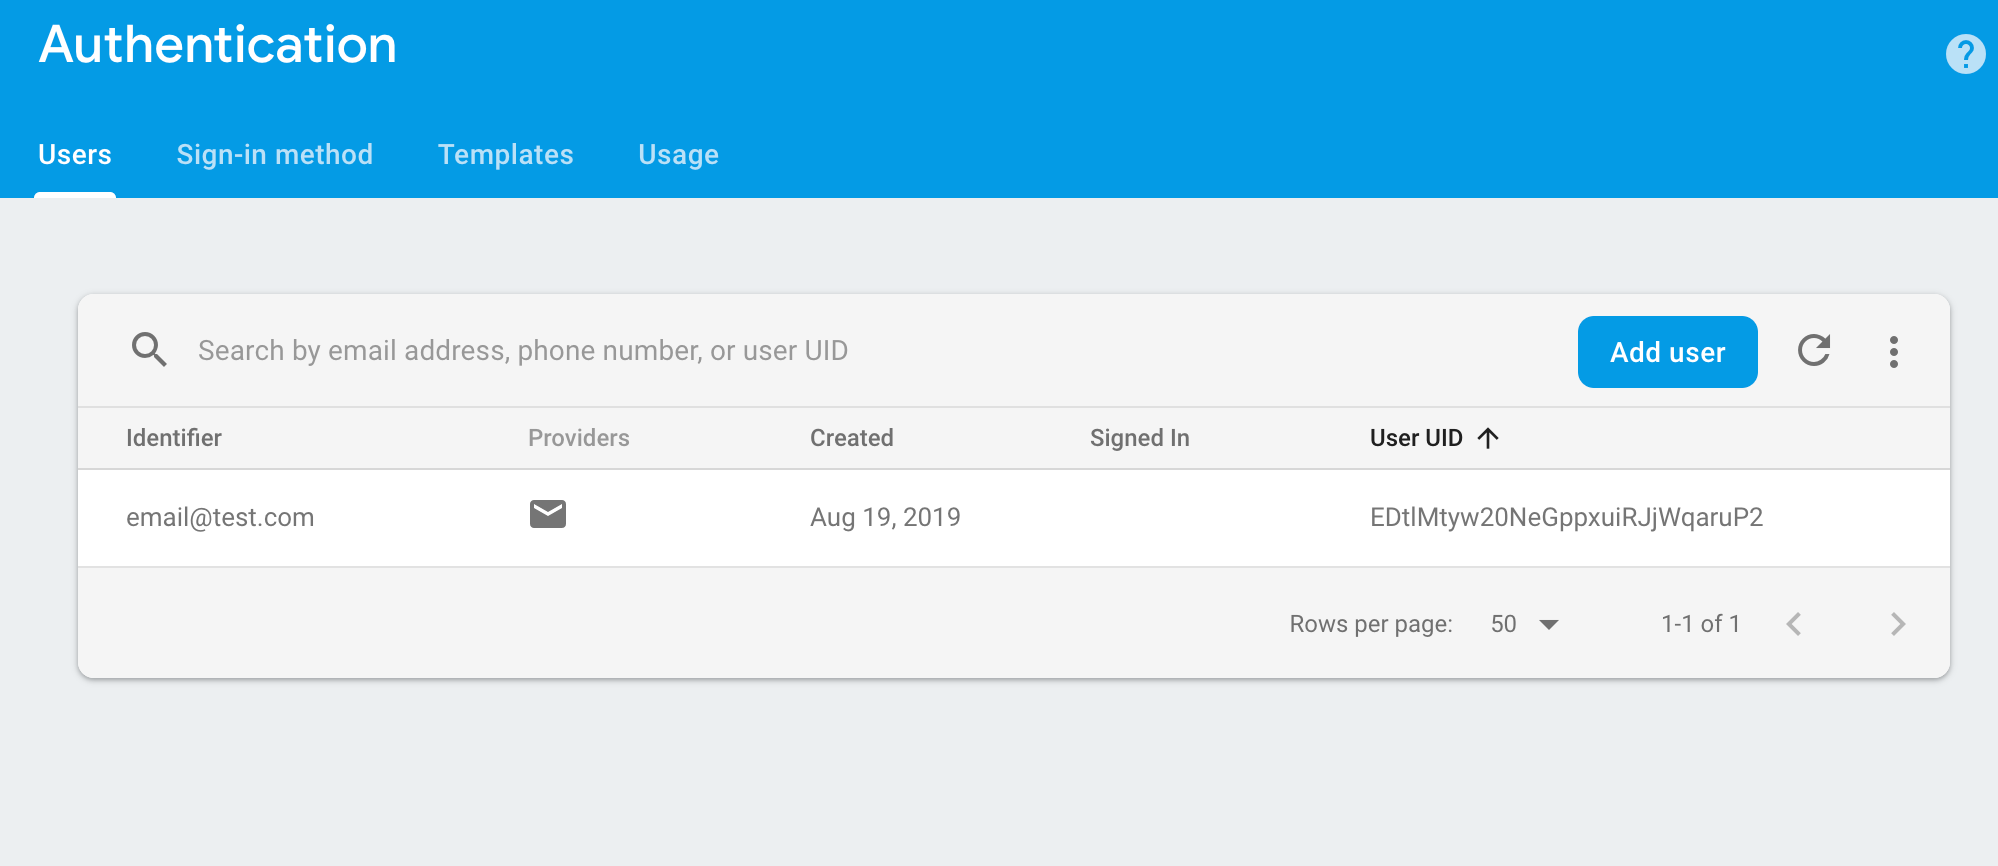
Add the user you want to test with:
Now, you can go back to your app and try to log in with the user you just created! You should be redirected to our *Home *
component at the application root URL.
Refreshing the page will also keep you logged in. If you want to see why we need verify auth you can remove the ***verifyAuth() ***dispatch from **configureStore.js **and try refreshing the page. You should be redirected back to the *Login *component. And finally, you can test the logout button to see that our ***logoutUser() ***action works. You should be redirected back to the login page.
To publish your app to firebase, make sure you take your Firestore database out of test mode by editing the **allow **line in firestore.rules in your srcdirectory to be the following:
allow read, write: if false;
Then to publish your app to firebase build your app with *npm run build *and run the following command:
firebase deploy
And your app is now live.
Thank you for following along! In a future tutorial, I plan to expand the functionality until eventually we have a full-fledged firebase web-app. I hope you found this helpful. This code would be a great starter for any firebase web app. If you’re forking, make sure you perform the firebase initialization steps in this article and setup your web app API key at firebase/firebase.js
https://github.com/chaseoc/firebase-login-page
Further reading:
☞ Breaking Down the Last Monolith
☞ 8 Miraculous Ways to Bolster Your React Apps
☞ React.js Firebase Tutorial: Building Firestore CRUD Web Application
☞ Angular vs React vs Vue: Which is the Best Choice for 2019?
☞ A comparison between Angular and React
☞ Have Confidence in Your Redux Apps With Integration and Unit Testing
☞ Setup Continuous Integration (CI) With React, CircleCI, and GitHub
#reactjs #redux #javascript