Generative adversarial network (GAN) is one of the most state-of-the-art artificial neural networks for new data generation. It is widely implemented in photograph generation, photograph editing, face aging, and more. The cores of GAN are the generator and the discriminator. They two play an adversarial game where the generator is learning to fool the discriminator by making fake images that look very much like real images, while the discriminator is learning to get better at detecting fake images. In an ideal situation, at the end of the training, the generator can produce fake images that look exactly like real images, but the discriminator can still find out they are fake.
While convolutional layers play an important role in the discriminator, transposed convolutional layers are the primary building blocks for the generator. Thanks to the TensorFlow API — Keras, building GAN becomes a very convenient process. However, setting the right values for the parameters, such as kernel sizes, strides, and padding, require us to understand how transposed convolutions work.** In this notebook, I would like to share some of my personal understandings about transposed convolutions, and hopefully help you to reveal the mystery.** Throughout the notebook, I will use convolutions as the comparison to better explain transposed convolutions. I will also show you how I implement these understandings to build my own convolutional and transposed convolutional layers, which act like a naive version of the Conv2D and Conv2DTranspose layers from Keras. The notebook consists of three sections:
- What is the transposed convolution?
- What are the parameters (kernel size, strides, and padding) in Keras Conv2DTranspose?
- Build my own Conv2D and Conv2DTranspose layers from scratch
Section 1: What Is The Transposed Convolution?
I understand the transposed convolution as the opposite of the convolution. In the convolutional layer, we use a special operation named cross-correlation (in machine learning, the operation is more often known as convolution, and thus the layers are named “Convolutional Layers”) to calculate the output values. This operation adds all the neighboring numbers in the input layer together, weighted by a convolution matrix (kernel). For example, in the image below, the output value 55 is calculated by the element-wise multiplication between the 3x3 part of the input layer and the 3x3 kernel, and sum all results together:

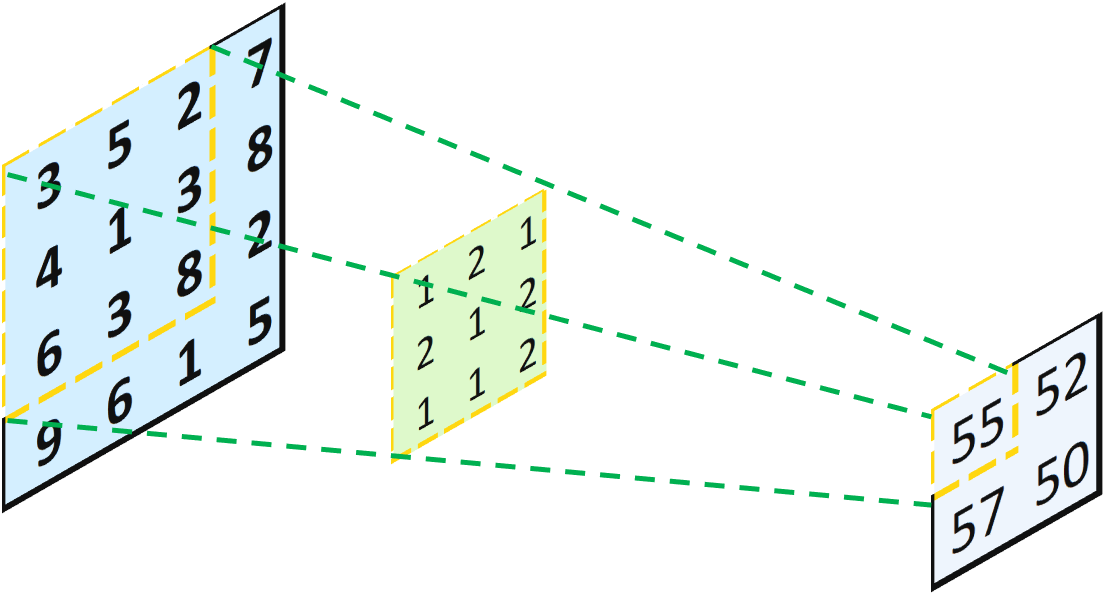
One Convolution Operation With 3x3 Part of the Input Layer and the 3x3 Kernel
Without any padding, this operation transforms a 4x4 matrix into a 2x2 matrix. This looks like someone is casting the light from left to right, and projecting an object (the 4x4 matrix) through a hole (the 3x3 kernel), and yield a smaller object (the 2x2 matrix). Now, our question is: what if we want to go backward from a 2x2 matrix to a 4x4 matrix? Well, the intuitive way is, we just cast the light backward! Mathematically, instead of multiplying two 3x3 matrices, we can multiply each value in the input layer by the 3x3 kernel to yield a 3x3 matrix. Then, we just combine all of them together according to the initial positions in the input layer, and sum the overlapped values together:
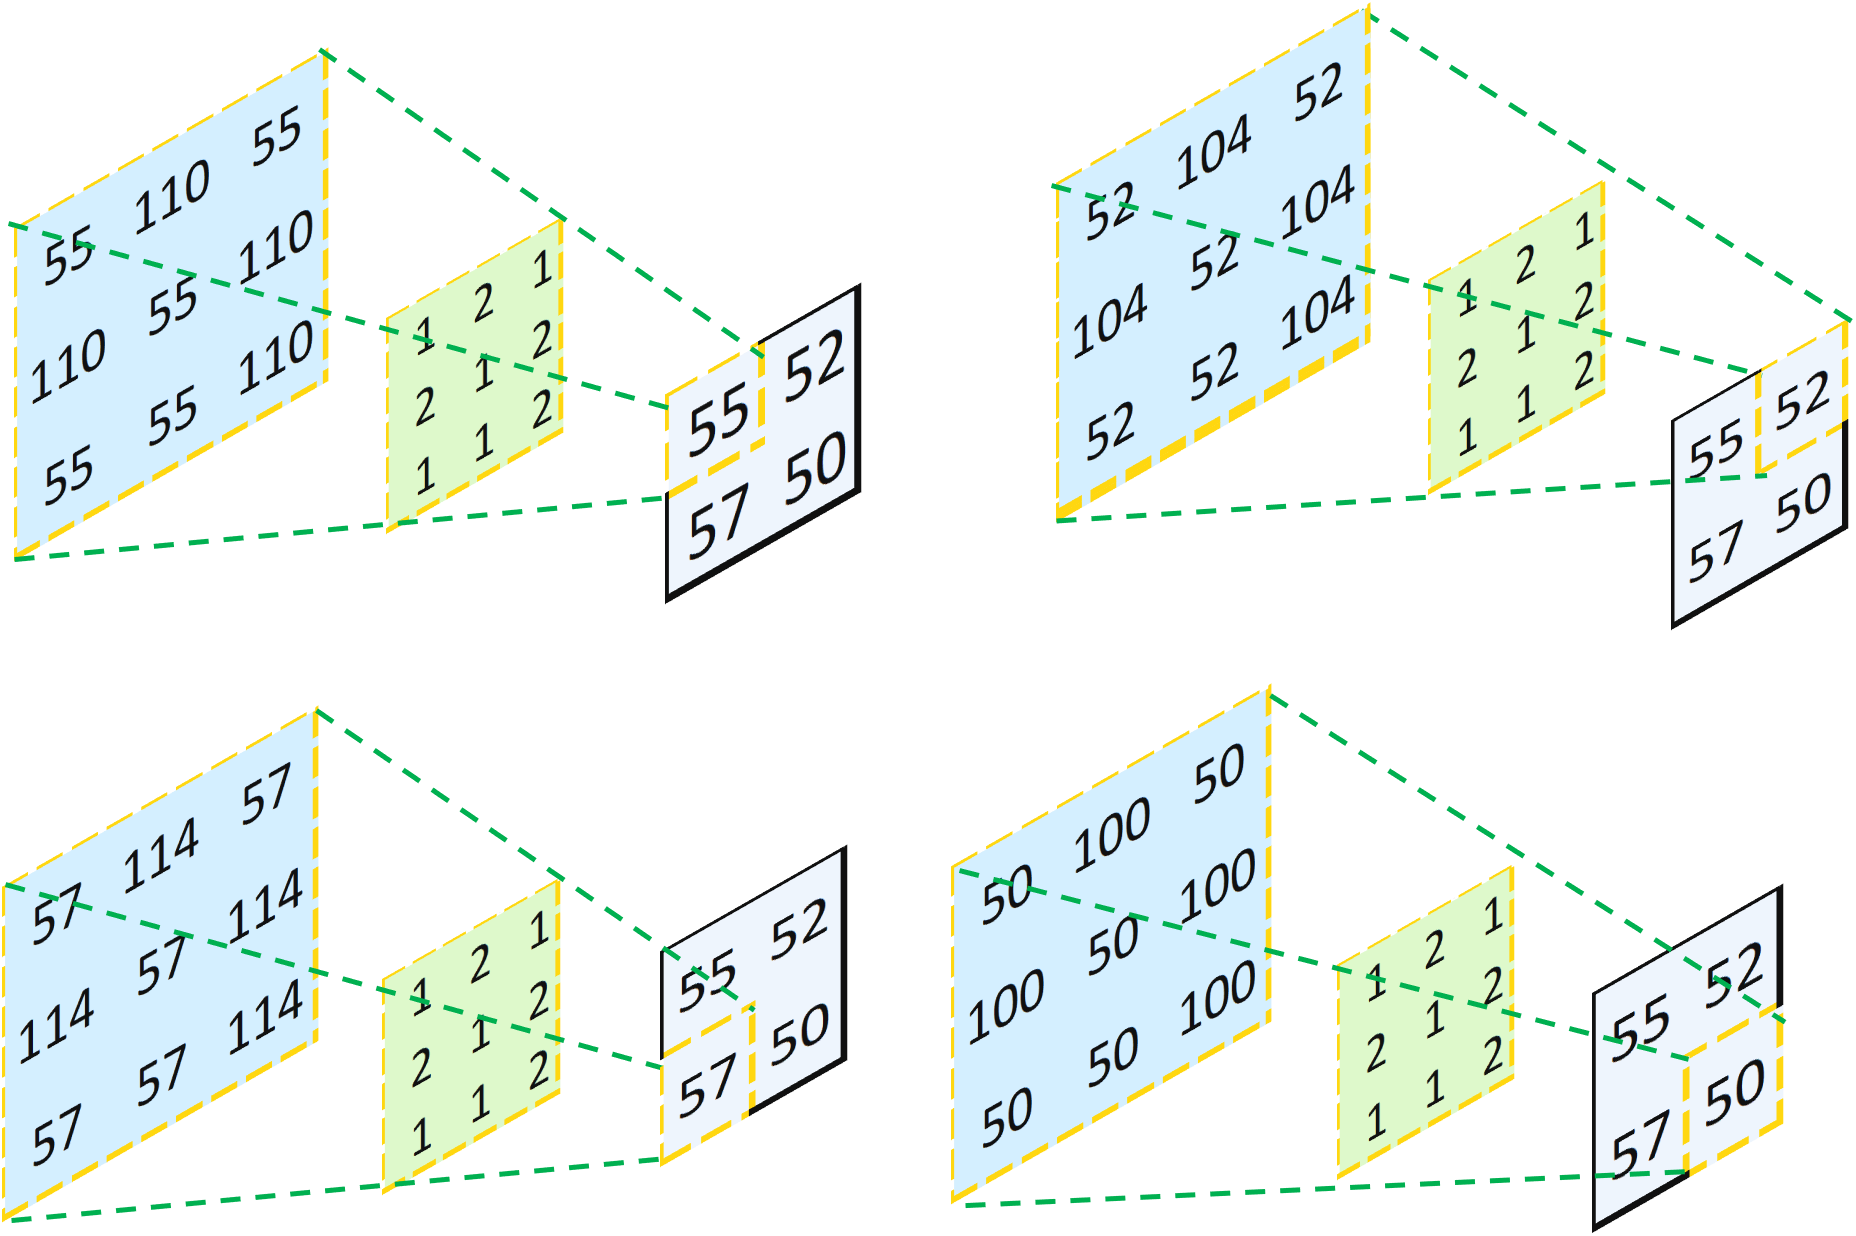
Multiply Each Element in the Input Layer by Each Value in the Kernel
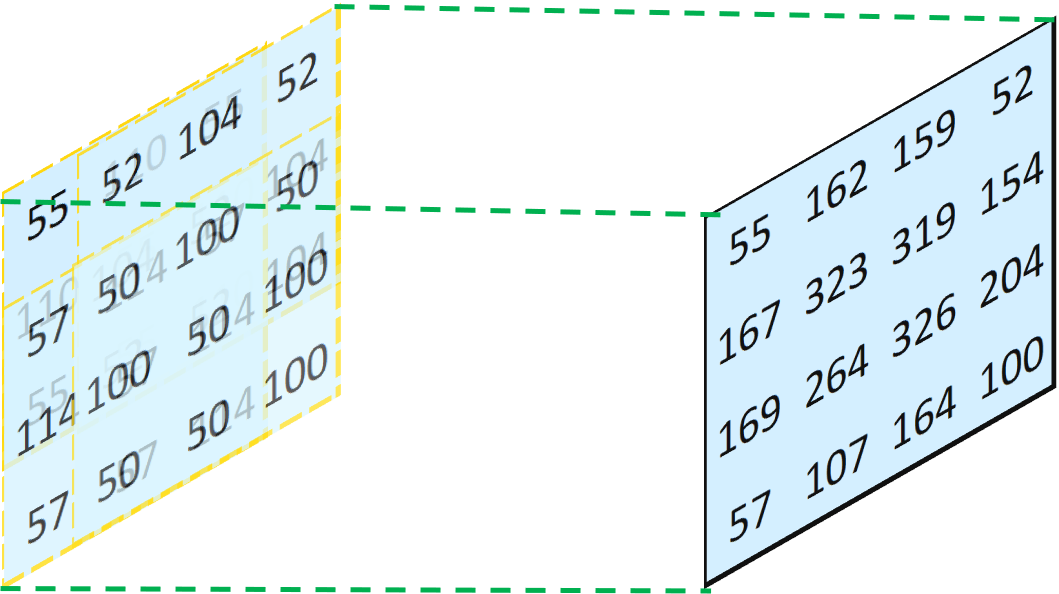
Combine All Four Resulting Layers Together And Sum the Overlapped Values
In this way, it is always certain that the output of the transposed convolution operation can have exactly the same shape as the input of the previous convolution operation, because we just did exactly the reverse. However, you may notice that the numbers are not restored. Therefore, a totally different kernel has to be used to restore the initial input matrix, and this kernel can be determined through training.
To demonstrate that my results are not just some random numbers, I build the convolutional neural networks using the conditions indicated above through Keras. As can be seen from the code below, the outputs are exactly the same.


Why “Transposed”?
Now that you may be wondering: hey, this looks just like a reversed convolution. Why is it named “transposed” convolution?
To be honest, I don’t know why I had to struggle with this question, but I did. I believed that it’s named as “transposed” convolution for a reason. To answer this question, I read many online resources about transposed convolution. An article named “Up-sampling with Transposed Convolution” helped me a lot. In this article, the author Naoki Shibuya expresses the convolution operation using a zero-padded convolution matrix instead of a normal squared-shape convolution matrix. Essentially, instead of expressing the above kernel as a 3x3 matrix, when performing the convolutional transformation, we can express it as a 4x16 matrix. And instead of expressing the above input as a 4x4 matrix, we can express it as a 16x1 vector:
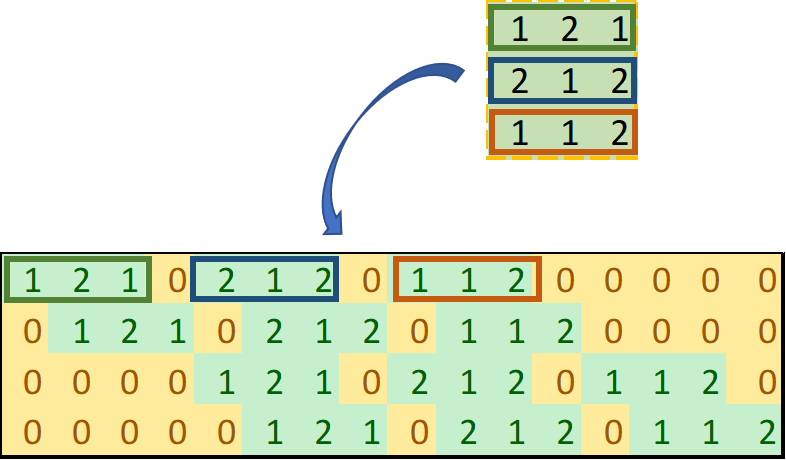
Express 3x3 Kernel as 4x16 Zero-Padded Convolution Matrix (Image by Author)
The reason it is 4x16 matrix is that:
- 4 rows: in total, we can perform four convolutions by splitting a 4x4 input matrix into four 3x3 matrices;
- 16 columns: the input matrix will be transformed into a 16x1 vector. To perform the matrix multiplication, it has to be 16 columns.
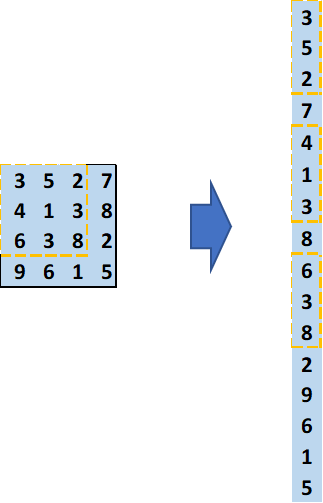
Express 4x4 Input Matrix as 16x1 Vector (Image by Author)
In this way, we can directly perform the matrix multiplication to get an output layer. The reshaped output layer will be exactly the same as the one derived by the general convolution operation.
#convolutional-network #python #machine-learning #editors-pick #deep-learning #deep learning
