1. Introduction:
Not everyone can indeed afford a powerful computing system. We have nothing but to adjust with less computing system which runs code for hours and even days. Most of us have got a system with RAM 4 GB or 8 GB and only a few have RAM beyond 8 GB with an advanced processor. What can we do if we have a less powerful computing system? Should we build-up patience and wait for the code to run for hours and even days? No, we don’t have to wait for hours or days to run certain codes. Here comes rescuer — Google Colab. Google Colab is also known as Google Colaboratory. Google Colab is a jupyter notebook environment. It is a free source provided by google wherein we can write and execute code. We can use Google Colab with ease just as we use local jupyter. Google Colab provides RAM of 12 GB with a maximum extension of 25 GB and a disk space of 358.27 GB. Wow! It is great to have a free source with such huge RAM and disk space.
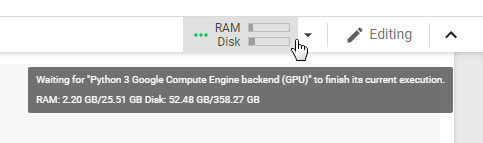
RAM and Disk Space provided by Google Colab
FYI: If certain code takes 1 hour to run in local Jupyter or Spyder or any other environment, same code takes around 10–15 minutes to run in Google Colab. Amazing, isn’t it!
2. How to Open and/or Upload Notebooks
Well, I must admit that it is not that tough to learn to use Google Colab. We can easily learn to use it in the first attempt. Click on the Google Colab link: https://colab.research.google.com/ which navigates us to the official site. This is how it looks when we click on the above link.

Google Colab Official Site View
In the above image, we can see a dialog box with headings** ‘Examples’, ‘Recent’, ‘Google Drive’, ‘Github’, and ‘Upload’.** Each heading is nothing but sections through which we can open our notebook and use it for further analysis.
2.1 Examples:
Under this section, we can explore google colab like overview, guide, etc.
2.2 Recent:
Under this section, only those notebooks will be displayed which are recently used. You can directly go to the Recent section and open a recent notebook for further analysis.
2.3 Google Drive:
Under this section, all the notebooks which are in our google drive are displayed. We can access it by click on it and use for further analysis.
2.4 Github:
Under this section, all the notebooks which are in our Github are displayed. We just need to paste the respective link and get access to notebooks.
2.5 Upload
Under this section, we can upload notebooks from our local drive and access it.
If we want to create a new notebook, then we should click on Cancel button (Bottom Right) in the dialog box. Below is the image for reference.
#data-science #deep-learning #google-drive #machine-learning #google-colab #deep learning