Cách xây dựng ứng dụng CRUD bằng Angular 17
Trong hướng dẫn này, bạn sẽ tìm hiểu cách xây dựng ứng dụng CRUD (Tạo, Đọc, Cập nhật, Xóa) bằng Angular 17. Bạn sẽ sử dụng Angular CLI, Bootstrap và Firebase làm chương trình phụ trợ.
Trang chủ:

Tạo trang:
Chỉnh sửa trang:
Trang chi tiết:
Bước cho hoạt động CRUD trong Angular 17
- Bước 1: Tạo dự án Angular 17
- Bước 2: Cài đặt Bootstrap
- Bước 3: Tạo mô-đun bài đăng
- Bước 4: Tạo thành phần cho mô-đun
- Bước 5: Tạo tuyến đường
- Bước 6: Tạo giao diện
- Bước 7: Tạo dịch vụ
- Bước 8: Cập nhật logic và mẫu thành phần
- Bước 9: xuất cung cấpHttpClient()
- Chạy ứng dụng góc
Bây giờ, hãy làm theo bước dưới đây để tạo ứng dụng thô với góc 17.
Bước 1: Tạo dự án Angular 17
Bạn có thể dễ dàng tạo ứng dụng góc cạnh của mình bằng lệnh bên dưới:
ng new my-new-appBước 2: Cài đặt Bootstrap
Bây giờ, chúng ta sẽ cài đặt bootstrap cho ứng dụng thô của mình, vì vậy hãy chạy lệnh dưới đây và nhập nó vào tệp css.
npm install bootstrap --saveBây giờ sau khi chạy thành công lệnh trên. hãy nhập nó vào tệp Angular.json.
góc cạnh.json
....
      "styles": [
        "node_modules/bootstrap/dist/css/bootstrap.min.css",
        "src/styles.css"
      ],
.....
Bước 3: Tạo mô-đun bài đăng
Sau khi tạo ứng dụng thành công, chúng ta cần tạo mô-đun bài đăng bằng lệnh cli góc. góc cung cấp lệnh để tạo mô-đun có định tuyến trong ứng dụng góc. vì vậy hãy chạy lệnh dưới đây để tạo mô-đun bài đăng:
ng generate module postchạy lệnh thành công thì nó sẽ tạo file như đường dẫn bên dưới:
src/app/post/post.module.tsBước 4: Tạo thành phần cho mô-đun
Bây giờ chúng ta sẽ thêm thành phần mới vào mô-đun bài đăng của mình bằng lệnh dưới đây, vì vậy hãy tạo chỉ mục, xem, tạo và chỉnh sửa thành phần cho mô-đun quản trị viên:
ng generate component post/index
ng generate component post/view
ng generate component post/create
ng generate component post/edit
chạy lệnh thành công, nó sẽ tạo thư mục chứa các file như đường dẫn dưới đây:
src/app/post/index/*

src/app/post/view/*

src/app/post/create/*

src/app/post/edit/*
Bước 5: Tạo tuyến đường
Trong bước này, chúng ta sẽ chỉ tạo lộ trình để lập chỉ mục, tạo, chỉnh sửa và xem bằng cách sử dụng thành phần mới được tạo. vì vậy chúng tôi phải cập nhật tệp mô-đun app.routes.ts giống như mã dưới đây:
src/app/app.routes.ts
import { Routes } from '@angular/router';

import { IndexComponent } from './post/index/index.component';
import { ViewComponent } from './post/view/view.component';
import { CreateComponent } from './post/create/create.component';
import { EditComponent } from './post/edit/edit.component';

export const routes: Routes = [
      { path: 'post', redirectTo: 'post/index', pathMatch: 'full'},
      { path: 'post/index', component: IndexComponent },
      { path: 'post/:postId/view', component: ViewComponent },
      { path: 'post/create', component: CreateComponent },
      { path: 'post/:postId/edit', component: EditComponent }
  ];
Bước 6: Tạo giao diện
Trong bước này, chúng ta sẽ tạo giao diện bằng lệnh góc cho mô-đun bài viết. chúng tôi sẽ sử dụng giao diện bài đăng với Observable. vì vậy hãy tạo giao diện với mã bên dưới.
ng generate interface post/postsrc/app/post/post.ts
export interface Post {
    id: number;
    title: string;
    body: string;
}
Bước 7: Tạo dịch vụ
Ở đây, chúng tôi sẽ tạo tệp dịch vụ bưu điện và chúng tôi sẽ viết và gọi tất cả các dịch vụ web. chúng ta sẽ tạo getAll(), create(), find(), update() và delete().
hiện tại chúng tôi đang sử dụng https://jsonplaceholder.typicode.com api trang web. họ cung cấp để dễ dàng sử dụng. Nhưng nếu bạn muốn tạo api của riêng mình bằng PHP thì liên kết dưới đây có thể giúp bạn.
Bây giờ, hãy tạo dịch vụ bưu điện và đặt tất cả mã cho phương thức dịch vụ web.
ng generate service post/post
src/app/post/post.service.ts
import { Injectable } from '@angular/core';
import { HttpClient, HttpHeaders } from '@angular/common/http';

import {  Observable, throwError } from 'rxjs';
import { catchError } from 'rxjs/operators';

import { Post } from './post';

@Injectable({
  providedIn: 'root'
})
export class PostService {

  private apiURL = "https://jsonplaceholder.typicode.com";

  /*------------------------------------------
  --------------------------------------------
  Http Header Options
  --------------------------------------------
  --------------------------------------------*/
  httpOptions = {
    headers: new HttpHeaders({
      'Content-Type': 'application/json'
    })
  }

  /*------------------------------------------
  --------------------------------------------
  Created constructor
  --------------------------------------------
  --------------------------------------------*/
  constructor(private httpClient: HttpClient) { }

  /**
   * Write code on Method
   *
   * @return response()
   */
  getAll(): Observable<any> {

    return this.httpClient.get(this.apiURL + '/posts/')

    .pipe(
      catchError(this.errorHandler)
    )
  }

  /**
   * Write code on Method
   *
   * @return response()
   */
  create(post:Post): Observable<any> {

    return this.httpClient.post(this.apiURL + '/posts/', JSON.stringify(post), this.httpOptions)

    .pipe(
      catchError(this.errorHandler)
    )
  }

  /**
   * Write code on Method
   *
   * @return response()
   */
  find(id:number): Observable<any> {

    return this.httpClient.get(this.apiURL + '/posts/' + id)

    .pipe(
      catchError(this.errorHandler)
    )
  }

  /**
   * Write code on Method
   *
   * @return response()
   */
  update(id:number, post:Post): Observable<any> {

    return this.httpClient.put(this.apiURL + '/posts/' + id, JSON.stringify(post), this.httpOptions)

    .pipe(
      catchError(this.errorHandler)
    )
  }

  /**
   * Write code on Method
   *
   * @return response()
   */
  delete(id:number){
    return this.httpClient.delete(this.apiURL + '/posts/' + id, this.httpOptions)

    .pipe(
      catchError(this.errorHandler)
    )
  }

  /**
   * Write code on Method
   *
   * @return response()
   */
  errorHandler(error:any) {
    let errorMessage = '';
    if(error.error instanceof ErrorEvent) {
      errorMessage = error.error.message;
    } else {
      errorMessage = `Error Code: ${error.status}\nMessage: ${error.message}`;
    }
    return throwError(errorMessage);
 }
}
Bước 8: Cập nhật logic và mẫu thành phần
Bây giờ trong bước này, chúng ta sẽ làm việc trên thành phần đã tạo cho ứng dụng thô. chúng tôi tạo bốn thành phần cho ứng dụng thô của mình. bây giờ chúng ta sẽ đi từng bước một để tạo trang danh sách, tạo trang, chỉnh sửa trang và xem trang.
vì vậy, chúng ta hãy xem từng cái một:
1) Mẫu và thành phần trang danh sách
Bây giờ, ở đây chúng ta sẽ làm việc với thành phần chỉ mục bài đăng. chúng tôi sẽ gọi dịch vụ bưu điện và hiển thị nó bằng nút tạo, chỉnh sửa, xóa và xem. vì vậy hãy cập nhật nó.
src/app/post/index/index.comComponent.ts
import { Component } from '@angular/core';

import { CommonModule } from '@angular/common';
import { RouterModule } from '@angular/router';
import { PostService } from '../post.service';
import { Post } from '../post';

@Component({
  selector: 'app-index',
  standalone: true,
  imports: [CommonModule, RouterModule],
  templateUrl: './index.component.html',
  styleUrl: './index.component.css'
})
export class IndexComponent {

  posts: Post[] = [];

  /*------------------------------------------
  --------------------------------------------
  Created constructor
  --------------------------------------------
  --------------------------------------------*/
  constructor(public postService: PostService) { }

  /**
   * Write code on Method
   *
   * @return response()
   */
  ngOnInit(): void {
    this.postService.getAll().subscribe((data: Post[])=>{
      this.posts = data;
      console.log(this.posts);
    })
  }

  /**
   * Write code on Method
   *
   * @return response()
   */
  deletePost(id:number){
    this.postService.delete(id).subscribe(res => {
         this.posts = this.posts.filter(item => item.id !== id);
         console.log('Post deleted successfully!');
    })
  }

}
src/app/post/index/index.comComponent.html
<div class="container">
<h1>Angular 17 CRUD Example - ItSolutionStuff.com</h1>
<a href="#" routerLink="/post/create/" class="btn btn-success">Create New Post</a>
<table class="table table-striped">
<thead>
<tr>
<th>ID</th>
<th>Title</th>
<th>Body</th>
<th width="250px">Action</th>
</tr>
</thead>
<tbody>
<tr *ngFor="let post of posts">
<td>{{ post.id }}</td>
<td>{{ post.title }}</td>
<td>{{ post.body }}</td>
<td>
<a href="#" [routerLink]="['/post/', post.id, 'view']" class="btn btn-info">View</a>
<a href="#" [routerLink]="['/post/', post.id, 'edit']" class="btn btn-primary">Edit</a>
<button type="button" (click)="deletePost(post.id)" class="btn btn-danger">Delete</button>
</td>
</tr>
</tbody>
</table>
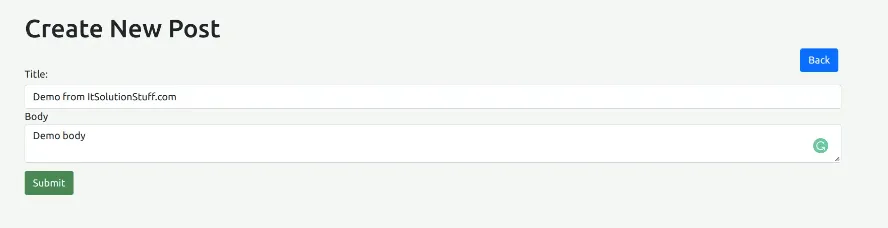
</div>2) Tạo mẫu và thành phần trang
Bây giờ ở đây, chúng ta sẽ sử dụng dữ liệu lưu trữ ở dạng phản ứng vào máy chủ bằng các dịch vụ web. vì vậy hãy cập nhật nó.
src/app/post/create/create.comComponent.ts
import { Component } from '@angular/core';
import { CommonModule } from '@angular/common';

import { PostService } from '../post.service';
import { Router } from '@angular/router';
import { ReactiveFormsModule, FormGroup, FormControl, Validators } from '@angular/forms';

@Component({
  selector: 'app-create',
  standalone: true,
  imports: [CommonModule, ReactiveFormsModule],
  templateUrl: './create.component.html',
  styleUrl: './create.component.css'
})
export class CreateComponent {

  form!: FormGroup;

  /*------------------------------------------
  --------------------------------------------
  Created constructor
  --------------------------------------------
  --------------------------------------------*/
  constructor(
    public postService: PostService,
    private router: Router
  ) { }

  /**
   * Write code on Method
   *
   * @return response()
   */
  ngOnInit(): void {
    this.form = new FormGroup({
      title: new FormControl('', [Validators.required]),
      body: new FormControl('', Validators.required)
    });
  }

  /**
   * Write code on Method
   *
   * @return response()
   */
  get f(){
    return this.form.controls;
  }

  /**
   * Write code on Method
   *
   * @return response()
   */
  submit(){
    console.log(this.form.value);
    this.postService.create(this.form.value).subscribe((res:any) => {
         console.log('Post created successfully!');
         this.router.navigateByUrl('post/index');
    })
  }

}
src/app/post/create/create.comComponent.html
<div class="container">
    <h1>Create New Post</h1>

    <a href="#" routerLink="/post/index" class="btn btn-primary">Back</a>

    <form [formGroup]="form" (ngSubmit)="submit()">

        <div class="form-group">
            <label for="title">Title:</label>
            <input
                formControlName="title"
                id="title"
                type="text"
                class="form-control">
            <div *ngIf="f['title'].touched && f['title'].invalid" class="alert alert-danger">
                <div *ngIf="f['title'].errors && f['title'].errors['required']">Title is required.</div>
            </div>
        </div>

        <div class="form-group">
            <label for="body">Body</label>
            <textarea
                formControlName="body"
                id="body"
                type="text"
                class="form-control">
            </textarea>
            <div *ngIf="f['body'].touched && f['body'].invalid" class="alert alert-danger">
                <div *ngIf="f['body'].errors && f['body'].errors['required']">Body is required.</div>
            </div>
        </div>

        <button class="btn btn-primary" type="submit" [disabled]="!form.valid">Submit</button>
    </form>
</div>
Bạn sẽ thấy bản xem trước giống như dưới đây:
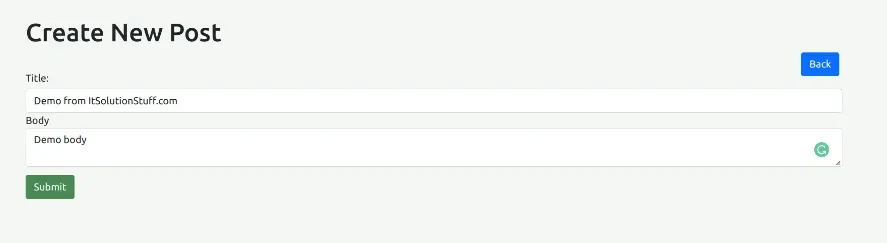
3) Chỉnh sửa mẫu và thành phần trang
Bây giờ ở đây, chúng tôi sẽ sử dụng dữ liệu lưu trữ dưới dạng phản ứng vào máy chủ bằng dịch vụ web để cập nhật thông tin bài đăng. vì vậy hãy cập nhật nó.
src/app/post/edit/edit.comComponent.ts
import { Component } from '@angular/core';
import { CommonModule } from '@angular/common';

import { PostService } from '../post.service';
import { ActivatedRoute, Router } from '@angular/router';
import { Post } from '../post';
import { ReactiveFormsModule, FormGroup, FormControl, Validators } from '@angular/forms';

@Component({
  selector: 'app-edit',
  standalone: true,
  imports: [CommonModule, ReactiveFormsModule],
  templateUrl: './edit.component.html',
  styleUrl: './edit.component.css'
})
export class EditComponent {

  id!: number;
  post!: Post;
  form!: FormGroup;

  /*------------------------------------------
  --------------------------------------------
  Created constructor
  --------------------------------------------
  --------------------------------------------*/
  constructor(
    public postService: PostService,
    private route: ActivatedRoute,
    private router: Router
  ) { }

  /**
   * Write code on Method
   *
   * @return response()
   */
  ngOnInit(): void {
    this.id = this.route.snapshot.params['postId'];
    this.postService.find(this.id).subscribe((data: Post)=>{
      this.post = data;
    });

    this.form = new FormGroup({
      title: new FormControl('', [Validators.required]),
      body: new FormControl('', Validators.required)
    });
  }

  /**
   * Write code on Method
   *
   * @return response()
   */
  get f(){
    return this.form.controls;
  }

  /**
   * Write code on Method
   *
   * @return response()
   */
  submit(){
    console.log(this.form.value);
    this.postService.update(this.id, this.form.value).subscribe((res:any) => {
         console.log('Post updated successfully!');
         this.router.navigateByUrl('post/index');
    })
  }

}
src/app/post/edit/edit.comComponent.html
<div class="container">
    <h1>Update Post</h1>

    <a href="#" routerLink="/post/index" class="btn btn-primary">Back</a>

    <form [formGroup]="form" (ngSubmit)="submit()">

        <div class="form-group">
            <label for="title">Title:</label>
            <input
                formControlName="title"
                id="title"
                type="text"
                [(ngModel)]="post.title"
                class="form-control">
            <div *ngIf="f['title'].touched && f['title'].invalid" class="alert alert-danger">
                <div *ngIf="f['title'].errors && f['title'].errors['required']">Title is required.</div>
            </div>
        </div>

        <div class="form-group">
            <label for="body">Body</label>
            <textarea
                formControlName="body"
                id="body"
                type="text"
                [(ngModel)]="post.body"
                class="form-control">
            </textarea>
            <div *ngIf="f['body'].touched && f['body'].invalid" class="alert alert-danger">
                <div *ngIf="f['body'].errors && f['body'].errors['required']">Body is required.</div>
            </div>
        </div>

        <button class="btn btn-primary" type="submit" [disabled]="!form.valid">Update</button>
    </form>
</div>
Bạn sẽ thấy bản xem trước giống như dưới đây:

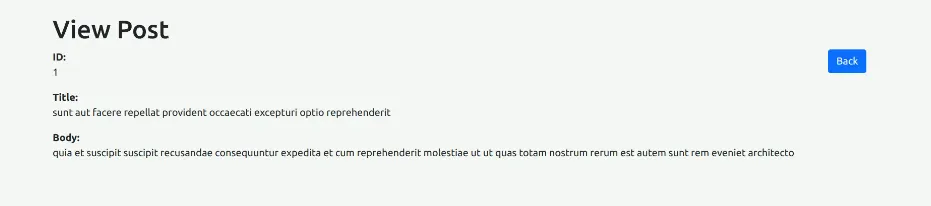
4) Mẫu và thành phần trang chi tiết
Bây giờ ở đây chúng ta sẽ hiển thị dữ liệu lên server sử dụng dịch vụ web để cập nhật thông tin bài viết. vì vậy hãy cập nhật nó.
src/app/post/view/view.comComponent.ts
import { Component } from '@angular/core';

import { PostService } from '../post.service';
import { ActivatedRoute, Router } from '@angular/router';
import { Post } from '../post';

@Component({
  selector: 'app-view',
  standalone: true,
  imports: [],
  templateUrl: './view.component.html',
  styleUrl: './view.component.css'
})
export class ViewComponent {

  id!: number;
  post!: Post;

  /*------------------------------------------
  --------------------------------------------
  Created constructor
  --------------------------------------------
  --------------------------------------------*/
  constructor(
    public postService: PostService,
    private route: ActivatedRoute,
    private router: Router
   ) { }

  /**
   * Write code on Method
   *
   * @return response()
   */
  ngOnInit(): void {
    this.id = this.route.snapshot.params['postId'];

    this.postService.find(this.id).subscribe((data: Post)=>{
      this.post = data;
    });
  }

}
src/app/post/view/view.comComponent.html
<div class="container">
    <h1>View Post</h1>

    <a href="#" routerLink="/post/index" class="btn btn-primary">Back</a>

    <div>
        <strong>ID:</strong>
        <p>{{ post.id }}</p>
    </div>

    <div>
        <strong>Title:</strong>
        <p>{{ post.title }}</p>
    </div>

    <div>
        <strong>Body:</strong>
        <p>{{ post.body }}</p>
    </div>

</div>
Bạn sẽ thấy bản xem trước giống như dưới đây:
Bây giờ hãy cập nhật chế độ xem html của ứng dụng:
src/app/app.comComponent.html
<router-outlet></router-outlet>Bước 9: xuất cung cấpHttpClient()
Trong bước này, chúng ta cần xuất cung cấpHttpClient() sang tệp app.config.ts. vì vậy hãy nhập nó như dưới đây:
src/app/app.config.ts
import { ApplicationConfig } from '@angular/core';
import { provideRouter } from '@angular/router';

import { routes } from './app.routes';
import { provideAnimations } from '@angular/platform-browser/animations';

import { provideHttpClient } from '@angular/common/http';

export const appConfig: ApplicationConfig = {
  providers: [provideRouter(routes), provideAnimations(), provideHttpClient()]
};
Chạy ứng dụng góc:
Tất cả các bước bắt buộc đã được thực hiện, bây giờ bạn phải nhập lệnh bên dưới và nhấn enter để chạy ứng dụng Angular:
ng serveBây giờ, hãy truy cập trình duyệt web của bạn, nhập URL đã cho và xem đầu ra của ứng dụng:
http://localhost:4200/post