Overview
Hobby robotics is a fascinating mix of different skill sets — a bit of electronics, a dash of mechanics, some code. You can go as deep as you want — open source projects make advanced projects like vision or Simultaneous Localization and Mapping (SLAM) easier to implement than ever before. There are even free simulators if you want to play with algorithms and aren’t interested in building hardware. It’s a terrific playground for DIY enthusiasts, programmers, and budding engineers.
Having built several simple Arduino robots with a few sensors, I wanted a platform that I could use to experiment with more advanced features. I settled on a robot that, for first steps, could stream high quality video and be driven over the network. I wanted enough compute power on board to pursue autonomy or light machine vision projects later.
Design Goals
- Good quality, low latency video stream as a top priority
- Robust network control from a gamepad
- The ability to monitor the robot’s battery pack and send telemetry back to the user
- A cool moon rover vibe
Interested? Let’s step through the design piece by piece. We’ll discuss the hardware, onboard software, and the PC client controller software in detail, and all the code is available in a Github repository.
The hardware layout
Required Disclosure
I’ve included links to many of the parts I used. The Amazon links below are affiliate links — if you buy the product below, I may receive compensation from Amazon. I hope it saves you some time and hassle, and it helps pay for my next project.
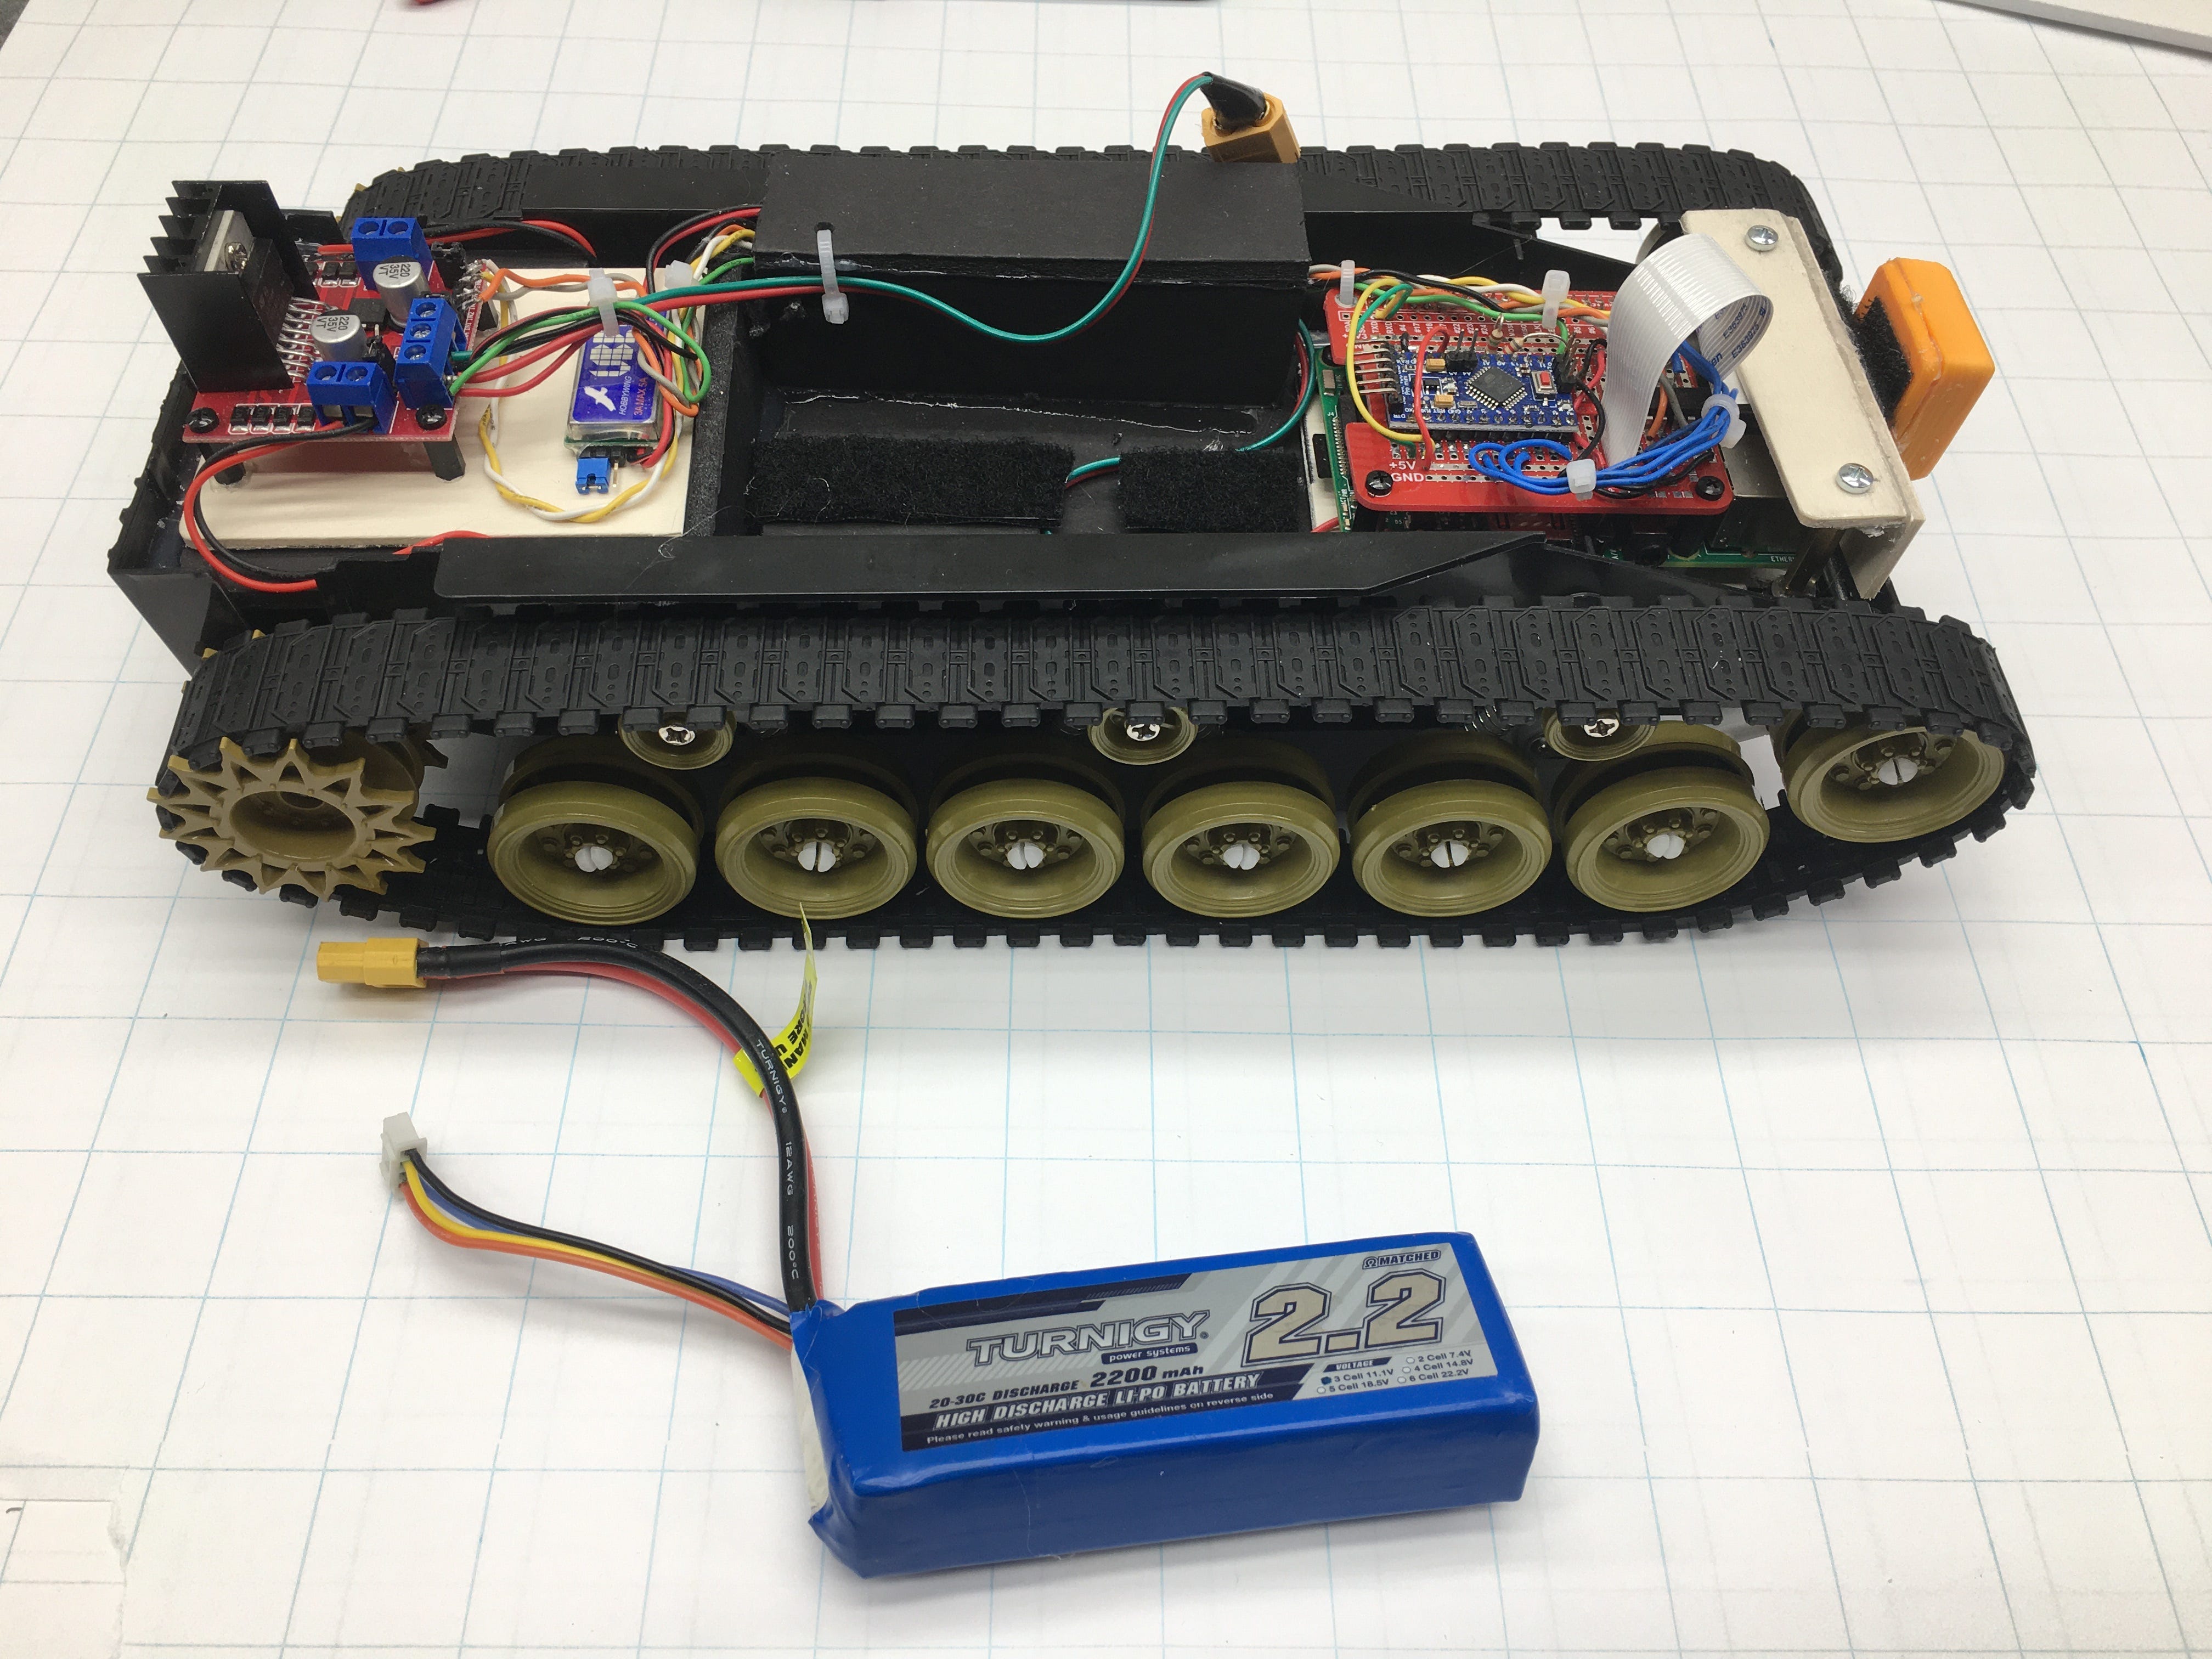
Chassis
Since the goal was a rapid build of an inexpensive platform for an experimental control system, I picked a light tracked chassis with a suspension and used inexpensive materials that were easy to work with. I liked that it had a suspension system on the tracks — it looks like a sub-assembly of a toy tank, and saved me the trouble of tearing one apart.
The bottom of the equipment bay was uneven and would be hard to mount electronics to, so I first installed a floor made of foam core board to get a flat surface. I installed some plates made of modeler’s plywood in the places I needed to put electronics — that gave me something to screw PCB standoffs to.
#electronics #arduino #raspberry-pi #diy #robotics