Now that we are already familiar with the problem, let’s set up Raspberry Pi to collect images. In this part, I will be talking about the technical setup of the Pigeon Avoidance System. This article consists of three subparts:
- Hardware setup
- Orchestration software
- Production installation
The general approach of how to set up a Raspberry Pi for the data collection could be adapted for your own Deep Learning project. All the code from this part is located on GitHub and can be reused.
Before I start, I would like to give credit to my friend and colleague Daniel, who helped me to set up the Raspberry and was my tech support when something suddenly didn’t work in production.
Hardware setup
Recall the diagram from Part 1:
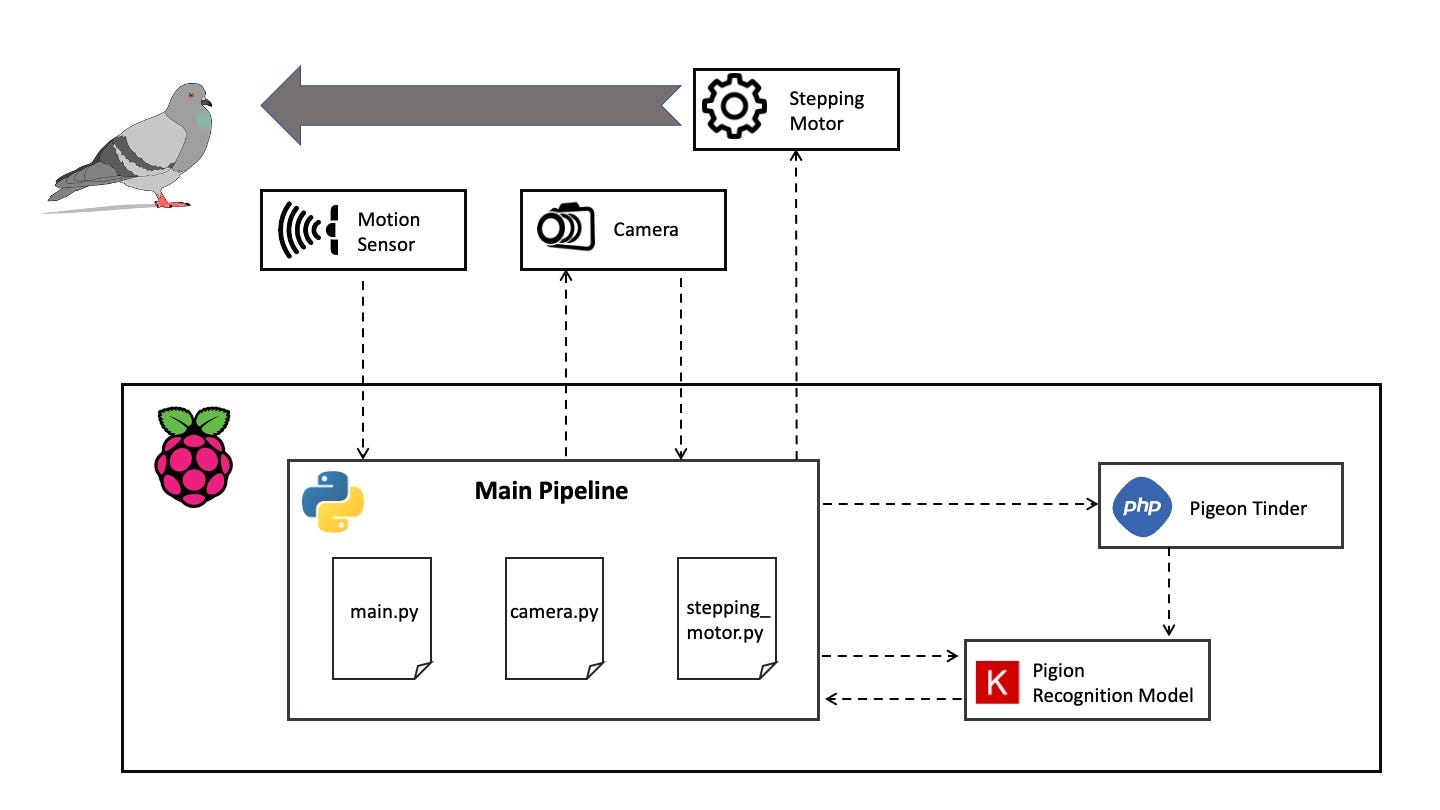
Image 1: Pigeon Avoidance System Architecture Diagram
Hardware-wise the Pigeon Avoidance System includes a Raspberry Pi and three external components: motion sensor, camera, and stepping motor. All is orchestrated through the Main Pipeline. Main Pipeline is the most crucial piece of software that we need to write. Even before we have the Pigeon Recognition Model trained, we need to have it in place to collect the data. However, we first need to connect the external components to the Raspberry Pi. For that, we will need to use GPIO (general purpose input/output) pins, which can be accessed through a Python program. The pins are enumerated as it is shown on the picture:
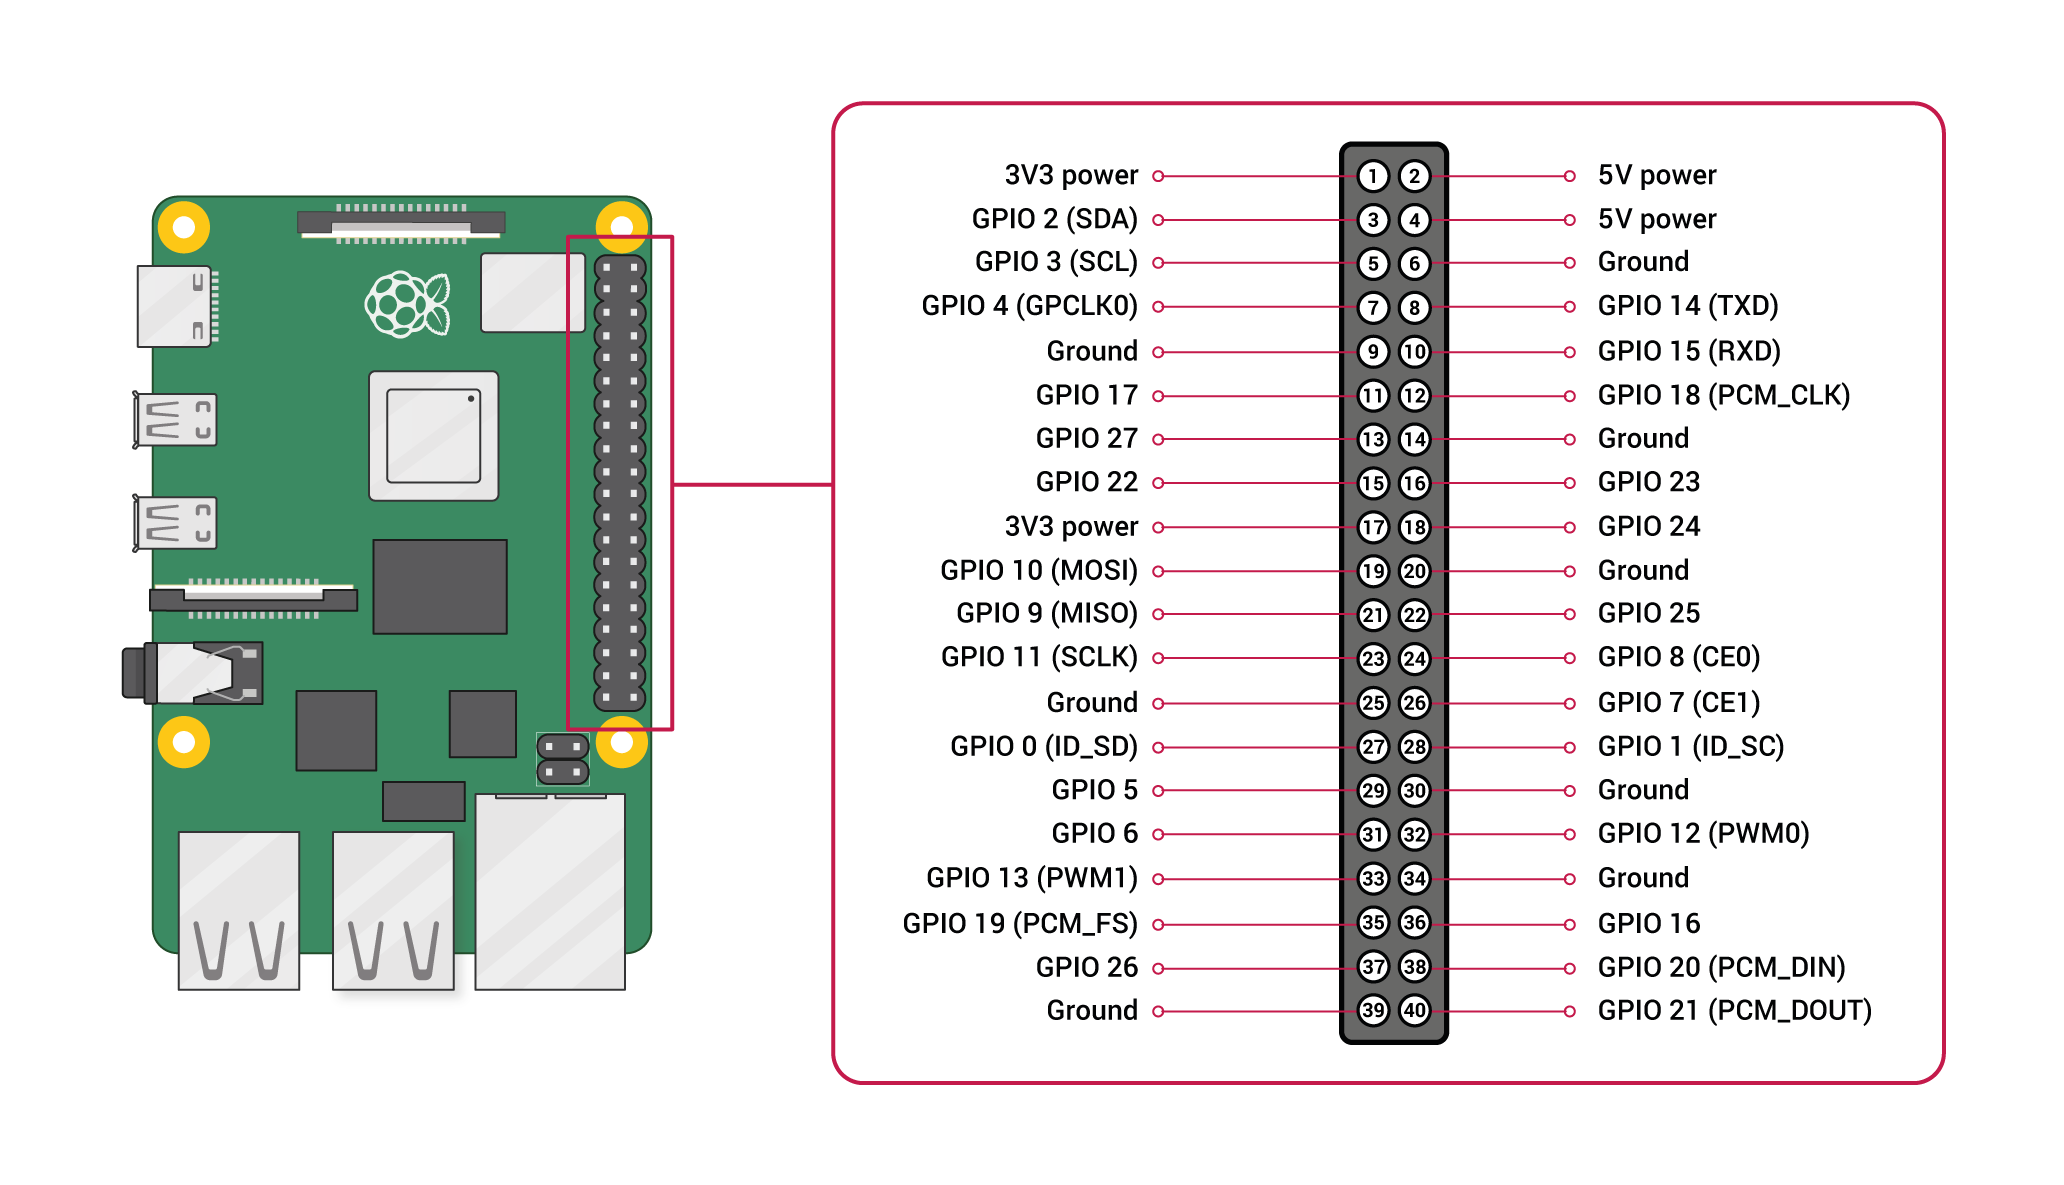
Image 2: Raspberry Pi GPIO layout. Source: official raspberry documentation
Any of the GPIO pins can be designated as an input or output pin and used for a wide range of purposes. There are also two 5V pins, two 3.3V pins, and several 0V ground pins that we will use to connect external Raspberry components.
#python #home-automation #raspberry-pi #data-science #internet-of-things #data analytic