This is the Part 2 of the MediaPipe Series I am writing.
Previously, we saw how to get started with MediaPipe and use it with your own tflite model. If you haven’t read it yet, check it out here.
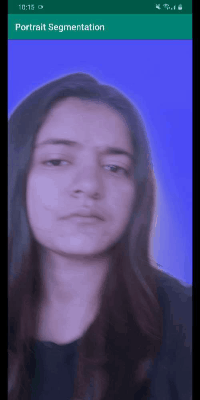
We had tried using the portrait segmentation tflite model in the existing segmentation pipeline with the calculators already present in MediaPipe

Portrait Segmentation MediaPipe — PART 1
After getting bored with this Blue Background, I decided to have some fun with it by having some Zoom like Virtual Backgrounds like beautiful stars or some crazy clouds instead :)

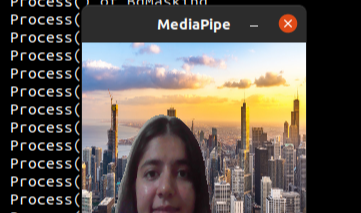
Virtual Clouds Background — PART 2
For this, I wrote a custom calculator and used it with the existing pipeline.
So today I’ll show how did I go about making this App
Before we get started, I would suggest you to go through this part of the documentation which explains the Flow of a basic calculator.
https://google.github.io/mediapipe/framework_concepts/calculators.html
Now, let’s get started with the code
1. Clone the Portrait Segmentation repository from Part1
$ git clone https://github.com/SwatiModi/portrait-segmentation-mediapipe.git
2. New Flow of the Pipeline (making changes in the graph .pbtxt file)
So earlier, the rendering/coloring was done by the _RecolorCalculator , _it used to take image and mask gpu buffer as input and returned gpu buffer rendered output (rendered using opengl)
Here, for replacing the Background with an Image(jpg/png), I have used OpenCV operations.
NOTE_ : OpenCV operations are performed on CPU — ImageFrame datatype where as opengl operations are performed on GPU — Image-buffer datatype_
We will replace the RecolorCalculator with the BackgroundMaskingCalculator
#deep-learning #machine-learning #image-segmentation #augmented-reality #tflite #deep learning