Hi everyone! 👋 Today we are going to understand the JPEG compression algorithm. One thing a lot of people don’t know is that JPEG is not a format but rather an algorithm. The JPEG images you see are mostly in the JFIF format (JPEG File Interchange Format) that internally uses the JPEG compression algorithm. By the end of this article, you will have a much better understanding of how the JPEG algorithm compresses data and how you can write some custom Python code to decompress it. We will not be covering all the nuances of the JPEG format (like progressive scan) but rather only the basic baseline format while writing our decoder.
Introduction
Why write another article on JPEG when there are already hundreds of articles on the internet? Well, normally when you read articles on JPEG, the author just gives you details about what the format looks like. You don’t implement any code to do the actual decompression and decoding. Even if you do write code, it is in C/C++ and not accessible to a wide group of people. I plan on changing that by showing you how a basic JPEG decoder works using Python 3. I will be basing my decoder on this MIT licensed code but will be heavily modifying it for increased readability and ease of understanding. You can find the modified code for this article on my GitHub repo.
Different parts of a JPEG
Let’s start with this nice image by Ange Albertini. It lists all different parts of a simple JPEG file. Take a look at it. We will be exploring each segment. You might have to refer to this image quite a few times while reading this tutorial.
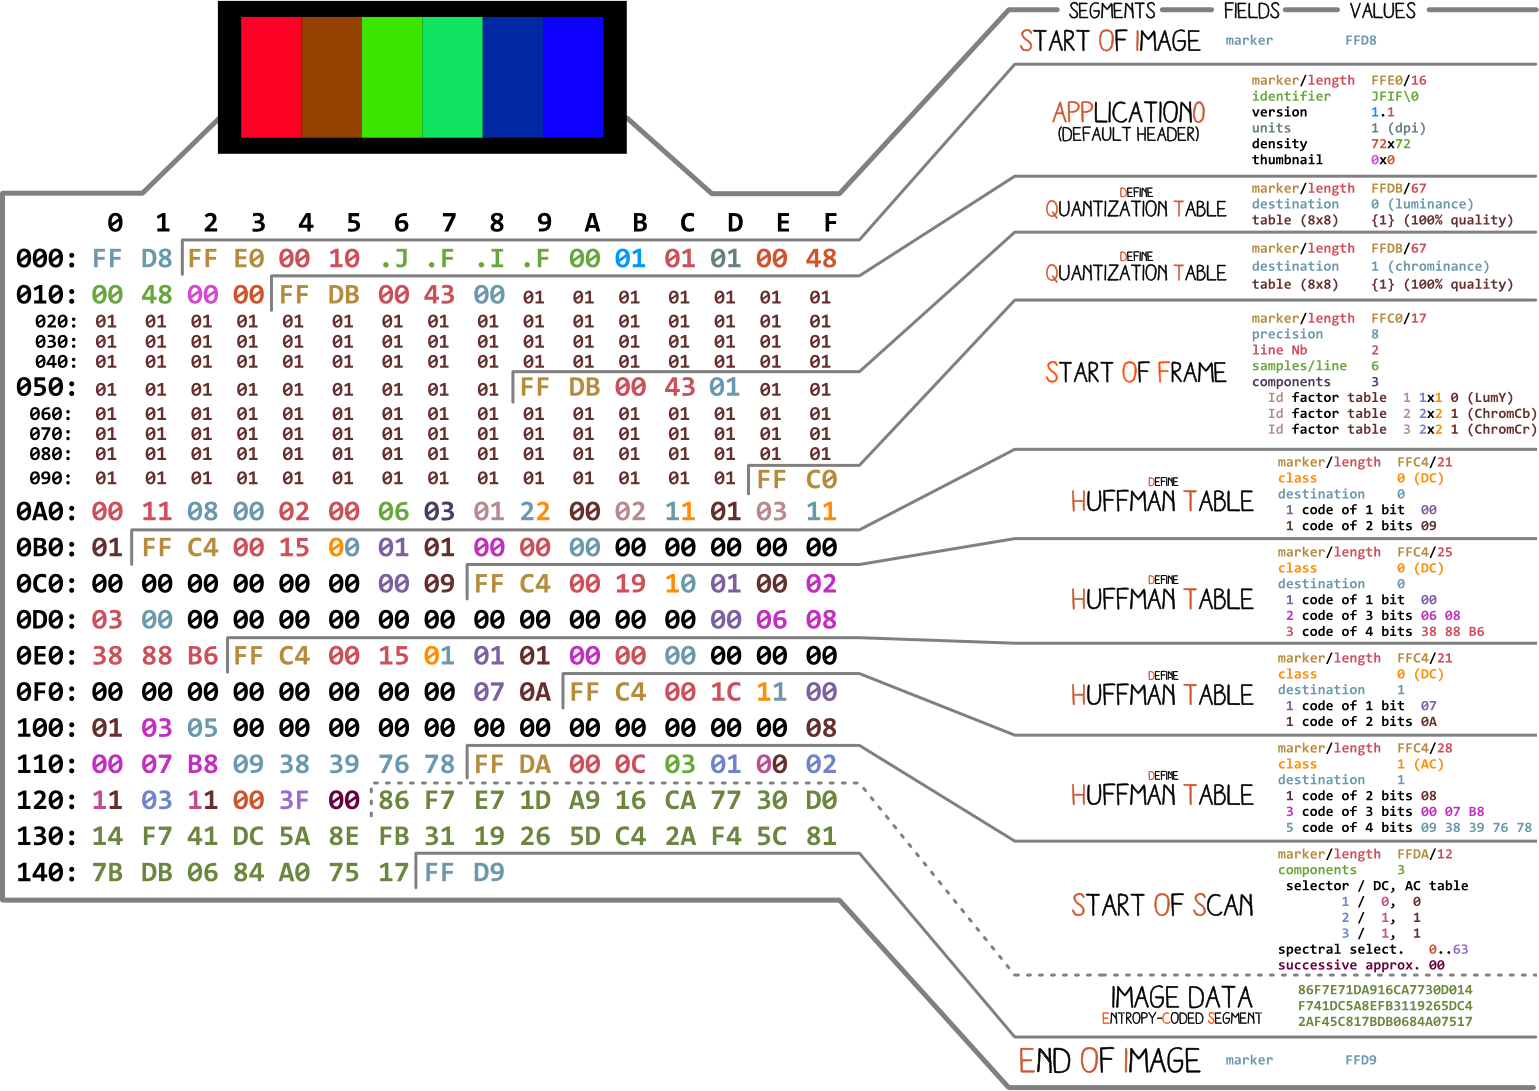
At the very basic level, almost every binary file contains a couple of markers (or headers). You can think of these markers as sort of like bookmarks. They are very crucial for making sense of a file and are used by programs like file (on Mac/Linux) to tell us details about a file. These markers define where some specific information in a file is stored. Most of the markers are followed by length information for the particular marker segment. This tells us how long that particular segment is.
File Start & File End
The very first marker we care about is FF D8. It tells us that this is the start of the image. If we don’t see it we can assume this is some other file. Another equally important marker is FF D9. It tells us that we have reached the end of an image file. Every marker, except for FFD0 to FFD9 and FF01, is immediately followed by a length specifier that will give you the length of that marker segment. As for the image file start and image file end markers, they will always be two bytes long each.
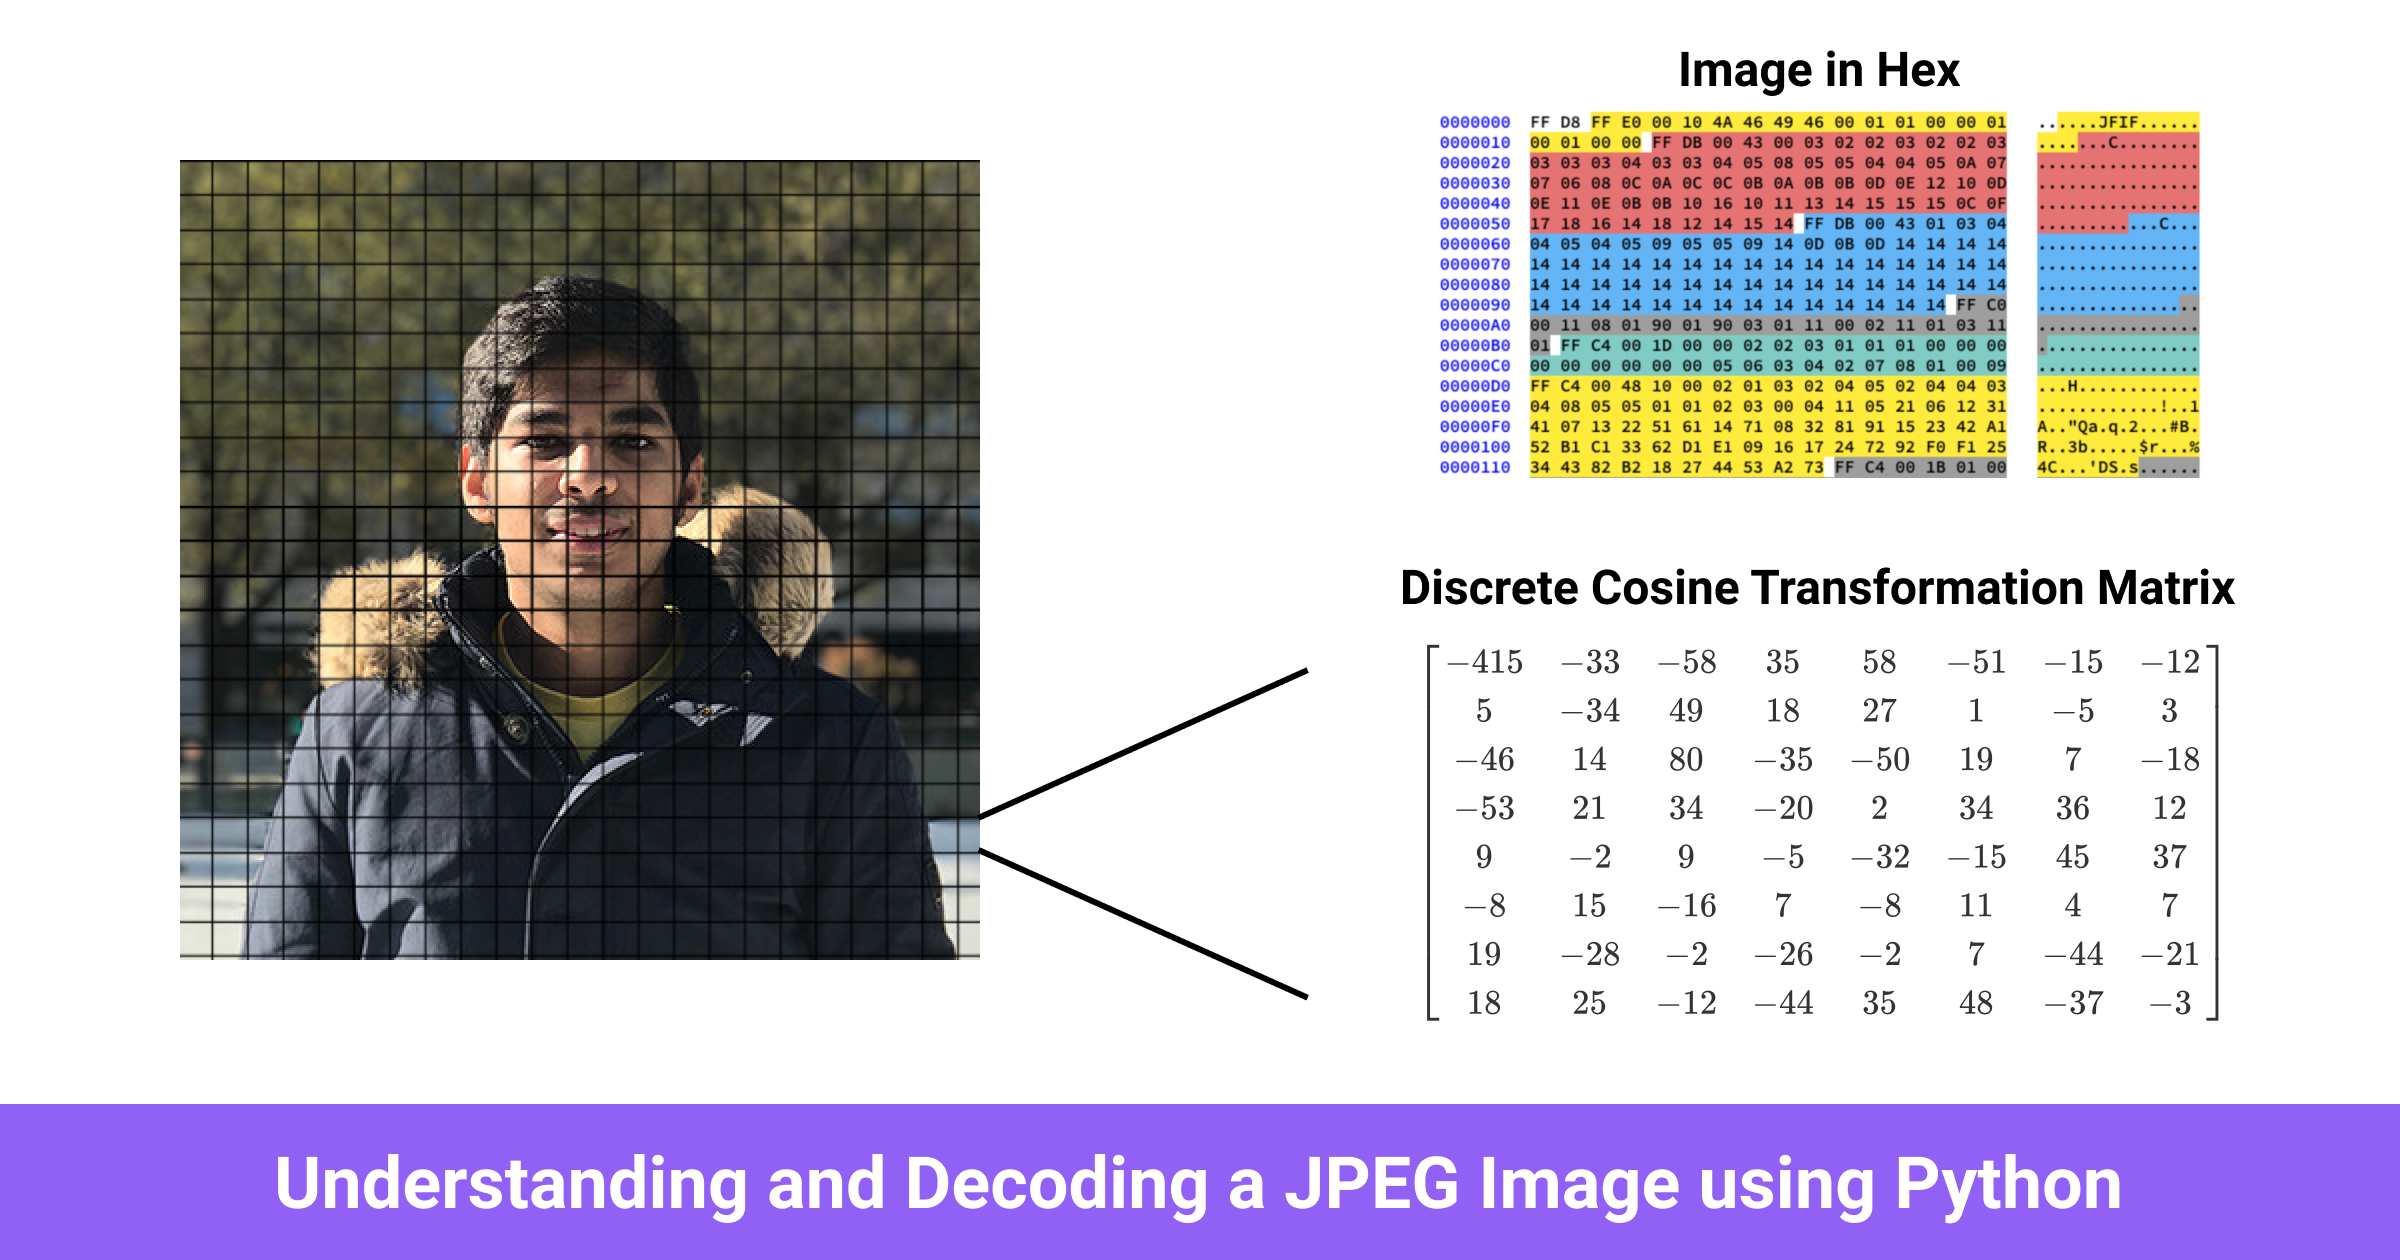
Throughout this tutorial, we will be working with this image:
#python #image using python #different parts of a jpeg