As web developers, a lot of our work is about gathering information and data from our users. In an ideal world we could let users input data anyway they like and somehow parse or extract the useful and relevant information from that data, but in reality that is not often the case. Many times, the data users input is complex and require us to make sure that it meets some kind of specification.
Over the last couple of years I’ve been working quite a bit with validating user input in Angular applications. For that purpose, I’ve been using the validation library Joi in its various versions. Joi is a powerful library and since it’s javascript, it can be run both in the front end and back end. That is a great benefit! If you are not running a javascript back end, it is still a great tool for front end validation.
If you are using template driven forms in Angular, you can use the Joi validation to, for instance, run the ngModel through the Joi validation engine after the form was submitted, and then informing the user if the input did not pass validation. But that makes for a poor user experience. And hooking up events to monitor user input, run input through validation, adding and removing classes to highlight errors is tedious work. However, using reactive forms, which has built in support for validation, this becomes a lot easier.
While researching how to use reactive forms together with Joi, I found this article that helped a lot: Advanced validation with Angular and Joi. But it is now a few years old, and it does not address how to validate a whole form with one Joi schema. This is what I aim to show in this article.
What you will learn
- Creating reusable specifications for user input
- Using the spec to ensure a form contains correct data before submission
- Visualizing the errors to the user
- Customizing error messages
- Cross field validation: if one field has X value, another field must be Y
- Validating forms with variable number of inputs (dynamic forms)
What you will not learn
- Designing great forms
- Translating error messages
- Managing browser differences in form rendering
Prerequisites
The setup here is based on angular v9.1.4 and node v12.16.3 (LTS), which are the latest at the time of writing. To make use of this article, you’ll need to be able to use npm, node and ng commands in a terminal of some kind. Also, I’ve only tested the CSS in Chrome, and it may not look the same in another browser.
Note on the images in this article
To visualize the validation I use animated gif images. It has come to my attention that sometimes these images do not load correctly, displaying instead as some kind of unsharp blob. If that happens to you, please try right clicking the image and opening it in a separate tab. I’ve seen this happening on other articles on Medium as well.
Basic setup
Create an Angular app like this:
ng new joi-validation
[some work takes place]
cd joi-validation
Now import the ReactiveFormsModule into your app.module (or other module if you are an advanced user and need to do that)
// app.module, some things removed for brevity
	import { ReactiveFormsModule } from '@angular/forms';
	@NgModule({
	  imports: [
	    ReactiveFormsModule // <-- Import here
	  ]
	})
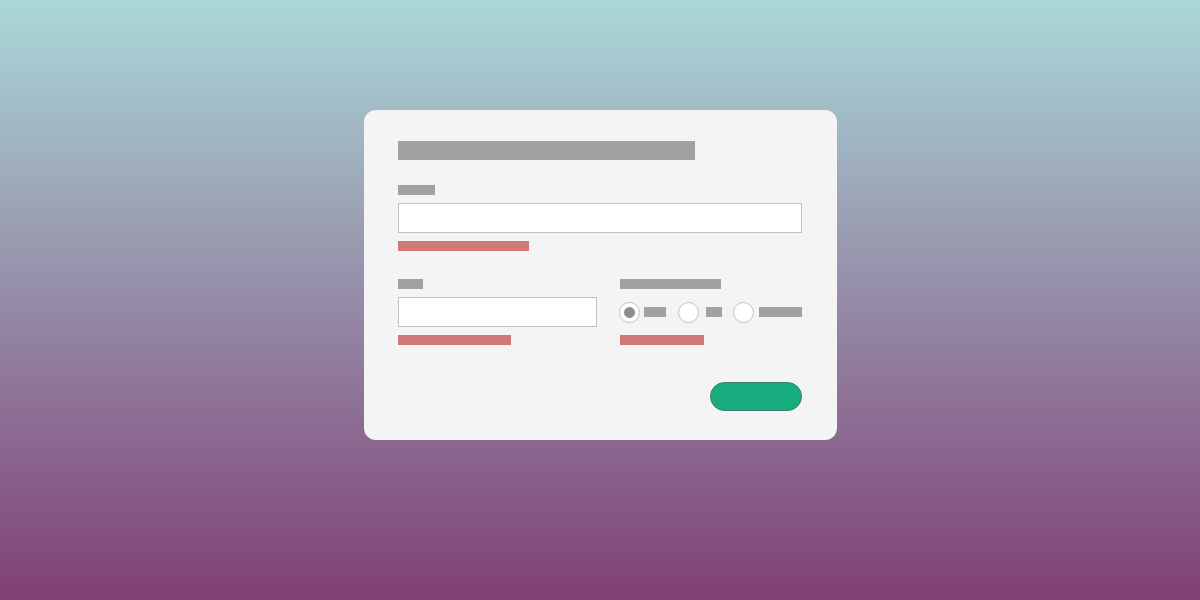
Next, it’s time to set up a form that we want to validate. Let’s create a “report incident” form, in which a user can report an incident on a construction site or similar. We can create the form directly in app.component.ts for simplicity. To minimize the code to write, we’ll use the FormBuilder service to build the FormGroup and its controls. This is an approach I recommend.
Here is a gist of all three files, obviously you’d not put all code in one file in a real project.
// app.component.ts

	import { Component } from '@angular/core';
	import { FormBuilder } from '@angular/forms';

	@Component({
	  selector: 'app-root',
	  templateUrl: './app.component.html',
	  styleUrls: ['./app.component.scss']
	})
	export class AppComponent {
	  title = 'joi-validation';
	  types = ['Lethal', 'Major', 'Minor'];

	  incidentForm = this.fb.group({
	    type: [this.types[2]],
	    title: [''],
	    description: [''],
	    siteId: ['']
	  });

	  constructor(private fb: FormBuilder) {
	  }
	}

	// app.component.html

	<div class="wrapper">
	  <h1>
	    Report an incident
	  </h1>
	  <form [formGroup]="incidentForm">
	    <label>Type
	      <select formControlName="type">
	        <option *ngFor="let option of types" [ngValue]="option">{{ option }} </option>
	      </select>
	    </label>

	    <label>Title
	      <input type="text" formControlName="title"/>
	    </label>

	    <label>Description
	      <input type="text" formControlName="description"/>
	    </label>

	    <label>Site ID
	      <input type="text" formControlName="siteId"/>
	    </label>

	    <button type="submit" [disabled]="!incidentForm.valid">Send report</button>
	  </form>
	</div>

	// app.component.scss

	:host {
	  font-family: sans-serif;
	  font-size: 16px;
	}
	input, select {
	  display: block;
	  width: 100%;
	  margin-top: 0.25rem;
	  margin-bottom: 1rem;
	}

	input[type="text"] {
	  padding: 0.25rem;
	}

	.wrapper {
	  margin: 0 auto;
	  width: 25vw;
	}

	button {
	  display: block;
	  margin: 0 auto;
	  font-size: 1rem;
	  padding: 0.5rem 0.75rem;
	  background-color: green;
	  color: white;
	  border: 0;
	}
A basic form is set up
Adding Joi
Right now there is no validation on the form. Let’s change that.
npm install @hapi/joi -s
Now we’ve installed Joi and are prepared to use it to create a schema which we’ll use to validate the input in the form.
// app.component.ts

	import * as Joi from '@hapi/joi';

	// add a schema
	incidentSchema = Joi.object({
	    type: Joi.any().valid('Lethal', 'Major', 'Minor'),
	    title: Joi.string().required().min(5).max(32),
	    description: Joi.string().required().min(20),
	    siteId: Joi.string().pattern(/^[a-zA-Z]{2}[0-9]{1,3}$/)
	});
In a real project, it is more likely that the schemas we use are located in a separate repository or package and shared within the team or organisation. But in this case, we’ll just create the schema in the app.component.
While we’ve not used the schema to validate the form, we can test the schema like this:
 constructor(private fb: FormBuilder) {
	    this.incidentForm.valueChanges.subscribe((values) => {
	      let result = this.incidentSchema.validate(values);
	      console.log('Errors: ', result.error );
	    })
	  }
Subscribing to changes in the form and running the form into the schema for validation
As you start editing the form, you’ll see that the console fills up with error messages:
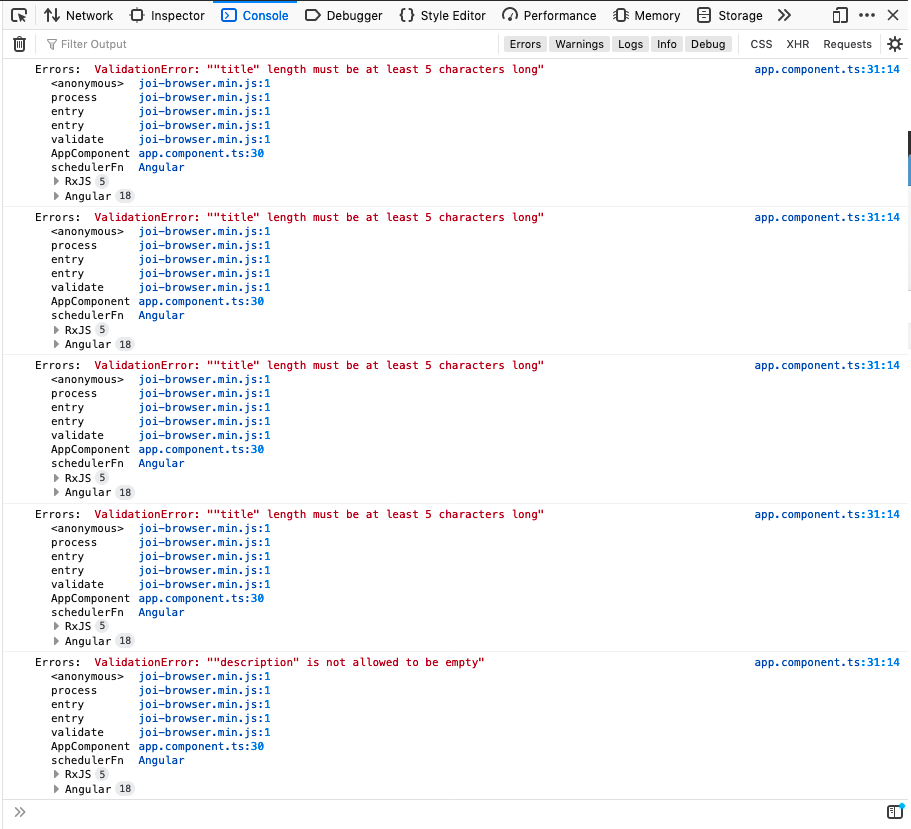
You can also see that validation returns early: as soon as a value does not pass validation, the validation stops and returns the first error. This is the default behavior in Joi, but can be changed when validating by passing an options object to the validate function:
schema.validate(values, { abortEarly: false })
#joi #programming #ux #validation #angular