How to Integrating dropbox in your React native chat App
You will need Node and React Native installed on your machine.
Chatkit has a limit of 5MB per attachment. In this tutorial, we’ll be looking at how we can work around this limit by using Dropbox to handle file uploads.
Prerequisites
Knowledge of React and React Native is required to follow this tutorial.
The following package versions are used. If you encounter any issues in compiling the app, try to use the following:
- Node 11.2
- Yarn 1.13
- React Native 0.59
You’ll need a Chatkit app instance with the test token provider enabled. If you don’t know the basics of using Chatkit yet, be sure to check out the official docs. This tutorial assumes that you already know the basics of integrating Chatkit into a React Native app.
You’ll also need an Auth0 account and a Dropbox account. We’ll be creating app instances for both services in this tutorial.
Lastly, you’ll need an ngrok account for exposing the server to the internet.
App overview
We’ll be building a simple chat app using Chatkit and React Native Gifted Chat. It will have two screens: login and chat.
The login screen is where the user can enter their username and their friend’s username:
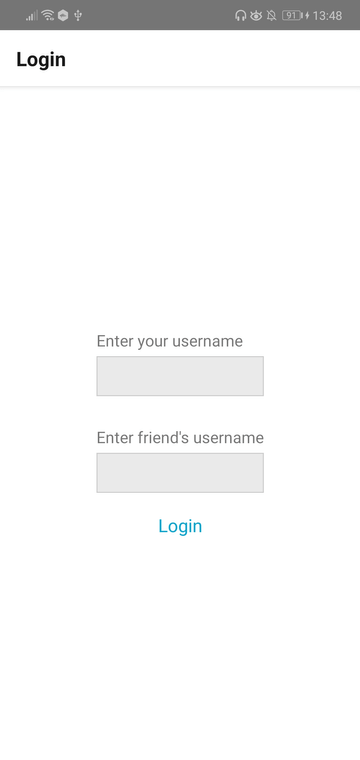
Once logged in, they’ll be redirected to the chat screen:

In order to upload the files using Dropbox, the user has to first log in and authenticate using their Dropbox account:
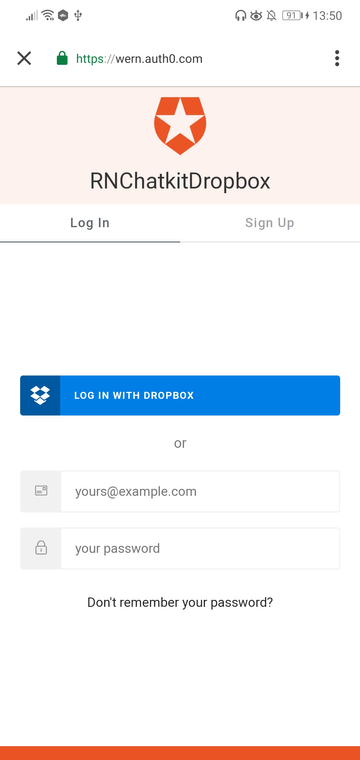
Once authenticated, their Dropbox access token will be stored in the app. This will be used for uploads whenever the user attaches a file.
Note that we won’t be using Chatkit’s attachment feature in this tutorial. Attachments will simply fail if the user didn’t authenticate with their Dropbox account.
You can find the code on this GitHub repo.
Creating a Dropbox app instance
This section assumes that you already have a Dropbox account. Go ahead and create one if you don’t have one already.
Once you have a Dropbox account, go to dropbox.com/developers and click on the Create your applink:

Choose the API type, access type, and enter the name of the app:

Note: the name of your app cannot include the word “dropbox” as it goes against their branding guidelines.
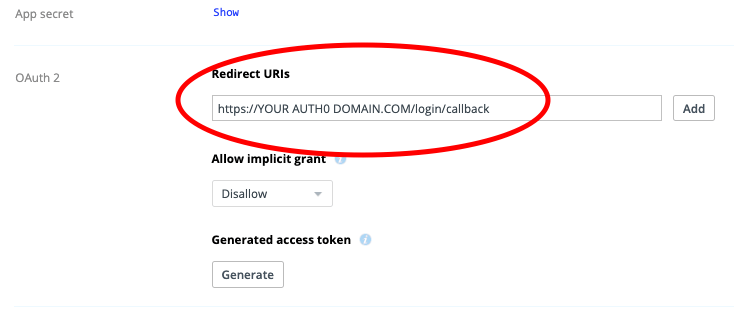
Once the app is created, it will redirect you to its settings page. Later on, you’ll have to update the Redirect URIs with the callback URL that Auth0 will provide:

Creating an Auth0 app instance
This section assumes that you already have an Auth0 account. Go ahead and create one if you don’t have one already.
Main app
First, we need to create the main app instance, which we’ll use in the React Native app that we will be creating later.
Once you’re logged in to your account, go to your dashboard and click on the + CREATE APPLICATION button.
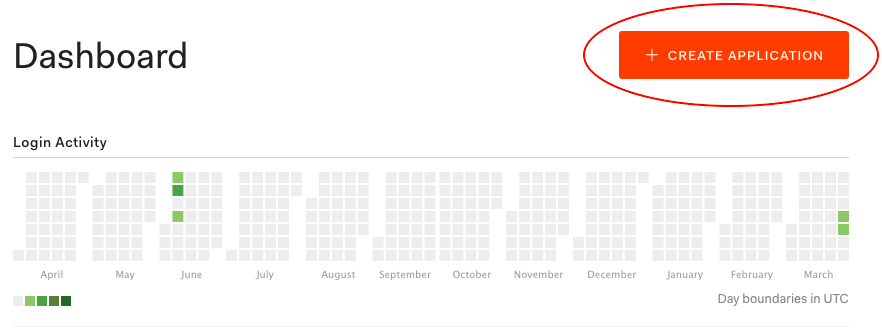
On the modal window that pops up, enter the name of the app and select native as the application type then click CREATE:
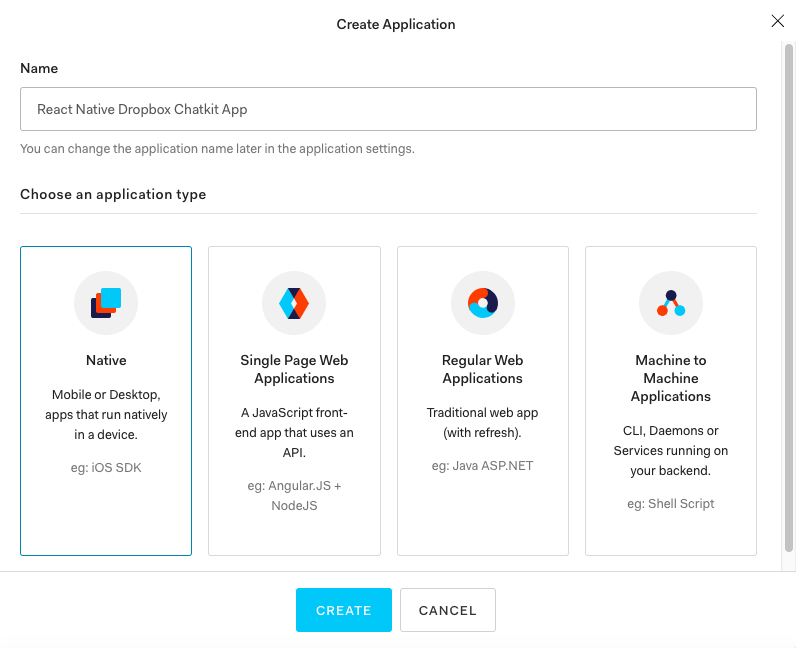
Once the app instance is created, you’ll be redirected to its page. Click on the Settings tab to view the settings for the app. This contains some of the information that you need to put in your .env file:
    AUTH0_DOMAIN="YOUR AUTH0 DOMAIN"
    AUTH0_CLIENT_ID="YOUR AUTH0 CLIENT ID"
    AUTHO_SCOPE="openid profile"
    AUTH0_AUDIENCE="YOUR AUTH0 DOMAIN/userinfo"
Take note of this page as we’ll go back to update the settings later with the details of the React Native app that we will be creating.
This is also a good time to update your Dropbox app settings with your redirect URI:
Machine to machine app
When the user authenticates the app via their Dropbox account, an access token is returned. This access token can be used to fetch the user’s details but it can’t be used to make requests to the Dropbox API. In order to get the access token for making those requests, we need to create another Auth0 app instance for communicating with the Identity Provider (in this case, it’s Dropbox).
From your Auth0 dashboard, create another application and select Machine to Machine Applicationsas the type:
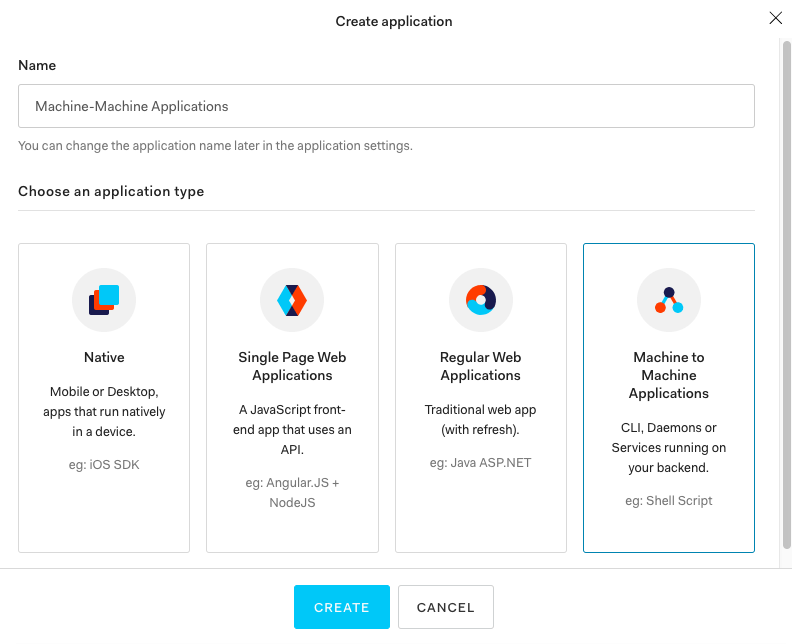
Once you’ve clicked the CREATE button, it will ask you to select the API type. Select Auth0 Management API, and under scopes, select read:users and read:useridtokens. Click on AUTHORIZEto create the app instance:

Once the app is created, you’ll be redirected to its settings page. Copy the Domain, Client ID and Client Secret from that page into your server/.env file:
    AUTH0_DOMAIN="YOUR AUTH0 DOMAIN"
    AUTH0_CLIENT_ID="YOUR MACHINE TO MACHINE AUTH0 APP CLIENT ID"
    AUTH0_CLIENT_SECRET="YOUR MACHINE TO MACHINE AUTH0 APP CLIENT SECRET"
Dropbox connection
The final step is to connect Dropbox to the Auth0 apps you created earlier. Click on Connections → Social link and enable Dropbox:
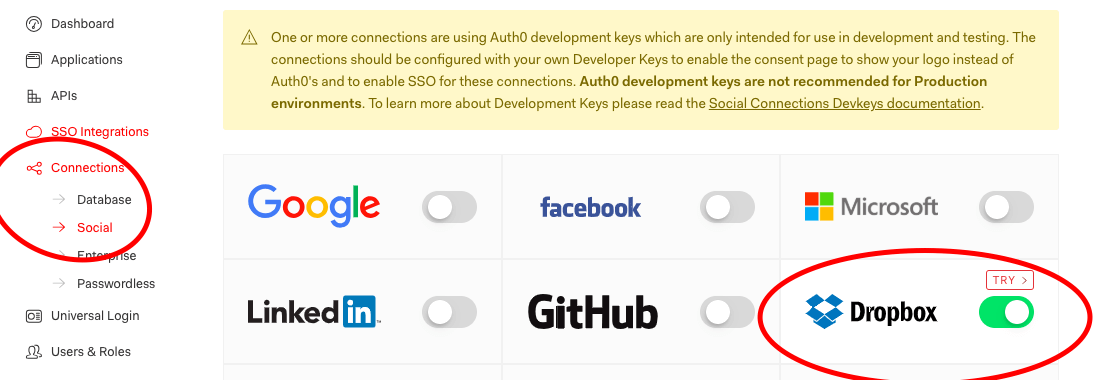
This should open the following modal window. Enter the Client ID and Client Secret of the Dropbox app instance you created earlier and click SAVE:

You can click on the TRY button to check if the connection works.
Next, enable the Dropbox connection for the relevant apps. This includes the main app (React Native Dropbox Chatkit App) which we will use in React Native, and the Machine-Machine Applications which we’ll use for generating the user’s Dropbox access token from the server:

Setting up the app
In order to save time in building the most important parts of the app, I’ve created a starter branch in the repository:
    git clone https://github.com/anchetaWern/RNChatkitDropbox
    git checkout starter
This already includes the code for the whole chat app. So all we have to do is integrate Dropbox login, file uploads, and downloads.
Next, install all the dependencies and link the relevant packages:
    yarn
    react-native eject
    react-native link react-native-gesture-handler
    react-native link react-native-permissions
    react-native link react-native-document-picker
    react-native link react-native-fs
    react-native link react-native-device-info
    react-native link react-native-config
    react-native link react-native-auth0
    react-native link react-native-vector-icons
    react-native link react-native-sensitive-info
Next, we need to update the Android manifest file to allow the app to read and write on the external storage:
 // android/app/src/main/AndroidManifest.xml
    <manifest xmlns:android="http://schemas.android.com/apk/res/android"
      package="com.rnchatkitdropbox">
      <uses-permission android:name="android.permission.INTERNET" />
      <uses-permission android:name="android.permission.READ_EXTERNAL_STORAGE" />
      <uses-permission android:name="android.permission.WRITE_EXTERNAL_STORAGE" />
      ...
    </manifest>
We also need to allow the app to open a Web View for authenticating the user. To do that, add android:launchMode="singleTask" as a property to <activity>. And inside <activity>, add a new <intent-filter>. This allows the app to connect to the default browser of the device. The config below specifies the exact domain that the app can open. In this case, it should be your Auth0 domain, so replace the placeholder YOUR AUTH0 DOMAIN value below:
<application
...
>
<activity
android:name=".MainActivity"
android:label="@string/app_name"
android:launchMode="singleTask"
>
<intent-filter>...</intent-filter>
<intent-filter>
<action android:name="android.intent.action.VIEW" />
<category android:name="android.intent.category.DEFAULT" />
<category android:name="android.intent.category.BROWSABLE" />
<data
android:host="YOUR AUTH0 DOMAIN"
android:pathPrefix="/android/${applicationId}/callback"
android:scheme="${applicationId}" />
</intent-filter>
</activity>
</application>
Next, go to your Auth0 app settings (the native app) and update its allowed callback URLs:

This uses the following format:
{YOUR_APP_PACKAGE_NAME}://{YOUR_AUTH0_DOMAIN}/android/{YOUR_APP_PACKAGE_NAME}/callback
Once replaced, mine looked like this for Android:
com.rnchatkitdropbox://wern.auth0.com/android/com.rnchatkitdropbox/callback
If you need to support iOS, you can view the tutorial on adding Auth0 to a React Native app.
Lastly, update your .env and server/.env file with your Chatkit credentials:
 CHATKIT_INSTANCE_LOCATOR_ID=“YOUR CHATKIT INSTANCE LOCATOR ID (omit v1:us1:)”

CHATKIT_SECRET_KEY=“YOUR CHATKIT SECRET KEY”
Integrating Dropbox into the app
Now we’re ready to integrate Dropbox to the app. We’ll start by updating the login screen, the chat screen, and finally the server.
Login screen
In the login screen, we need to ask for permission to access the device storage. The starter branch already includes the React Native Permissions library which is what we’re using below. This library allows us to ask for various permissions to use a specific device feature (for example, camera, contacts):
  // src/screens/Login.js

import axios from “axios”;

import Permissions from “react-native-permissions”; // add this
Once the component is mounted, we ask for permission. This will show an alert message asking the user to agree for the app to access the device storage. If the user agrees, the permission is granted and the app will be able to pick files from the external storage when the user attaches a file. Otherwise, it will only be able to pick files from the internal storage:
componentDidMount() {

Permissions.check(‘storage’).then((response) => {

if(response == ‘undetermined’) {

Permissions.request(‘storage’).then((response) => {

console.log('requested storage permission: ', response);

});

}

});

}
Next, we update the enterChat method to get the systemtoken and pass it to the chat screen. We will update the server code later to pass this value when the app makes a request to the /users route. The systemtoken is used for getting the access token that the app can use for uploading files to Dropbox:
 enterChat = async () => {
  // ...
  if (username && friends_username) {
    try {
      const response = await axios.post(
        // ...
      );

      const system_token = response.data; // add this

      this.props.navigation.navigate("Chat", {
        user_id,
        username,
        friends_username,
        system_token // add this
      });

      // ..
    } catch (e) {
      // ...
    }
    // ...
  }
}
Chat screen
As mentioned earlier, the starter branch already contains the basic chat code (sending and receiving messages and rendering it on the screen). All we have to do in this section is to implement the file picker and integrate Dropbox file upload and download.
Start by importing the additional packages and components that we’ll be using:
// src/screens/Chat.js// ... // add these: import { DocumentPicker, DocumentPickerUtil } from "react-native-document-picker"; // for picking files import * as mime from "react-native-mime-types"; // for getting the content type of files import RNFS from "react-native-fs"; import { Buffer } from 'buffer/'; // for converting the base64 string representation of the file to array buffer import DeviceInfo from "react-native-device-info"; // for getting unique device info import { Dropbox } from "dropbox"; // for using the Dropbox API import Auth0 from "react-native-auth0"; // for using Auth0 import SInfo from "react-native-sensitive-info"; // for storing the access token import IconButton from "../components/IconButton"; import ChatBubble from "../components/ChatBubble";
Initialize Auth0:
const auth0 = new Auth0({

domain: Config.AUTH0_DOMAIN,

clientId: Config.AUTH0_CLIENT_ID

});
You will need Node and React Native installed on your machine.
Chatkit has a limit of 5MB per attachment. In this tutorial, we’ll be looking at how we can work around this limit by using Dropbox to handle file uploads.
Prerequisites
Knowledge of React and React Native is required to follow this tutorial.
The following package versions are used. If you encounter any issues in compiling the app, try to use the following:
- Node 11.2
- Yarn 1.13
- React Native 0.59
You’ll need a Chatkit app instance with the test token provider enabled. If you don’t know the basics of using Chatkit yet, be sure to check out the official docs. This tutorial assumes that you already know the basics of integrating Chatkit into a React Native app.
You’ll also need an Auth0 account and a Dropbox account. We’ll be creating app instances for both services in this tutorial.
Lastly, you’ll need an ngrok account for exposing the server to the internet.
App overview
We’ll be building a simple chat app using Chatkit and React Native Gifted Chat. It will have two screens: login and chat.
The login screen is where the user can enter their username and their friend’s username:
Once logged in, they’ll be redirected to the chat screen:
In order to upload the files using Dropbox, the user has to first log in and authenticate using their Dropbox account:
Once authenticated, their Dropbox access token will be stored in the app. This will be used for uploads whenever the user attaches a file.
Note that we won’t be using Chatkit’s attachment feature in this tutorial. Attachments will simply fail if the user didn’t authenticate with their Dropbox account.
You can find the code on this GitHub repo.
Creating a Dropbox app instance
This section assumes that you already have a Dropbox account. Go ahead and create one if you don’t have one already.
Once you have a Dropbox account, go to dropbox.com/developers and click on the Create your applink:
Choose the API type, access type, and enter the name of the app:
Note: the name of your app cannot include the word “dropbox” as it goes against their branding guidelines.
Once the app is created, it will redirect you to its settings page. Later on, you’ll have to update the Redirect URIs with the callback URL that Auth0 will provide:
Creating an Auth0 app instance
This section assumes that you already have an Auth0 account. Go ahead and create one if you don’t have one already.
Main app
First, we need to create the main app instance, which we’ll use in the React Native app that we will be creating later.
Once you’re logged in to your account, go to your dashboard and click on the + CREATE APPLICATION button.
On the modal window that pops up, enter the name of the app and select native as the application type then click CREATE:
Once the app instance is created, you’ll be redirected to its page. Click on the Settings tab to view the settings for the app. This contains some of the information that you need to put in your .env file:
    AUTH0_DOMAIN=“YOUR AUTH0 DOMAIN”

AUTH0_CLIENT_ID=“YOUR AUTH0 CLIENT ID”

AUTHO_SCOPE=“openid profile”

AUTH0_AUDIENCE=“YOUR AUTH0 DOMAIN/userinfo”
Take note of this page as we’ll go back to update the settings later with the details of the React Native app that we will be creating.
This is also a good time to update your Dropbox app settings with your redirect URI:
Machine to machine app
When the user authenticates the app via their Dropbox account, an access token is returned. This access token can be used to fetch the user’s details but it can’t be used to make requests to the Dropbox API. In order to get the access token for making those requests, we need to create another Auth0 app instance for communicating with the Identity Provider (in this case, it’s Dropbox).
From your Auth0 dashboard, create another application and select Machine to Machine Applicationsas the type:
Once you’ve clicked the CREATE button, it will ask you to select the API type. Select Auth0 Management API, and under scopes, select read:users and read:user_id_tokens. Click on AUTHORIZEto create the app instance:
Once the app is created, you’ll be redirected to its settings page. Copy the Domain, Client ID and Client Secret from that page into your server/.env file:
    AUTH0_DOMAIN=“YOUR AUTH0 DOMAIN”

AUTH0_CLIENT_ID=“YOUR MACHINE TO MACHINE AUTH0 APP CLIENT ID”

AUTH0_CLIENT_SECRET=“YOUR MACHINE TO MACHINE AUTH0 APP CLIENT SECRET”
Dropbox connection
The final step is to connect Dropbox to the Auth0 apps you created earlier. Click on Connections → Social link and enable Dropbox:
This should open the following modal window. Enter the Client ID and Client Secret of the Dropbox app instance you created earlier and click SAVE:
You can click on the TRY button to check if the connection works.
Next, enable the Dropbox connection for the relevant apps. This includes the main app (React Native Dropbox Chatkit App) which we will use in React Native, and the Machine-Machine Applications which we’ll use for generating the user’s Dropbox access token from the server:
Setting up the app
In order to save time in building the most important parts of the app, I’ve created a starter branch in the repository:
    git clone https://github.com/anchetaWern/RNChatkitDropbox

git checkout starter
This already includes the code for the whole chat app. So all we have to do is integrate Dropbox login, file uploads, and downloads.
Next, install all the dependencies and link the relevant packages:
    yarn

react-native eject

react-native link react-native-gesture-handler

react-native link react-native-permissions

react-native link react-native-document-picker

react-native link react-native-fs

react-native link react-native-device-info

react-native link react-native-config

react-native link react-native-auth0

react-native link react-native-vector-icons

react-native link react-native-sensitive-info
Next, we need to update the Android manifest file to allow the app to read and write on the external storage:
    // android/app/src/main/AndroidManifest.xml

<manifest xmlns:android=“http://schemas.android.com/apk/res/android”

package=“com.rnchatkitdropbox”>

<uses-permission android:name=“android.permission.INTERNET” />

<uses-permission android:name=“android.permission.READ_EXTERNAL_STORAGE” />

<uses-permission android:name=“android.permission.WRITE_EXTERNAL_STORAGE” />

…

</manifest>
We also need to allow the app to open a Web View for authenticating the user. To do that, add android:launchMode=“singleTask” as a property to <activity>. And inside <activity>, add a new <intent-filter>. This allows the app to connect to the default browser of the device. The config below specifies the exact domain that the app can open. In this case, it should be your Auth0 domain, so replace the placeholder YOUR AUTH0 DOMAIN value below:
<application
…
>
<activity
android:name=“.MainActivity”
android:label=“@string/app_name”
android:launchMode=“singleTask”
>
<intent-filter>…</intent-filter><intent-filter> <action android:name="android.intent.action.VIEW" /> <category android:name="android.intent.category.DEFAULT" /> <category android:name="android.intent.category.BROWSABLE" /> <data android:host="YOUR AUTH0 DOMAIN" android:pathPrefix="/android/${applicationId}/callback" android:scheme="${applicationId}" /> </intent-filter> </activity> </application>
Next, go to your Auth0 app settings (the native app) and update its allowed callback URLs:
This uses the following format:
{YOUR_APP_PACKAGE_NAME}://{YOUR_AUTH0_DOMAIN}/android/{YOUR_APP_PACKAGE_NAME}/callback
Once replaced, mine looked like this for Android:
com.rnchatkitdropbox://wern.auth0.com/android/com.rnchatkitdropbox/callback
If you need to support iOS, you can view the tutorial on adding Auth0 to a React Native app.
Lastly, update your .env and server/.env file with your Chatkit credentials:
    CHATKIT_INSTANCE_LOCATOR_ID=“YOUR CHATKIT INSTANCE LOCATOR ID (omit v1:us1:)”

CHATKIT_SECRET_KEY=“YOUR CHATKIT SECRET KEY”
Integrating Dropbox into the app
Now we’re ready to integrate Dropbox to the app. We’ll start by updating the login screen, the chat screen, and finally the server.
Login screen
In the login screen, we need to ask for permission to access the device storage. The starter branch already includes the React Native Permissions library which is what we’re using below. This library allows us to ask for various permissions to use a specific device feature (for example, camera, contacts):
    // src/screens/Login.js

import axios from “axios”;

import Permissions from “react-native-permissions”; // add this
Once the component is mounted, we ask for permission. This will show an alert message asking the user to agree for the app to access the device storage. If the user agrees, the permission is granted and the app will be able to pick files from the external storage when the user attaches a file. Otherwise, it will only be able to pick files from the internal storage:
    componentDidMount() {

Permissions.check(‘storage’).then((response) => {

if(response == ‘undetermined’) {

Permissions.request(‘storage’).then((response) => {

console.log('requested storage permission: ', response);

});

}

});

}
Next, we update the enterChat method to get the system_token and pass it to the chat screen. We will update the server code later to pass this value when the app makes a request to the /users route. The system_token is used for getting the access token that the app can use for uploading files to Dropbox:
    enterChat = async () => {
  // ...
  if (username && friends_username) {
    try {
      const response = await axios.post(
        // ...
      );

      const system_token = response.data; // add this

      this.props.navigation.navigate("Chat", {
        user_id,
        username,
        friends_username,
        system_token // add this
      });

      // ..
    } catch (e) {
      // ...
    }
    // ...
  }
}
Chat screen
As mentioned earlier, the starter branch already contains the basic chat code (sending and receiving messages and rendering it on the screen). All we have to do in this section is to implement the file picker and integrate Dropbox file upload and download.
Start by importing the additional packages and components that we’ll be using:
// src/screens/Chat.js// ... // add these: import { DocumentPicker, DocumentPickerUtil } from "react-native-document-picker"; // for picking files import * as mime from "react-native-mime-types"; // for getting the content type of files import RNFS from "react-native-fs"; import { Buffer } from 'buffer/'; // for converting the base64 string representation of the file to array buffer import DeviceInfo from "react-native-device-info"; // for getting unique device info import { Dropbox } from "dropbox"; // for using the Dropbox API import Auth0 from "react-native-auth0"; // for using Auth0 import SInfo from "react-native-sensitive-info"; // for storing the access token import IconButton from "../components/IconButton"; import ChatBubble from "../components/ChatBubble";
Initialize Auth0:
    const auth0 = new Auth0({

domain: Config.AUTH0_DOMAIN,

clientId: Config.AUTH0_CLIENT_ID

});
Next, update the code for the navigation header to include a button for authenticating the user with their Dropbox account:
class Chat extends Component {
  static navigationOptions = ({ navigation }) => {
    const { params } = navigation.state;

    return {
      headerTitle: `Chat with ${params.friends_username}`,
      headerRight: (
        <IconButton icon="dropbox" size={30} color="#0062ff" onPress={params.loginToDropbox} />
      ),
      headerStyle: {
        backgroundColor: "#333"
      },
      headerTitleStyle: {
        color: "#FFF"
      }
    };
  };
}
In the constructor, initialize the values that we will be using for integrating Dropbox:
constructor(props) {

// …
  // add these:
  const system_token = navigation.getParam("system_token");
  this.system_token = system_token; // the system token that came from the server
  this.access_token = null; // the access token that we can use to upload & download files from Dropbox
}
Update componentDidMount to set the loginToDropbox method as a navigation param. We need to do this because there’s no way of accessing component class methods from inside the navigationOptions. While you’re here, get the access token that was securely stored using the React Native Sensitive Info library and use it to initialize Dropbox:
async componentDidMount() {

// add this:

this.props.navigation.setParams({

loginToDropbox: this.loginToDropbox

});
  try {
    // ..

    await this.currentUser.subscribeToRoom({
      // ..
    });

    // add these:
    this.access_token = await SInfo.getItem("access_token", {});
    if (this.access_token) {
      this.dbx = new Dropbox({
        accessToken: this.access_token,
        fetch: fetch
      });
    }

    // ..

  } catch (chat_manager_err) {
    // ..
  }

}
Access tokens from identity providers become invalid after some time (usually 24 hours). So you’ll need to implement a way to renew the token (probably store the last time the token was updated and then prompt the user to authenticate with their Dropbox account once it has exceeded 24 hours).
Add the loginToDropbox method. This method will be executed when the user clicks on the button in the navigation header. This opens a new Web View asking the user to authenticate using their Dropbox account. Once the user has gone through the whole process, the chat screen is displayed back to the user. At this point, the accessToken becomes available. This allows us to request the user’s info. This contains the general user data and their Dropbox user ID. The only thing useful to us is the latter, and that’s under the sub property:
 loginToDropbox = async () => {

try {

const { accessToken } = await auth0.webAuth.authorize({

scope: Config.AUTHO_SCOPE,

audience: Config.AUTH0_AUDIENCE,

device: DeviceInfo.getUniqueID(),

prompt: “login”

});
    // request for the user's info
    auth0.auth
      .userInfo({ token: accessToken })
      .then(({ sub }) => { // sub is the Dropbox user ID

        // next: get Dropbox access token
      })
      .catch((dropbox_user_details_err) => {
        console.log("error occurred while trying to get user details: ", dropbox_user_details_err);
      });

  } catch (auth0_dropbox_err) {
    console.log('error logging in Dropbox: ', auth0_dropbox_err);
  }

}
By using the system token and the Dropbox user ID, we can make a request for the Identity Provider’s Access Token. We securely store this access token for later use and initialize Dropbox: using it:
auth0
.users(this.system_token)
.getUser({ id: sub })
.then(({ identities }) => {this.access_token = identities[0].access_token; SInfo.setItem("access_token", this.access_token, {}); // initialize Dropbox this.dbx = new Dropbox({ accessToken: this.access_token, fetch: fetch // React Native's fetch API implementation }); });
Here’s what the user’s data looks like:
{

sub: ‘dropbox|xxxxxx’,

givenName: ‘Wern’,

familyName: ‘Ancheta’,

nickname: ‘xxxx’,

name: ‘xxxx’,

picture: ‘https://s.gravatar.com/avatar/717bcde740783a83a168468df0dbbb75?s=480&r=pg&d=https%3A%2F%2Fcdn.auth0.com%2Favatars%2Fan.png’,

locale: ‘en’,

updatedAt: ‘2019-03-28T12:46:01.164Z’

}
Now that we have an access token that we can use for uploading and downloading files, we can now add the method for picking files. But before that, initialize the value of ispickingfile in the state:
state = {

messages: [],

is_initialized: false,

is_picking_file: false // add this. For showing/hiding the file attachment loader

};
In order to pick files, we also need to add a button for doing so. React Native Gifted Chat allows us to add custom action buttons so we can simply create a function which returns the component for doing so:
renderCustomActions = () => {

if (!this.state.is_picking_file) {

const icon_color = this.attachment ? “#0064e1” : “#808080”;
    return (
      <View style={styles.customActionsContainer}>
        <TouchableOpacity onPress={this.openFilePicker}>
          <View style={styles.buttonContainer}>
            <Icon name="paperclip" size={23} color={icon_color} />
          </View>
        </TouchableOpacity>
      </View>
    );
  }

  return (
    <ActivityIndicator size="small" color="#0064e1" style={styles.loader} />
  );
}
Once that’s done, we can now add the openFilePicker method. Here, we’re using the React Native Document Picker library to implement it. Once the file is picked, we use the react-native-fs library to convert the file to its base64 representation and then the Node buffer module to convert it to an array buffer:
openFilePicker = async () => {

await this.setState({

is_picking_file: true

});
  DocumentPicker.show({
    filetype: [DocumentPickerUtil.allFiles()], // allow all kinds of file types
  }, async (err, file) => {

    if (!err) {
      try {
        const base64 = await RNFS.readFile(file.uri, "base64"); // convert the file to its base64 string representation
        const buff = Buffer.from(base64, 'base64'); // convert base64 string representation of the file to array buffer

        // next: upload the file to Dropbox

      } catch (read_file_err) {
        console.log("error reading file: ", read_file_err);
      }
    }

  });
}
The Dropbox API only accepts array buffer when using the upload endpoint so we have to convert from base64.
Next, use the filesUpload method to upload the file to Dropbox. This method accepts an object containing the path and contents of the file. path is the full path to which the file will be saved on the user’s Dropbox, while contents is the array buffer:
this.dbx.filesUpload({ path: ‘/’ + file.fileName, contents: buff })

.then(({ path_display }) => {
    Alert.alert("Success", "File attached!");

    this.setState({
      is_picking_file: false // hide the file attachment loader
    });

    // required data when sending the message with Chatkit
    this.attachment = {
      uri: path_display,
      file_type: mime.contentType(file.fileName)
    };
  })
  .catch((file_upload_err) => {
    console.log('error occured while uploading file: ', file_upload_err);
  });
Next, update the onSend method to include the attachment in the message_parts:
 onSend = async ([message]) => {

// …
  let message_parts = [
    // ..
  ];

  // add these:
  if (this.attachment) {
    const { uri, file_type } = this.attachment;
    message_parts.push({
      type: file_type,
      url: uri,
    });
  }

  try {
    await this.currentUser.sendMultipartMessage(
      // ..
    );

    this.attachment = null; // add this

    // ..
  } catch (send_msg_err) {
    // ..
  }
}
Now that we have attachments, also add it to getMessage:
getMessage = async ({ id, senderId, text, attachment, createdAt }) => { // extract the attachment here
  let msg_data = {
    // ...
    user: {
     // ..
    },
    attachment // add this
  };

  return {
    message: msg_data
  };
}
Next, update the render method to pass the renderCustomActions prop and renderMessage prop to <GiftedChat>:
<GiftedChat

// …

renderSend={this.renderSend}

renderMessage={this.renderMessage}

/>
Next, add the renderMessage method. This will render a custom message bubble if the message being rendered has an attachment:
renderMessage = (msg) => {

const { attachment } = msg.currentMessage;

const renderBubble = (attachment) ? this.renderPreview.bind(this, attachment.link) : null;

const modified_msg = {

…msg,

renderBubble

}
  return <Message {...modified_msg} />
}
Here’s the renderPreview method. This uses React Native Gifted Chat’s ChatBubble component, but we’re also adding a download button as its child. When the user clicks it, the attached file will be downloaded to their device:
renderPreview = (uri, bubbleProps) => {
  const text_color = (bubbleProps.position == 'right') ? '#FFF' : '#000';
  const modified_bubbleProps = {
    ...bubbleProps
  };

  return (
    <ChatBubble {...modified_bubbleProps}>
      <TouchableOpacity onPress={() => {
        this.downloadFile(uri);
      }}>
        <View style={styles.downloadButton}>
          <Text style={[styles.link, { color: text_color }]}>download</Text>
        </View>
      </TouchableOpacity>
    </ChatBubble>
  );
}
Here’s the downloadFile method. Unlike the file upload, we can’t use a method from the Dropbox JavaScript SDK to download a file. This is because the SDK primarily caters for the web, so all it has to do is generate a temporary URL that links directly to the file. Things are a bit different in React Native because it has to open the link in the browser. We won’t really do that in this tutorial because we don’t want to involve the browser just for downloading files. Here, we’re using the downloadFilemethod from react-native-fs instead. This is similar to making a regular POST request. But instead of returning the response as a string, it will return it in binary format. Which is then saved to the path you specify:
downloadFile = (link) => {

RNFS.downloadFile({

fromUrl: “https://content.dropboxapi.com/2/files/download”, // the base URL for the request

toFile: RNFS.DocumentDirectoryPath + link, // the path in your device where the file will be saved

headers: {

“Authorization”: Bearer ${this.access_token}, // the IDP’s access token

“Dropbox-API-Arg”: JSON.stringify({ path: link })} // the link to the file

})

.promise

.then((response) => {

if (response.statusCode == 200) { // file was downloaded

Alert.alert(‘Operation Complete’, ‘Successfully downloaded file’);

} else {

Alert.alert(‘Error’, ‘Something went wrong while trying to download file’);

}

}

)

.catch((download_err) => {

console.log('error downloading file: ', download_err);

});

}
You can view more examples that use Dropbox’s JavaScript SDK on their GitHub repo. But use your judgment whether the specific methods are applicable to the React Native environment or not.
IconButton component
Here’s the code for the IconButton component:
// src/components/IconButton.js
import React from “react”;
import { TouchableOpacity, View } from “react-native”;
import Icon from “react-native-vector-icons/FontAwesome”;const IconButton = ({ icon, size, color, onPress }) => { return ( <TouchableOpacity onPress={onPress}> <View style={styles.container}> <Icon name={icon} size={size} color={color} /> </View> </TouchableOpacity> ); } const styles = { container: { marginRight: 10 } } export default IconButton;
ChatBubble component
Here’s the code for the ChatBubble component:
import React from “react”;
import { View } from “react-native”;
import { MessageText, Time } from “react-native-gifted-chat”;const ChatBubble = (props) => { const { position, children } = props; return ( <View style={styles[position].container}> <View style={styles[position].wrapper}> <MessageText {...props} /> {children} <Time {...props} /> </View> </View> ); } const styles = { left: { container: { flex: 1, alignItems: 'flex-start', }, wrapper: { borderRadius: 15, backgroundColor: '#f0f0f0', marginRight: 60, minHeight: 20, justifyContent: 'flex-end', } }, right: { container: { flex: 1, alignItems: 'flex-end', }, wrapper: { borderRadius: 15, backgroundColor: '#0084ff', marginLeft: 60, minHeight: 20, justifyContent: 'flex-end', } } } export default ChatBubble;
Server
The code for handling the creation of Chatkit users and rooms are already added in the starter branch. All we have to do in the server side is to add the code for obtaining/refreshing the token that allows us to get the user’s IDP access token and return it as a response when the user is logging in.
Start by adding the code for initializing Auth0:
// server/index.js
require(“dotenv”).config();// add these: const AuthenticationClient = require('auth0').AuthenticationClient; const auth0 = new AuthenticationClient({ domain: process.env.AUTH0_DOMAIN, clientId: process.env.AUTH0_CLIENT_ID, clientSecret: process.env.AUTH0_CLIENT_SECRET }); let system_token = null;
Next, add a route that allows you to refresh the token manually:
app.get(“/token/refresh”, (req, res) => {

auth0.clientCredentialsGrant(

{

audience: https://${process.env.AUTH0_DOMAIN}/api/v2/,

scope: ‘read:users read:user_idp_tokens’ // note: the same scopes that you chose earlier for the machine to machine Auth0 app

},

(err, response) => {

if (err) {

console.log('error occurred: ', err);

} else {

system_token = response.access_token;

console.log('access token: ', system_token);

}
      res.send('ok');
    }
  );
});
The token expires after some time, so we need to constantly refresh it. The code above allows us to easily test things out. For production apps, you need to have a CRON job that will automatically refresh the token for you.
Lastly, update the /users route to return the system_token:
app.post(“/users”, async (req, res) => {
  // ..
  try {
    // ..

    res.send(system_token); // update this
  } catch (err) {
    if (err.error === "services/chatkit/user_already_exists") {

      res.send(system_token); // update this
    } else {
      // ..
    }
  }

});
Running the app
At this point, you can now run the app. Start by running the server and exposing it to the internet using ngrok:
cd server

yarn start

~/Downloads/ngrok http 5000
Update the login and chat screen with your ngrok URL:
 // src/screens/Login.js

const CHAT_SERVER = “YOUR NGROK HTTPS URL/users”;
 // src/screens/Chat.js

const CHAT_SERVER = “YOUR NGROK HTTPS URL/rooms”;
Finally, run the app:
react-native run-android
Conclusion
In this tutorial, we’ve successfully integrated Dropbox authentication and file uploads to an existing React Native chat app. This has helped us overcome the file attachment limits of Chatkit. Do note that if you need to upload files that are greater than 150MB, you’ll need to use the upload session API call.
Originally published on https://pusher.com
#ios #chatbot #javascript #node-js #react-native #reactjs
