Add Custom Markers on Google Map in React Native with MapView
Learn how to add custom markers on a Google map, rendered in React Native with MapView. Use React Native and the MapView component to render a Google map with customizable markers, floating buttons, and more.
Using custom markers is an effective way to provide a richer user experience to your in-app maps. Custom markers allow you to showcase your brand and create a memorable mapping experience for your users while saving time and resources.
Google Maps recently introduced the Advanced Markers feature to the JavaScript API. This feature allows you to customize your markers by using your own image assets, such as PNGs and SVGs.
This article will explore how to add custom markers on a Google map, rendered in React Native with MapView.
Table of contents:
- Adding a map to a React Native app
- Adding a floating button to our map
- Adding multiple markers to our map
- Creating custom map markers
- Creating a map application with three states
Requirements
To follow this tutorial, you’ll need to know how to build applications with React Native. You also need to have the following programs installed on your local machine to enable you to run React Native locally:
- Node.js v10 or above
- Xcode or Android Studio (set up to run the emulator)
- React Native CLI
For step-by-step instructions on how to set up your React Native development environment with the CLI, visit the official React Native setup documentation.
Adding a map to a React Native app
Before we can add a map to our React Native app, we first need to initialize the app. If you already have the setup, run the following command to create a fresh application:
npx react-native@latest init MyAppBefore running the command, replace MyApp with whatever name you prefer for your application. Then, we’ll get started on adding a map to the app.
In your application’s root folder, open the App.tsx file and clear its contents. Then start by importing the following:
import React from 'react'
import { SafeAreaView } from 'react-native'
import MapView from 'react-native-maps'
import {FAB, Title} from 'react-native-paper'
Next, beneath the imports, create the App functional component and return a <MapView /> component (with its initial region set) wrapped inside <SafeAreaView />:
export default function App() {
  return (
    <SafeAreaView style={styles.container}>
      <MapView
        style={{flex: 1}}
        initialRegion={{
          latitude: -34.397,
          longitude: 150.644,
          latitudeDelta: 0.09,
          longitudeDelta: 0.03
        }}
      />
    </SafeAreaView>
  );
}
With the above code, we set the initial focus of the map by passing the region’s coordinates to the respective properties of initialRegion. The delta latitude and longitude are necessary for the map to make calculations to zoom into and out of our map.
The map should look something like this:

Adding a floating button to our map
React Native Paper has a custom component, <FAB />, which is a floating action button. We already imported this component into the file, and we’ll add this component to our screen in this section.
Inside <SafeAreaView> and underneath <MapView>, add the FAB component:
  return (
    <SafeAreaView style={styles.container}>
       // MapView is here
      <FAB
          icon="plus"
          styles={styles.fab}
      />
    </SafeAreaView>
  );
To push the button to the bottom-right corner of the screen, add the following property to your styles object:
fab: {
  position: 'absolute',
  right: 20,
  bottom: 30,
  margin: 16
}
If you save the file, you should find the button in the bottom-right corner like so:

Adding multiple markers to your map
You can add markers to your map by putting multiple <Marker> components inside your <MapView/> component. Let’s start by adding one marker for Delivery person 1 and placing the marker at the same spot as our area of focus on the map:
<MapView
  // style and initialRegion
>
  <Marker
    description="Delivery person 1"
    coordinate={langitude: -34.397, longitude: 150.644}
  />
</MapView>
If you save the file and check your device/emulator, you’ll find the marker you just added:
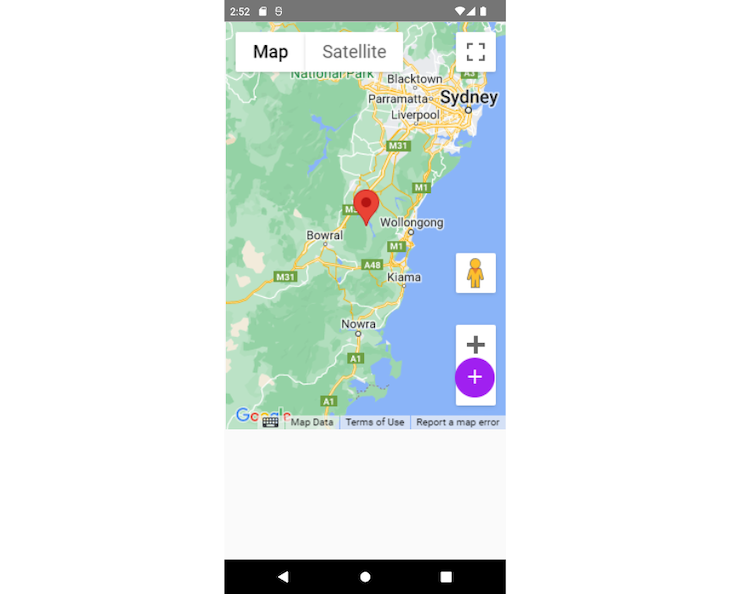
As you can see, the marker is a standard Google red pin marker.
Creating custom map markers
To create custom markers, begin by creating a folder named assets in your project’s root folder. This folder is for storing image files, icons, and every other kind of asset that you’ll use in your application.
To make our app more engaging, we’ll download a cyclist icon and move the image file into the assets folder. Afterward, add the image inside the <Marker> like so:
<Marker
  // description and coordinate
>
  <Image
    source="require(../../../assets/cyclist-icon.png)"
    style={styles.markerImage}
  />
</Marker>
With the above code, the cyclist icon will become the marker. To style the icon, add the following property to your styles object:
markerImage: {
  width: 35,
  height: 35
}
Here’s the result:

Now that we have the marker set, we’ll add more markers so we have a more visually interesting map.
Copy the sole <Marker/> component (and its <Image> child) and paste it into two places below, making the markers three in total. Afterward, change each of their latitude and longitude by very small margins to keep the markers near each other.
Creating a map application with three states
Let’s say you want your map to have three states:
- State 1: The map appears alongside the floating button and three markers that are meant to display delivery people that are close to you
- State 2: When you place an order, the map shows the origin and delivery points, along with the order details and two buttons to confirm and cancel the delivery, respectively
- State 3: Once the order is confirmed, the map appears alongside a loading animation indicating that a delivery person is being searched for in the region
State 1: Showing the map with three markers (and a floating button)
Create a variable named status just above the return statement and assign it a value of 1:
const state = 1Because you want to show the current three markers only when the status is 1, you’ll create the following expression above the markers, then cut and paste them into the expression:
{
  state == 1 ?
    <>
      // Paste all three markers here
    </>
  :null
}
This says that if the status is not equal to 1, you render nothing in the app. Note that we wrapped the markers inside a fragment because React Native code only returns one parent component, not three (markers).
Beneath MapView, repeat the same step for the floating button:
{
  state == 1 ?
  <FAB
    style={styles.tab}
    icon="plus"
  />
  :null
}
This hides the button if state is not equal to one. Save the file and go to your screen. You’ll notice that your marker and the button are no longer appearing on the screen.
State 2: Adding an origin, destination markers, and an order summary
In this section, we’ll add the second state that will render a card with a summary of the delivery.
Start by importing Card from react-native-paper:
import {..., Card} from 'react-native-paper'Inside <SafeAreaView />, create another expression for displaying a card with a list item that shows our order summary (if state is 2):
{
state == 2 ?
<Card>
<Card.Content>
<List.Item
title="$15.00"
description= "Total price"
left={() =>
<IconButton
icon="bike"
size=30
style="styles.icon"
/>
}
right={() =>
<View>
<Button style="styles.cancelButton">Cancel</Button>
<Button mode="contained">Confirm</Button>
</View>
}
/>
</Card.Content>
<Card>
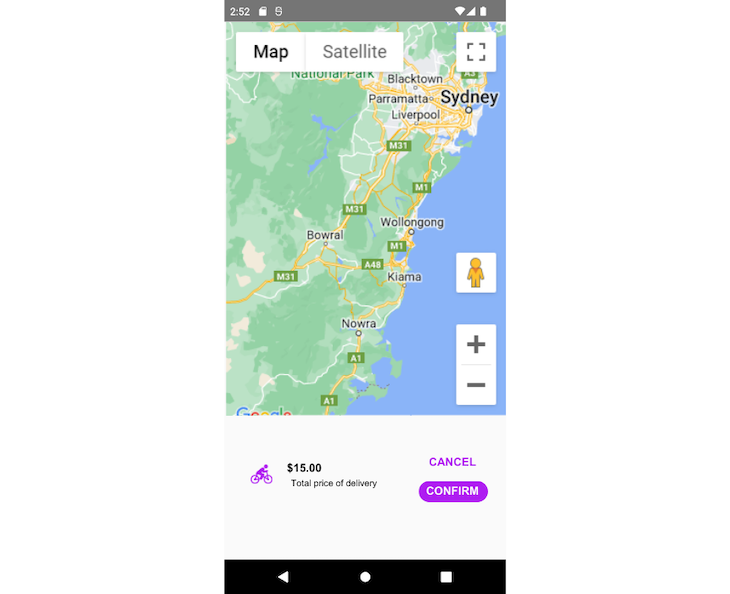
}We’re rendering text, an icon, and two buttons that say Cancel and Confirm.
Add the following CSS property to your styles object to make the cyclist icon purple (to match the app’s theme color), and some space between the two buttons:
icon: {
  color: 'purple'
  marginTop: 20
},
cancelButton: {
  marginBottom: 10
}
Save the file and check the screen. You should find the card with the icon and the buttons (cancel and confirm) as shown in the image below:
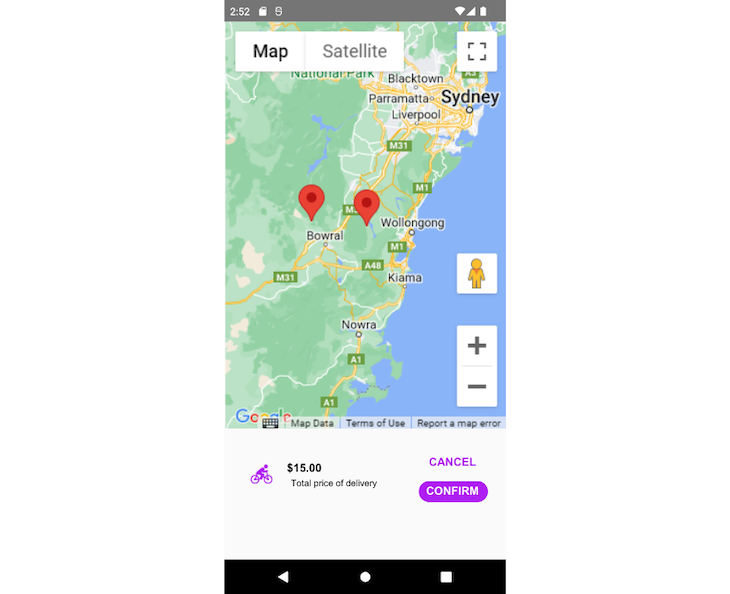
Now, inside MapView and just below the expression for the first state, create another expression that renders the following two new markers if the state is equal to 2:
<MapView>
  {
    // state == 1 ...
  }

  {
    state == 2 ?

    <Marker
      description="Origin"
      coordinate={langitude: -34.377, longitude: 150.344}
    />
    </Marker>

    <Marker
      description="Destination"
      coordinate={langitude: -34.397, longitude: 150.644}
    />
    </Marker>
  }
</MapView>
We’ve also removed the custom cyclist images, so the markers will be the default red pin:
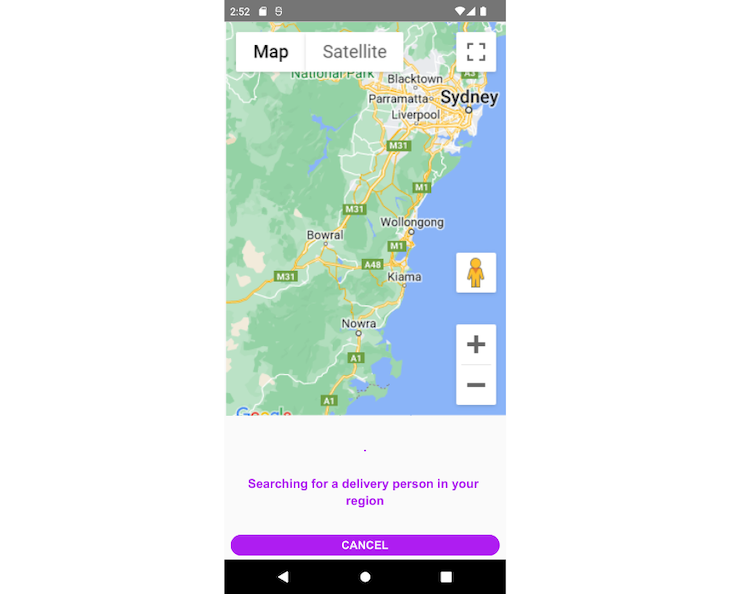
State 3: Searching for people nearby
This last state displays the map along with a loading indicator and text that tells you that the search for a delivery person is being made.
Just above the closing <SafeAreaView /> tag, create the following ternary to return a loading indicator using the ActivityIndicator API if the state is 3:
{
  state = 3 ?
  <View style={styles.flexCenterColumn}>
    <ActivityIndicator
      animating = {true}
    />
    <Title style={styles.title}>Searcing For A Delivery Person In Your        Region
    </Title>
    <Button
      mode="contained"
      style = {styles.cancelDeliveryButton}
    >
      Cancel
    </Button>
  </View>
  :null
}
To style the components, add the following CSS properties to your styles object:
FlexCenterColumn: {
  display: 'flex',
  justifyContent: 'center',
  alignItems: 'center',
  flex: 1,
  flexDirection: 'column'
},
title: {
  margin: 20,
  marginTop: 40,
  textAlign: 'center',
  color: 'purple'
},
cancelDeliveryButton: {
  position: 'absolute',
  margin: '2%',
  bottom: 0,
  width: '96%'
}
On your device/emulator, you’ll find that the button and text look much better:
To switch between the states, simply change the value of the state variable between 1, 2, and 3.
Conclusion
I hope this tutorial helps you have a better understanding of Google maps and React Native. You should now be able to create immersive, custom makers in your map using the React Native Map library.
If you have any questions about this topic, leave a comment and I’ll respond as soon as I get the chance. Happy coding!
Source: https://blog.logrocket.com
#reactnative #googlemaps