Developers know that securing web apps can be a pain. Doing it right is tough. The worst part is that “right” is a moving target. Security protocols change. Vulnerabilities are found in dependencies and patches are released. Tons of often complex boilerplate code has to be generated. The software-as-service paradigm has proliferated over the last decade, and while I love reinventing the wheel as much as the next developer (because, clearly, I’m gonna write it better than the yahoo they hired), security is an area where I’m happy to offload this work to specialists. Enter Okta.
In this tutorial, you’re going to use Spring Boot to build a simple web application with a user registration system and a login system. It will have the following features:
- Login and registration pages
- Password reset workflows
- Restricting access according to group membership
Download the Spring Boot Web App Example Project
The first thing you’re going to need is a free Okta account. If you don’t already have one
The next thing will be to download the example project for this tutorial from GitHub.
git clone https://github.com/oktadeveloper/okta-spring-simple-app-example.git spring-app
This project uses Gradle, as the build tool, and the Thymeleaf templating system.
Run the Initial Web App
Once you have downloaded the example code from the GitHub repository, checkout out the Start tag using the following git command: git checkout tags/Start.
The app at this point it not protected at all. There is no authorization or authentication enabled (even though the necessary dependencies are included in the build.gradle file). Go ahead and run the example by opening a terminal and, from the project root directory, running the command ./gradlew bootRun (The bootRun command is a task provided by the Gradle Spring Boot plugin, added to the build.gradle file in the buildscript section at the top of the file).
Navigate to http://localhost:8080 in your favorite browser, and you should see this:
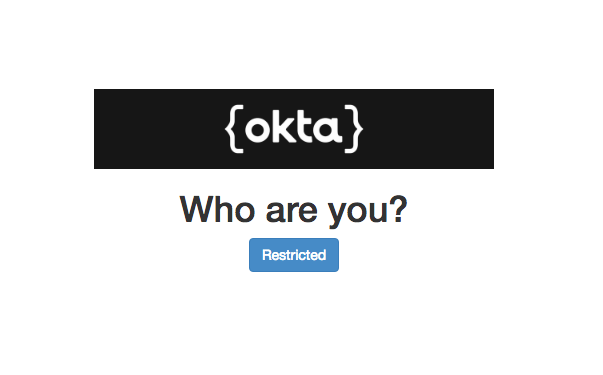
And if you click on the “Restricted” button:
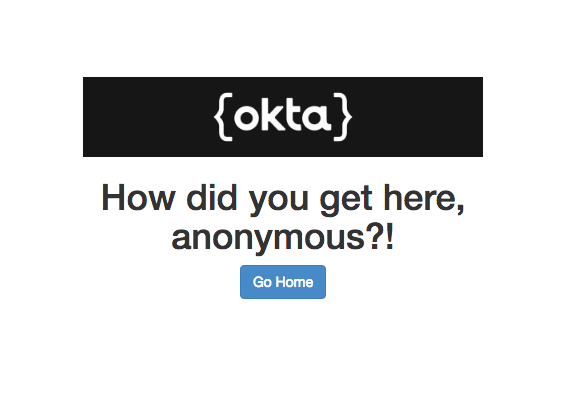
Add Project Dependencies for Your Spring Boot + Spring Security Web App
The project dependencies are defined in the build.gradle file (see below). There’s a lot going on in this file, and this tutorial isn’t going to try and explain the Gradle build system to you. Feel free to check out their documentation. I just want to point out a few things.
First off, notice that we’re including the okta-spring-boot-starter. This project greatly simplifies integrating Okta with your Spring Boot application. It’s entirely possible to use Okta and Spring Boot without this starter. In fact, up to the point where Groups and Roles are introduced, the differences are minor (mostly involve application.yml changes). However, once you start to trying to integrate Groups and Roles, the Okta Spring Boot Starter saves a lot of coding. If you’d like to look a little deeper, take a look at the Okta Spring Boot Starter GitHub project.
The rest of the dependencies deal with Spring and Spring Boot. You’ll notice none of the org.springframework.bootdependencies have version numbers. This is because of some behind-the-scenes magic being done by the Spring io.spring.dependency-management Gradle plugin. The Spring Boot Version is set by the build script property springBootVersion near the top of the build.gradle file. Based on this version number, the Spring dependency management plugin decides what versions of dependencies to include.
We’re also bringing in the org.springframework.boot Gradle plugin, which adds the bootRun task that we’ll use to run the app.
spring-boot-starter-securityandspring-boot-starter-webare core Spring Boot dependencies.spring-security-oauth2-autoconfigureis required to use the@EnableOAuth2Ssoannotation that we use to hook OAuth and Single Sign-On into our app.spring-boot-starter-thymeleafandthymeleaf-extras-springsecurity4bring in the Thymeleaf templating system and integrate it with Spring Security.
buildscript {
   ext {
      springBootVersion = '2.0.5.RELEASE'
  }
   repositories {
      mavenCentral()
   }
   dependencies {
      classpath("org.springframework.boot:spring-boot-gradle-plugin:${springBootVersion}")
   }
}
apply plugin: ‘java’

apply plugin: ‘eclipse’

apply plugin: ‘org.springframework.boot’

apply plugin: ‘io.spring.dependency-management’
group = ‘com.okta.springboot’

version = ‘0.0.1-SNAPSHOT’

sourceCompatibility = 1.8
repositories {

mavenCentral()

}
dependencies {

compile(‘com.okta.spring:okta-spring-boot-starter:0.6.0’)

compile(‘org.springframework.boot:spring-boot-starter-security’)

compile(‘org.springframework.boot:spring-boot-starter-web’)

compile(‘org.springframework.boot:spring-boot-starter-thymeleaf’)

compile(‘org.thymeleaf.extras:thymeleaf-extras-springsecurity4’)

compile(‘org.springframework.security.oauth.boot:spring-security-oauth2-autoconfigure:2.0.5.RELEASE’)

testCompile(‘org.springframework.boot:spring-boot-starter-test’)  "

testCompile(‘org.springframework.security:spring-security-test’)

}
/*

This is required to resolve a logging dependency conflict between the

okta-spring-boot-starter and the various spring dependencies.

*/

configurations.all {

exclude group: ‘org.springframework.boot’, module: ‘spring-boot-starter-logging’

exclude group: ‘org.springframework.boot’, module: ‘logback-classic’

}
Understand Your Spring Boot App
The Java web application has only three class files and a few templates. Obviously Spring Boot is doing a lot of heavy hitting going on in the background, but what’s going on in our class files?
The application entry point is in the SpringSimpleApplication class:
@SpringBootApplication

public class SpringSimpleApplication {

public static void main(String[] args) {

SpringApplication.run(SpringSimpleApplication.class, args);

}

}
Two important things are happening here that get things rolling: 1) we use the @SpringBootApplication annotation, and 2) our main method calls the SpringApplication.run() method. This is the entry point to the entire Spring/Spring Boot system.
The SpringSecurityWebAppConfig class is a way to use Java code to configure how Spring Boot handles web app security. Here we use the HttpSecurity object to remove authorization from all endpoints. By default, the Spring Boot behavior is the opposite: all endpoints require authorization.
@Configuration
public class SpringSecurityWebAppConfig extends WebSecurityConfigurerAdapter {@Override protected void configure(HttpSecurity http) throws Exception { http.authorizeRequests().anyRequest().permitAll(); }}
The @Configuration annotation tells Spring that we are using the class as a source of programmatic configuration, allowing us to override the configure() method.
The last Java class, SimpleAppController, is our only controller object. Controllers in a Spring Boot web application are where URL requests are mapped to Java code. The @Controller annotation tells Spring that this class is a controller.
@Controller
class SimpleAppController {@RequestMapping("/") String home() { return "home"; } @RequestMapping("/restricted") String restricted() { return "restricted"; }}
Connections between class methods and URLs are made using the @RequestMapping annotation.
We have two mappings:
- “home” mapping
- “restricted” mapping
Remember that initially nothing is actually “restricted”, so don’t get confused by that. You’ll lock that mapping down in a bit.
Also notice that the classes return a simple text string, but this is getting auto-magically turned into a full html file. This is part of the Thymeleaf dependency that is included in the build.gradle file. These strings are assumed to be template file names, which are by default paths in the templates directory on the classpath.
Thus “home” is mapped to the src/main/resources/templates/home.html template file. When the web app is packaged in the the final jar, the entire resources folder is copied into the classpath, so that the templates directory is accessible at runtime.
Set Up Okta for OAuth 2.0 Single Sign-On
Now you’re going to set up authorization for our app. Okta makes this super easy. You should have already signed up for a free developer.okta.com account. Now you’re going to create an OpenID Connect (OIDC) application to use with OAuth 2.0 Single Sign-On (SSO).
That might be a lot of jargon and acronyms, if you’re not already familiar with them. Very simply, OAuth 2.0 is an industry standard for authorization - a standardized and tested method by which authorization servers and applications can communicate to facilitate user authorization. OpenID Connect is a layer on top of OAuth 2.0 that standardizes and simplifies the authorization procedure as well as providing user authentication. Together they provide a proven way for an application to interact with a remote server that provides authentication and authorization services (such as Okta).
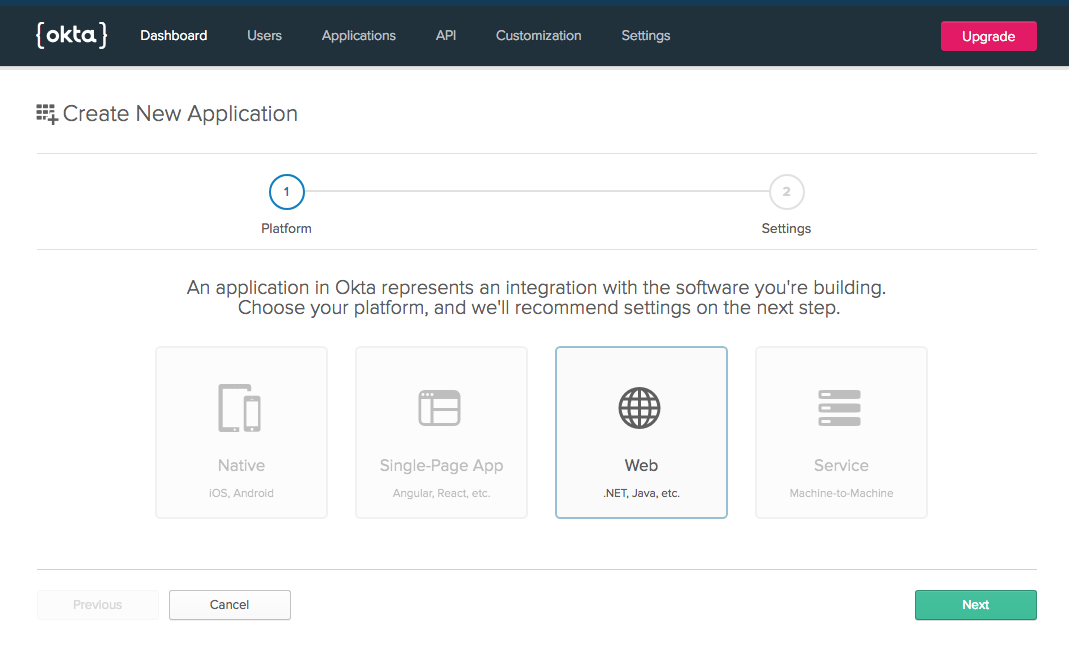
To create an OIDC app, open your Okta developer dashboard. Click on the Applications top menu item, and then click on Add Application.
You should see the following screen. Click on the icon for the Web option. Click Next.
You need to update a few of the initial configuration options. First change the name to something more descriptive. I used “Okta Spring Boot Simple Web App.” Next update the Login redirect URIs to http://localhost:8080/login. Click Done.
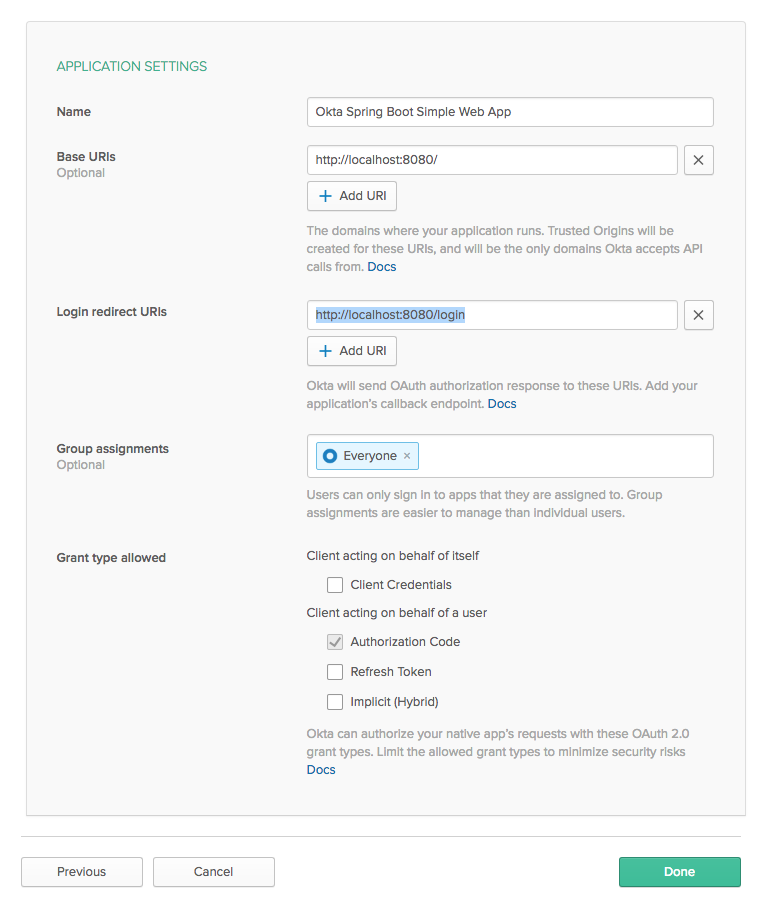
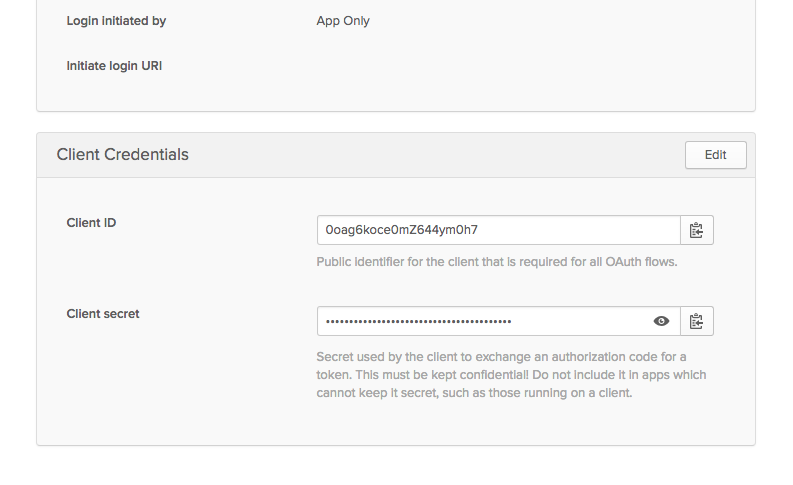
This will take you to the new application’s general configuration tab. Scroll down and note the Client ID and Client secret. You’ll need these later.
That’s all you need to do to set up Okta for OAuth! Now let’s return to the Spring Boot app and hook our new OIDC application into the Spring Boot application.
Configure Your Spring Boot App for Single Sign-On (SSO)
Now you need to configure the Spring Boot app to interact with the Okta servers. This is super easy. We need to do two things:
- Add the
@EnableOAuth2Ssoannotation - Update the
application.ymlconfiguration
First add the @EnableOAuth2Sso annotation to the SpringSecurityWebAppConfig class.
@EnableOAuth2Sso
@Configuration
public class WebSecurityConfigurerAdapter extends WebSecurityConfigurerAdapter {@Override protected void configure(HttpSecurity http) throws Exception { http.authorizeRequests().anyRequest().permitAll(); }}
The @EnableOAuth2Sso annotation does a TON of stuff. It’s worth digging into to understand what’s going on. You can check out Spring’s docs on the annotation itself, and their Spring Boot and OAuth2 tutorial.
One thing I want to point out (bc this has been bugging me a while and I just figured it out) is that you can put this annotation on other classes in the project. However, if you do, be aware that Spring is going to create a WebSecurityConfigurerAdapter and add it to the security chain. Since we’re also creating a WebSecurityConfigurerAdapter, there will be two of them, and you’ll get an error about conflicting chain orders. This is because both WebSecurityConfigurerAdapters will by default use the same chain order. You can resolve this error by adding an @Order(101) annotation to our customized class. However, even better is to add the @EnableOAuth2Sso annotation to our WebSecurityConfigurerAdapter class, WebSecurityConfigurerAdapter, and Spring will use that class instead of creating a duplicate one.
The second change you need to make is update the src/main/resources/application.yml file, filling in some Okta-specific configuration options for the OAuth SSO values take from our Okta OIDC application.
You’ll need to fill in your Client ID and Client secret from the application you created above. You’ll also need to change the issuer URL so that it reflects your Okta preview URL, something like dev-123456.oktapreview.com.
server:
port: 8080spring:
resources: static-locations: “classpath:/static/”okta:
oauth2:
issuer: https://{yourOktaDomain}/oauth2/default
clientId: {yourClientId}
clientSecret: {yourClientSecret}
rolesClaim: groups
Refine Our Permissions
Now you’re going to want to update the SpringSecurityWebAppConfig class so that you have a public home page and a restricted “restricted” page. We do this by using Spring’s fluent API for the HttpSecurity object.
import org.springframework.boot.autoconfigure.security.oauth2.client.EnableOAuth2Sso;
import org.springframework.context.annotation.Configuration;
import org.springframework.security.config.annotation.web.builders.HttpSecurity;
import org.springframework.security.config.annotation.web.configuration.WebSecurityConfigurerAdapter;@EnableOAuth2Sso
@Configuration
public class SpringSecurityWebAppConfig extends WebSecurityConfigurerAdapter {@Override protected void configure(HttpSecurity http) throws Exception { http.authorizeRequests() .antMatchers("/").permitAll() // allow all at home page .antMatchers("/img/**").permitAll() // allow all to access static images .anyRequest().authenticated(); // authenticate everything else! }}
Restart your app and now you should be able to:
- See the home page without authenticating
- NOT see the
/restrictedpage without authenticating - Be able to authenticate using Okta Single Sign-On
This point in the tutorial corresponds to the OktaOAuthSSO tag in the GitHub repository.
Take a Look at the Thymeleaf Templates
The Thymeleaf templates are pretty self explanatory, on the whole, but I did want to point out a couple things. Thymeleaf templates are fully valid HTML5, which is nice. If you want to dig deeper, you can head over to their website and their documentation.
What I wanted to point out is how the template brings in authentication information. To do this, we’re using the thymeleaf-extras-springsecurity plugin. This is included in the build.gradle file with the following line:
compile (“org.thymeleaf.extras:thymeleaf-extras-springsecurity4”)
And is included in the template file as an XML namespace attribute on the main <html> tag.
xmlns:sec=“http://www.thymeleaf.org/thymeleaf-extras-springsecurity4”
This plugin is what allows us to check if a user is authenticated using the th:if attribute with a custom SPEL expression (Spring Expression Language). It also allows us to insert authentication properties. Below you see a span <span th:text=“${#authentication.name}”></span> that is used to insert the name of the authenticated user.
<html xmlns:th=“http://www.thymeleaf.org” xmlns:sec=“http://www.thymeleaf.org/thymeleaf-extras-springsecurity4”>
<head>
<!–// <th:block th:include=“fragments/head :: head”/> //–>
</head>
<body>
<div class=“container-fluid”>
<div class=“row”>
<div class=“box col-md-6 col-md-offset-3”>
<div class=“okta-header”>
<img src=“img/logo.png”/>
</div><!--/* displayed if account IS NOT null, indicating that the user IS logged in */--> <div th:if="${#authorization.expression('isAuthenticated()')}"> <h1 th:inline="text">Hello, <span th:text="${#authentication.name}"></span>!</h1> <a href="/restricted" class="btn btn-primary">Restricted</a> </div> <!--/* displayed if account IS null, indicating that the user IS NOT logged in */--> <div th:unless="${#authorization.expression('isAuthenticated()')}"> <h1>Who are you?</h1> <a href="/restricted" class="btn btn-primary">Restricted</a> </div> </div> </div></div>
</body>
</html>
The thymeleaf-extras-springsecurity plugin has some other nice features as well. If you want to dig a little deeper, check out the project repository on GitHub.
Secure Access By Group Membership
The next step in our tutorial is to add Group-based authentication using user groups that we’ll create and define on Okta. A very common example of this is to have an “admin” section of a website and a “user” section of a website, along with perhaps a public home page open to everybody. In this example, “admin” and “user” would correspond to two different groups of which an authenticated user could be a member. What we want to do is be able to restrict access to URL endpoints based on user group membership, and to be able to assign users to these groups.
A side note: groups vs roles. What’s the difference?
- A “group” is a collection of users, and permissions are assigned to the group. Generally speaking group membership is relatively static, at least throughout the duration of a session.
- A “role” is a set of permissions that a user can inherit when he/she acts under that role. Roles are generally more dynamic in nature. Users can have many roles. Roles frequently are activated or deactivated depending on complex criteria and often may change throughout a user session.
In practice, for simple authorization systems, they’re pretty similar. The main difference is that groups classify based on individual identity, whereas roles classify based on permissible activities. You’ll probably see apps and tutorials on the wild and woolly internet that ignore this difference, as it’s functionally somewhat subtle. (But now you know. And you can get on the comment thread for the tutorial in question and write a comment correcting the author.)
Configure Authorization Groups in Okta
Go to your developer.okta.com dashboard. From the top menu, go to Users and click on Groups.
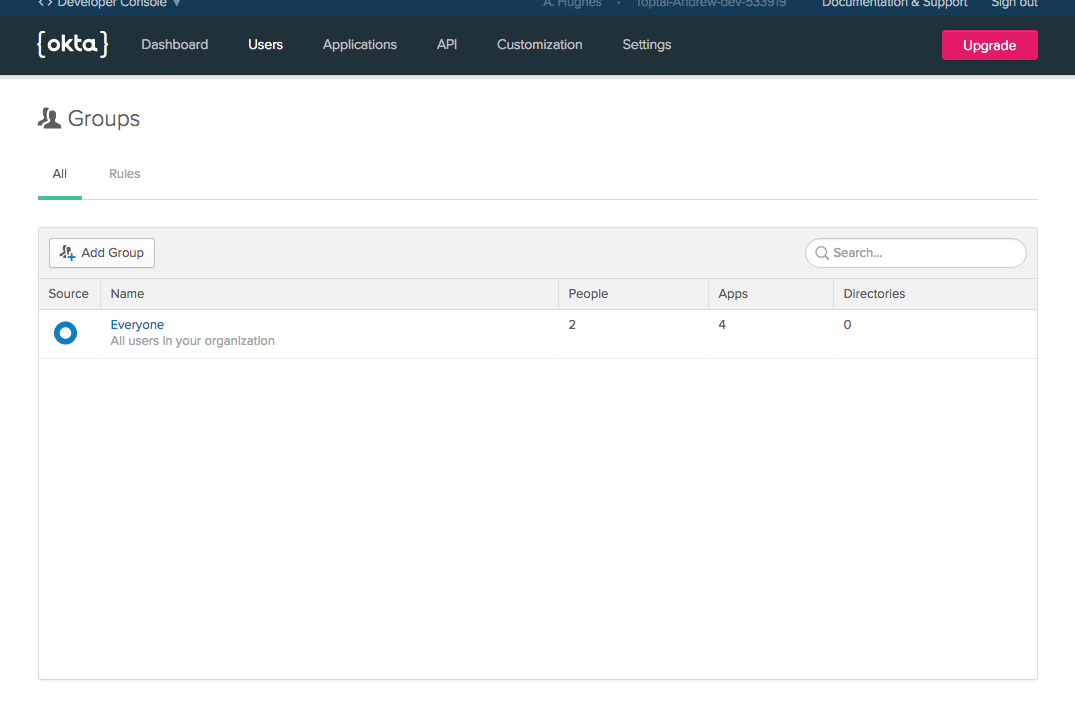
Click on the Add Group button.
Name the group “Admin” and give it a description (I put “Administrators,” doesn’t matter what you put here really, just something descriptive).
Click on the group Name to open the group and click on the Add Members button. Add your user to the Admin group.
Next add a new user that’s not an admin.
- Go to Users from the top menu and click on People.
- Click Add Person.
- Fill out the popup form:
- First name: Not
- Last name: Admin
- Username: notadmin@gmail.com
- No groups or secondary email
- Password: Set by admin
- Assign a password
- Uncheck “User must change password on first login”
- Click Save
The next thing you’ll need to do is add a “groups” claim to the default authorization server.
- From the top menu, go to API and click on Authorization Servers”
- Click on the default authorization server.
- Click on the Claims tab.
- Click the Add Claim button.
- Update the popup form to match the image below
- Name: groups
- Token type: Access
- Value type: Groups
- Filter: Regex .*
- Don’t disable
- Include in any scope
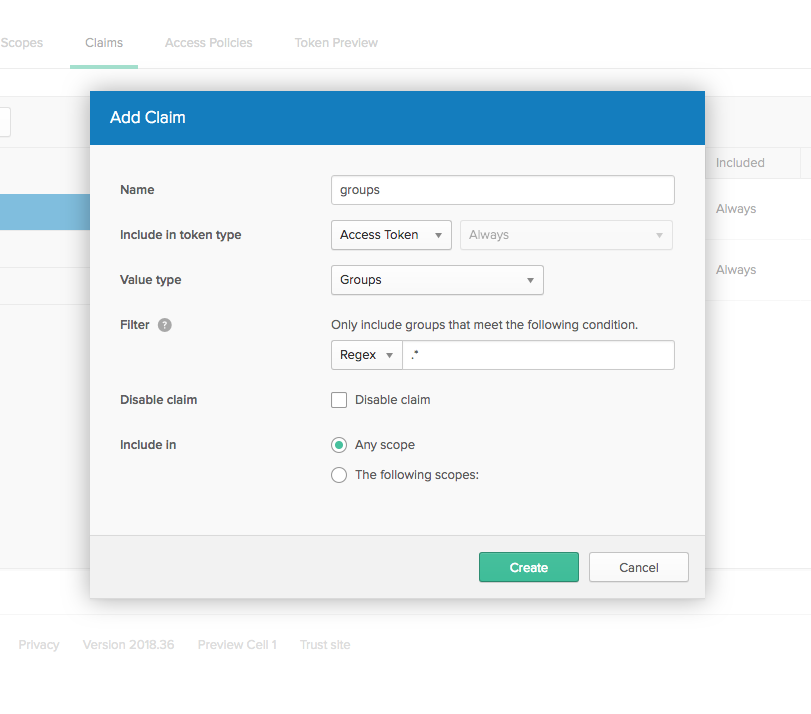
What you’re doing here is telling Okta to include a “groups” claim in the access token that is sent to your application. This is the OAuth method of Okta telling your application about the groups your authenticated user is a member of. Somewhat confusingly, these will be called “authorities” on the Spring application side, which is an abstract term for groups/roles/privileges communicated by the OAuth server to the app.
Now we have two users. Your primary user, which has been added to the Admin group, and a new user that is not in the admin group. We’ve also configured Okta to add the groups claim to the access token. Now all we have to do is make a few changes to the app code!
Update Your Spring Boot + Spring Security App to Use Group-based Authorization
This is where the Okta Spring Boot Starter really starts to shine. Normally if you wanted to map the security groups and groups claims that we are sending in the token to groups in the app, you’d have to write an extractor class or two to handle the extraction, as well as perhaps a group class. The Okta Spring Boot Starter handles all of this for you!
The first thing you’re going to want to do is add the following annotation to your SpringSecurityWebAppConfig class.
@EnableGlobalMethodSecurity(prePostEnabled = true)
Like so:
import org.springframework.security.config.annotation.method.configuration.EnableGlobalMethodSecurity;@EnableOAuth2Sso
@Configuration
@EnableGlobalMethodSecurity(prePostEnabled = true)
public class SpringSecurityWebAppConfig extends WebSecurityConfigurerAdapter {
/* class contents omitted for brevity */
}
This annotation enables the next annotation that we’re going to use, the @PreAuthorize annotation. This annotation allows us to use a Spring Expression Language (SpEL) predicate to determine if the controller method is authorized. The predicate expression is executed before the app even enters the controller method (hence the “pre”-authorize).
In the SimpleAppController class, add a new method called admin like so:
import org.springframework.security.access.prepost.PreAuthorize;@Controller
class SimpleAppController {/* other controllers omitted for clarity */ @RequestMapping("/admin") @PreAuthorize("hasAuthority('Admin')") String admin() { return "admin"; }}
Just to recap a little, this method does the following:
- create a mapping for the
/adminurl endpoint; - assign the
/adminendpoint an authorization scheme based on SpEL; - and simply return the name of a Thymeleaf template, assumed to be in the
/templatesdirectory (which we’ll create next).
Create the new admin template page. In the src/main/resources/templates directory, create a new file called admin.html with the following contents:
<html xmlns:th=“http://www.thymeleaf.org” xmlns:sec=“http://www.thymeleaf.org/thymeleaf-extras-springsecurity4”>
<head>
<!–// <th:block th:include=“fragments/head :: head”/> //–>
</head>
<body>
<div class=“container-fluid”>
<div class=“row”>
<div class=“box col-md-6 col-md-offset-3”>
<div class=“okta-header”>
<img src=“img/logo.png”/>
</div><h1>Welcome to the admin page!</h1> <a href="/" class="btn btn-primary">Go Home</a> </div> </div></div>
</body>
</html>
You may be asking yourself what the SpEL expression used in the @PreAuthorize annotation means. Why is the SpEL expression hasAuthority and not hasGroup? A correct answer is somewhat complicated, having to do with the fact that Spring calls permissions privileges and authorities in different contexts, which can be mapped to groups and roles in the app. When using Spring Boot and OAuth, an ‘authority’ is often equated with a ‘role’, which is fine. But you said we’re using groups, not roles? Right. Practically speaking, in this instance, it doesn’t matter because Okta knows we’re talking about groups and the app knows we’re talking about groups, and in the middle we just use the groups claim and the authorities fields to communicate the text strings that represent the groups the user is a member of.
A helpful hint:
If you want to inspect the authentication information that the Spring Boot App is receiving, you can add the following line in one of the controller methods before the return statement.
Authentication authentication = SecurityContextHolder.getContext().getAuthentication();
Set a breakpoint on this line, or right after it, really, and run the app with a debugger that allows you to inspect the authentication object. It’s a great way to learn and debug problems.
Try Out Your New Spring Boot + Spring Security Web App!
That’s pretty much it. You should be able to restart the app and log in with two different users. Only the user that was added to the Admin group should be able to access the admin page. You’ll have to directly navigate to http://localhost:8080/admin (as we didn’t add a link or a button). If you try to navigate to the admin page with the other user, you’ll see the beautiful whitelabel error page showing a 403 / Unauthorized error.
Keep in mind that when switching between users you’ll have to stop the app, log out of your developer.okta.com account, and restart the app. You can also use an incognito window in your browser.
This part of the tutorial corresponds to the GroupsAuth tag, which you can checkout using the following command git checkout tags/GroupsAuth.
Thanks for reading. If you liked this post, share it with all of your programming buddies!
Further reading
☞ Spring & Hibernate for Beginners (includes Spring Boot)
☞ Spring Framework Master Class - Learn Spring the Modern Way!
☞ Master Microservices with Spring Boot and Spring Cloud
☞ Spring Boot and OAuth2: Getting the Authorization Code
☞ An Introduction to Spring Boot
☞ How to build GraphQL APIs with Kotlin, Spring Boot, and MongoDB?
☞ Build a Rest API with Spring Boot using MySQL and JPA
☞ Angular 8 + Spring Boot 2.2: Build a CRUD App Today!
☞ Spring Boot vs. Spring MVC vs. Spring: How Do They Compare?
☞ Top 4 Spring Annotations for Java Developer in 2019
Originally published on developer.okta.com
#spring-boot #web-service #security #web-development
