How to use any iOS and Android library in React Native
How to use any iOS and Android library in React Native. Image Source: MindInventory
- Objective: Learn how to use any native library by creating a React Native bridge.
- TL;DR: Check the entire code and follow the commits on GitHub.
- Advanced feature: It’s recommended you know React Native well and have some experience with Android/iOS development.
Sometimes, you need to use a native Android or iOS library that doesn’t support React Native yet.
In my case, I wanted to use Helpshift, which is a customer support platform. If you explore their developer guide, you can see that they support every platform except React Native so I had no alternative but to build it myself.
I was also on a very tight schedule and I had to do it the fastest way possible, which is normal in the startup world, so keep reading if you find yourself in a similar situation.
Introduction
In this tutorial, I will build a native loading screen overlay that can be called anywhere from React Native.
I will use JGProgressHUD for iOS and KProgressHUD for Android. I chose these two libraries because they look very similar and have a similar API.
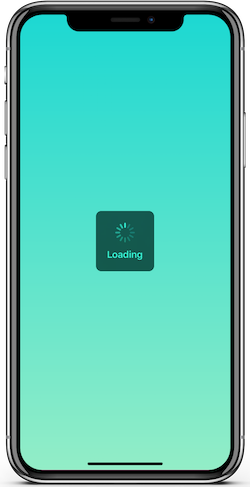
I named the project ReactNativeLoadingSpinnerOverlayNativeTutorial after an existing project but it uses native iOS and Android libraries instead of React Native components. It will look something like this:
iOS
1. Install the iOS library
Add this line to your pod file:
pod ‘JGProgressHUD’
To install the pod, run:
cd ios && pod install
2. Create the iOS bridge
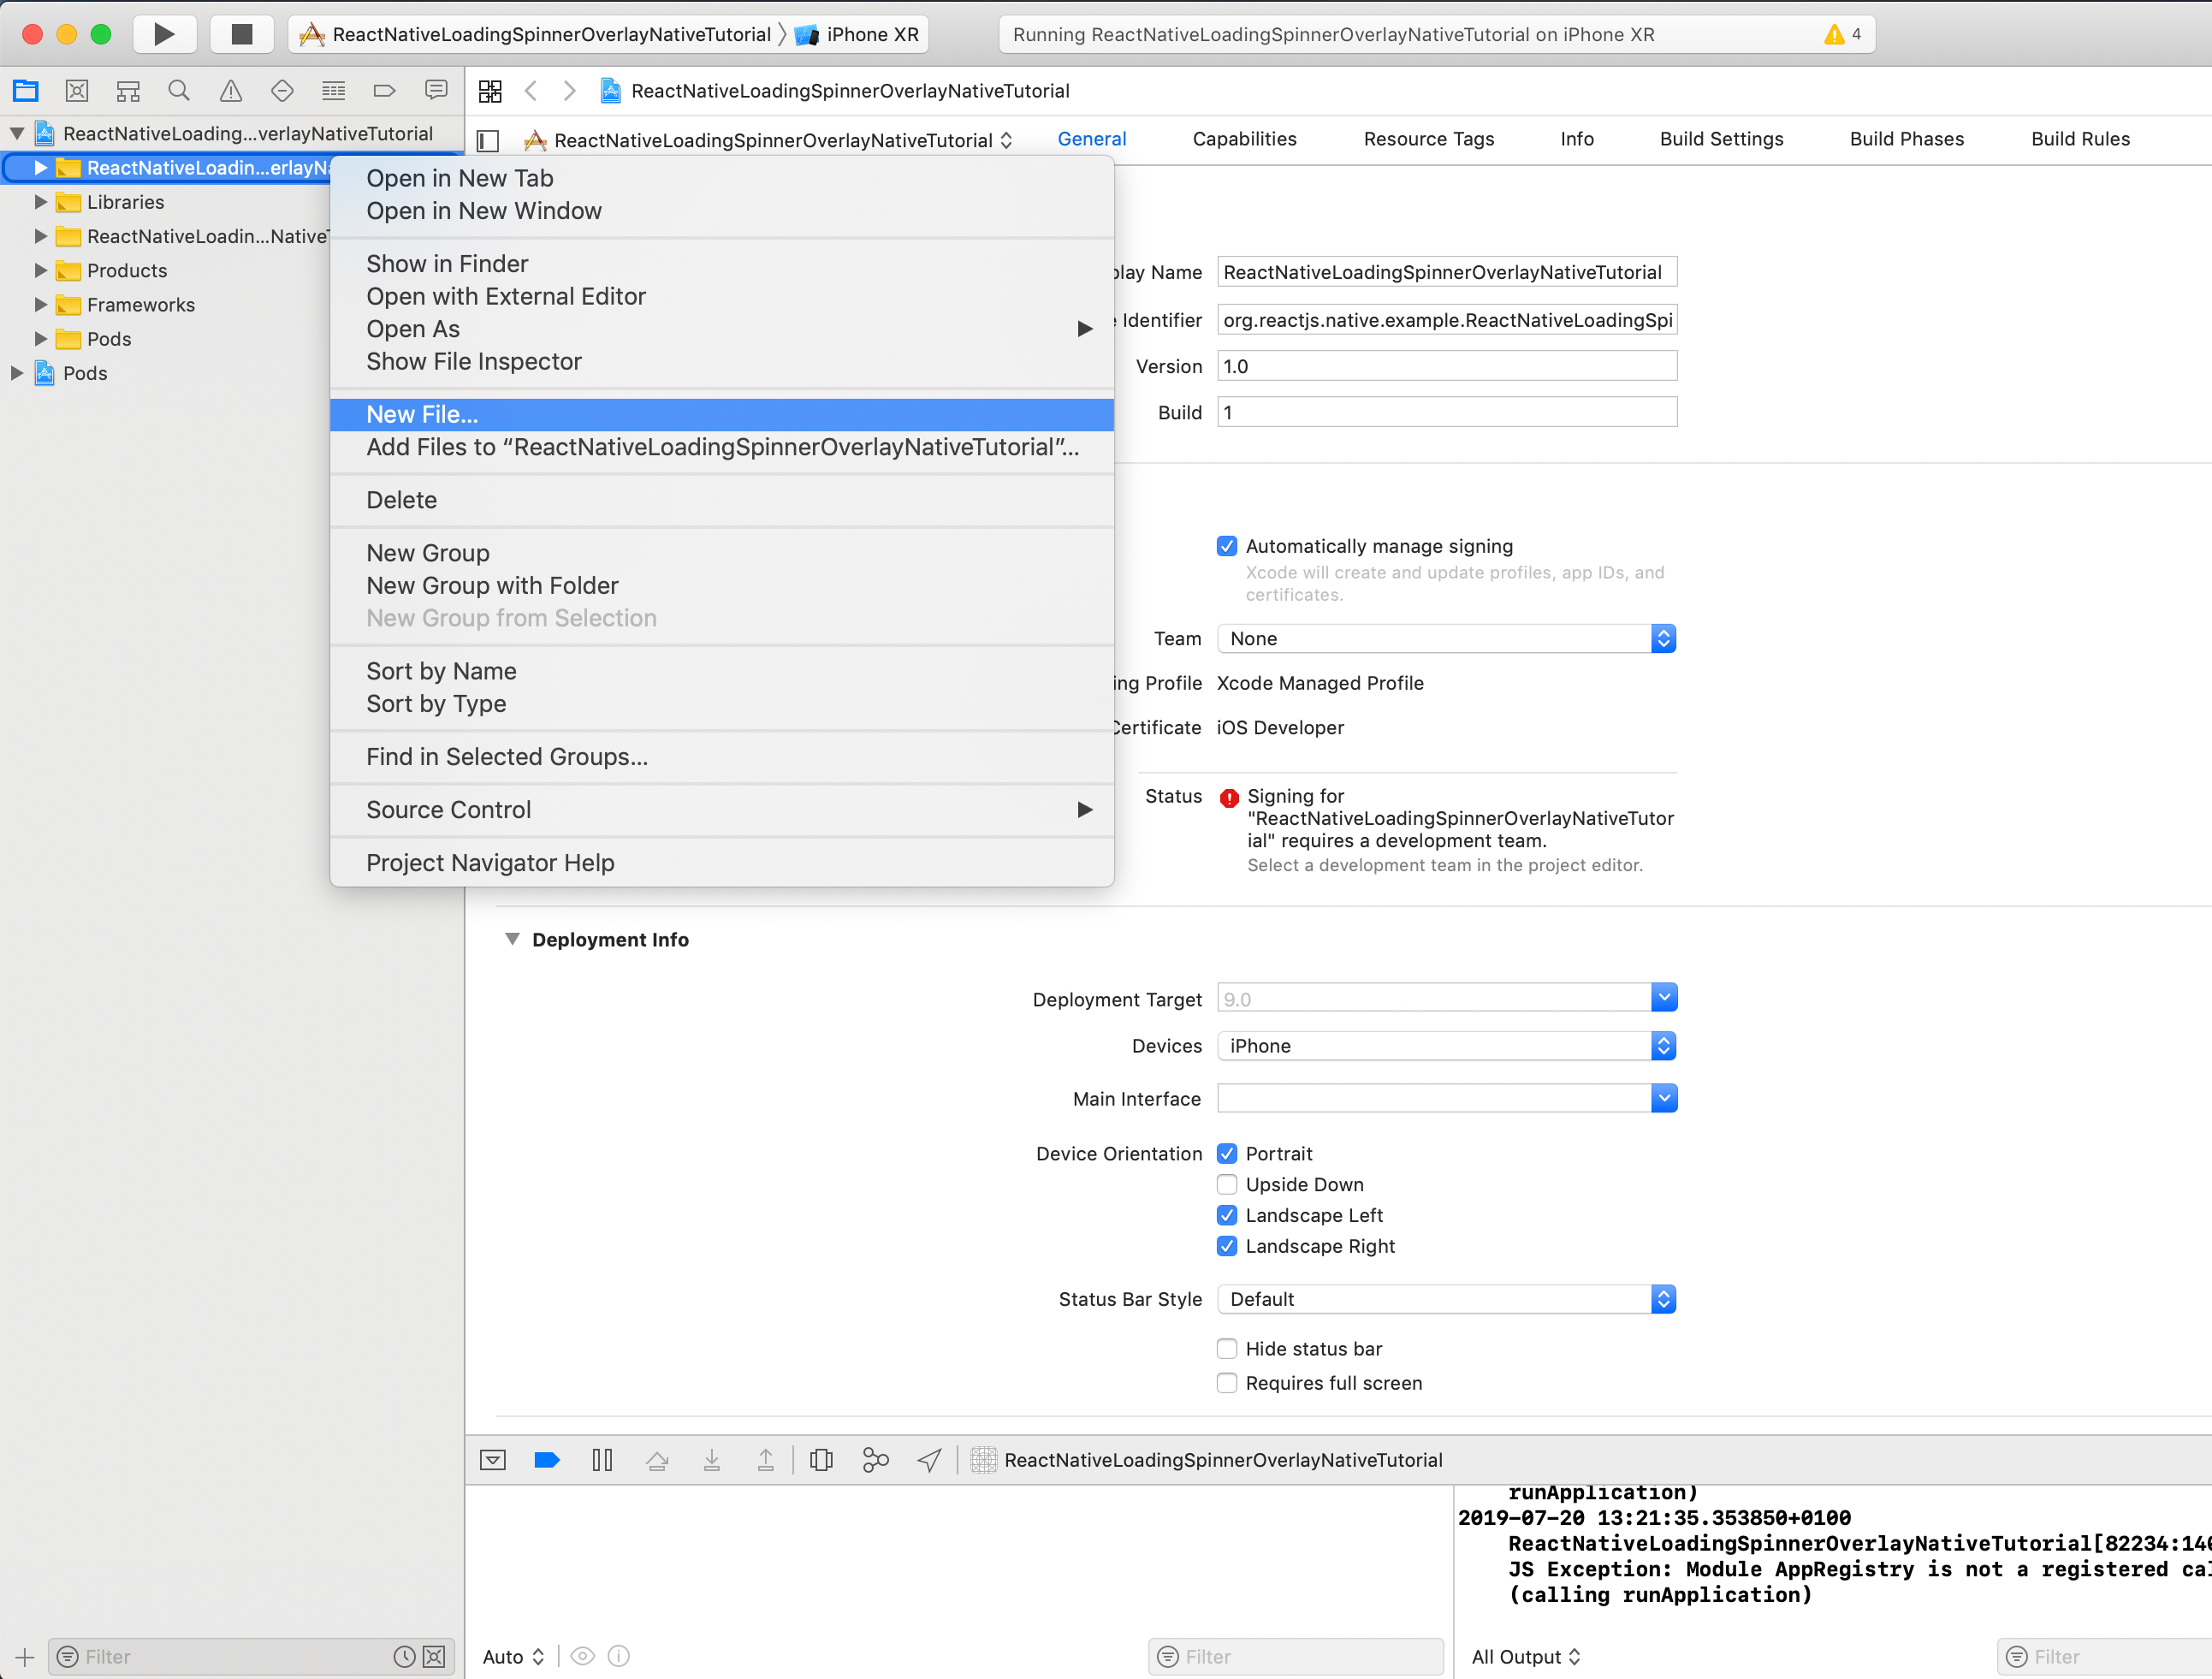
Create the native files for your module by opening your workspace file on Xcode, select your project, and right-click to add a new file:
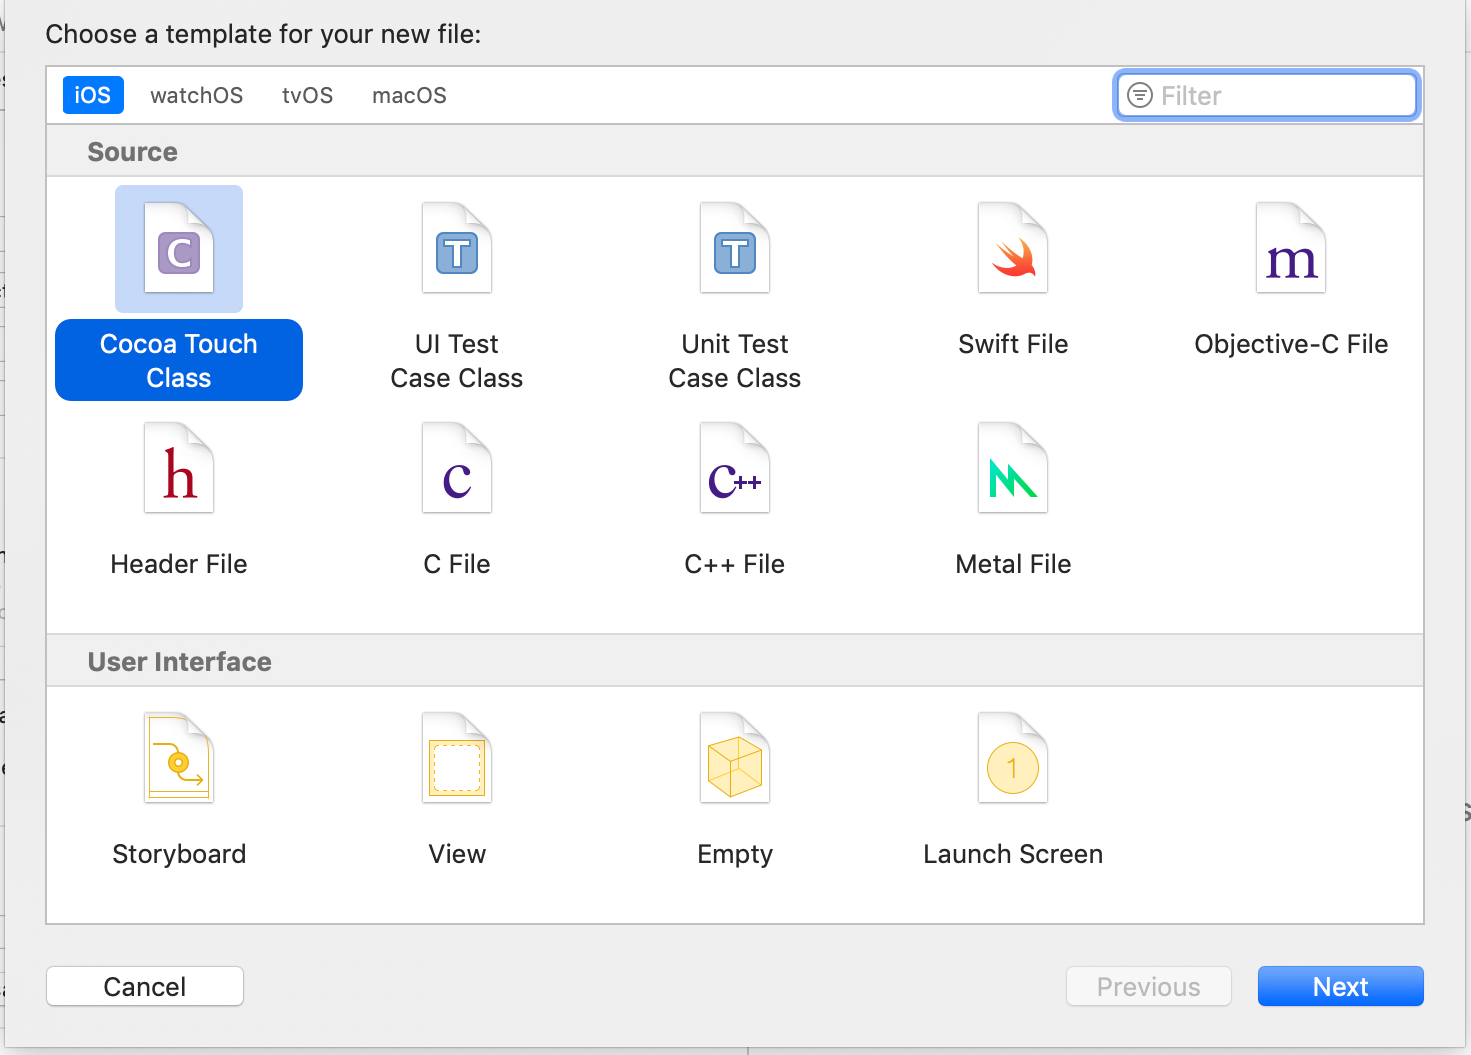
Select Cocoa Touch Class and click Next:
Put the name that you want for your module and click next:
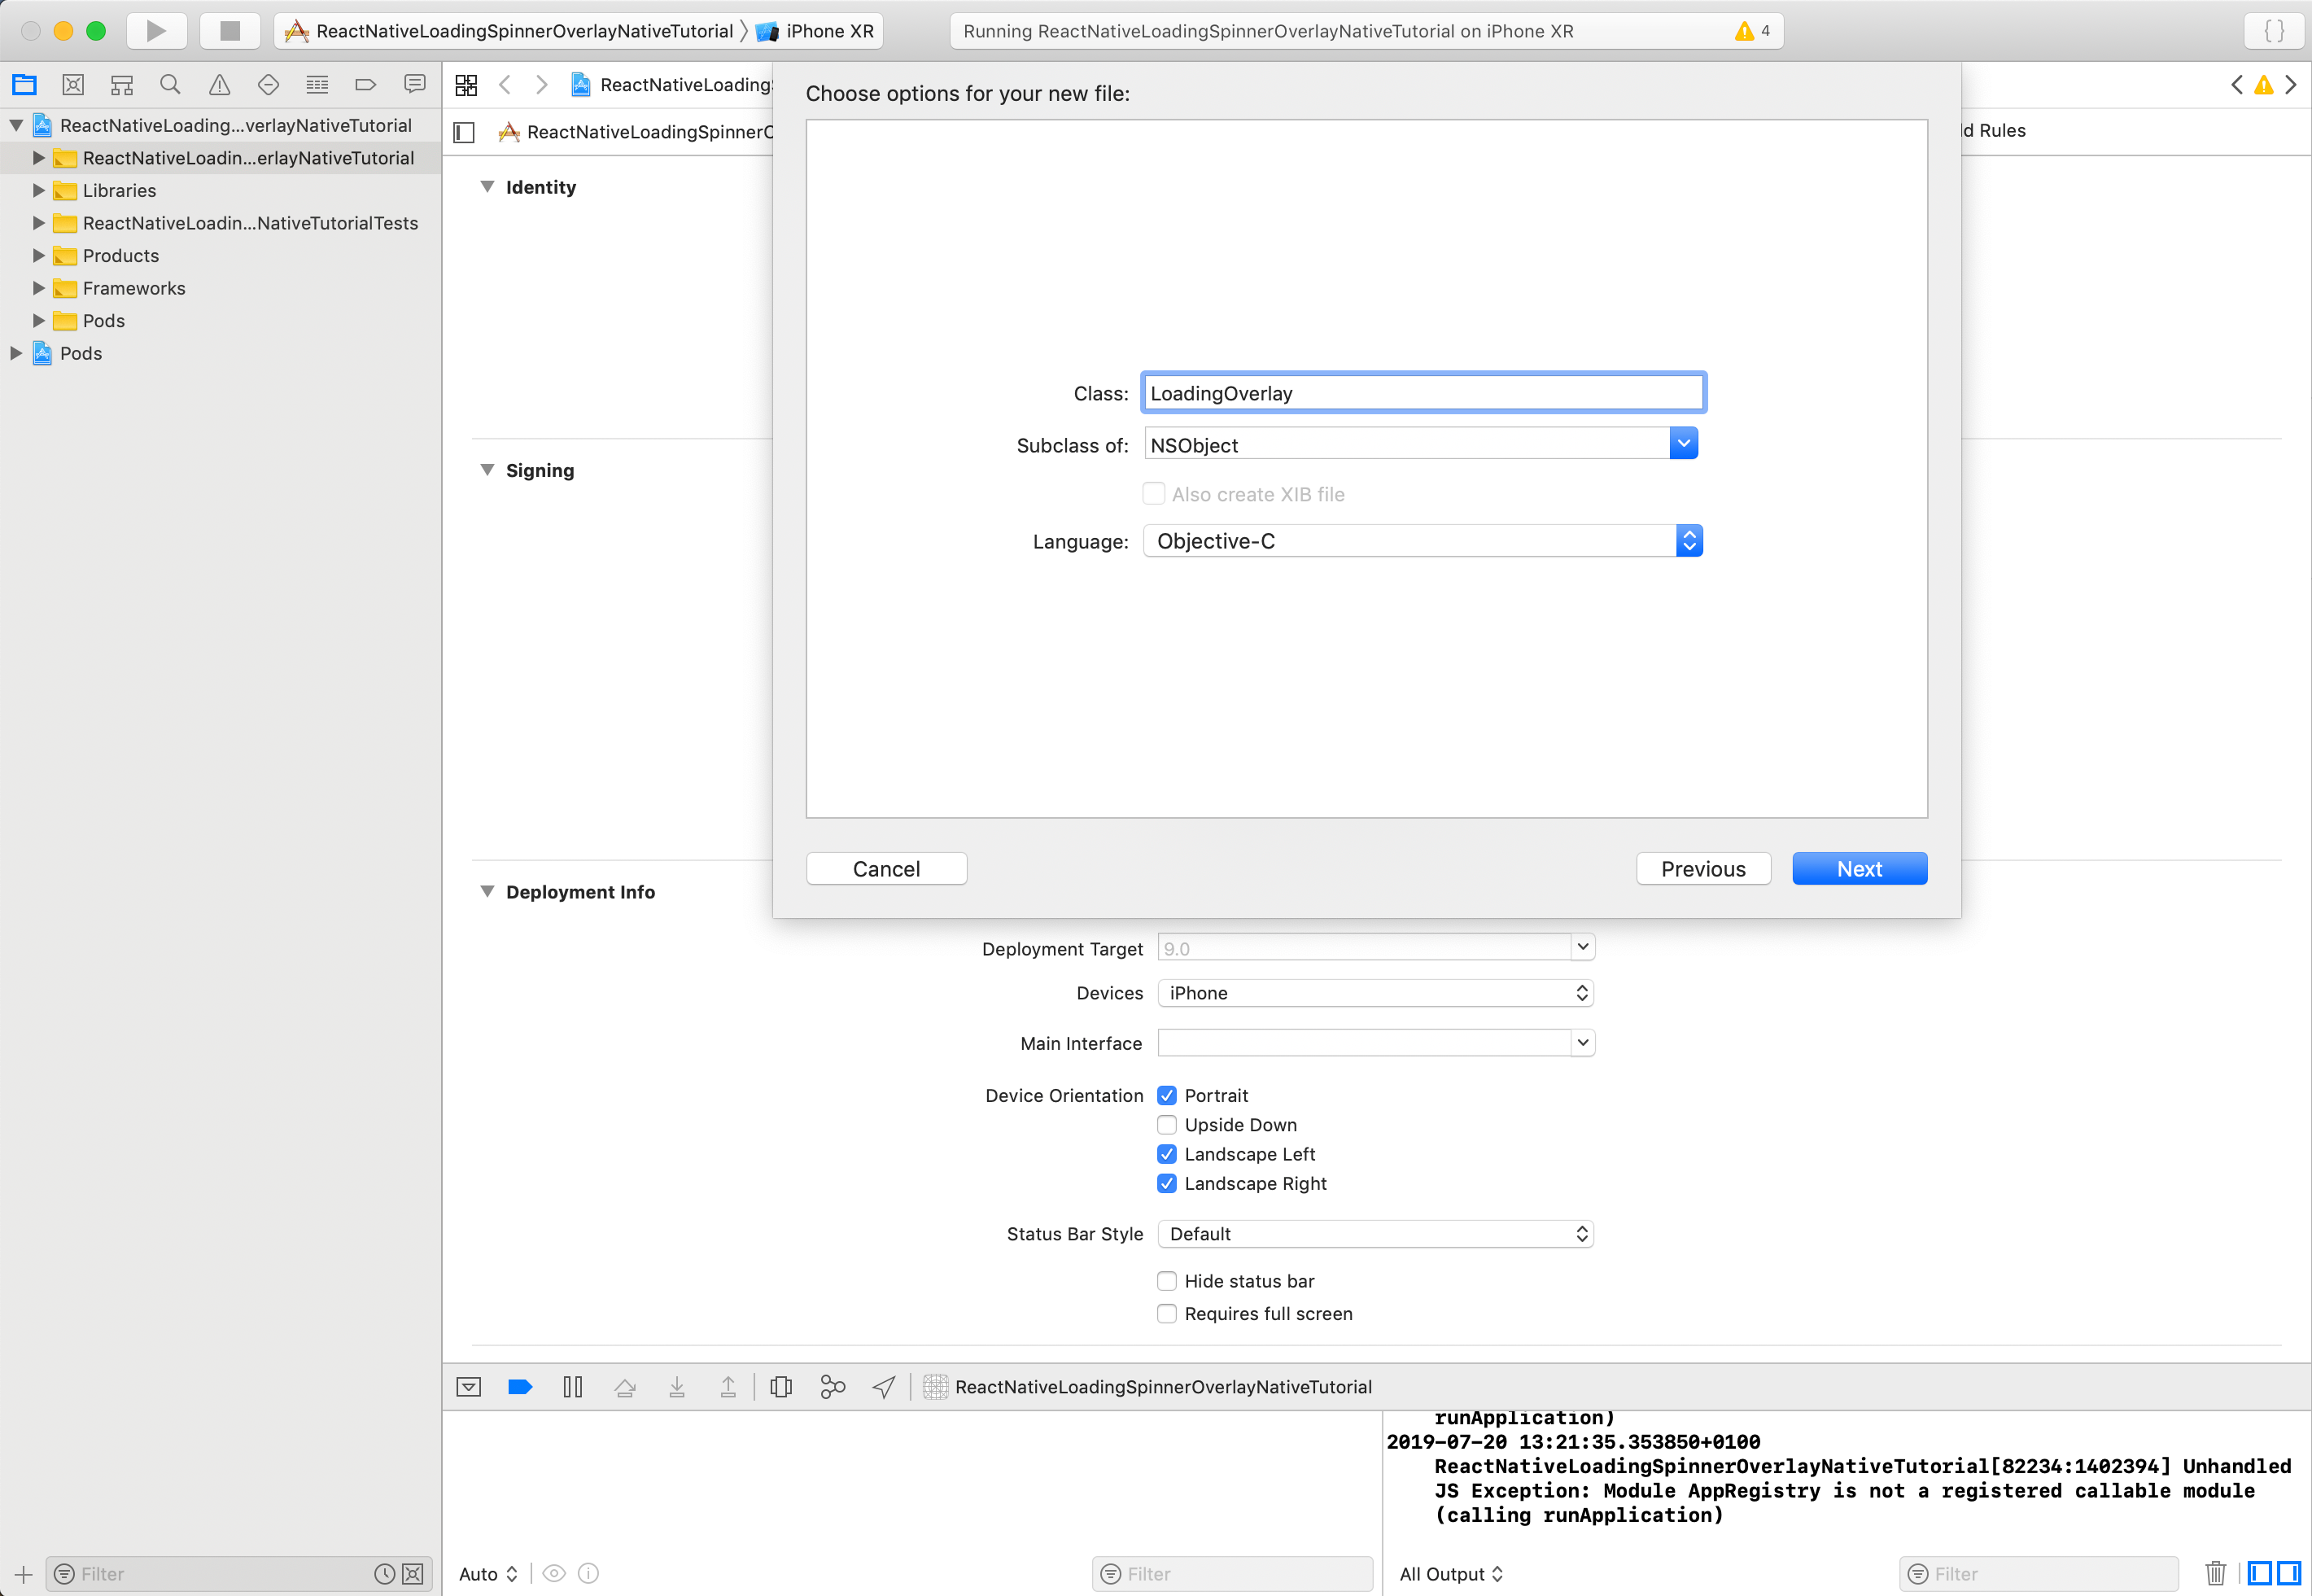
Then, just click create:
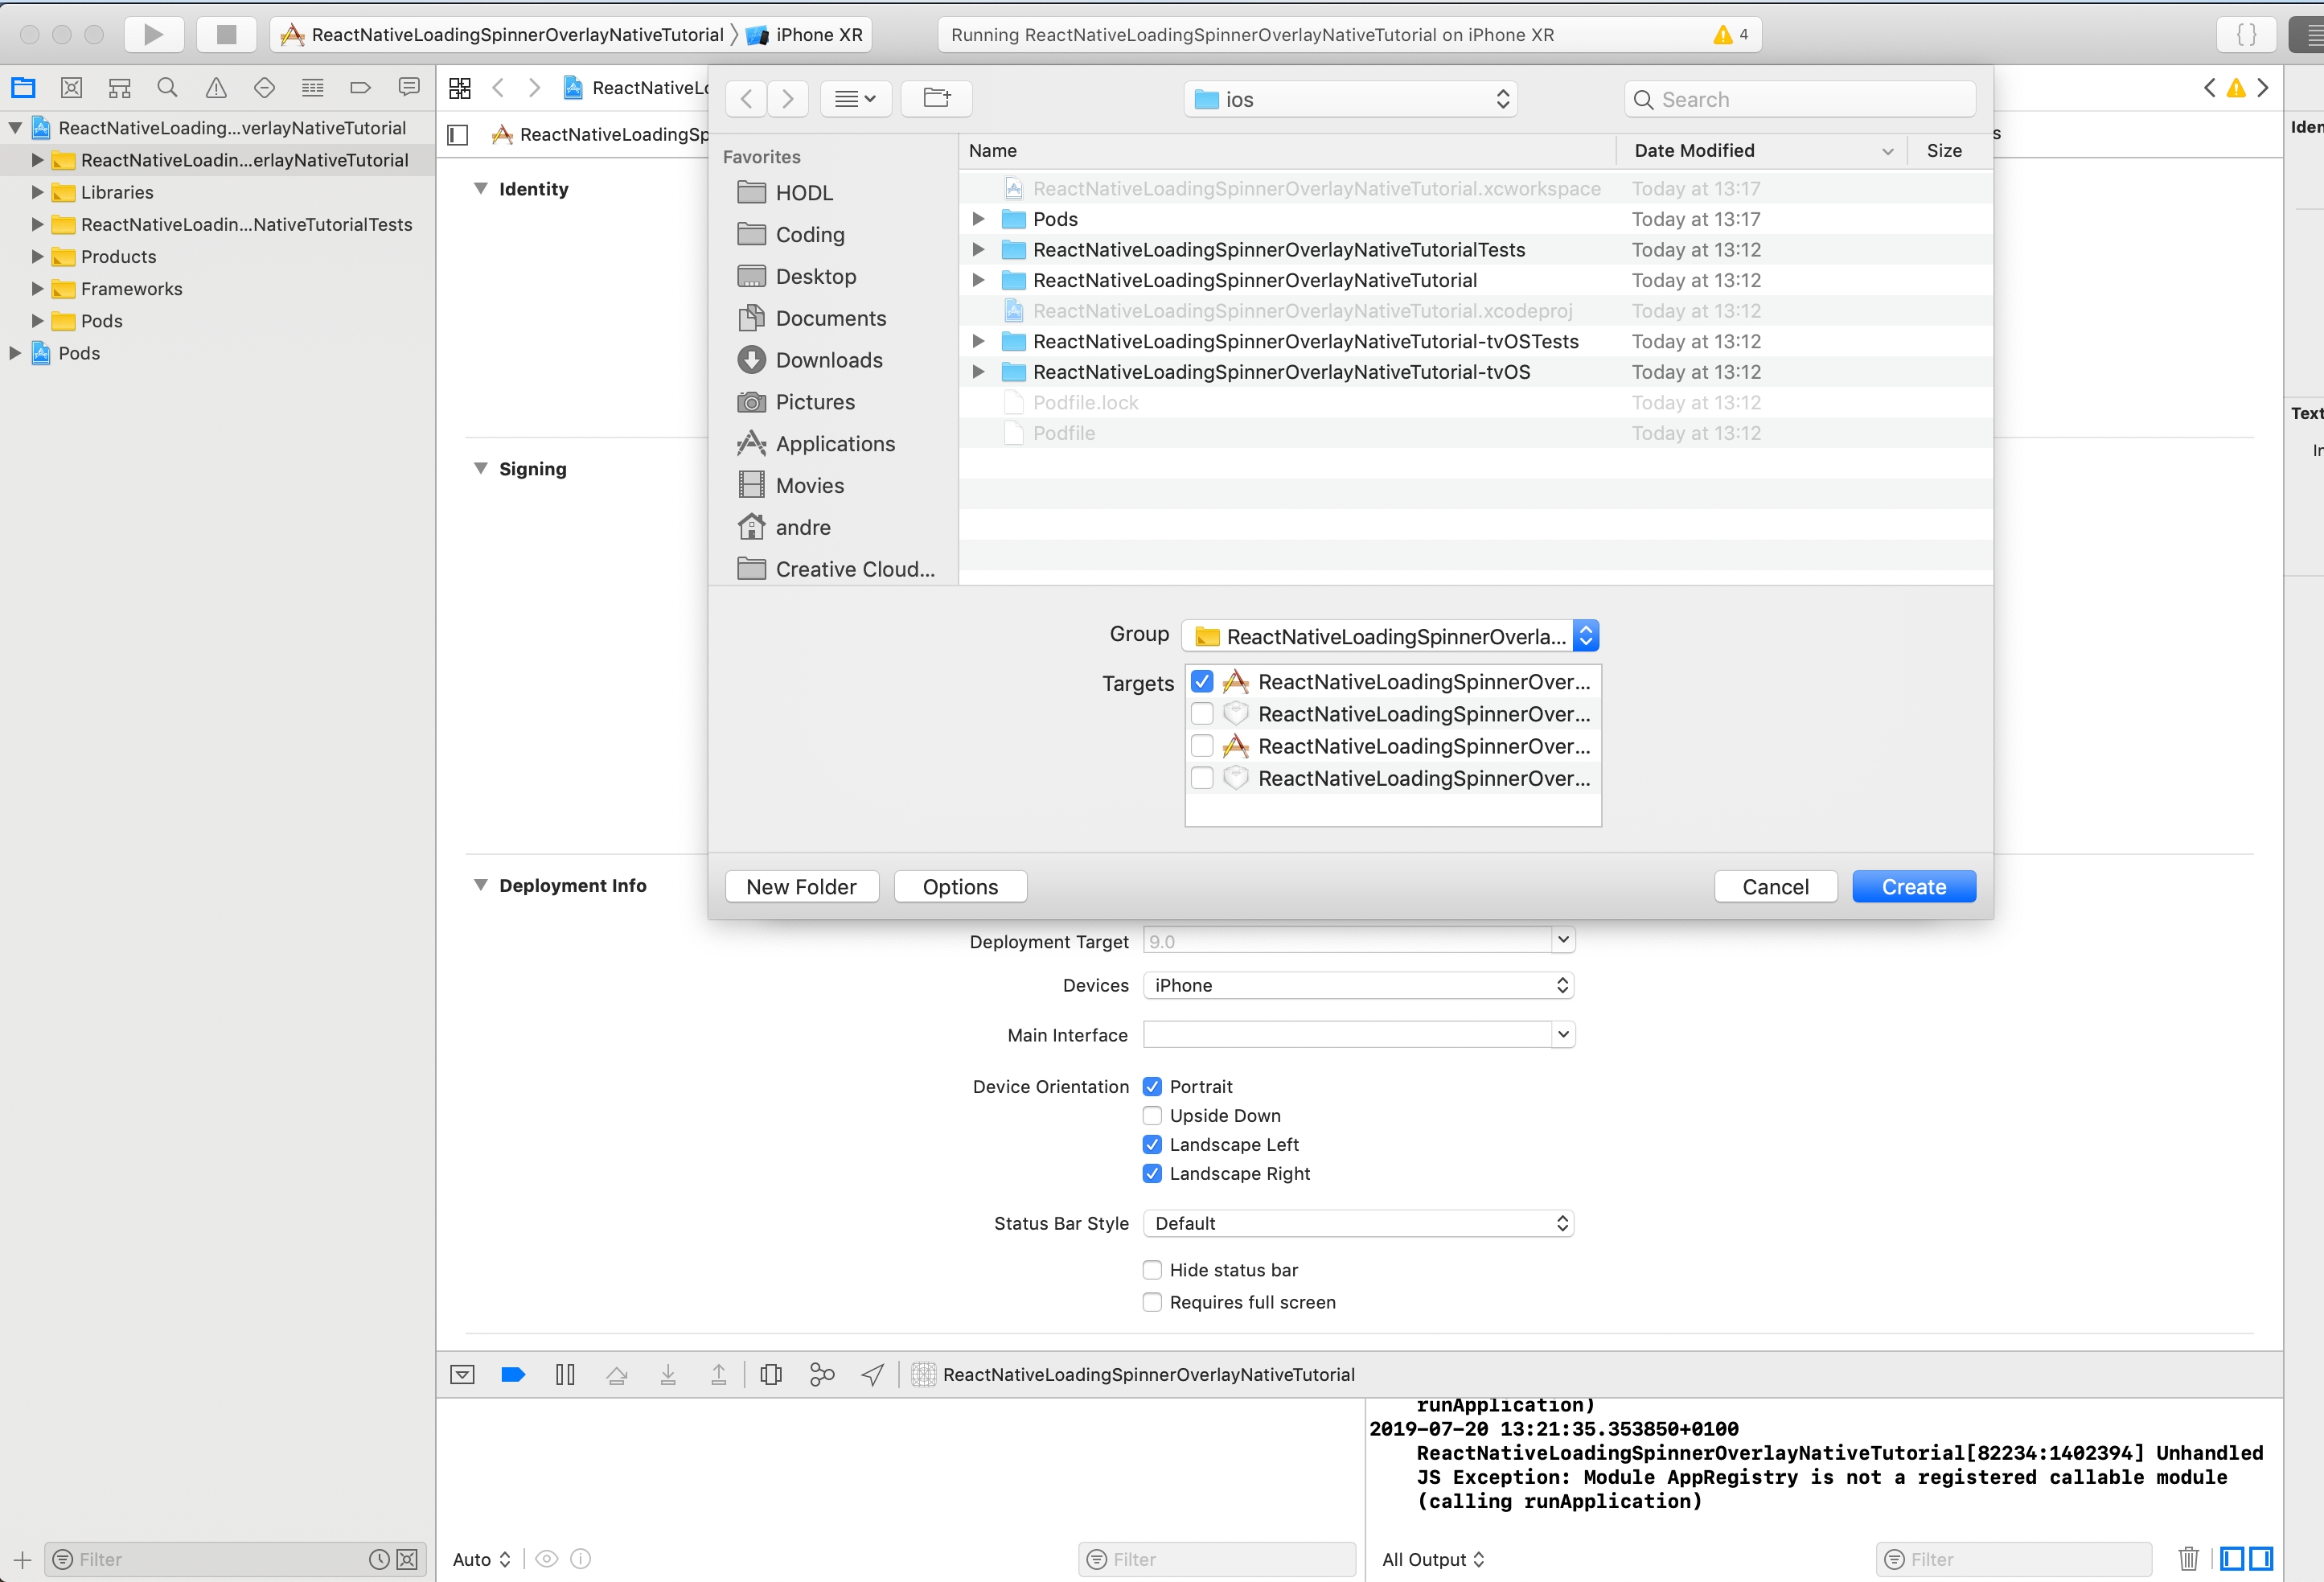
Now you should have two files, in this case, LoadingOverlay.h and LoadingOverlay.m:
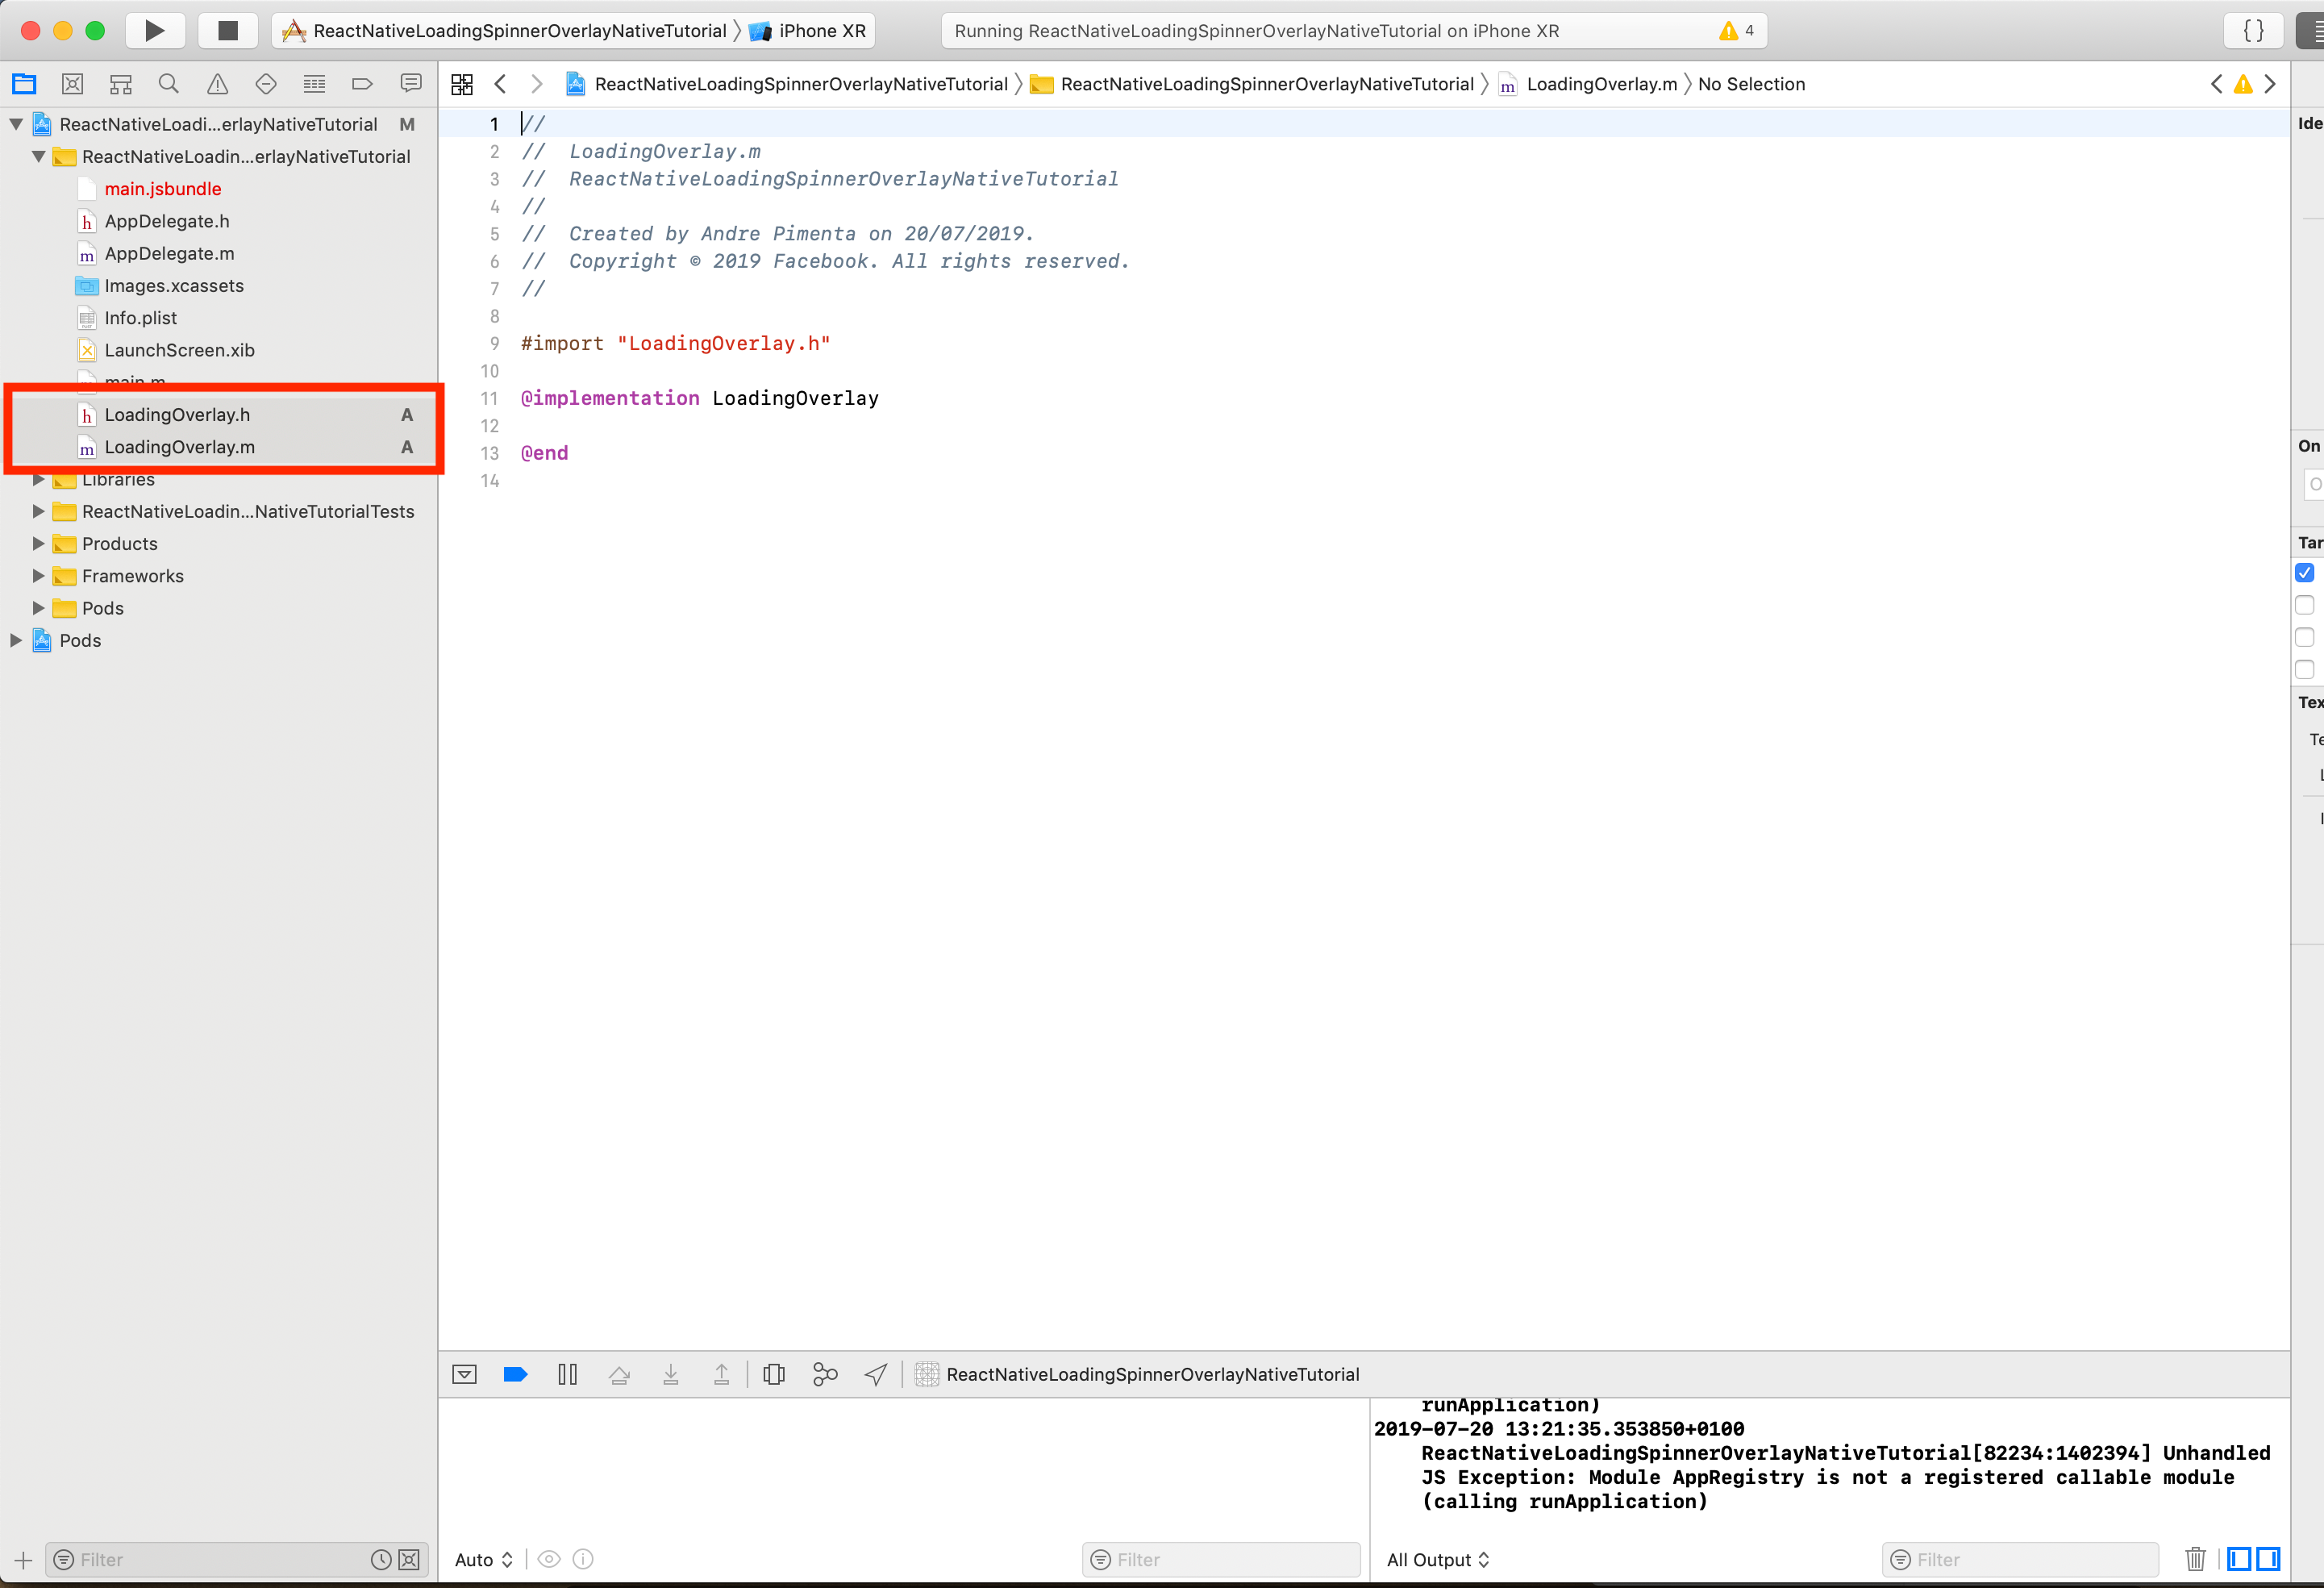
Create the bridge by copying this into your LoadingOverlay.h file:
//
//  BridgeTemplate.h
//  ReactNativeLoadingSpinnerOverlayNative
//
//  Created by Andre Pimenta on 11/07/2019.
//  Copyright © 2019 Facebook. All rights reserved.
//

#import "React/RCTBridgeModule.h"

// Instead of LoadingOverlay put the name of your module
@interface LoadingOverlay : NSObject <RCTBridgeModule>
@end
BridgeTemplate.h
And this into your LoadingOverlay.m file:
//
//  BridgeTemplate.m
//  ReactNativeLoadingSpinnerOverlayNative
//
//  Created by Andre Pimenta on 11/07/2019.
//  Copyright © 2019 Facebook. All rights reserved.
//

#import "React/RCTLog.h"
#import "LoadingOverlay.h" // Here put the name of your module

@implementation LoadingOverlay // Here put the name of your module

// This RCT (React) "macro" exposes the current module to JavaScript
RCT_EXPORT_MODULE();

RCT_EXPORT_METHOD(toggle:(BOOL *)show
                 resolver:(RCTPromiseResolveBlock)resolve
                 rejecter:(RCTPromiseRejectBlock)reject)
{
  dispatch_async(dispatch_get_main_queue(), ^{

    @try{
      resolve(@{ @"key": [NSNumber numberWithBool:1] });
    }
    @catch(NSException *exception){
      reject(@"get_error",exception.reason, nil);
    }
  });
}

@end
BridgeTemplate.m
This created a bridge that you can call from React Native.
As you can see, the function is called togglewhichreceives a boolean called show. Inside that function, you can play around with native code.
3. Implement the iOS native library
Let’s look at an example from JGProgressHUD:
JGProgressHUD *HUD = [JGProgressHUD progressHUDWithStyle:JGProgressHUDStyleDark];
HUD.textLabel.text = @"Loading";
[HUD showInView:self.view];
[HUD dismissAfterDelay:3.0];
They instantiate the HUD with some options, then show the HUD in a self.view, and then tell it to close in 3 seconds. OK, let’s implement this in the LoadingOverlay.m file.
We want to show it if show is true and hide it if show is false:
HUD = [JGProgressHUD progressHUDWithStyle:JGProgressHUDStyleDark];
if(show){
 UIWindow *window = [[UIApplication sharedApplication] keyWindow];
 UIView *topView = window.rootViewController.view;
 HUD.textLabel.text = @"Loading";
 [HUD showInView:topView];
}else{
 [HUD dismiss];
}
The whole file now looks like this:
//
//  LoadingOverlay.m
//  ReactNativeLoadingSpinnerOverlayNative
//
//  Created by Andre Pimenta on 11/07/2019.
//  Copyright © 2019 Facebook. All rights reserved.
//

#import "React/RCTLog.h"
#import "LoadingOverlay.h"
#import "JGProgressHUD.h"
#import <UIKit/UIKit.h>
@implementation LoadingOverlay

// This RCT (React) "macro" exposes the current module to JavaScript
RCT_EXPORT_MODULE();

JGProgressHUD *HUD;

RCT_EXPORT_METHOD(toggle:(BOOL *)show
                 resolver:(RCTPromiseResolveBlock)resolve
                 rejecter:(RCTPromiseRejectBlock)reject)
{
  dispatch_async(dispatch_get_main_queue(), ^{

    @try{
      if(!HUD)
        HUD = [JGProgressHUD progressHUDWithStyle:JGProgressHUDStyleDark];

      if(show){
        UIWindow *window = [[UIApplication sharedApplication] keyWindow];
        UIView *topView = window.rootViewController.view;
        HUD.textLabel.text = @"Loading";
        [HUD showInView:topView];
      }else{
        [HUD dismiss];
      }


      resolve(@{ @"key": [NSNumber numberWithBool:1] });
    }
    @catch(NSException *exception){
      reject(@"get_error",exception.reason, nil);
    }
  });
}

@end
LoadingOverlay.m
Notice I instantiate JGProgressHUD *HUD in the beginning of the file. We and then use it like a normal iOS library with the possibility of calling it from React Native.
Notice also how I get the main window where I show the HUD, this is very common when making these bridges, you will often need to get the main application window.
And that’s it for the native side. We can now call it anywhere on the React Native side:
import { NativeModules } from 'react-native';
var LoadingOverlay = NativeModules.LoadingOverlay;
//Let's show it
LoadingOverlay.toggle(true).then(result => {
  console.log('show', result)
})
// And let's hide it after 3 seconds
setTimeout(()=>{
  LoadingOverlay.toggle(false).then(result=>{
      console.log("hide", result)
  })
}, 3000)

Android
1. Install the Android library
Include this in your dependencies for your app: build.gradle inside the android/app folder.
dependencies {
    // Other dependencies
    implementation 'com.kaopiz:kprogresshud:1.2.0'
}
2. Create the Android bridge
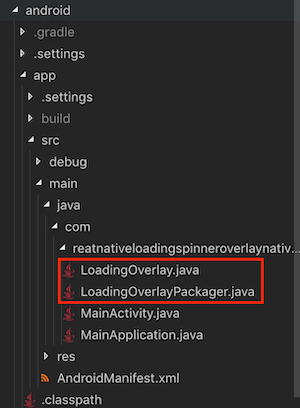
Add two files on your project next to MainActivity.java, called LoadingOverlay.java andLoadingOverlayPackager.java:
Create the bridge by copying this into your LoadingOverlayPackager.java file:
//PUT YOUR PACKAGE HERE, IT'S THE SAME AS IN MainApplication.java
package com.reatnativeloadingspinneroverlaynativetutorial;

import com.facebook.react.ReactPackage;
import com.facebook.react.bridge.JavaScriptModule;
import com.facebook.react.bridge.NativeModule;
import com.facebook.react.bridge.ReactApplicationContext;
import com.facebook.react.uimanager.ViewManager;

import java.util.ArrayList;
import java.util.Collections;
import java.util.List;

//CHANGE LoadingOverlay WITH THE NAME OF YOUR CHOICE
public class LoadingOverlayPackager implements ReactPackage {

    @Override
    public List<ViewManager> createViewManagers(ReactApplicationContext reactContext) {
        return Collections.emptyList();
    }

    @Override
    public List<NativeModule> createNativeModules(
            ReactApplicationContext reactContext) {
        List<NativeModule> modules = new ArrayList<>();

        modules.add(new LoadingOverlay(reactContext));

        return modules;
    }

}
BridgeTemplateAndroidPackager.java
Important: Don’t forget to change the package name in the code.
Add this into your LoadingOverlay.java file:
//PUT YOUR PACKAGE HERE, IT'S THE SAME AS IN MainApplication.java
package com.reatnativeloadingspinneroverlaynativetutorial;

import com.facebook.react.ReactPackage;
import com.facebook.react.bridge.JavaScriptModule;
import com.facebook.react.bridge.NativeModule;
import com.facebook.react.bridge.ReactApplicationContext;
import com.facebook.react.uimanager.ViewManager;

import java.util.ArrayList;
import java.util.Collections;
import java.util.List;

//CHANGE LoadingOverlay WITH THE NAME OF YOUR CHOICE
public class LoadingOverlayPackager implements ReactPackage {

    @Override
    public List<ViewManager> createViewManagers(ReactApplicationContext reactContext) {
        return Collections.emptyList();
    }

    @Override
    public List<NativeModule> createNativeModules(
            ReactApplicationContext reactContext) {
        List<NativeModule> modules = new ArrayList<>();

        modules.add(new LoadingOverlay(reactContext));

        return modules;
    }

}
BridgeTemplateAndroidPackager.java
Important: Don’t forget to change the package name on the code
This created a bridge that you can call from React Native. As you can see, the function is called togglewhichreceives a boolean called show. Inside that function, you can play around with native code.
In order for Android to know that your module exists, add it to your packages list in your MainActivity.java file:
new LoadingOverlayPackager()
3. Implement the Android native library
Let’s look at an example from KProgressHUD:
KProgressHUD.create(MainActivity.this)
	.setStyle(KProgressHUD.Style.SPIN_INDETERMINATE)
	.setLabel("Please wait")
	.setDetailsLabel("Downloading data")
	.setCancellable(true)
	.setAnimationSpeed(2)
	.setDimAmount(0.5f)
	.show();
They instantiate the HUD with some options, then show the HUD in an activity. OK, let’s implement this in the LoadingOverlay.java file.
We want to show it if show is true and hide it if show is false:
KProgressHUD hud = KProgressHUD.create(activity);
if(show){
 hud.setStyle(KProgressHUD.Style.SPIN_INDETERMINATE)
 .setLabel("Please wait")
 .setAnimationSpeed(2)
 .setDimAmount(0.1f)
 .show();
}else{
 hud.dismiss();
}
The whole file now looks like this:
//PUT YOUR PACKAGE HERE, IT'S THE SAME AS IN MainApplication.java
package com.reatnativeloadingspinneroverlaynativetutorial;

import com.facebook.react.bridge.NativeModule;
import com.facebook.react.bridge.ReactApplicationContext;
import com.facebook.react.bridge.ReactContext;
import com.facebook.react.bridge.ReactContextBaseJavaModule;
import com.facebook.react.bridge.ReactMethod;
import android.app.Activity;

import com.kaopiz.kprogresshud.KProgressHUD;

//CHANGE LoadingOverlay WITH THE NAME OF YOUR CHOICE
public class LoadingOverlay extends ReactContextBaseJavaModule {

    KProgressHUD hud;

    public LoadingOverlay(ReactApplicationContext reactContext) {
        super(reactContext);
    }

    @Override
    public String getName() {
        return "LoadingOverlay";
    }

    @ReactMethod
    public void toggle(Boolean show) {
        final Activity activity = getCurrentActivity();
        // PUT YOUR NATIVE CODE HERE

        if (hud == null) {
            hud = KProgressHUD.create(activity);
        }

        if (show) {
            hud.setStyle(KProgressHUD.Style.SPIN_INDETERMINATE)
                .setLabel("Please wait")
                .setAnimationSpeed(2)
                .setDimAmount(0.1f).show();
        } else {
            hud.dismiss();
        }

    }
}
LoadingOverlay.java
Notice I instantiate KProgressHUD hud in the beginning of the file. We can then use it like a normal Android library with the possibility of calling it from React Native.
Notice also how I get the main activity where I show the HUD, as was said for iOS, this is very common when making these bridges, you will often need to get the main application activity.
And that’s it. On the React Native side, you can call both iOS and Android native modules. This is a complete example of a React Native component calling the native module:
/**
 * Sample React Native App
 * https://github.com/facebook/react-native
 *
 * @format
 * @flow
 */

import React, {Component} from 'react';
import {
  View,
  StyleSheet
} from 'react-native';
import { NativeModules } from 'react-native';

class App extends Component {

  componentDidMount(){
	var LoadingOverlay = NativeModules.LoadingOverlay;
	//Let's show it
	LoadingOverlay.toggle(true)
	// And let's hide it after 3 seconds
	setTimeout(()=>{
		LoadingOverlay.toggle(false)
	}, 3000)
  }

  render(){
	return ( <View style={styles.background}></View>)
  }
};

const styles = StyleSheet.create({
  background: {
	backgroundColor: '#6ce6cb',
	flex: 1,
  },
});

export default App
App.js
And that’s it for coding, now for the final results.
Results
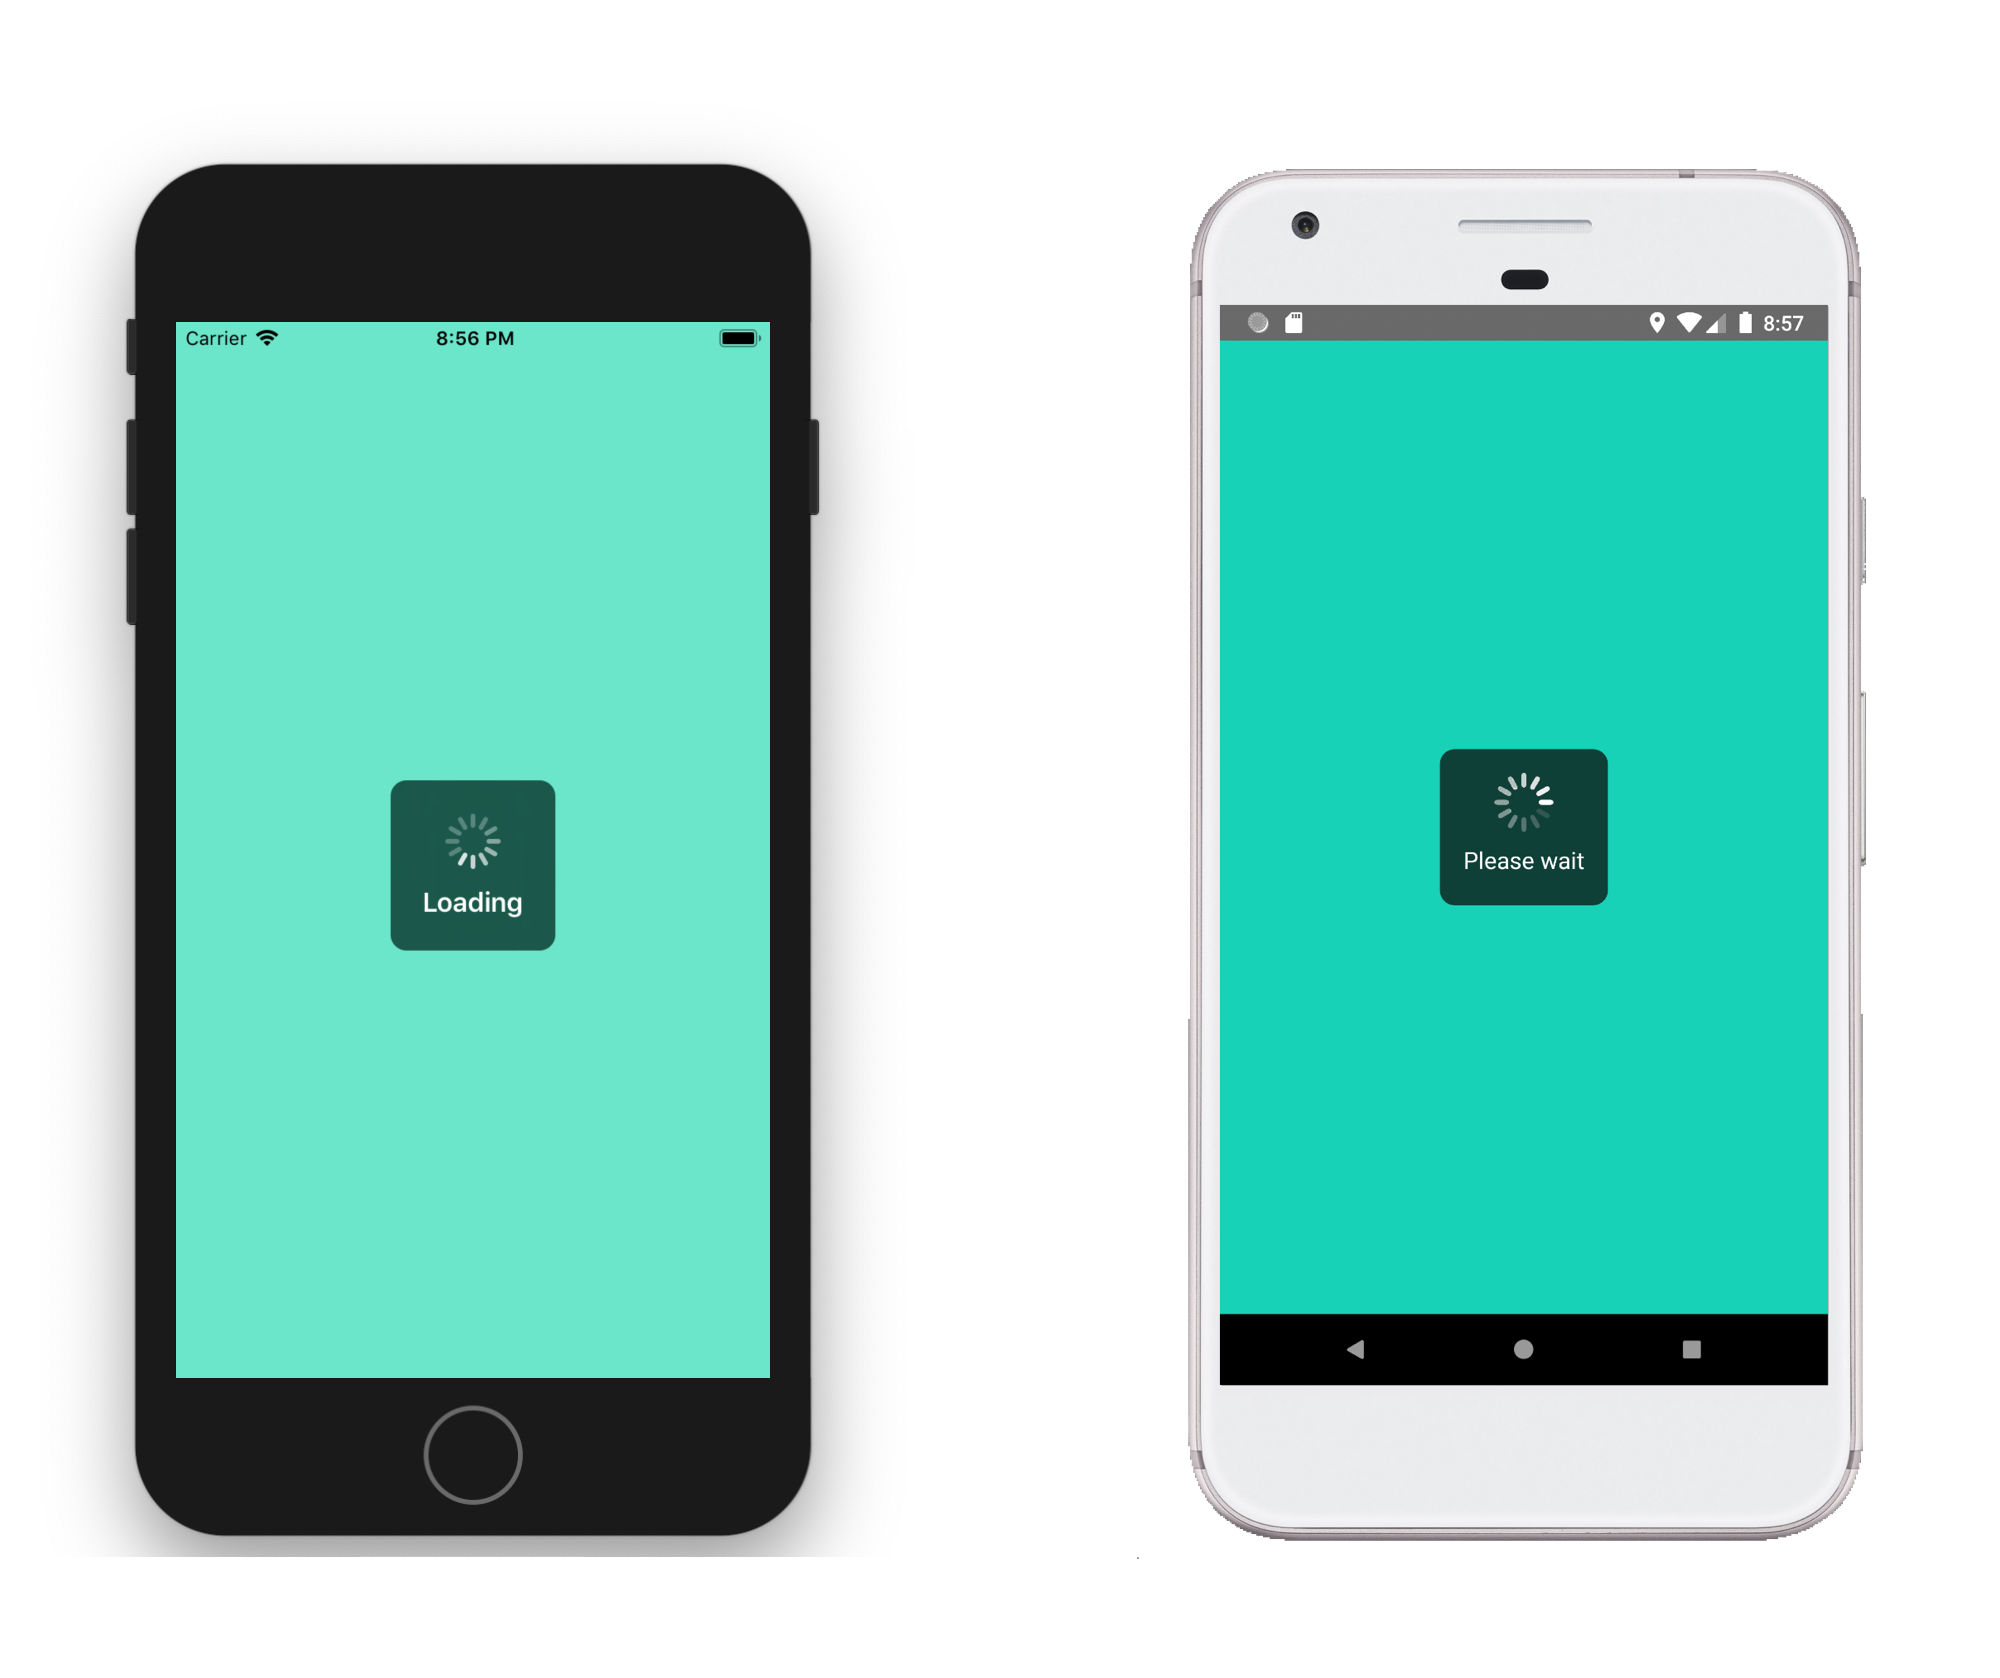
- Code: Check the entire code on GitHub.
I hope this tutorial helped you!
Let me know in the comments if you are interested in the continuation of this article where I turn the implemented example into a proper npm package. Or, I can show how to build a much more complex bridge example.
#reactjs #React Native
