Deploy an Angular App from Visual Studio Code to Azure
Deploy an Angular App from Visual Studio Code to Azure - What do you get when you mix Angular 6, Node 10, Visual Studio Code and Azure? A really quick and slick way to develop and deploy a web application using the latest and greatest technologies. Keep reading to find out how.
This article will discuss how to:
- Setup a free Node server on the cloud using Azure App Service
- Build a basic Angular 6 web app running on Node 10
- Use Visual Studio Code to deploy the web app from a local development machine to Azure
Prerequisites
You will need a free Microsoft Azure account with any Azure subscription. If you don’t have a paid subscription, a Pay-As-You-Go subscription is fine. All Azure services used in this article are free for development and testing purposes.
You will also need the following tools installed on your development machine:
- Setup a free Node server on the cloud using Azure App Service
- Build a basic Angular 6 web app running on Node 10
- Use Visual Studio Code to deploy the web app from a local development machine to Azure
The instructions in this article assume Visual Studio Code v1.28, Node 10.6.0 and Angular CLI v6.1.1 although other versions may work too.
Set Up a New Web App on Azure
The first thing to do is setup the Web App (server) on the Azure cloud. The Azure portal or the Azure CLI can be used to create a new Web App. This article will demonstrate how to setup a server using the Azure portal.
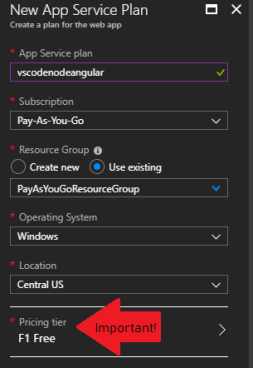
To setup a Node.js server on Azure, you will need to create an App Service plan and a Web A_pp_. The App Service plan will be created on the F1 Free tier which provides a basic free virtual server suitable for development (1 GB ram, 1 hour CPU time / day).
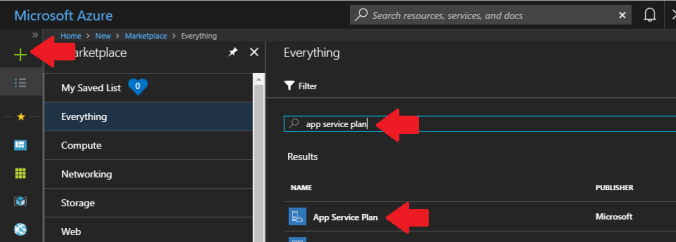
To create the App Service plan:
- Locate “App Service plan” using the resource search in the Azure Portal
- Fill in the App Service plan name, Resource Group and make sure you select the “F1 Free” pricing tier. The free pricing tier can be found under the “Dev / Test” tab.
To create your Web App:
- Locate “App Service plan” using the resource search in the Azure Portal
- Fill in the App Service plan name, Resource Group and make sure you select the “F1 Free” pricing tier. The free pricing tier can be found under the “Dev / Test” tab.
You should now see your App Service plan and Web App on your Azure dashboard.
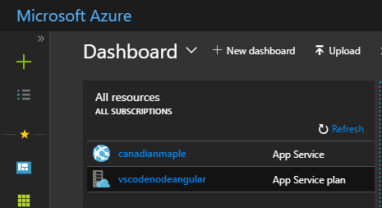
The web server is now ready.
You might be wondering why you don’t have to specify the type of web server to use when creating an Azure Web App. This is because Azure Web Apps conveniently support .NET, .NET Core, Java, Node.js, PHP and static HTML websites out of the box.## Set up Local Development Environment
The next step is to set up a local development environment including a local Node.js server, an Angular 6 application, Visual Studio Code and the Azure App Service extension.
The Local Node.js Server
A Node.js server needs to be installed on your development machine to build and test locally. I recommend that you use the Node Version Manager (NVM) command-line utility to manage and switch between multiple Node.js versions installed on your development machine. If you have NVM installed, installing the right version of Node.js is as simple as running these commands:
nvm install 10.6.0 64
nvm use 10.6.0
You should always make sure that your local server and remote server versions are in sync. Azure Web Apps support many versions of Node.js including v10.6.0.
The Angular App
You can generate an Angular 6.x app shell using the Angular CLI:
npm install -g @angular/cli
npm new canadian-maple
Alternatively, if you want to work with something a little more flashier and Canadian then clone the official Canadian Maple app from GitHub. The rest of this article will assume you did!
Visual Studio Code
Visual Studio Code combined with the Azure App Service extension can be used to develop, package and deploy the web app to Azure cloud.
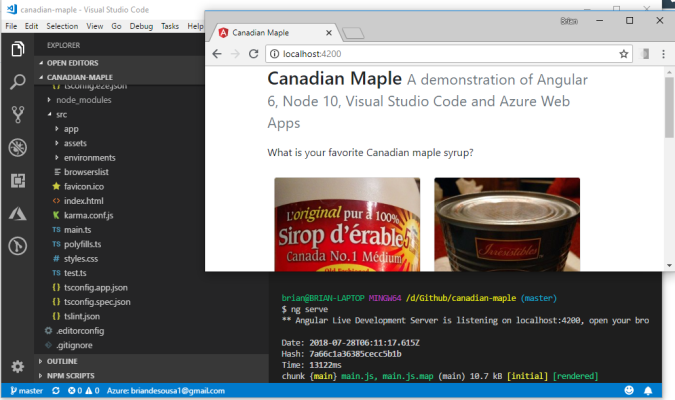
Open up Visual Studio Code in the directory of your Angular app. Use the ng serve command in the integrated terminal (CTRL-~ shortcut) to run and verify your app .
Azure App Service Extension
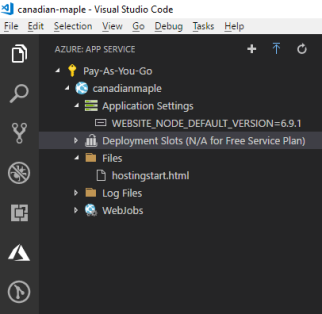
Install the Azure App Service extension from the Visual Studio Code marketplace. After installing the extension and reloading Visual Studio Code, you will notice a new Azure icon in the left navigation bar. Click on the Azure icon to open the extension and select the option to sign into Azure.

After signing into Azure, you will see the “canadianmaple” Web App that was created previously.
You might be wondering why you don’t have to specify the type of web server to use when creating an Azure Web App. This is because Azure Web Apps conveniently support .NET, .NET Core, Java, Node.js, PHP and static HTML websites out of the box.> You might be wondering why you don’t have to specify the type of web server to use when creating an Azure Web App. This is because Azure Web Apps conveniently support .NET, .NET Core, Java, Node.js, PHP and static HTML websites out of the box.## Update Node Version on Azure Web App
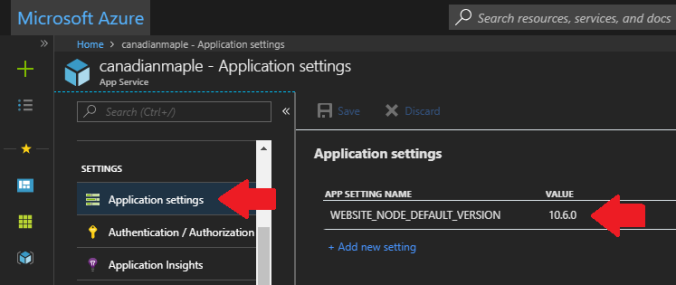
Chances are the default version of Node on the Azure Web App is not the version that you want to use. Luckily, the version of node can be changed with the WEBSITE_NODE_DEFAULT_VERSION environment variable. Navigate to the Application settings section of the Application settings page for your Azure Web App. Click on the environment variable value to change it to 10.6.0.
You might be wondering why you don’t have to specify the type of web server to use when creating an Azure Web App. This is because Azure Web Apps conveniently support .NET, .NET Core, Java, Node.js, PHP and static HTML websites out of the box.
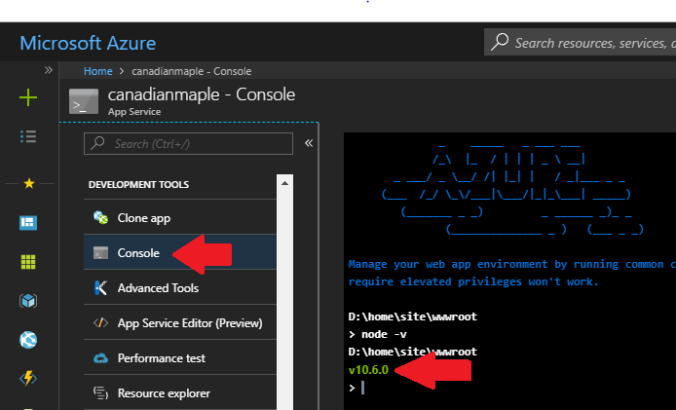
After changing the Node version, you can verify that the setting took effect by using the Console development tool and issuing the node -v command:
Deploying the App
Build the web application before deploying with the ng build command. This command will create the dist/canadian-maple directory containing a transpiled, minified, ready-to-deploy version of your application.
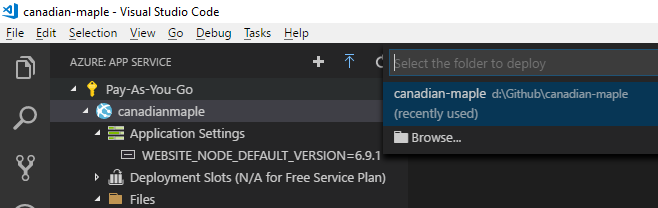
Deploying to an Azure Web App is as simple as right-clicking on the web app in the Azure App Service extension and selecting the “Deploy to Web App” option. The extension will make a suggestion on what to deploy but use the Browse option to select the dist/canadian-maple folder instead.
You will see a few prompts and notifications:
- Setup a free Node server on the cloud using Azure App Service
- Build a basic Angular 6 web app running on Node 10
- Use Visual Studio Code to deploy the web app from a local development machine to Azure
Once the deployment is complete, you will receive a notification with a convenient button to browse to the site.
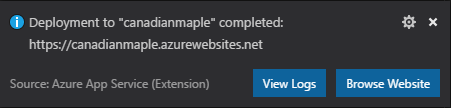
You have just deployed an Angular 6 app running on Node 10.6.0 to the Azure cloud… relatively painlessly! Check out http://canadianmaple.azurewebsites.net to see a live example.
Recap
Let’s recap what has been accomplished:
- Setup a free Node server on the cloud using Azure App Service
- Build a basic Angular 6 web app running on Node 10
- Use Visual Studio Code to deploy the web app from a local development machine to Azure
Now wasn’t that fast and painless?
#angular #visual-studio