Add documentation to your API is really important for share it with your team or with your clients, some times the process of create this documentation takes a lot of time and we usually leave it until the end of the project.
I highly recommend to code your API Documentation in the moment that you create the endpoints.
How? With Swagger!
What Is Swagger?
Simplify API development for users, teams, and enterprises with the Swagger open source and professional toolset. Find out how Swagger can help you design and document your APIs at scale.
So Swagger makes easier the process of documenting your API. We are going to work with Swagger to generate the documentation in our API Gateway in AWS.
We are going to use Swagger with NestJS, so here is the documentation to create the documentation. There are so many decorators that we can use to document our serverless application.
This is important because when you create a NestJS Serverless Application unlike pure Javascript Serverless Application, the sls deploy command only creates 1 endpoint /dev/{proxy+}, so this is the reason that motivated me to create this article, we need to document all the endpoints related to our NestJS Serverless Application.
Let’s Get Started!
First we need to add swagger to our application, here is the command:
npm install @nestjs/swagger
So once you have swagger installed (you can check it in your package.json) we need to document our ‘/hello’ endpoint:
We need to make some imports, here is an example:
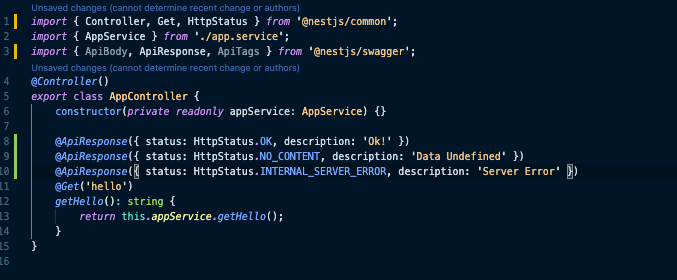
We are using one decorator here “@ApiResponse()”, this decorator indicates the different responses that our endpoint is going to give us using the GET.
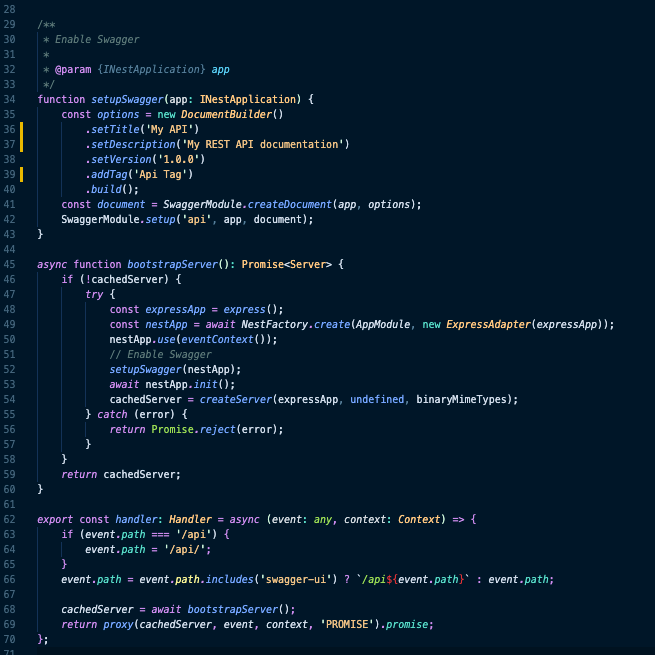
We also need to make some changes in our main.ts file to generate our api endpoint. (We already generated this file in the previous article).
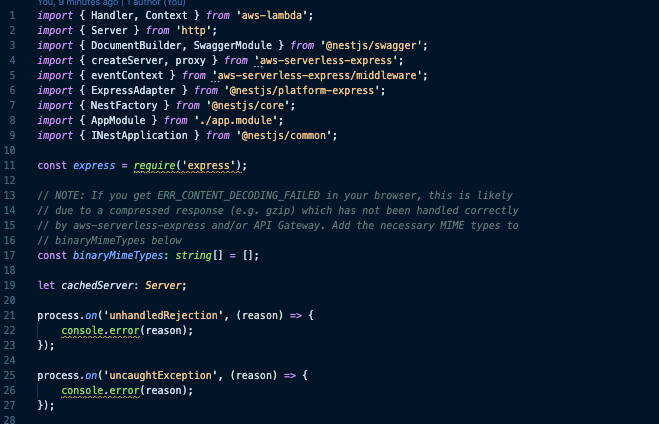
So here is the magic, we need to add this “setupSwagger()” function, this function creates the instance for our API and do all the job. Then we need to modify our handler too. Basically we are redirecting the swagger-ui to /api. This will do all the job to see our api.
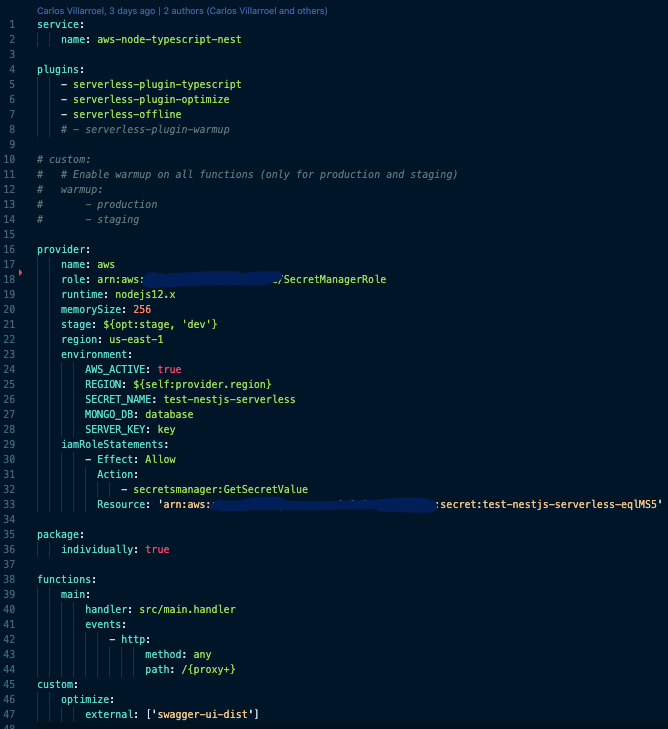
Serverless.yml
Obviously we also need to modify our serverles.yml file, we need to add a new section to our file called “custom”, usually this section is used to add some environment variable names and other configurations that we may need to run our application.
custom:

    optimize:
        external: ['swagger-ui-dist']
Be careful, the indent is really important, I highly recommend to use the Prettier plugin if you are coding with Visual Studio.
Your file should look like this:
#serverless #aws #nest #api #swagger