Working with APIs using Flask, Flask-RESTPlus and Swagger UI
The article discusses about how to use Flask and Flask-RESTPlus to create APIs and then use them to send and retrieve information.
While working on Machine Learning projects, I decided that I would like to develop complete applications. This would require developing APIs, so that we can post values and get responses of predictions. This is where Flask and Flask-RESTPlus come into the picture.
Flask enables exposure of Python functions as APIs. Flask-RESTPlus is an extension to Flask which improves upon its capabilities. It allows us to not only define REST APIs but also brings in Swagger UI for all the APIs.
In this article, I’ll explain how I developed a Flask application with several APIs and dummy data. The project is available as a GitHub Repository.
Installation
I began the process by creating a virtual environment using pipenv. You can read more about it in my article on comparison of virtual environments. I installed Flask and Flask-RESTPlus.
pipenv install flask
pipenv install flask-restplus
However, if you do not wish to work inside a pipenv environment, you can simply use the following commands.
pip install flask
pip install flask-restplus
Basics

Import
I began by importing Flask from flask. From flask_restplus, I imported Api to define the app and Resource which is received as a parameter in the various classes defined in the project.
from flask import Flask
from flask_restplus import Api, Resource
Define App
I defined the application as a flask application using the method Flask() which sets the name using __name__. Next, I’ll used Api to initialise the application.
flask_app = Flask(__name__)
app = Api(app = flask_app)

name_space = app.namespace('main', description='Main APIs')
I defined a namespace here. The concept is very simple. Whenever APIs are defined under a given namespace, they appear under a given heading in Swagger (we’ll explore Swagger later in this article). In namespace, the first variable defines the path and second defines the description for that space.
In the example above, the url for the namespace is [http://127.0.0.1:5000/main](http://127.0.0.1:5000/main "http://127.0.0.1:5000/main") and has the description as Main APIs in Swagger.
Define APIs
Lastly, I defined the endpoints. As our namespace is name_space, I’ll define the url through route as @name_space.route("/"). Next, Flask-RESTPlus requires us to define all endpoints under a given route inside a class. The methods can beget(), put(), and many others.
@name_space.route("/")
class MainClass(Resource):
	def get(self):
		return {
			"status": "Got new data"
		}
	def post(self):
		return {
			"status": "Posted new data"
}
In the example above, the APIs can be accessed at the path [http://127.0.0.1:5000/main](http://127.0.0.1:5000/main "http://127.0.0.1:5000/main"). The classname is set as MainClass with two methods, get() and post(). Whenever, I make a GET call, I get the reply with status field as Got new data and with POST call, I get the reply as Posted new data.
Run App
Now, everything is set up. The file is saved as basic.py. I run the app by the following command using pipenv.
pipenv shell
FLASK_APP=basic.py flask run
Using pip, you can use the following command.
FLASK_APP=basic.py flask run
Swagger UI
The best part of Flask-RESTPlus is that it automatically documents the APIs that we have created and they are visible in the Swagger UI. Go to [http://127.0.0.1:5000/](http://127.0.0.1:5000/ "http://127.0.0.1:5000/") and you can see all the APIs.

Both APIs are visible under the main namespace with the description Main APIs. We can try either API and check their functioning by clicking the Try it out button.
Try API
I used curl to make GET and POST requests from the terminal.

While using the curl command, first use the word curl followed by the method after the character -X. Finally, the endpoint is specified. Taking a look at our curl responses, we see that I received the correct data for both GET and POST APIs.
Taking it up a notch

There is so much more to Flask and Flask REST-Plus. Let’s explore them in even more depth and understand them better. The following code is available as [app.py]([https://github.com/kb22/Understanding-Flask-and-Flask-RESTPlus/blob/master/app.py)](https://github.com/kb22/Understanding-Flask-and-Flask-RESTPlus/blob/master/app.py) "https://github.com/kb22/Understanding-Flask-and-Flask-RESTPlus/blob/master/app.py)") in the GitHub Repository.
We can use a POST request to send data and save it. We can then use the GET request to get that data. Let’s say we have a project that manages names of individuals and stores them. We create a GET endpoint to fetch the name using id and POST endpoint to save a name against an id.
Here, I have created the path as [http://127.0.0.1:5000/names/<int:id>](http://127.0.0.1:5000/names/ "http://127.0.0.1:5000/names/<int:id>") where we will pass the id each time. To store names, I have created an object list_of_names which will be used to get and receive data.
Import more libraries
We have already imported Flask, Api, and Resource. We also import request from the flask package. This helps us get the request object and then retrieve information such as JSON data from it. We also import fields from flask_restplus package to define the type of elements such as String.
from flask import Flask, request
from flask_restplus import Api, Resource, fields
Add Application Information
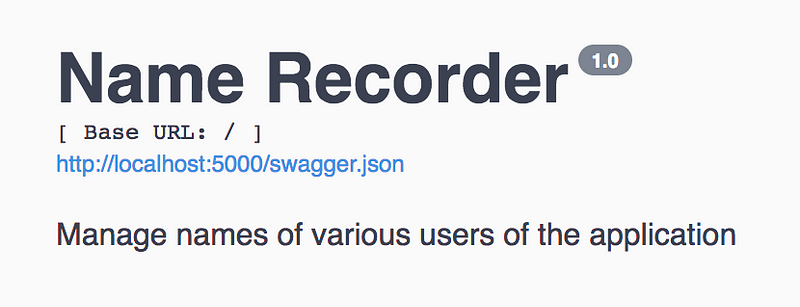
We can also add extra information to our Flask app. This information is useful and is displayed in the Swagger UI.
flask_app = Flask(__name__)
app = Api(app = flask_app,
		  version = "1.0",
		  title = "Name Recorder",
		  description = "Manage names of various users of the application")

name_space = app.namespace('names', description='Manage names')
We can define the version, title and the description of our application. We’ve set only one namespace namely names. The Swagger UI header would now look like the image below.
Define Models
Whenever we want to receive or send information in a particular format (JSON) we accomplish this with the help of model. We specify the name of the model. Next, we describe the information it expects and the properties of each expected value.
model = app.model('Name Model',
		  {'name': fields.String(required = True,
					 description="Name of the person",
help="Name cannot be blank.")})
We define the model name as Name Model. It includes one parameter, namely name which is a required field, and define its description and help text. The API which will use this model will expect a JSON with a key as name.
list_of_names = {}
To keep track of all names, I’ll store them in list_of_names.
Define APIs
@name_space.route("/<int:id>")
class MainClass(Resource):

	@app.doc(responses={ 200: 'OK', 400: 'Invalid Argument', 500: 'Mapping Key Error' },
			 params={ 'id': 'Specify the Id associated with the person' })
	def get(self, id):
		try:
			name = list_of_names[id]
			return {
				"status": "Person retrieved",
				"name" : list_of_names[id]
			}
		except KeyError as e:
			name_space.abort(500, e.__doc__, status = "Could not retrieve information", statusCode = "500")
		except Exception as e:
			name_space.abort(400, e.__doc__, status = "Could not retrieve information", statusCode = "400")

	@app.doc(responses={ 200: 'OK', 400: 'Invalid Argument', 500: 'Mapping Key Error' },
			 params={ 'id': 'Specify the Id associated with the person' })
	@app.expect(model)
	def post(self, id):
		try:
			list_of_names[id] = request.json['name']
			return {
				"status": "New person added",
				"name": list_of_names[id]
			}
		except KeyError as e:
			name_space.abort(500, e.__doc__, status = "Could not save information", statusCode = "500")
		except Exception as e:
name_space.abort(400, e.__doc__, status = "Could not save information", statusCode = "400")
Let’s break down the code snippet above into smaller parts to understand it better. We’ll explore the POST endpoint. The functionality of GET would be very similar.
Define route and class
@name_space.route("/<int:id>")
class MainClass(Resource):
We use the name_space namespace to define the route i.e. [http://127.0.0.1:5000/main/<int:id>](http://127.0.0.1:5000/main/ "http://127.0.0.1:5000/main/<int:id>"). It expects an Id to be sent as an integer. The name of out class is MainClass which has one parameter, Resource.
Define docs for the API
@app.doc(responses={ 200: 'OK', 400: 'Invalid Argument', 500: 'Mapping Key Error' },
params={ 'id': 'Specify the Id associated with the person' })
Using doc we can define the documentation for the API in Swagger. The responses key defines the various possible HTTP Status Codes. For each status code, we also define a text that describes it to the user. The params key defines the expected parameter. The API expects id in the URL and we specify a help text for the user. The Swagger UI looks like the image below.

The parameters are defined in the top part. All the expected responses with their description appear in the lower part.
Define the method
@app.expect(model)
def post(self, id):
  try:
    list_of_names[id] = request.json['name']
    return {
      "status": "New person added",
      "name": list_of_names[id]
    }
  except KeyError as e:
    name_space.abort(500, e.__doc__, status = "Could not save information", statusCode = "500")
  except Exception as e:
name_space.abort(400, e.__doc__, status = "Could not save information", statusCode = "400")
We can now define our method. Before our method, we add the line expect(model) which defines that the API expects model. We wrap our code inside a try block and catch all errors that might occur. The request.json['name] gets us the received name and we can save it as well as send it back in the response. If the name key is missing, we get KeyError and we send Status Code 500. In other cases, we send Status Code 400.
Try the App
Let’s start the app.
FLASK_APP=app.py flask run
POST
We parse the response from the request, read the name and store it against the id in list_of_names. We also return the status and the name of the newly added person.


Error in POST Request
Say, we forgot to supply the name parameter in the data object. In this case, we’ll get an error.


On not supplying the key name, we got an error with Status Code 500 and the message Mapping key not found.
GET
We just pass the id that we want to get the name for and we get the status and the name of the person back if available.


Error in GET Request
Say, we don’t have any person against Id 2. If we try to retrieve that information, it’ll throw an error.


As that specific Id is not found, we get Status Code 500 and the message Mapping key not found.
Conclusion
In this article, we explored creation of APIs using Flask and Flask-RESTPlus. Both of these are great libraries to develop as well as document APIs in Python and interact with APIs using Swagger.
Please feel free to share your thoughts and ideas.
#python #flask #rest #api