For windows, download Apache Derby zip and extract it. After extraction, copy the folder that contains the bin folder, to root directory and rename it to java-derby (renaming is just for ease of locating it). Now, add path, till the bin folder, in PATH environment variable. Add a new variable, in the system variable section and user variable section, named as DERBY_HOME and add the path, till the parent directory of the bin folder, as its value. Now move to a directory, say C:\work\derby, and type startnetworkserver. If everything goes well, your prompt will look like this:
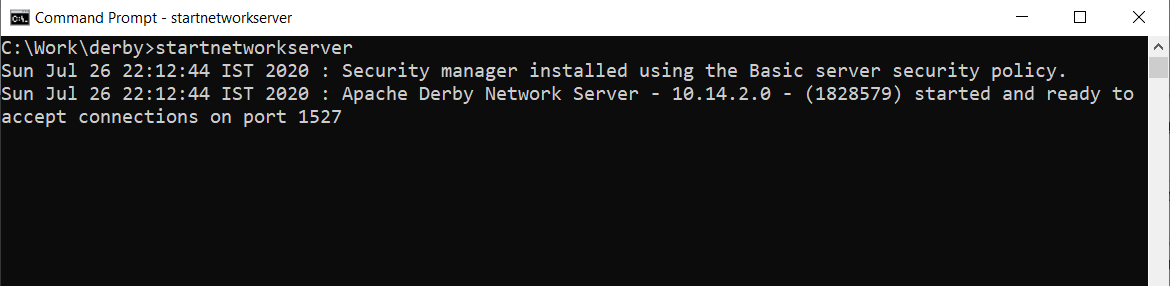
Apache Derby Server listening at port 1527
Note : If a firewall prompt appears, select allow. If you any face problem, turn off the firewall.
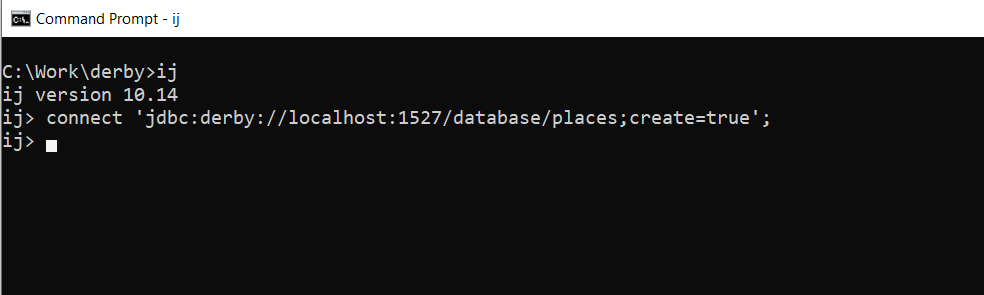
Verification: Using another prompt move to derby folder, again. Create another folder named as database. You don’t need to move in it. We will ask the Apache Derby server to create database files in the database folder. Now, while staying in the c:\work\derby folder type ij, you will see a derby prompt. In that, type:
connect ‘jdbc:derby://localhost:1527/database/places;create=true’;
By doing this, we are creating a JDBC connectivity and creating a database named as places and “create=true” specifies we need to create a new one. Every time, while connecting, we won’t be writing this. It is a one time act. If you have executed everything correctly, then on the next line the derby prompt will appear as follows:
#rdbms #dbms #programming #database #derby