Originally published by Ari Birnbaum at Ceiphr on April 21
Prerequisites
Basic Python, HTML, CSS and Unix Command Line. As long as you're comfortable with all that, you're good.
Table of Contents
- Introduction
- Our Goal
- So what is Django?
- Setting up our project
- The Database
- Media file support
- Writing our models
- Migrating our new models
- Admin control panel
- View logic
- Templates with Style
- Wrap Up
Introduction
This is not a tutorial. This crash course is a quick way to get started making a basic Django website without going in-depth about the underlying concepts that are required to make complex web applications. For every step of this crash course I will link a more thorough explanation of the tools and concept you're using so you can get a better understanding of Django while creating your first project.
Our Goal
We're making a website where you can upload an image with a title, date and description. Simple.
So what is Django?
Django /JANG-oh/ — A type of tool (web framework) most known for helping people make neat websites quickly with few mistakes.
Making stuff in Django follows this pattern:
- Model — How you store stuff. This is where we will tell Django how to store our images, titles, dates and descriptions.
- View — Where your project thinks. This is how our website will get the stuff we stored based on our models and process it for the user.
- Template — How your project presents the stuff it was thinking about. The view will use this to display the contents it processed based on our models.
Django does more complex (and really fun) things, but if you're starting out that's all you need to know for now.
Setting up our project
NOTICE: Windows Users
By default, Windows doesn't have a Unix command line, which is a prerequisite for this crash course. The October 2018 update for Windows 10 offers Linux subsystems, such as Ubuntu. Please install and set up a Linux subsystem to utilize the Unix command line.
We're going to use your computer's terminal to set up our python environment and Django. Let's make the project in our computer's Documents folder, so enter these commands
$ cd ~/Documents
$ python3 -m venv django_cc
python3 -m venv django_ccwill create a virtual environment within a folder calleddjango_ccfor our project so all the stuff we install for it to work won't interfere with anything else on your system. [in-depth]
Next we'll get in our project folder, enable our new python environment and install Django.
$ cd django_cc
$ source bin/activate
$ pip install django
source bin/activatewill activate the virtual environment we created. This means when we install Django, it won't be installed on the whole system, just in our project.pip install djangowill use Python's package manager to install the most recent version of Django.
Now that Django is installed we get some new commands. Let's start by creating a project within Django, migrating our development database and finally starting our local development server for the first time to ensure we did everything right.
$ django-admin startproject django_cc
$ cd django_cc
$ python3 manage.py migrate
$ python3 manage.py runserver
django-admin start project django_ccis telling django to make the stem of our project where everything else will be connected (i.e. django apps). [in-depth]- This is also where we will find
manage.pythe file that we will use to interact with Django. python3 manage.py migrateis used to let Django know that changes have been made to our models. Since we've just started our project this will be our initial migration which establishes models Django makes on its own (i.e. accounts, activity logs, permissions, etc.). [in-depth]python3 manage.py runserverwill start our development server where we will be testing our project.
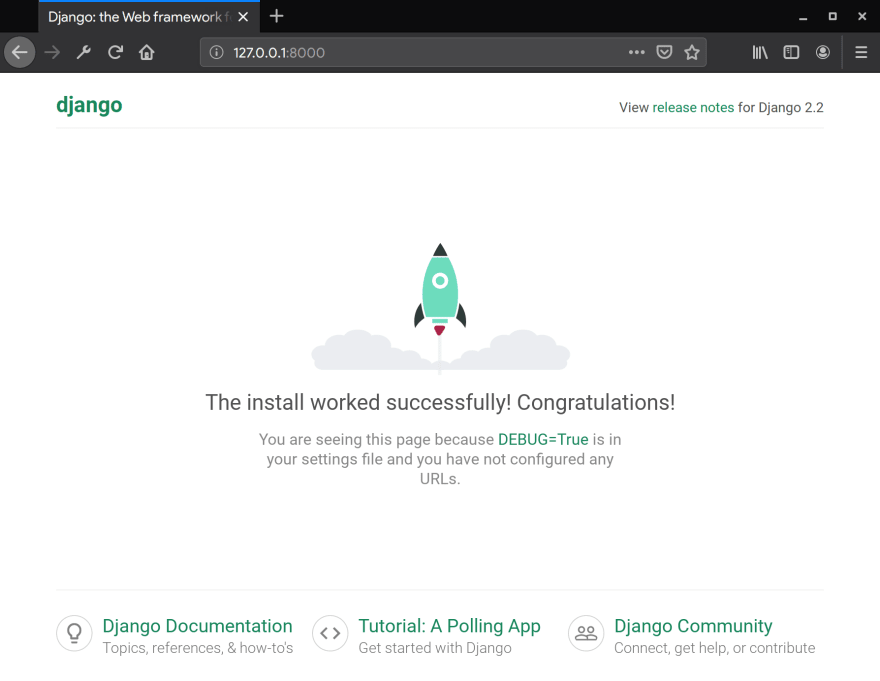
To see the development server in action go to 127.0.0.1:8000 in your browser. A Django start up page should appear:
The Database
Next grab your favorite text editor or python IDE because we're going to delve into Django. We're going to start by creating a Django app where we will write all of our models for this project.
$ python manage.py startapp database
In order for our core project to recognize this app we need to let it know our database app exists by adding it to INSTALLED_APPS in django_cc/settings.py like so:
# Application definitionINSTALLED_APPS = [
‘django.contrib.admin’,
‘django.contrib.auth’,
‘django.contrib.contenttypes’,
‘django.contrib.sessions’,
‘django.contrib.messages’,
‘django.contrib.staticfiles’,
‘database’,
]
Media file support
Let’s add the following to the bottom of settings.py so Django knows where to store media files such as the images that we upload:
# Media file supportMEDIA_ROOT = os.path.join(BASE_DIR, ‘media’)
MEDIA_URL = ‘/media/’
We will also need to add a few imports and a conditional at the bottom of django_cc/urls.py so the files are accessible on the development server:
from django.conf.urls import url
from django.contrib import adminAdd these imports for static file support and to get
directory details from Django’s settings.py
from django.conf.urls.static import static
from django.conf import settingsurlpatterns = [
url(r’^admin/', admin.site.urls),
]Add this to enable media file support on the development server
if settings.DEBUG:
urlpatterns += static(settings.MEDIA_URL, document_root=settings.MEDIA_ROOT)
Great, our project is now set up, and we can begin by writing our models.
Writing our models
Inside of our new database app we will find a models.py file where we will write our models for our database. The class Post will act as our first model for uploading a post with an image, title, description, and date published.
from django.db import models
import datetimeclass Post(models.Model):
image = models.FileField(upload_to=‘images/’)
title = models.CharField(default=“”, max_length=64)
description = models.CharField(default=“”, max_length=512)
date = models.DateField(default=datetime.date.today)
models.FileField(upload_to=‘images/’)acts as a field where we will upload images to an image folder in the media directory we configured in settings.models.CharField(default=“”, max_length=n)is a basic text field where the max character length is n.models.DateField(default=datetime.date.today)is self explanitory, it’s a date/time field that is set to the current date and time.
To finish off our models let’s tell Django to order them based newest to oldest:
class Post(models.Model):

image = models.FileField(upload_to=‘images/’)

title = models.CharField(default=“”, max_length=64)

description = models.CharField(default=“”, max_length=512)

date = models.DateField(default=datetime.date.today)

class Meta:

ordering = [‘-date’]

def str(self):

return self.title
- The
Metaclass can do a lot, in our case we will use it to order our models based on time. - The
strfunction is telling Django to display the title (instead of saying Post 1, Post 2, etc.) for when we interact with our entries later on in the Django admin panel.
Migrating our new models
Finish off our models with the following two commands that essentially tell Django that we’ve made some changes and that they should be applied to our database:
$ python3 manage.py makemigrations

$ python3 manage.py migrate
Congratulations! Our database is all set up for our posts. There is one issue though. We can’t edit them right now. Let’s get you set up with the Django admin panel so you make some posts.
Admin control panel
Inside of our database app go to admin.py and add the following:
from django.contrib import admin
from database.models import *admin.site.register(Post)
from database.models import Postimports all the models that we’ve just created.admin.site.register(<model_name>)tells Django to display that model within the control panel.
Next we will create a superuser, so we can log into the admin panel. Type the following command and follow the prompts. You only need to fill out the username and passwords prompts.
$ python3 manage.py createsuperuser

Username (leave blank to use ‘ari’):

Email address:

Password:

Password (again):

Superuser created successfully.
Once completed head over to 127.0.0.1:8000/admin and sign in with the credentials you just wrote. You should see this page:

From here you can add posts to your Django project. We are officially done with our models. Next will design our view so Django can serve our posts.
View logic
A view is how Django knows what to do when we ask for a page. The first thing we have to do is create a views.py file in django_cc. In that file paste the following:
from django.shortcuts import render
from django.views.generic.base import View
from django.views.generic import TemplateView
from database.models import Postclass post_feed(TemplateView):
template_name = ‘index.html’def get_context_data(self, *args, **kwargs): context = dict() context["posts"] = Post.objects.all()
from django.views.generic import TemplateViewallows us to use Django’s basic template view which is all that we need for displaying our posts.from database.models import Postimports all of our database models for our view functions to use.post_feedis our basic template view that will use anindex.htmlfile we will create next to render our database contents.get_context_datais how we will send our template the information from the database.context[“posts”] = Post.objects.all()Our template will refer topostswithin ourcontextdictionary for a list of all posts that is collected from the database usingPost.objects.all()
In urls.py we will need to add a new path so Django knows when that URL is requested to call our view:
from django.conf.urls import url
from django.contrib import admin
from django.conf.urls.static import static
from django.conf import settingsimport path for easy urls
from django.urls import path
import our views so urls.py can call them
from django_cc.views import post_feed
urlpatterns = [
# Path for root of our website that will display the post feed path('', post_feed.as_view(template_name="index.html"), name="post_feed"), url(r'^admin/', admin.site.urls),]
if settings.DEBUG:
urlpatterns += static(settings.MEDIA_URL, document_root=settings.MEDIA_ROOT)
Our basic view logic is now complete, now we need to build our index template for displaying our posts.
Templates with Style
In the root of our Django project where you can find our database and django_cc folders create a templates folder and make an index.html file inside. For the design of our site we’re going to use the framework Bulma so we won’t need to write any CSS. Here is a boilerplate we can use for our template.
<!DOCTYPE html>

<html lang=“en”>

<head>

<title>Posts | Django Crash Course</title>

<link rel=“stylesheet”

href=“https://cdnjs.cloudflare.com/ajax/libs/bulma/0.7.4/css/bulma.min.css”

integrity=“sha256-8B1OaG0zT7uYA572S2xOxWACq9NXYPQ+U5kHPV1bJN4=”

crossorigin=“anonymous” />

</head>

<body>

</body>

</html>
Django templates utilize a DRY version of HTML called Django HTML. This is how we will send our context to render in our index.html template. In the body of the boilerplate let’s add a basic card with the context for our posts.
<div class=“container”>

{% for post in posts %}

<div class=“card”>

<div class=“card-image”>

<figure class=“image”>

<img src=“{{ post.image.url }}” alt=“Placeholder image”

style=“max-width: 250px; max-height: 250px;”>

</figure>

</div>

<div class=“card-content”>

<div class=“content”>

<b>{{ post.title }}</b> | {{ post.description }}

<br>

<time datetime=“{{ post.date }}”>{{ post.date }}</time>

</div>

</div>

</div>

{% endfor %}

</div>
{% for post in posts %}acts as a for loop that will duplicate its contents for each post insideposts.- Every time the for loop runs the context for the post in the current iteration is placed in the HTML when it is referred to using
{{ <variable> }} {{ post.image.url }}is how you refer to the image’s URL, you cannot just reference the image itself.
When we visit 127.0.0.1:8000 there should be a list of all the posts we’ve added in the control panel:

Now we have a website that displays what we add to our control panel in Bulma cards. Neat.
Wrap Up
Django is a wonderful framework for building websites and other complex things. Today you’ve created a very basic website that is capable of displaying posts akin to Instagram and in the future hopefully you can build Instagram yourself. For now I suggest learning more about Django either through their documentation or this introduction (which got me started).
FYI — Follow this tutorial by Digital Ocean so you can learn how to host your Django creations for the world to see. If you want to host with Digital Ocean, use my referral link for a discount.
---------------------------------------------------------------
Thanks for reading :heart: If you liked this post, share it with all of your programming buddies! Follow me on Facebook | Twitter
Learn More
☞ Machine Learning with Python, Jupyter, KSQL and TensorFlow
☞ Introduction to Python Microservices with Nameko
☞ Comparing Python and SQL for Building Data Pipelines
☞ Python Tutorial - Complete Programming Tutorial for Beginners (2019)
☞ Python and HDFS for Machine Learning
☞ Build a chat widget with Python and JavaScript
☞ Complete Python Bootcamp: Go from zero to hero in Python 3
☞ Learn Python by Building a Blockchain & Cryptocurrency
☞ Python and Django Full Stack Web Developer Bootcamp
☞ The Python Bible™ | Everything You Need to Program in Python
☞ Learning Python for Data Analysis and Visualization
☞ Python for Financial Analysis and Algorithmic Trading
☞ The Modern Python 3 Bootcamp
#python #django