How to Migrate Redux to the Context API
In the following documentation, we are going to, from the ground up, refactor a Redux shopping cart product’s data into the Context Provider pattern.
This guide’s primary focus will be on comparing and contrasting Redux vs. the Context API.
The refactor aims to provide a guided example, as well as deepen our understanding of state management in React, implementing various efficient scalable patterns.
Process Overview
The shopping cart application will be pulled from the official Redux GitHub repository to maintain a standard example environment.
We will trace the Flux-like pattern of Redux in the shopping cart app, and by focusing on the product data, implement a successful state management refactor by leveraging React Hooks and the Context API.
Guide Outline
- Clone Redux.
- Scalable state management analysis.
- Tracing shopping cart product data.
- Reducers and Actions.
- Thunk and logger: middleware vs. dispatch.
- Implement Context Provider pattern.
- HOCs, HOFs, and Redux
Connect(). - Leveraging React Hooks and
useContext. setTimeout()vs. promises.- Final Context Provider pattern refactor.
Alright. So, let’s grab some coffee and get this show on the road.

Please note that a basic level requirement of Node and React is beneficial for getting started and for general concept comprehension.
Clone Redux
First off, go to the Redux GitHub repository.
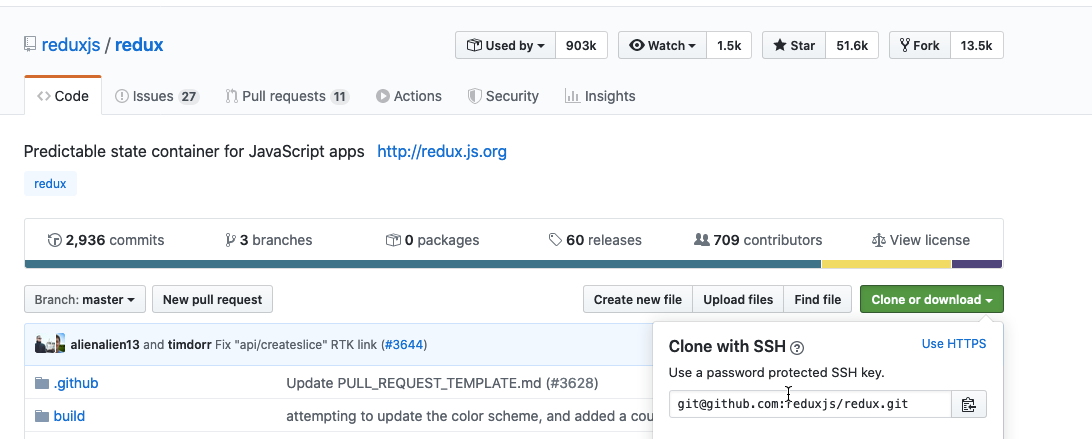
Redux Github Repo
Clone the source project by copying the SSH link and running git clonein the command prompt.
git clone git@github.com:reduxjs/redux.git
Copy the Shopping Cart folder which can be found in the folder directory: examples/shopping-cart and paste it somewhere where you can conveniently access it throughout this guide.
Now, using the terminal (Mac) command prompt, go cd shopping-cart into the shopping-cart folder directory and install all required node modules simply by running npm install.
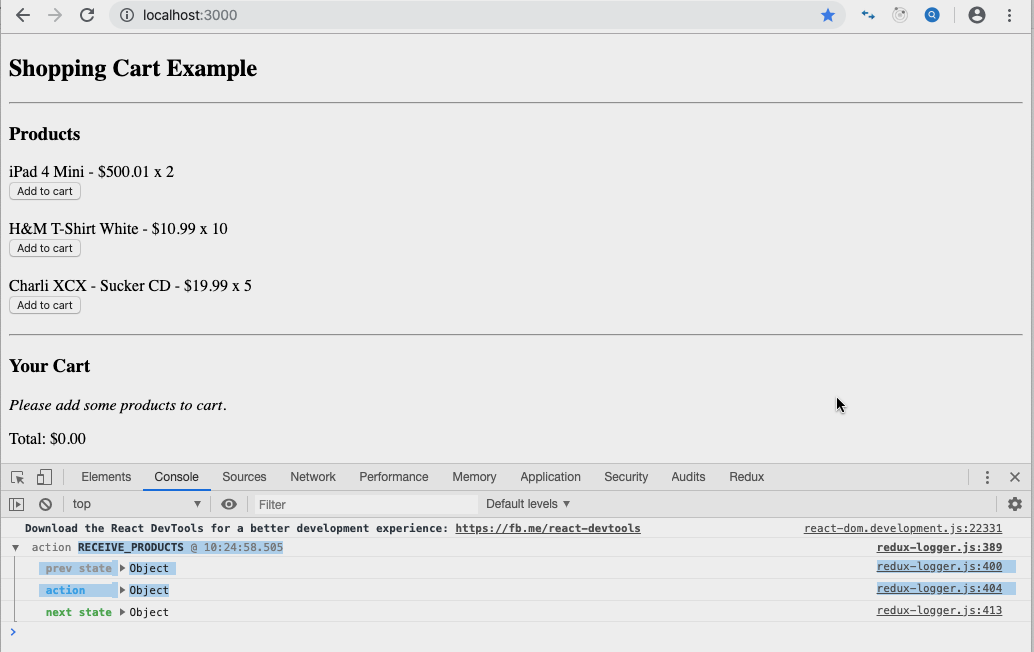
Open the code source into your text editor and then launch the local development server by running npm start. We should now see the shopping cart application up and running in the browser.
Open up the DevTools Console (Chrome) to verify this and also note Redux Logger is activated and working.
Excellent. Now, let’s take a quick yet savory sip of coffee before proceeding.
Application Structure and API Emulation
Simply by viewing the shopping cart’s display in the browser, we can ascertain two main sections: the products section and the cart section.
- The products section contains a list of products available to purchase including the title, price, and quantity. As well, there is an add to cart button to individually select products for the cart.
- When we click on the iPad 4 Mini add to cart button, we see that the cart sectiongets updated, including the total price. If we scroll down to the Logger in the DevTools and check on the previous state vs. the next state, the products inventory is updated and reflected accordingly.
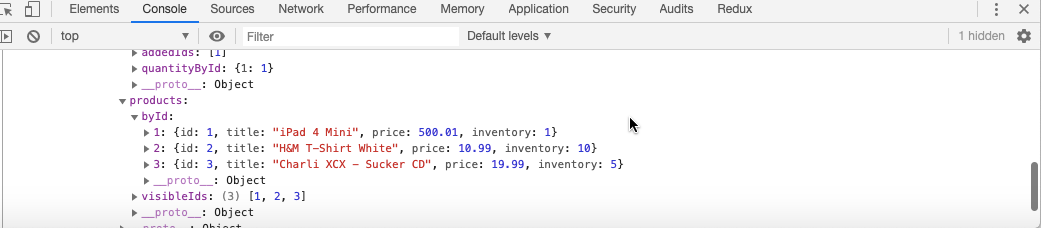
Next State Logger
But where are we receiving our product’s item data to begin with?
Good question. In the Redux shopping cart project’s API folder, we see a products.json file with a list of items and a shop.jsfile, grabbing and exporting the array from products.json.
The shop.js getProducts object’s property has an additional setTimeout function set to 100 milliseconds to simulate an Async-esque operation of fetching the shopping cart items from a real-world API scenario.
const TIMEOUT = 100

export default { getProducts: (cb, timeout) => setTimeout(() => cb(_products), timeout || TIMEOUT),

buyProducts: (payload, cb, timeout) => setTimeout(() => cb(), timeout || TIMEOUT)}
If we change the TIMEOUT const numerical value to 2000 (two seconds) and go back to the browser and refresh, we’ll notice the initial products render will now take two full seconds before displaying: const TIMEOUT = 2000.
Having now located and assessed our API data structure and retrieval setup, let’s fully trace the state retrieval management process of the products data in Redux.
Products: Actions, Reducers, and Thunk Middleware
If we go into the actions folder, the index.jscontains the following code:
import shop from '../api/shop'

import * as types from '../constants/ActionTypes'

const receiveProducts = products => ({

type: types.RECEIVE_PRODUCTS,

products})

export const getAllProducts = () => dispatch => {

shop.getProducts(products => {

dispatch(receiveProducts(products))

})}
The receiveProducts establishes the type types.RECEIVE_PRODUCTS and a payload of products.
This type is set up as const in the ActionTypes file. It’s then passed to a switch statement in two reducers, visibleIds and byIds, located in the reducer folder in products.js.
Maintaining focus on the actions, also notice a getAllProducts function which returns a dispatch function that grabs the products.json from the shop and sends the data payload of products into our receiveProducts action.
Back in the main index.jsfile located in our src folder, if we remove our Thunk middleware: const middleware = [ ];, we receive the following error:

Since the action performs an emulated real-life API fetch, set to a setTimeout(), we need to implement Thunk to correctly process and handle the async action.
Have a contemplative sip or two of coffee and return Thunk back to the middleware: const middleware = [thunk].
We’ve now managed to complete a full assessment of the product’s data API display: How and where we’re receiving the data and managing it in our application.
With this assessment, let’s proceed by setting up the architecture for the Context Provider pattern.
Context Provider Pattern Setup
Back in the project’s src folder, create a new folder called providers and file inside of the folder named products.provider.js.
In the products provider file, we’re going to set up a products provider pre-test demonstration with the following code:
import React,{createContext, useState} from 'react'

export const ProductsContext = createContext({
    test: ''
})

const ProductsProvider = ({children}) => {
    const [test] = useState('the products provider has been successfully connected :)')
    return (
        <ProductsContext.Provider value={{test}}>
            {children}
        </ProductsContext.Provider>
    )
}

export default ProductsProvider
The code above first brings in createContext to access the React Context API and the useState Hook. Then, we set our context to the constProductsContext where we initialize an object that takes the property of test which we set to an empty string.
After that, we create the ProductsProviderfunction which takes the object of children props as its parameter, passing the props of children through the Context.Provider.
Within, we initialize the state of test to a string: const [test] = useState(‘the products provider has been successfully connected :)’).
ProductsProvider then explicitly returns the ProductsContext to the Provider with a value of the object test passing in the state with the property of children.
Alright, let’s stop for a second. Might sound like a bit of mouthful, but it’s actually quite simple, except that it takes a bit of following in terms of how things are hooked up.
If you’re having trouble following, go back and take each step one at a time, slowly. Just make sure you follow the traces and it will make much more sense, otherwise, if you’ve managed to follow along up to this part, kudos and let’s keep moving!
The products Context is made aware of an empty string of test in which we initialize state by setting up a const test in the product’s Provider, also taking a string.
We can then set the state of test to the object property of test by setting the ProductsContext.Provider value={{test}} to an object receiving test.
Finally, pass the children over as a wrapper.
To enable the Provider to be wrapped around the component/container of our choosing, let’s simply go into the index.js filein thesrc folder, import the Provider, and wrap it around our application granting it access to the children.
import React from 'react'
import { render } from 'react-dom'
import { createStore, applyMiddleware } from 'redux'
import { Provider } from 'react-redux'
import { createLogger } from 'redux-logger'
import thunk from 'redux-thunk'
import reducer from './reducers'
import { getAllProducts } from './actions'
import App from './containers/App'
import ProductsProvider from './provider/products.provider'

const middleware = [thunk];
if (process.env.NODE_ENV !== 'production') {
  middleware.push(createLogger());
}

const store = createStore(
  reducer,
  applyMiddleware(...middleware)
)

store.dispatch(getAllProducts())

render(
  <ProductsProvider>
  <Provider store={store}>
    <App />
  </Provider>
  </ProductsProvider>,
  document.getElementById('root')
)
Note that the ProductsProvider wraps over the Redux store Provider illustrating it at the utmost top of our application’s state management tree.
Context Provider Pattern Test
Time to drink some more coffee and test if our new Context Provider is effectively working.
Go into the containers folder in productsContainer.js.We can now bring in the useContext Hook and destructure our test from the ProductsContext into our products container to see if it works.
import React,{useContext} from 'react'
import PropTypes from 'prop-types'
import { connect } from 'react-redux'
import { addToCart } from '../actions'
import { getVisibleProducts } from '../reducers/products'
import ProductItem from '../components/ProductItem'
import ProductsList from '../components/ProductsList'
import {ProductsContext} from '../provider/products.provider'

const ProductsContainer = ({ products, addToCart }) => {
  const {test} = useContext(ProductsContext)
  console.log(test)
return (
  <ProductsList title="Products">
    {products.map(product =>
      <ProductItem
        key={product.id}
        product={product}
        onAddToCartClicked={() => addToCart(product.id)} />
    )}
  </ProductsList>
)
    }
ProductsContainer.propTypes = {
  products: PropTypes.arrayOf(PropTypes.shape({
    id: PropTypes.number.isRequired,
    title: PropTypes.string.isRequired,
    price: PropTypes.number.isRequired,
    inventory: PropTypes.number.isRequired
  })).isRequired,
  addToCart: PropTypes.func.isRequired
}

const mapStateToProps = state => ({
  products: getVisibleProducts(state.products)
})

export default connect(
  mapStateToProps,
  { addToCart }
)(ProductsContainer)
Our productsContainer.jsshould now be updated to the code above. Upon browser refresh, DevTools now displays the test log successfully.
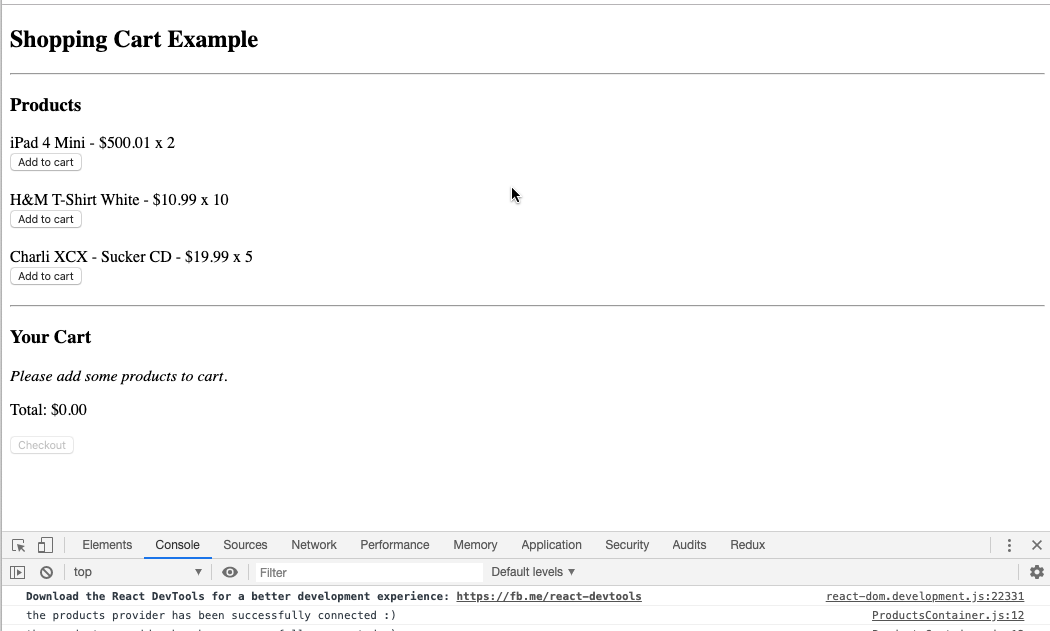
Very nice. Our Context Provider pattern for our product’s display is now fully connected and ready for implementation.
Let’s head back to our products.provider.js file and completely refactor the product’s data into our Context API setup.
Migrate Products Data to Context Provider
We’ll now update the products.provider.jscode. First, we’ll import the shop from our shop.js.
We’ll establish a new property in our context object for the products’ data and set it to an empty array. We’ll then import the useEffect Hook as well from React and create a products’ state also set to an empty array.
Then, we’ll leverage the useEffect Hook to render our product’s data by setting the hook to async to await grabbing the product’s data from our shop and setting the response to our products state.
We’ll leave an empty array in our useEffect so that the mounting life-cycle executes once, by default.
Finally, we’ll bring the product’s state into the Context Provider’s value object.
import React,{createContext, useState, useEffect} from 'react'
import shop from '../api/shop'

export const ProductsContext = createContext({
    test: '',
    products: []
})

const ProductsProvider = ({children}) => {
    const [test] = useState('the products provider has been successfully connected :)')
    const [products, setProducts] = useState([])
    useEffect(async ()=> {
        const response = await shop.getProducts(products => products)
        setProducts(response)
},[])
    return (
        <ProductsContext.Provider value={{test, products}}>
            {children}
        </ProductsContext.Provider>
    )
}

export default ProductsProvider
Final Implementation and Async vs. Promises
Saving the newly updated code, let’s refill our coffee cups and head back to the productsContainer.js file.
Let’s update our products’ data to be called from our Products Provider instead of our Redux Provider by destructuring products off the ProductsContext and removing products destructured props from the ProductsContainer, as shown below.
import React,{useContext} from 'react'
import PropTypes from 'prop-types'
import { connect } from 'react-redux'
import { addToCart } from '../actions'
import { getVisibleProducts } from '../reducers/products'
import ProductItem from '../components/ProductItem'
import ProductsList from '../components/ProductsList'
import {ProductsContext} from '../provider/products.provider'

const ProductsContainer = ({  addToCart }) => {
  const {test, products} = useContext(ProductsContext)
  console.log(test)
return (
  <ProductsList title="Products">
    {products.map(product =>
      <ProductItem
        key={product.id}
        product={product}
        onAddToCartClicked={() => addToCart(product.id)} />
    )}
  </ProductsList>
)
    }
ProductsContainer.propTypes = {
  products: PropTypes.arrayOf(PropTypes.shape({
    id: PropTypes.number.isRequired,
    title: PropTypes.string.isRequired,
    price: PropTypes.number.isRequired,
    inventory: PropTypes.number.isRequired
  })).isRequired,
  addToCart: PropTypes.func.isRequired
}

const mapStateToProps = state => ({
  products: getVisibleProducts(state.products)
})

export default connect(
  mapStateToProps,
  { addToCart }
)(ProductsContainer)
After saving everything, we will now run into the following error.

No need to panic, this is expected behavior. Since setTimeout does not return a promise, async await will not execute accordingly to prevent JavaScript from running until the setTimeout interval value is completed.
To maintain the coded simulation effect of this API, let’s go back to the shop.jsfile and promisify the code.
Let’s create an async anonymous function and wrap a new Promise around the getProduct data retrieval property.
* Mocking client-server processing */

import _products from './products.json'

const TIMEOUT = 100

export default {

getProducts: async ()=> new Promise((cb, timeout) => setTimeout(() => cb(_products), timeout || TIMEOUT)),

buyProducts: (payload, cb, timeout) => setTimeout(() => cb(), timeout || TIMEOUT)
}
With the new promise patch modification, getProducts will now return a promise for our async useEffect to retrieve.
Saving this latest update, our product’s shopping cart data will once again successfully be displayed upon mounting.
Congratulations. We have now migrated our initial product’s data display from Redux into the newly instated Context Provider pattern.
Take a congratulatory sip or three of coffee and let’s do some final code clean-up and review.
Final Refactor and Conclusion
Back in our productsContainer.js file, we can delete our mapStateToProps const and remove it from our connect since our products’ data retrieval is no longer being managed by Redux.
export default connect(null,{ addToCart })(ProductsContainer)
Our application will continue to work as is it did before, demonstrating a successful refactor.
Just like Connect() is a higher-order component that wrapped around our productsContainer component to pass over the data state to props, our ProductsProvider now acts in its place.
The Products Context passes the children props of the products data state as the Products Provider wraps around the main application in our index.jsby being placed at the top of the app tree.
Although both implementations are effective, this guide in no way favors one over the other as an ultimate go-to.
It simply depends on each application and these are the decisions we need to think about carefully and make to achieve the most effective state management path for our applications.
This guide has purely been intended to simulate a refactor process and analysis of working with Context and Redux as a basic starting point.
If you’d like an additional exercise idea, you can go ahead and find something else in the Redux shopping cart example to refactor.
If you have any questions or comments, please feel free to leave them below. You can also check out the full source code or video tutorial in the links at the top of this post.
Thank you for checking this out and I hope you found some of this helpful!
#React #Redux #React Hook #JavaScript #Programming