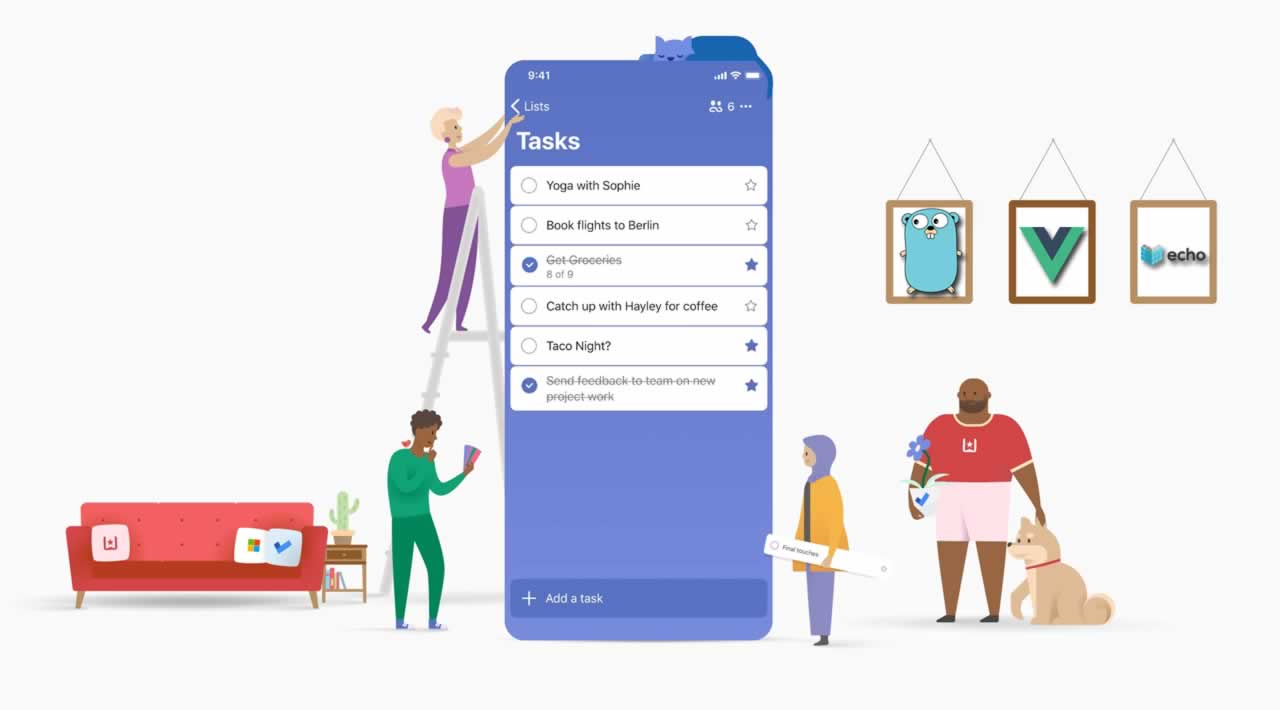
Create a Simple To-Do App With Go, Echo and Vue.js
In this tutorial we’ll create a very simple “todo” application. When finished we will be able to create tasks with a title, display the newly created tasks and delete them.
The application backend will be written using the Go programming language. Go was created by Google and though it isn’t the most popular language in the world, it is steadily gaining traction. Go is very lightweight, easy to learn and fast. This tutorial assumes that you have at least a simple understanding of the language and that you have Go installed and configured on your machine.
To help keep boilerplate to a minimum we will use a web application framework called Echo. Echo is micro framework for Go similar to something like Slim PHP or Lumen. You should be somewhat familiar with using a micro framework and the concept of using routes to handle HTTP requests.
All of our tasks will be stored in a SQLite database. SQLite is a lightweight alternative to something like MySQL or PostgreSQL. The data is stored in a single file usually kept in the same directory as the application rather than on a server.
Finally the frontend will be written using HTML5 and the popular VueJS Javascript framwork. A basic understanding of VueJS is required.
Our app will be broken out into four basic pieces. We’ll have our main package which will have the basic setup for our routes and database. Next we’ll have a few handlers connected to our routes. Of course we’ll have a Task model as well which will use SQLite for persistence. Finally the app will have a simple index.html file containing our HTML5 and VueJS client code. Let’s dig in!
Routes and Database
In our main file we’ll start by importing a few useful packages. “database/sql” is included in the Go standard library but Echo and the go SQLite library need to be fetched from Github.
$ go get github.com/labstack/echo
$ go get github.com/mattn/go-sqlite3
Let’s also create a directory for our project.
$ cd $GOPATH/src
$ mkdir go-echo-vue && cd go-echo-vue
Now lets start by creating a few routes. Create a file caled “todo.go” in the top level of our app directory. At the top let’s import the Echo framework packages.
// todo.go
package main

import (
    "github.com/labstack/echo"
    "github.com/labstack/echo/engine/standard"
)
The next step is to create a “main” function which is a required function for any Go application.
// todo.go
func main() { }
In order for our VueJS frontend to talk to the backend and start creating tasks, we need to setup some basic routes. The first thing we need to do is create a new instance of Echo. Then we simply define some routes using the built-in functions. If you’ve used any other web framework this should look somewhat familiar.
A route takes a pattern to match as its first argument and then a handler function. In this case the function must implement the Echo.HandlerFunc interface.
Inside our “main” function we can now create some basic routes for our frontend to talk to.
// todo.go
func main() {
    // Create a new instance of Echo
    e := echo.New()

    e.GET("/tasks", func(c echo.Context) error { return c.JSON(200, "GET Tasks") })
    e.PUT("/tasks", func(c echo.Context) error { return c.JSON(200, "PUT Tasks") })
    e.DELETE("/tasks/:id", func(c echo.Context) error { return c.JSON(200, "DELETE Task "+c.Param("id")) })

    // Start as a web server
    e.Run(standard.New(":8000"))
}
These routes don’t do much but echo out some static text. We will improve upon these later.
The final line starts the Echo application using the “Run” function and tells it to use Go’s standard HTTP server.
To test the routes we need to first compile our application and run it then we can test the routes using a popular Chrome extension called Postman.
$ go build todo.go
$ ./todo
After building and starting the app, open Postman and point it to localhost:8000 and test the “/tasks” routes using the various HTTP verbs we defined (GET, PUT, DELETE). If everything worked you should see the following results.


Next we’ll initialize the database and specify a filename of “storage.db”. If this file doesn’t already exist, the driver will go ahead and create it for us. Once the database is create we need to run our migrations. In this case we just create a migrate function which I’ll explain in a bit.
// todo.go
package main
import (
    "database/sql"

    "github.com/labstack/echo"
    "github.com/labstack/echo/engine/standard"
    _ "github.com/mattn/go-sqlite3"
)
At the top of our “main” function add these two lines.
// todo.go
func main() {

    db := initDB("storage.db")
    migrate(db)
After our main function we need to define the initDB and migrate functions.
// todo.go
func initDB(filepath string) *sql.DB {
    db, err := sql.Open("sqlite3", filepath)

    // Here we check for any db errors then exit
    if err != nil {
        panic(err)
    }

    // If we don't get any errors but somehow still don't get a db connection
    // we exit as well
    if db == nil {
        panic("db nil")
    }
    return db
}

func migrate(db *sql.DB) {
    sql := `
    CREATE TABLE IF NOT EXISTS tasks(
        id INTEGER NOT NULL PRIMARY KEY AUTOINCREMENT,
        name VARCHAR NOT NULL
    );
    `

    _, err := db.Exec(sql)
    // Exit if something goes wrong with our SQL statement above
    if err != nil {
        panic(err)
    }
}
These two functions are for creating the database and then migrating the schema. “initDB” will try and open a db file or create it if it doesn’t exist. If those fail, the program will exit because we really can’t do anything without a db.
“migrate” just runs some SQL against the database and is pretty self explanatory. If the tasks table doesn’t exist, create it. If that fails the program exits.
To test if this works we need to build the app again and run it.
$ go build todo.go
$ ./todo
If you open another terminal window and list the contents of our app directory you should now see a file called “storage.db”. Run the following to make sure the file is a valid SQLite file.
$ sqlite3 storage.db
If you don’t have this command installed, grab a copy of SQLite from the official site for your specific OS.
This command should bring up a prompt. At the prompt type “.tables” and then hit “Enter”. You should see the “tasks” table listed. To exit the prompt type “.quit”.

Handlers
We’ve already created some endpoints for our frontend to interact with. Now we need to create or delete a task then return a result to the client. This is accomplished by a few handler functions.
In our “todo.go” file we need to import a new package. This is a handlers package that we will create ourselves.
package main
import (
    "database/sql"
    "go-echo-vue/handlers"

    "github.com/labstack/echo"
    "github.com/labstack/echo/engine/standard"
    _ "github.com/mattn/go-sqlite3"
)
Next we need to set our routes to use the new handlers we are about to create.
// todo.go
    e := echo.New()

    e.File("/", "public/index.html")
    e.GET("/tasks", handlers.GetTasks(db))
    e.PUT("/tasks", handlers.PutTask(db))
    e.DELETE("/tasks/:id", handlers.DeleteTask(db))

    e.Run(standard.New(":8000"))
}
Looking at this code, you may notice that the handlers listed don’t actually follow the function signature required by Echo. Instead these are functions that return a function that satisfy that interface. This is a trick I used so we can pass around the db instance from handler to handler without having to create a new one each time we want to use the database. It’ll be come more clear later.
We’ve also added an extra route. This is a static html file that will contain our VueJS client code. We can serve up static files using the ‘File’ function. In this case we’ll use it to serve up our client code at the “/” endpoint.
Now lets create a directory called ‘handlers’ and inside that directory we’ll create a file called “tasks.go”. Next we need to import a few packages that we’ll need.
// handlers/tasks.go
package handlers

import (
    "database/sql"
    "net/http"
    "strconv"

    "github.com/labstack/echo"
)
This next line is just a small trick which allows us to return arbitary JSON in our response as you’ll see later. It’s just a map with strings as keys and anything as values. In Go, the “interface” keyword represents anything from a primitive datatype to a user defined type or struct.
// handlers/tasks.go
type H map[string]interface{}
The meat of this file are the handler functions. They all take a db connection as an argument, but remember to be a proper handler used by the Echo router, the function needs to implement the Echo.HandlerFunc interface. We accomplish this by returning an anonymous function that matches the interface signature. That function is now able to use the db connection and pass it to our models.
Just to get things working however, we won’t deal with the database. We’ll just return some fake data.
// handlers/tasks.go

// GetTasks endpoint
func GetTasks(db *sql.DB) echo.HandlerFunc {
    return func(c echo.Context) error {
        return c.JSON(http.StatusOK, "tasks")
    }
}

// PutTask endpoint
func PutTask(db *sql.DB) echo.HandlerFunc {
    return func(c echo.Context) error {
        return c.JSON(http.StatusCreated, H{
            "created": 123,
    }
}

// DeleteTask endpoint
func DeleteTask(db *sql.DB) echo.HandlerFunc {
    return func(c echo.Context) error {
        id, _ := strconv.Atoi(c.Param("id"))
        return c.JSON(http.StatusOK, H{
            "deleted": id,
        })
    }
}
The Go http package gives us some handy constants to use for HTTP status codes. For example we use http.StatusCreated for our PUT response. Each of these handlers now return JSON formatted responses. The last function “DeleteTask” takes an id parameter. We us the strconv package and the Atoi (alpha to integer) function to make sure the id is cast to an integer. This will allow us to use it correctly when querying tasks by id in the database.
To test these handlers rebuild and run the app. We can test again by using Postman.


Model
Now that we have some handlers we need to actually wire our application up to use the database. Instead of just making direct database calls from our handlers, we will keep our code nice and tidy by abstracting the database logic out into a model.
First lets incorporate the references to our new model in our recently created handlers file.
Lets import the models package that we are about to create.
// handlers/tasks.go
package handlers

import (
    "database/sql"
    "net/http"
    "strconv"

    "go-echo-vue/models"

    "github.com/labstack/echo"
)
Then add the calls into our handler functions.
// handlers/tasks.go

// GetTasks endpoint
func GetTasks(db *sql.DB) echo.HandlerFunc {
    return func(c echo.Context) error {
        // Fetch tasks using our new model
        return c.JSON(http.StatusOK, models.GetTasks(db))
    }
}

// PutTask endpoint
func PutTask(db *sql.DB) echo.HandlerFunc {
    return func(c echo.Context) error {
        // Instantiate a new task
        var task models.Task
        // Map imcoming JSON body to the new Task
        c.Bind(&task)
        // Add a task using our new model
        id, err := models.PutTask(db, task.Name)
        // Return a JSON response if successful
        if err == nil {
            return c.JSON(http.StatusCreated, H{
                "created": id,
            })
        // Handle any errors
        } else {
            return err
        }
    }
}

// DeleteTask endpoint
func DeleteTask(db *sql.DB) echo.HandlerFunc {
    return func(c echo.Context) error {
        id, _ := strconv.Atoi(c.Param("id"))
        // Use our new model to delete a task
        _, err := models.DeleteTask(db, id)
        // Return a JSON response on success
        if err == nil {
            return c.JSON(http.StatusOK, H{
                "deleted": id,
            })
        // Handle errors
        } else {
            return err
        }
    }
}
Now in the “PutTask” function you’ll see “c.Bind”. This will take a JSON formatted body sent in a PUT request and map it to a Task struct. The Task struct will be defined in our models package.
You’ll also notice some error checking. The Tasks model will have functions that will return data or error depending on whether or not the actions were successful. Our handlers need to respond accordingly.
Now we can create our model. This is what will actually talk to the database. Create a directory called “models” and in that directory create a file called “tasks.go”.
Again we import the packages we need.
// models/tasks.go
package models

import (
    "database/sql"

    _ "github.com/mattn/go-sqlite3"
)
Next we need to create a Task type which is a struct with two fields, ID and Name. Go lets you add meta data to variables using backticks. In this case we’re just defining what we want each field to look like once it is converted to JSON. This also allows the “c.Bind” function from earlier in our handlers to know where to map JSON data when populating a new Task.
The second type is just a collection of Task items. We’ll use this when we return all the tasks that are in the database.
// models/tasks.go

// Task is a struct containing Task data
type Task struct {
    ID   int    `json:"id"`
    Name string `json:"name"`
}

// TaskCollection is collection of Tasks
type TaskCollection struct {
    Tasks []Task `json:"items"`
}
Get Tasks simply selects all tasks from the database, shoves them into a new collection and returns them.
// models/tasks.go

func GetTasks(db *sql.DB) TaskCollection {
    sql := "SELECT * FROM tasks"
    rows, err := db.Query(sql)
    // Exit if the SQL doesn't work for some reason
    if err != nil {
        panic(err)
    }
    // make sure to cleanup when the program exits
    defer rows.Close()

    result := TaskCollection{}
    for rows.Next() {
        task := Task{}
        err2 := rows.Scan(&task.ID, &task.Name)
        // Exit if we get an error
        if err2 != nil {
            panic(err2)
        }
        result.Tasks = append(result.Tasks, task)
    }
    return result
}
PutTask inserts a new task into the database and returns the new id on success and panics on failure.
// models/tasks.go

func PutTask(db *sql.DB, name string) (int64, error) {
    sql := "INSERT INTO tasks(name) VALUES(?)"

    // Create a prepared SQL statement
    stmt, err := db.Prepare(sql)
    // Exit if we get an error
    if err != nil {
        panic(err)
    }
    // Make sure to cleanup after the program exits
    defer stmt.Close()

    // Replace the '?' in our prepared statement with 'name'
    result, err2 := stmt.Exec(name)
    // Exit if we get an error
    if err2 != nil {
        panic(err2)
    }

    return result.LastInsertId()
}
DeleteTask does what you expect. Deletes a task.
// models/tasks.go

func DeleteTask(db *sql.DB, id int) (int64, error) {
    sql := "DELETE FROM tasks WHERE id = ?"

    // Create a prepared SQL statement
    stmt, err := db.Prepare(sql)
    // Exit if we get an error
    if err != nil {
        panic(err)
    }

    // Replace the '?' in our prepared statement with 'id'
    result, err2 := stmt.Exec(id)
    // Exit if we get an error
    if err2 != nil {
        panic(err2)
    }

    return result.RowsAffected()
}
Notice that we are using prepared SQL statements in our model functions by way of “db.Prepare”. There are two reasons for this. First, a prepared statement can be compiled and cached so executing multiple times is faster. Second and most importantly is that prepared statements prevent against SQL injection attacks.
We can once again test using Postman. First we’ll check the “GET /tasks” route. You should see JSON formatted response with “tasks” set to null.

Now let’s add a task. In Postman, switch the method to “PUT” then click the “Body” tab. Check “raw” and select JSON (application/json) as the type. In the text box enter the following.
{
    "name": "Foobar"
}
You should get a ‘created’ response back similar to this.

Take note of the id that is returned because we need it to test the “DELETE /tasks” route. Just like in the previous examples set the method to “DELETE” and point Postman to “/tasks/:id”. Replace “:id” with the id return in our previous test. You should get a successful “deleted” message.

If all went well, now you can check out “GET /tasks” once again and you should see “null”.
Frontend
Finally we have our frontend. For simplicity’s sake we include our Javascript code in the same file as our HTML markup. The markup is simple. We include a few libraries like Bootstrap, JQuery and of course VueJS. The UI is just a input field, some buttons and an unordered list for our tasks. Create a directory called ‘public’ and inside that directory create a file called “index.html”
<!-- public/index.html -->

<html>
    <head>
        <meta http-equiv="content-type" content="text/html; charset=utf-8">

        <title>TODO App</title>

        <!-- Latest compiled and minified CSS -->
        <link rel="stylesheet" href="https://maxcdn.bootstrapcdn.com/bootstrap/3.3.6/css/bootstrap.min.css">

        <!-- Font Awesome -->
        <link rel="stylesheet"  href="https://maxcdn.bootstrapcdn.com/font-awesome/4.6.3/css/font-awesome.min.css">

        <!-- JQuery -->
        <script src="https://cdnjs.cloudflare.com/ajax/libs/jquery/2.2.4/jquery.min.js"></script>

        <!-- Latest compiled and minified JavaScript -->
        <script src="https://maxcdn.bootstrapcdn.com/bootstrap/3.3.6/js/bootstrap.min.js"></script>

        <!-- Vue.js -->
        <script src="http://cdnjs.cloudflare.com/ajax/libs/vue/1.0.24/vue.min.js"></script>
        <script src="https://cdnjs.cloudflare.com/ajax/libs/vue-resource/0.7.0/vue-resource.min.js"></script>
    </head>
    <body>
        <div class="container">
            <div class="row">
                <div class="col-md-4">
                    <h2>My Tasks</h2>
                    <ul class="list-group">
                        <li class="list-group-item" v-for="task in tasks">
                            {{ task.name }}
                            <span class="pull-right">
                                <button class="btn btn-xs btn-danger" v-on:click="deleteTask($index)">
                                    <i class="fa fa-trash-o" aria-hidden="true"></i>
                                </button>
                            </span>
                        </li>
                    </ul>
                    <div class="input-group">
                        <input type="text"
                            class="form-control"
                            placeholder="New Task"
                            v-on:keyup.enter="createTask"
                            v-model="newTask.name">
                        <span class="input-group-btn">
                            <button class="btn btn-primary" type="button" v-on:click="createTask">Create</button>
                        </span>
                    </div><!-- /input-group -->
                </div>
            </div>
        </div>
    </body>
</html>
If you rebuild and run the application you should be able to see the new UI in your browser at http://localhost:8000.

Right under the final “div” tag we can place our VueJS code in a “script” tag. The VueJS code is slightly more complicated but pretty self explanatory as well. We have a few methods for creating and deleting tasks as well as a method that is run on initialization (created). This fetches all the tasks currently stored in the database.
In order to communicate with our backend we need to use an HTTP client. In this case we’ll use vue-resource. Once that is included we can use it by referencing “this.$http” and then whatever HTTP verb (get, put, etc…) we want to use.
    <!-- public/index.html -->

        <script>
            new Vue({
                el: 'body',

                data: {
                    tasks: [],
                    newTask: {}
                },

          // This is run whenever the page is loaded to make sure we have a current task list
                created: function() {
        // Use the vue-resource $http client to fetch data from the /tasks route
                    this.$http.get('/tasks').then(function(response) {
                        this.tasks = response.data.items ? response.data.items : []
                    })
                },

                methods: {
                    createTask: function() {
                        if (!$.trim(this.newTask.name)) {
                            this.newTask = {}
                            return
                        }

             // Post the new task to the /tasks route using the $http client
                        this.$http.put('/tasks', this.newTask).success(function(response) {
                            this.newTask.id = response.created
                            this.tasks.push(this.newTask)
                            console.log("Task created!")
                            console.log(this.newTask)
                            this.newTask = {}
                        }).error(function(error) {
                            console.log(error)
                        });
                    },

                    deleteTask: function(index) {
             // Use the $http client to delete a task by its id
                        this.$http.delete('/tasks/' + this.tasks[index].id).success(function(response) {
                            this.tasks.splice(index, 1)
                            console.log("Task deleted!")
                        }).error(function(error) {
                            console.log(error)
                        })
                    }
                }
            })
        </script>
Run
Now that our application is complete, we need to compile it and run it.
$ go build todo.go
$ ./todo
Once the application is running, we can point our browser to http://localhost:8000.

Conclusion
In this tutorial we learned how to create a simple Go backend using the Echo framework and a simple frontend using VueJS. Hopefully this has piqued your curiosity of the Go language and will inspire you to build even more complex web applications.
#Go #Golang #Vuejs #Echo