How to Creat Drag and Drop List with React and HTML
Creating a Drag and Drop List

What goes into building a drag and drop component in 2019?
The drag and drop interaction was invented in the 1970’s by Jef Raskin as a part of the Macintosh project. That’s 40 years ago! So how come that making things draggable on the web is still so painful? We were recently looking for answers since our component library needs to support a sortable list and slider.
HTML Drag and Drop API
There is an official HTML drag and drop API, it was introduced in the HTML5 standard and it comes with eight different events:
- drag
- dragend
- dragenter
- dragexit
- dragleave
- dragover
- dragstart
- drop
Here is a little pop quiz for you. What’s the difference between dragexit and dragleave? Not sure? It takes some imagination to implement eight different events for something that could be described by three user actions:
- pressing the mouse button
- moving the mouse
- releasing the mouse button
That is not the only strange thing about this API. Some other “glitches”:
- no support for touch devices (ugh)
- limited styling options for dragged items
- the API is wildly inconsistent across browsers
Yes, Internet Explorer 6 is the culprit here. If we don’t want to settle with no mobile support and other shortcomings, what else we can do?
(The dragexit event is fired when an element is no longer the drag operation’s immediate selection target. The dragleave event is fired when a dragged element or text selection leaves a valid drop target.)
Tracking Basic Actions
Fortunately, there are still good old mouse and touch events:
- mousedown (touchstart)
- mousemove (touchmove)
- mouseup (touchend, touchcancel)
They also nicely translate into our three drag and drop actions.
Mouse/Finger Coordinates
Another information we need is the coordinates of the mouse/finger at any given point. That’s very straightforward since all mouse/touch events pass them through. Mouse events:
event.clientXevent.clientY
Touch events:
event.touches[0].clientXevent.touches[0].clientY
Measuring Elements
We need to measure things. There is a great API with a horrible name. Let me introduce you Element.getBoundingClientRect. Call it on any element and it returns its dimensions and locations:
{
  "width": 500,
  "height": 100,
  "top": 674,
  "right": 800,
  "bottom": 774,
  "left": 1300
}
Positioning
As user “moves” an item around, we need to keep changing its position to actually create the illusion of moving. The first naive solution could look like this:
position: fixed;
top: 100px;
left: 200px;
As user moves the item, we apply position fixed and keep updating its top and left values. This works reasonably well. However, the better solution is using CSS transforms:
transform: translate(10px, 20px);
transition-duration: 1s;
It’s GPU accelerated, requires less work from the browser and we can also combine it with transition-duration to animate it.
Other DOM APIs
There are many other useful DOM APIs to deal with scrolling, container manipulation or optimizing the browser workload:
window.getComputedStyle(ELement);
window.scrollTo(X, Y);
window.pageXOffset;
window.pageYOffset;
window.innerHeight;
Element.contains();
Element.scrollTop;
requestAnimationFrame(() => {});
ReactDOM.createPortal
There is also one very useful React API - Portals.
Portals provide a first-class way to render children into a DOM node that exists outside the DOM hierarchy of the parent component.
Why would we need such a thing? It’s the only way to make the positioning of dragged items reliable.
render() {
  return ReactDOM.createPortal(
    <li>Dragged</li>,
    document.body
  );
}
In this example, we “portal” the dragged list item to the bottom of document body. This way the item has no parents and there are no inherited CSS properties that could impact its position (like CSS transforms). You can often see this technique being used for modals or notifications.
The Algorithm
We have all the tools and APIs we need. Now it’s time to put it all into a single algorithm.

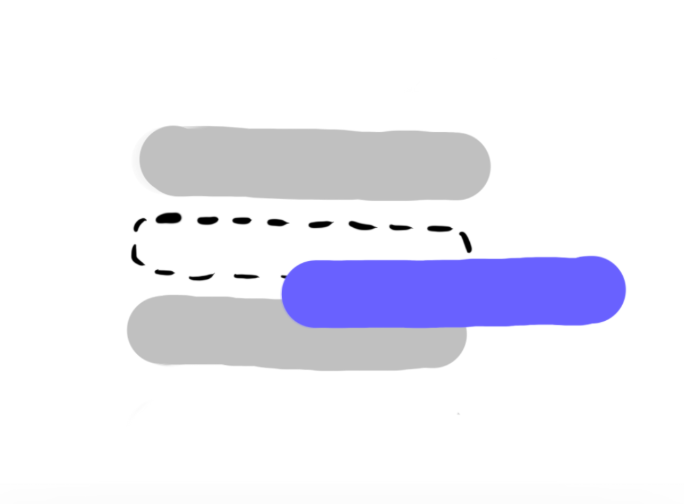
user starts dragging the second item
User clicks on the second item and starts dragging it. We set its visibility to hidden so it preserves the current space occupied by the item and at the same time we portal it to the root. We give it an initial top and left position and as user keeps moving, we update the translate values.

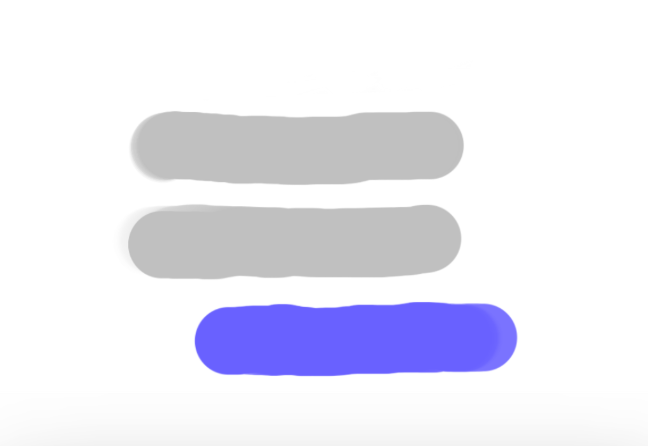
User reaches the boundary of the third item
The user reached the boundary of the third item so we want to move the third item to the second position. All we need to do is applying a negative translate Y value. We should also add the transition property to animate it.
So far we didn’t change the DOM order of our items. That happens only after the user finishes the drop.
There are many ways how you could go about it but this algorithm is pretty straightforward and works.
Accessibility
What does it mean? You should be able to control our component only through the keyboard and screen reader. There is a set of keyboard shortcuts we implement:
tabandshift+tabto focus a itemspaceto lift or drop the itemjorarrow downto move the lifted item downkorarrow upto move the lifted item upescapeto cancel the lift and return the item to its initial position
We also need to provide audible cues through the screen reader. First, we should describe each item so it’s clear that you can move it:
<li aria-roledescription="This is a draggable item. Press space to lift.">
  Item 1
</li>
Then we provide additional messages as the user goes through the interaction:
<div aria-live="assertive" role="log" aria-atomic="true">
  You have lifted item at position 5. Press j to move it down...
</div>
This is called ARIA live region. Whatever you set its content to gets announced by the screen reader. Check this article for more details.
Little Things
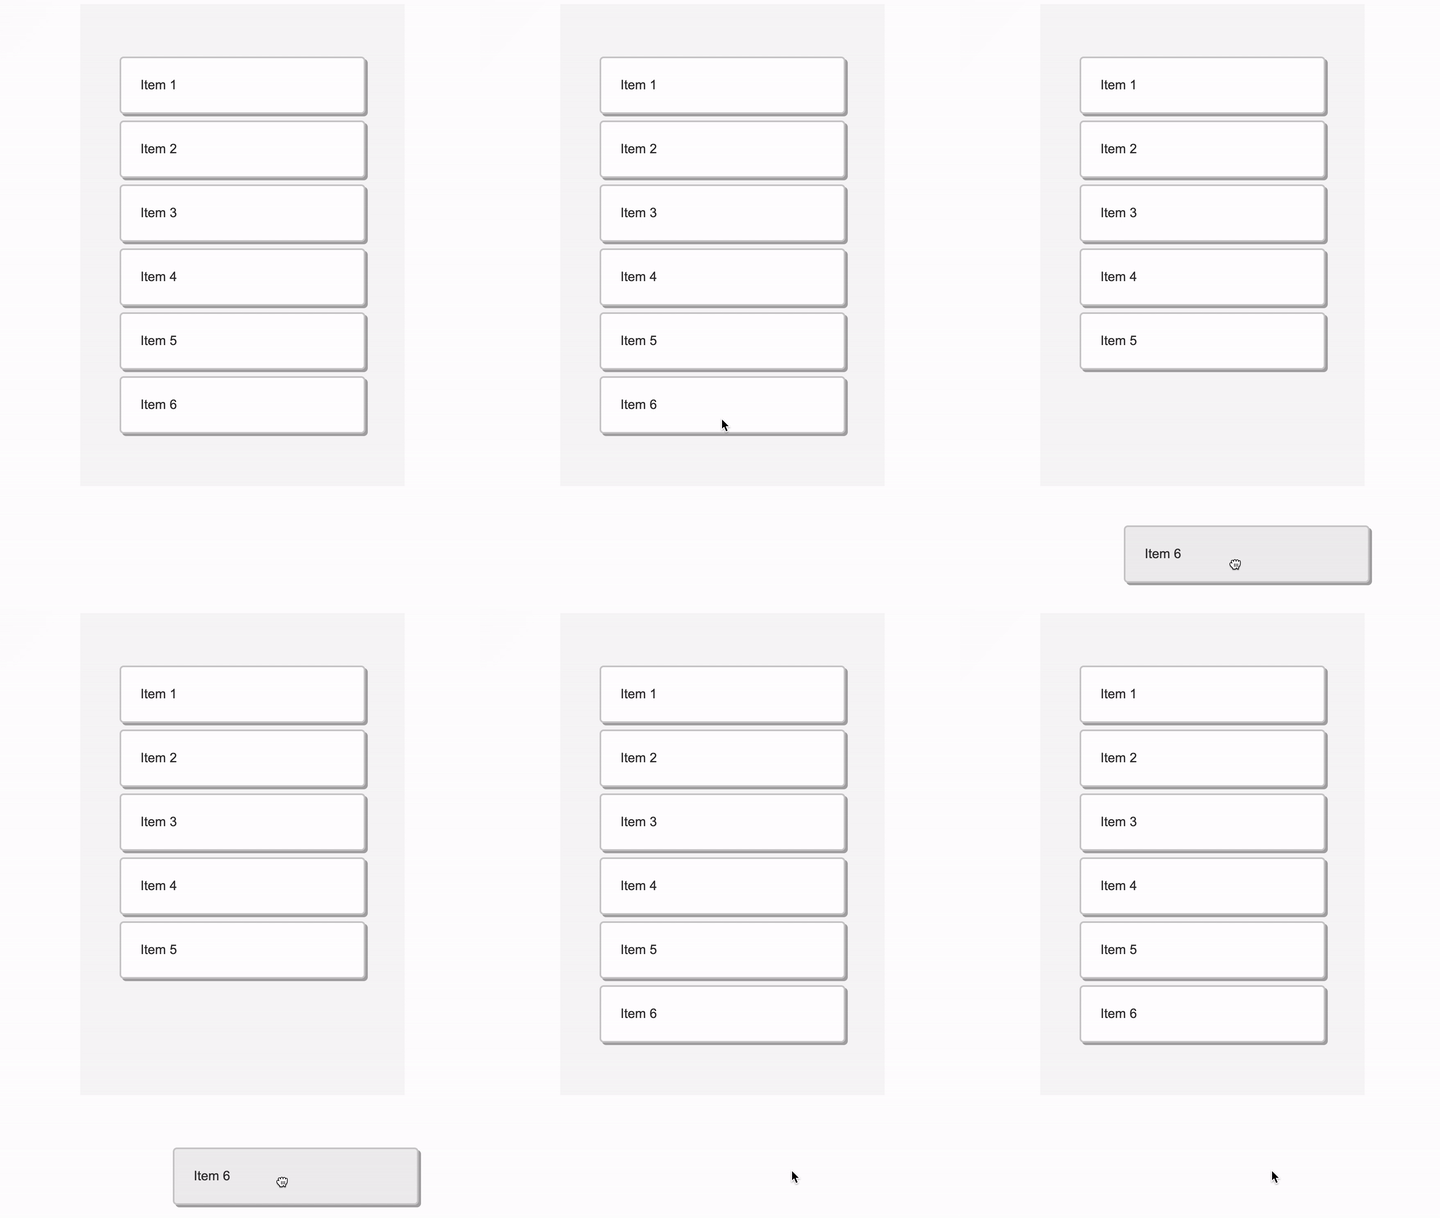
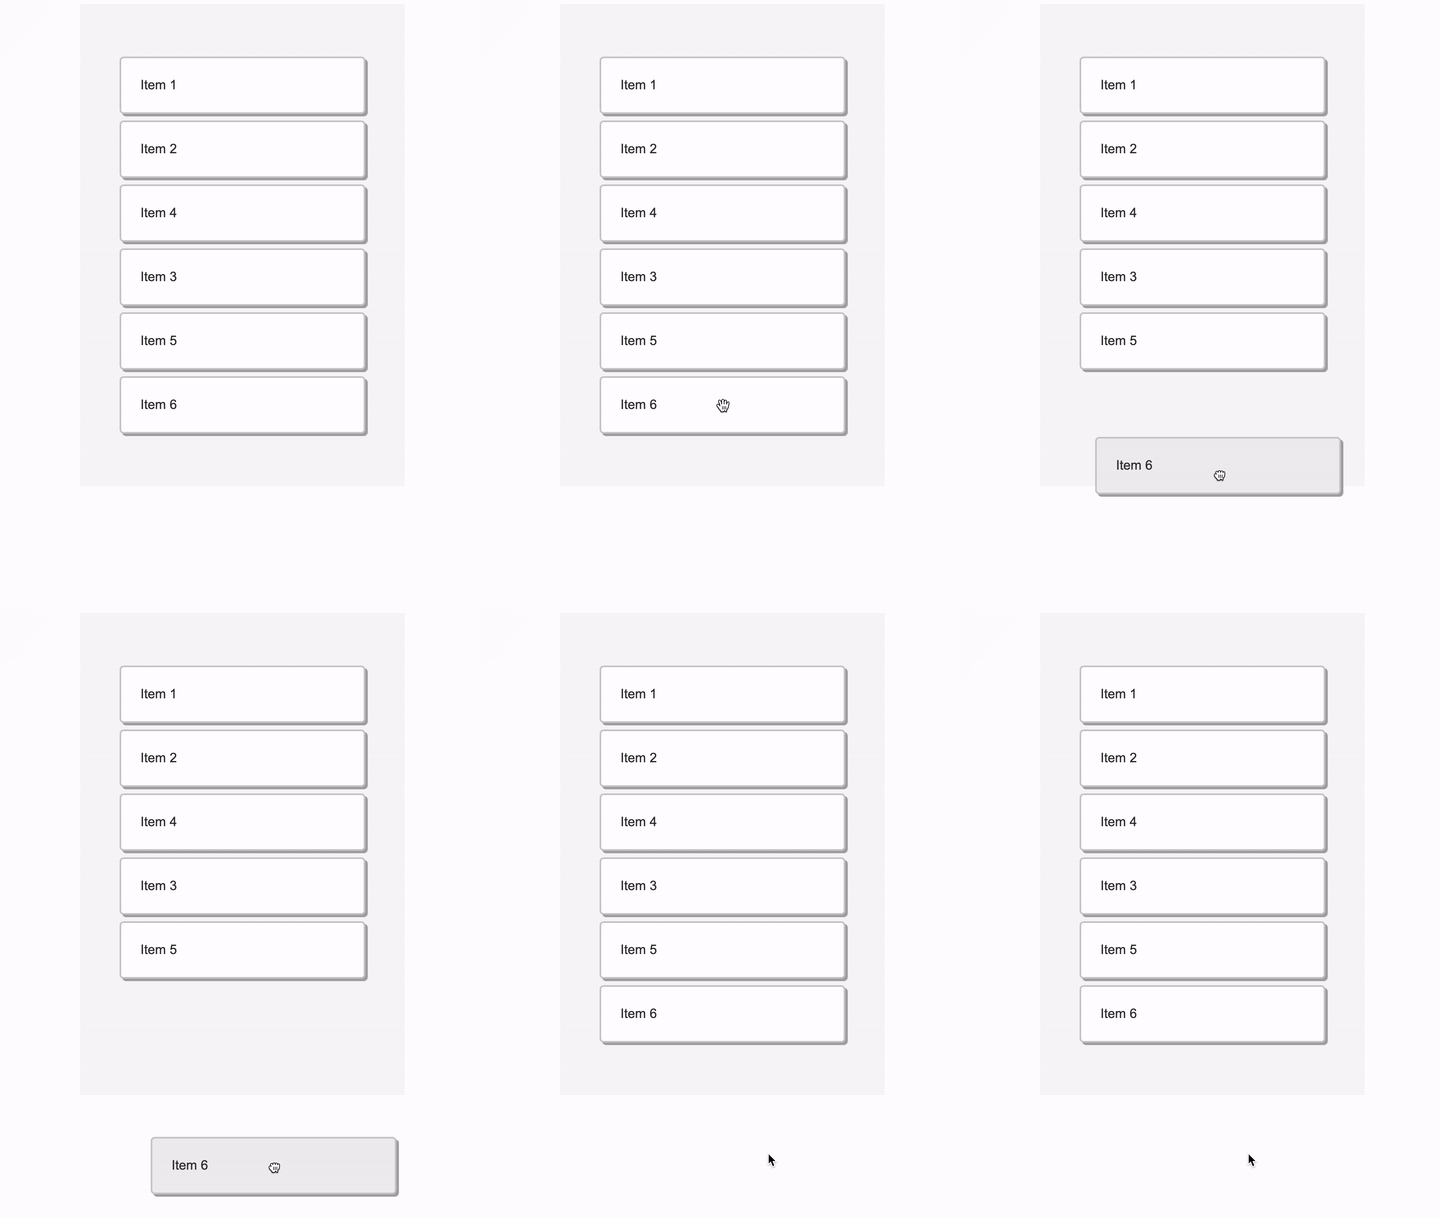
There are some little things that you might now even notice but they make the whole interaction nicer. For example, the drop animation. There is none here:

No drop animation
On the other hand, we use
transition: 0.3s cubic-bezier(0.2, 1, 0.1, 1);
bellow to make the item fly back which gives user a nice additional feedback:

The drop is animated.
And there are many other small interactions like this to consider.
Testing
Any drag and drop library needs to rely on a multiple DOM APIs. If you want to write unit tests, you would have to mock out all of them. What are you even testing at that point? Focusing on end to end tests might be a better solution. With Puppeteer you can write short and descriptive tests. Here we are testing the whole interaction using the mouse:
test('dnd the first item to second position', async () => {
  await page.mouse.move(190, 111);
  await page.mouse.down();
  await page.mouse.move(190, 190);
  await page.mouse.up();
  expect(await getListItems(page)).toEqual([
    'Item 2',
    'Item 1',
    'Item 3',
    'Item 4',
    'Item 5',
    'Item 6',
  ]);
});
We just move the mouse around and check the order of DOM elements at the end. The test for keyboard is similar:
test('move the first item to second position', async () => {
  await page.keyboard.press('Tab');
  await page.keyboard.press('Space');
  await page.keyboard.press('ArrowDown');
  await page.keyboard.press('Space');
  expect(await getListItems(page)).toEqual([
    'Item 2',
    'Item 1',
    'Item 3',
    'Item 4',
    'Item 5',
    'Item 6',
  ]);
});
Gotchas
There is a class of bugs that regular tests might not cover. Since we deal with a lot of positioning it’s quite easy to misplace some items by a few pixels. We can utilize visual regression testing with jest-image-snapshot. It takes an image (snapshot) of our functioning component, takes another one on the subsequent run and compares them pixel by pixel. If there is any difference, the test fails. Be aware that each OS renders fonts differently. You might need to use docker to keep the tests reliable.
Internet Explorer
Frankly, it would be surprising to open IE for the first time and see everything working. Fortunately, the issues are relatively minor:
transform: translatedoesn’t work for table rowswindow.scrollBydoesn’t existwindow.scrollYneeds to be replaced bywindow.pageYOffsetwindow.scrollneeds to be replacedwindow.scrollTo
Safari and Scrolling
The gesture for touch scrolling and drag and drop is exactly the same, so we need to disable the touch scrolling. Luckily for us there is a CSS property just for that:
touch-action: none;
and it works in all browsers. Except Safari. What do you do when CSS fails you? Use more JavaScript! We can e.preventDefault all touch events. However, don’t forget to make your event listeners not passive:
document.addEventListener('touchstart', _, {passive: false});
since otherwise the e.preventDefault() calls are ignored by default. This also means you can’t use React event system at all - use native events only.
Conclusion
Building a drag and drop web experience is involved but not impossible. You should never compromise on mobile support and accessibility. To ensure that, avoid the HTML5 API and go with mouse/touch events. For positioning, CSS transforms are the right choice. Browsers provide many great APIs like getBoundingClientRect for measuring things. And before you release anything, don’t forget to write tests. Puppeteer makes it easy!
Thank for reading! Please share if you liked it!
#react #html #webdev #dragndrop
