Build a Note-Taking App with GraphQL and React — Part 2
In this part of the series, you’ll build the frontend of the note-taking app using React. So far, only the backend server has been created which can be seen in the previous article. Therefore you’ll need to build the UI needed to add, edit and delete notes.
You’ll also install all the necessary dependencies needed to build the app’s UI.
You’ll be using the create-react-app CLI tool to build the React app. It allows you to create React apps with no need for any build configuration.
Create a React app by running the command below in your terminal. This creates a folder named notetaking-ui in your directory.
npx create-react-app notetaking-ui
When the installation is done, you will have a working React app in the notetaking-ui folder. Navigate into the folder and run the yarn start command to start the app in development mode.
You will be building a minimal React app, therefore, the following views are needed for the React app:
- A view to see all the notes listed.
- A view to edit notes.
- A view to add notes.
To that end, create the following files in the src folder, AllNotes.js, EditNote.js, NewNote.js. We’ll edit them later on.
Now, you’ll install the required dependencies for building the UI for your note-taking app.
yarn add react-router-dom
This command installs the react-router package which is a great library for handling routing in React apps. We’ll also be making use of Bulma, a CSS framework, to help with styling the React app. Add the line of code below to the head tag in the public/index.html file to add the Bulma framework to the app.
<link rel="stylesheet" href="https://cdnjs.cloudflare.com/ajax/libs/bulma/0.7.1/css/bulma.min.css">
To set up the routes for the React app, you’ll need to make use of react-router to define the routes. Open up the App.js file and edit with the code below:
import React, { Component } from 'react';
import {
  BrowserRouter as Router,
  Route,
  Link
} from 'react-router-dom'
import './App.css';
import AllNotes from './src/AllNotes'
import NewNote from './src/NewNote'
import EditNote from './src/EditNote'
class App extends Component {
  render() {
    return (
      <Router>
        <div>
          <nav className="navbar App-header" role="navigation" aria-label="main navigation">
            <div className="navbar-brand">
              <Link to="/" className="navbar-item">
                NotesQL
              </Link>
            </div>
<div className="navbar-end">
              <Link to="/" className="navbar-item">
                All Notes
              </Link>
<Link to="/newnote" className="navbar-item">
                New Note
              </Link>
            </div>
          </nav>
<Route exact path="/" component={AllNotes}/>
          <Route path="/newnote" component={NewNote}/>
          <Route path="/note/:id" component={EditNote}/>
        </div>
      </Router>
    );
  }
}
export default App;
In the code block above, all the components needed for react-router are imported, as well as the components for the views created above.
In the render function, the whole layout is wrapped in the <Router> component. This helps by creating a history object to keep track of the location. Therefore, when there’s a location change, the app will be r-rendered. The Link component is used to navigate through the different routes.
Finally, the code block below is where the actual routes are defined:
The / route is the homepage of the app and will always point to the AllNotes component which displays all the notes, the /newnote route is pointed to the NewNote component which contains the view to add a new note and the /note/:id route is pointed to the EditNote component which contains the view needed to edit a note. The id bit is what will be used to fetch that particular note’s detail from the database.
Creating the React App views
In this step, we’ll create the views needed for the note-taking app. In the previous step, we used the create-react-app CLI to create a functional React application. As a reminder, the views to be created are:
- View all existing notes
- Add a new note
- Edit an existing note
Therefore, let’s start with the view for all notes. Open up the previously created AllNotes.js file and add the code below to the file.
import React from "react";
import { Link } from "react-router-dom";
const AllNotes = () => {
  let data = [1, 2, 3, 4, 5];
  return (
    <div className="container m-t-20">
      <h1 className="page-title">All Notes</h1>
<div className="allnotes-page">
        <div className="columns is-multiline">
          {data.length > 0
            ? data.map((item, i) => (
                <div className="column is-one-third" key={i}>
                  <div className="card">
                    <header className="card-header">
                      <p className="card-header-title">Component</p>
                    </header>
                    <div className="card-content">
                      <div className="content">
                        Lorem ipsum dolor sit amet, consectetur adipiscing elit.
                        Phasellus nec iaculis mauris. Lorem ipsum dolor sit
                        amet.
                        <br />
                      </div>
                    </div>
                    <footer className="card-footer">
                      <Link to={`note/${i}`} className="card-footer-item">
                        Edit
                      </Link>
                      <a href="#" className="card-footer-item">
                        Delete
                      </a>
                    </footer>
                  </div>
                </div>
              ))
            : "No Notes yet"}
        </div>
      </div>
    </div>
  );
}
export default AllNotes;
In the code block above, we’re using the Cards component from Bulma as the layout for displaying the notes. The Card component is an all-around flexible and composable component that’s used to display information in a concise manner.
Note that we’re iterating through the data array as an example, ideally, it would be the results from the database.
We’re also doing a check in the render function to check if there are available data. If there is, we display accordingly and if not a message of “No Notes yet” is displayed.
Next, you’re going to add some custom CSS for the components created above, so go ahead to update the stylesheets accordingly.
Edit the src/App.css file with the code below.
.App-header {
background-color: #222;
color: white;
}
.navbar-item {
color: white;
}
.App-title {
font-size: 1.5em;
}
.App-intro {
font-size: large;
}
.m-t-20 {
margin-top: 20px;
}
.card {
box-shadow: 0 1px 5px 1px rgba(0, 0, 0, 0.1);
}
.page-title {
font-size: 2rem;
margin-bottom: 20px;
}
.newnote-page {
height: calc(100vh - 52px);
width: 60%;
}
.field:not(:last-child) {
margin-bottom: 2.75rem;
}
.card button {
border: none;
color: #3273dc;
cursor: pointer;
text-decoration: none;
font-size: 16px;
}
.card button:hover {
color: #363636;
}
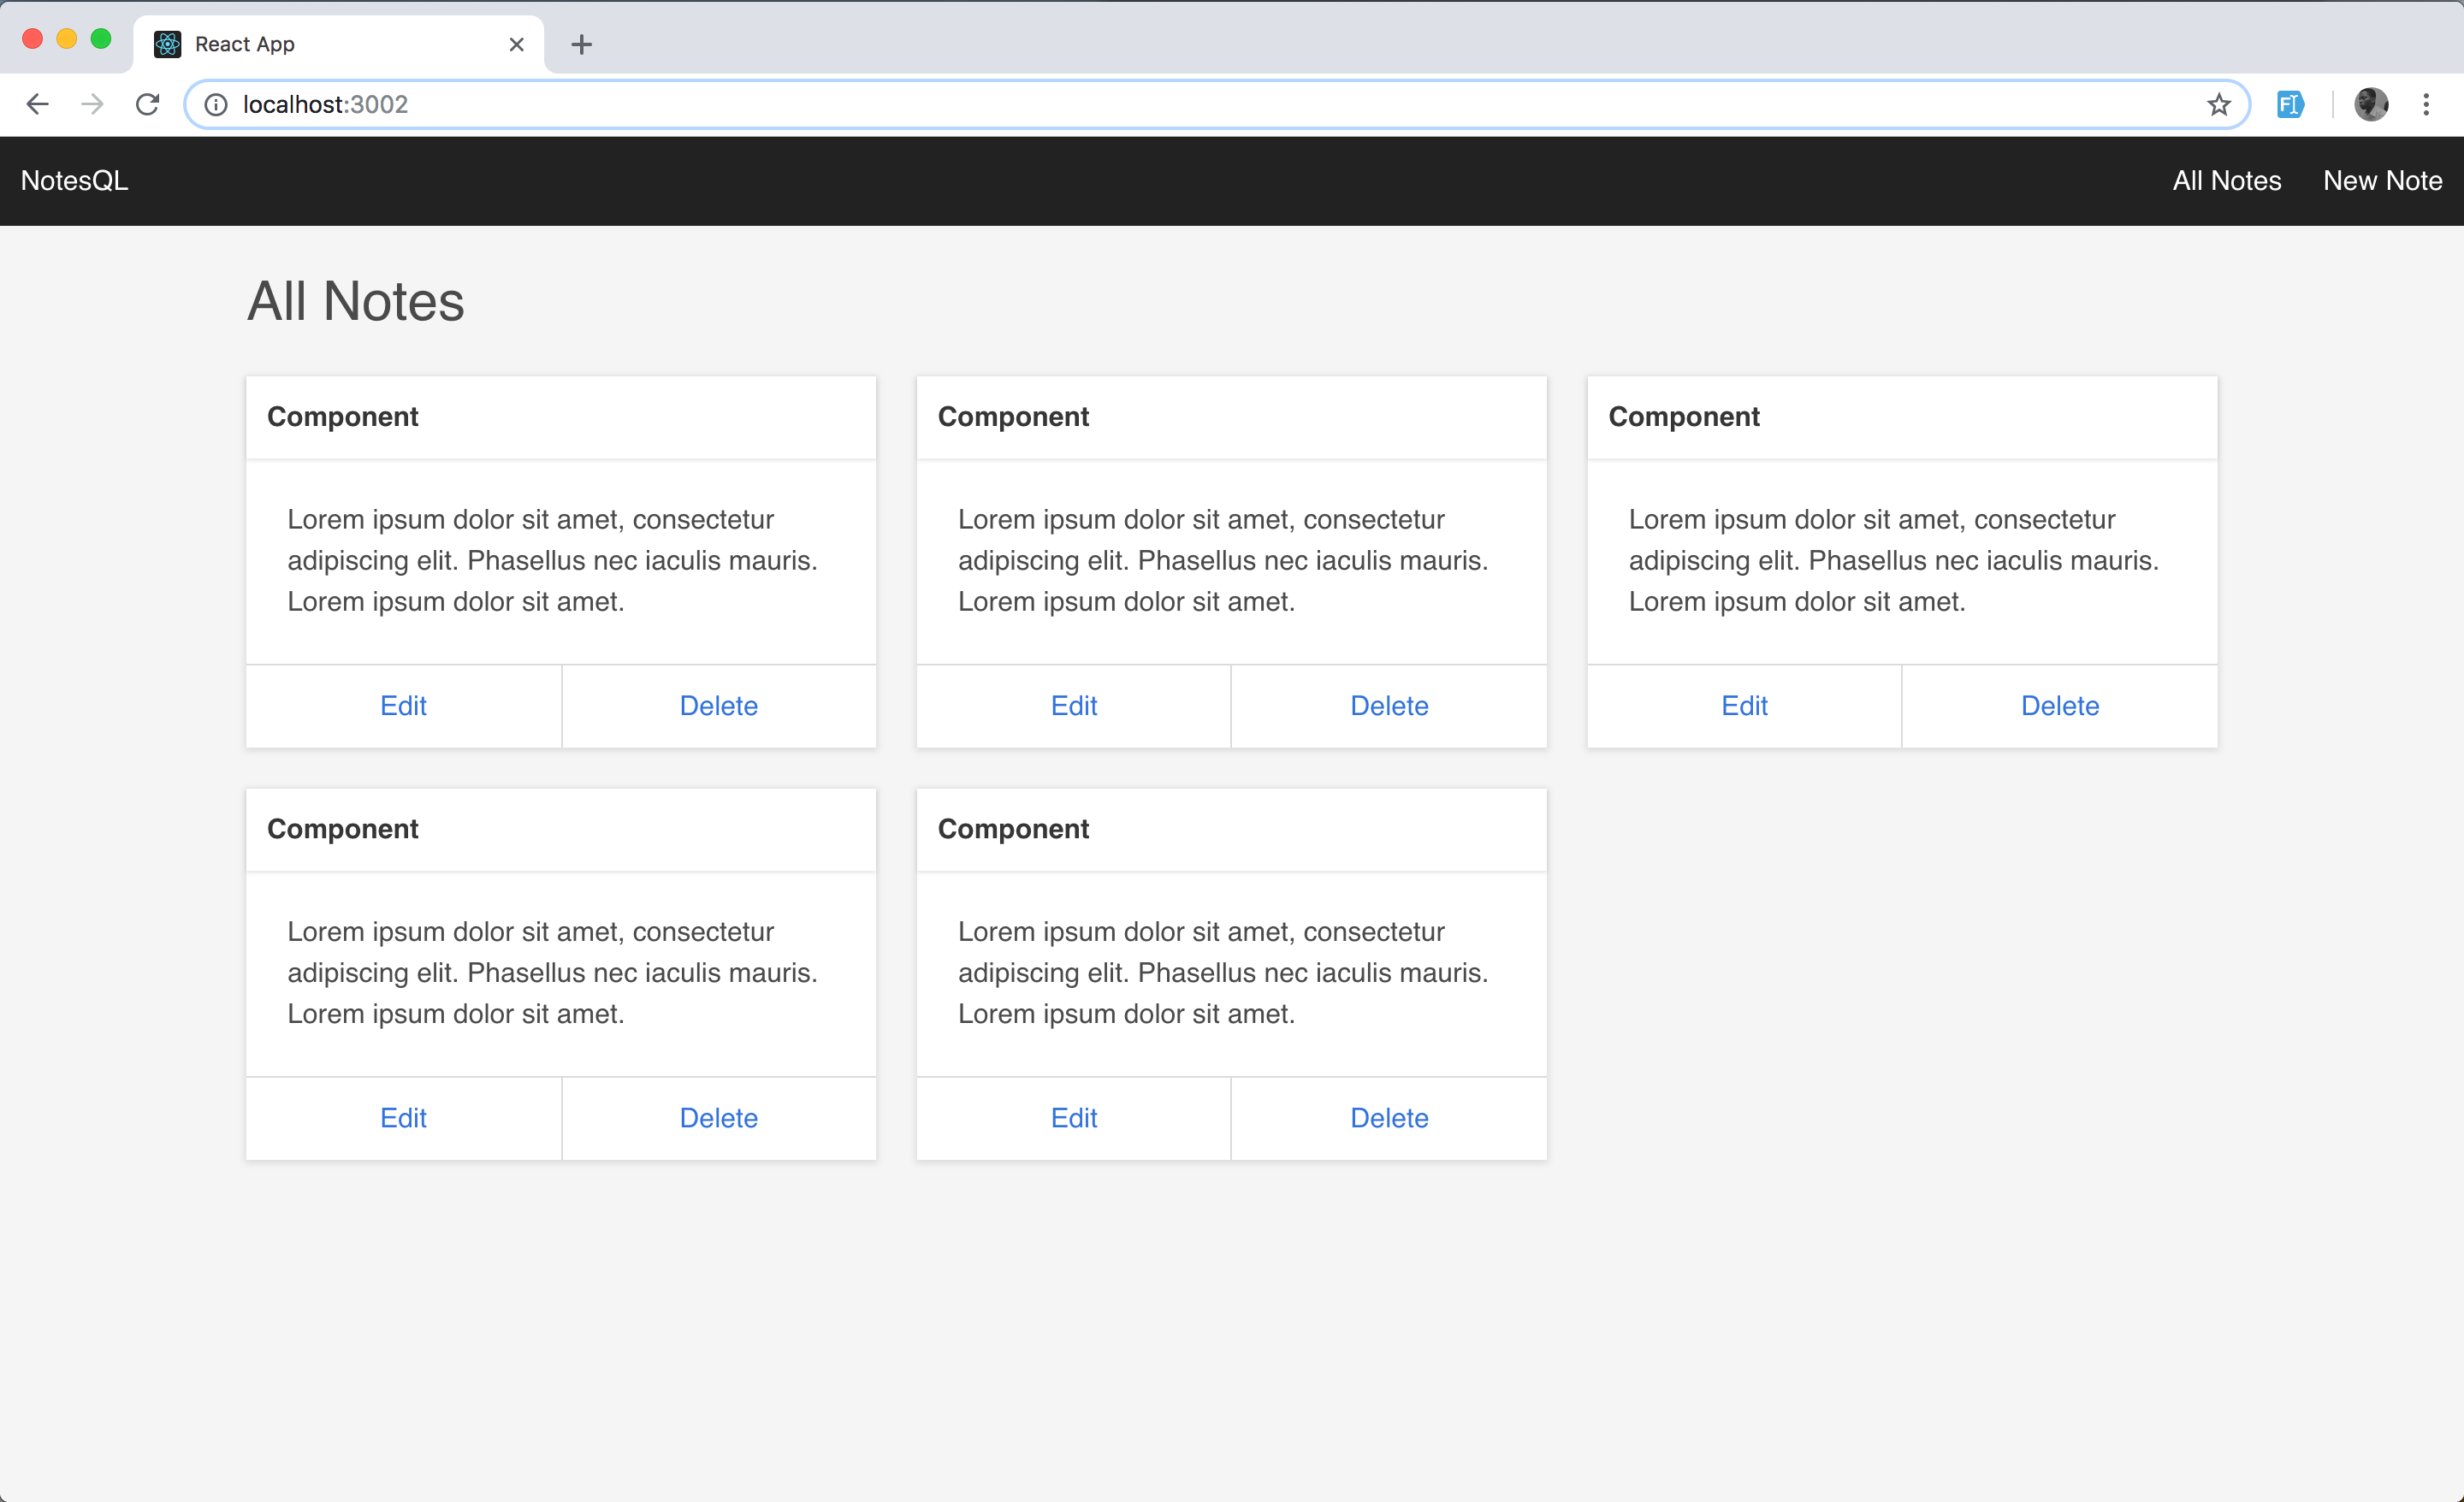
Next, let’s create the view for adding a new note. Open up the NewNote.js file and add the code below to the file.
import React from "react";
const NewNote = () => {
return (
<div className="container m-t-20">
<h1 className="page-title">New Note</h1>
<div className="newnote-page m-t-20">
<form>
<div className="field">
<label className="label">Note Title</label>
<div className="control">
<input className="input" type="text" placeholder="Note Title" />
</div>
</div>
<div class="field">
<label class="label">Note Content</label>
<div class="control">
<textarea class="textarea" rows="10" placeholder="Note Content here..."></textarea>
</div>
</div>
<div class="field">
<div class="control">
<button class="button is-link">Submit</button>
</div>
</div>
</form>
</div>
</div>
)
}
export default NewNote;
In the code bock above, a form is created and it contains an input field and a textarea field for the note title and note content respectively.
You’ll hook the form up to a function that does the actual addition of note later on.
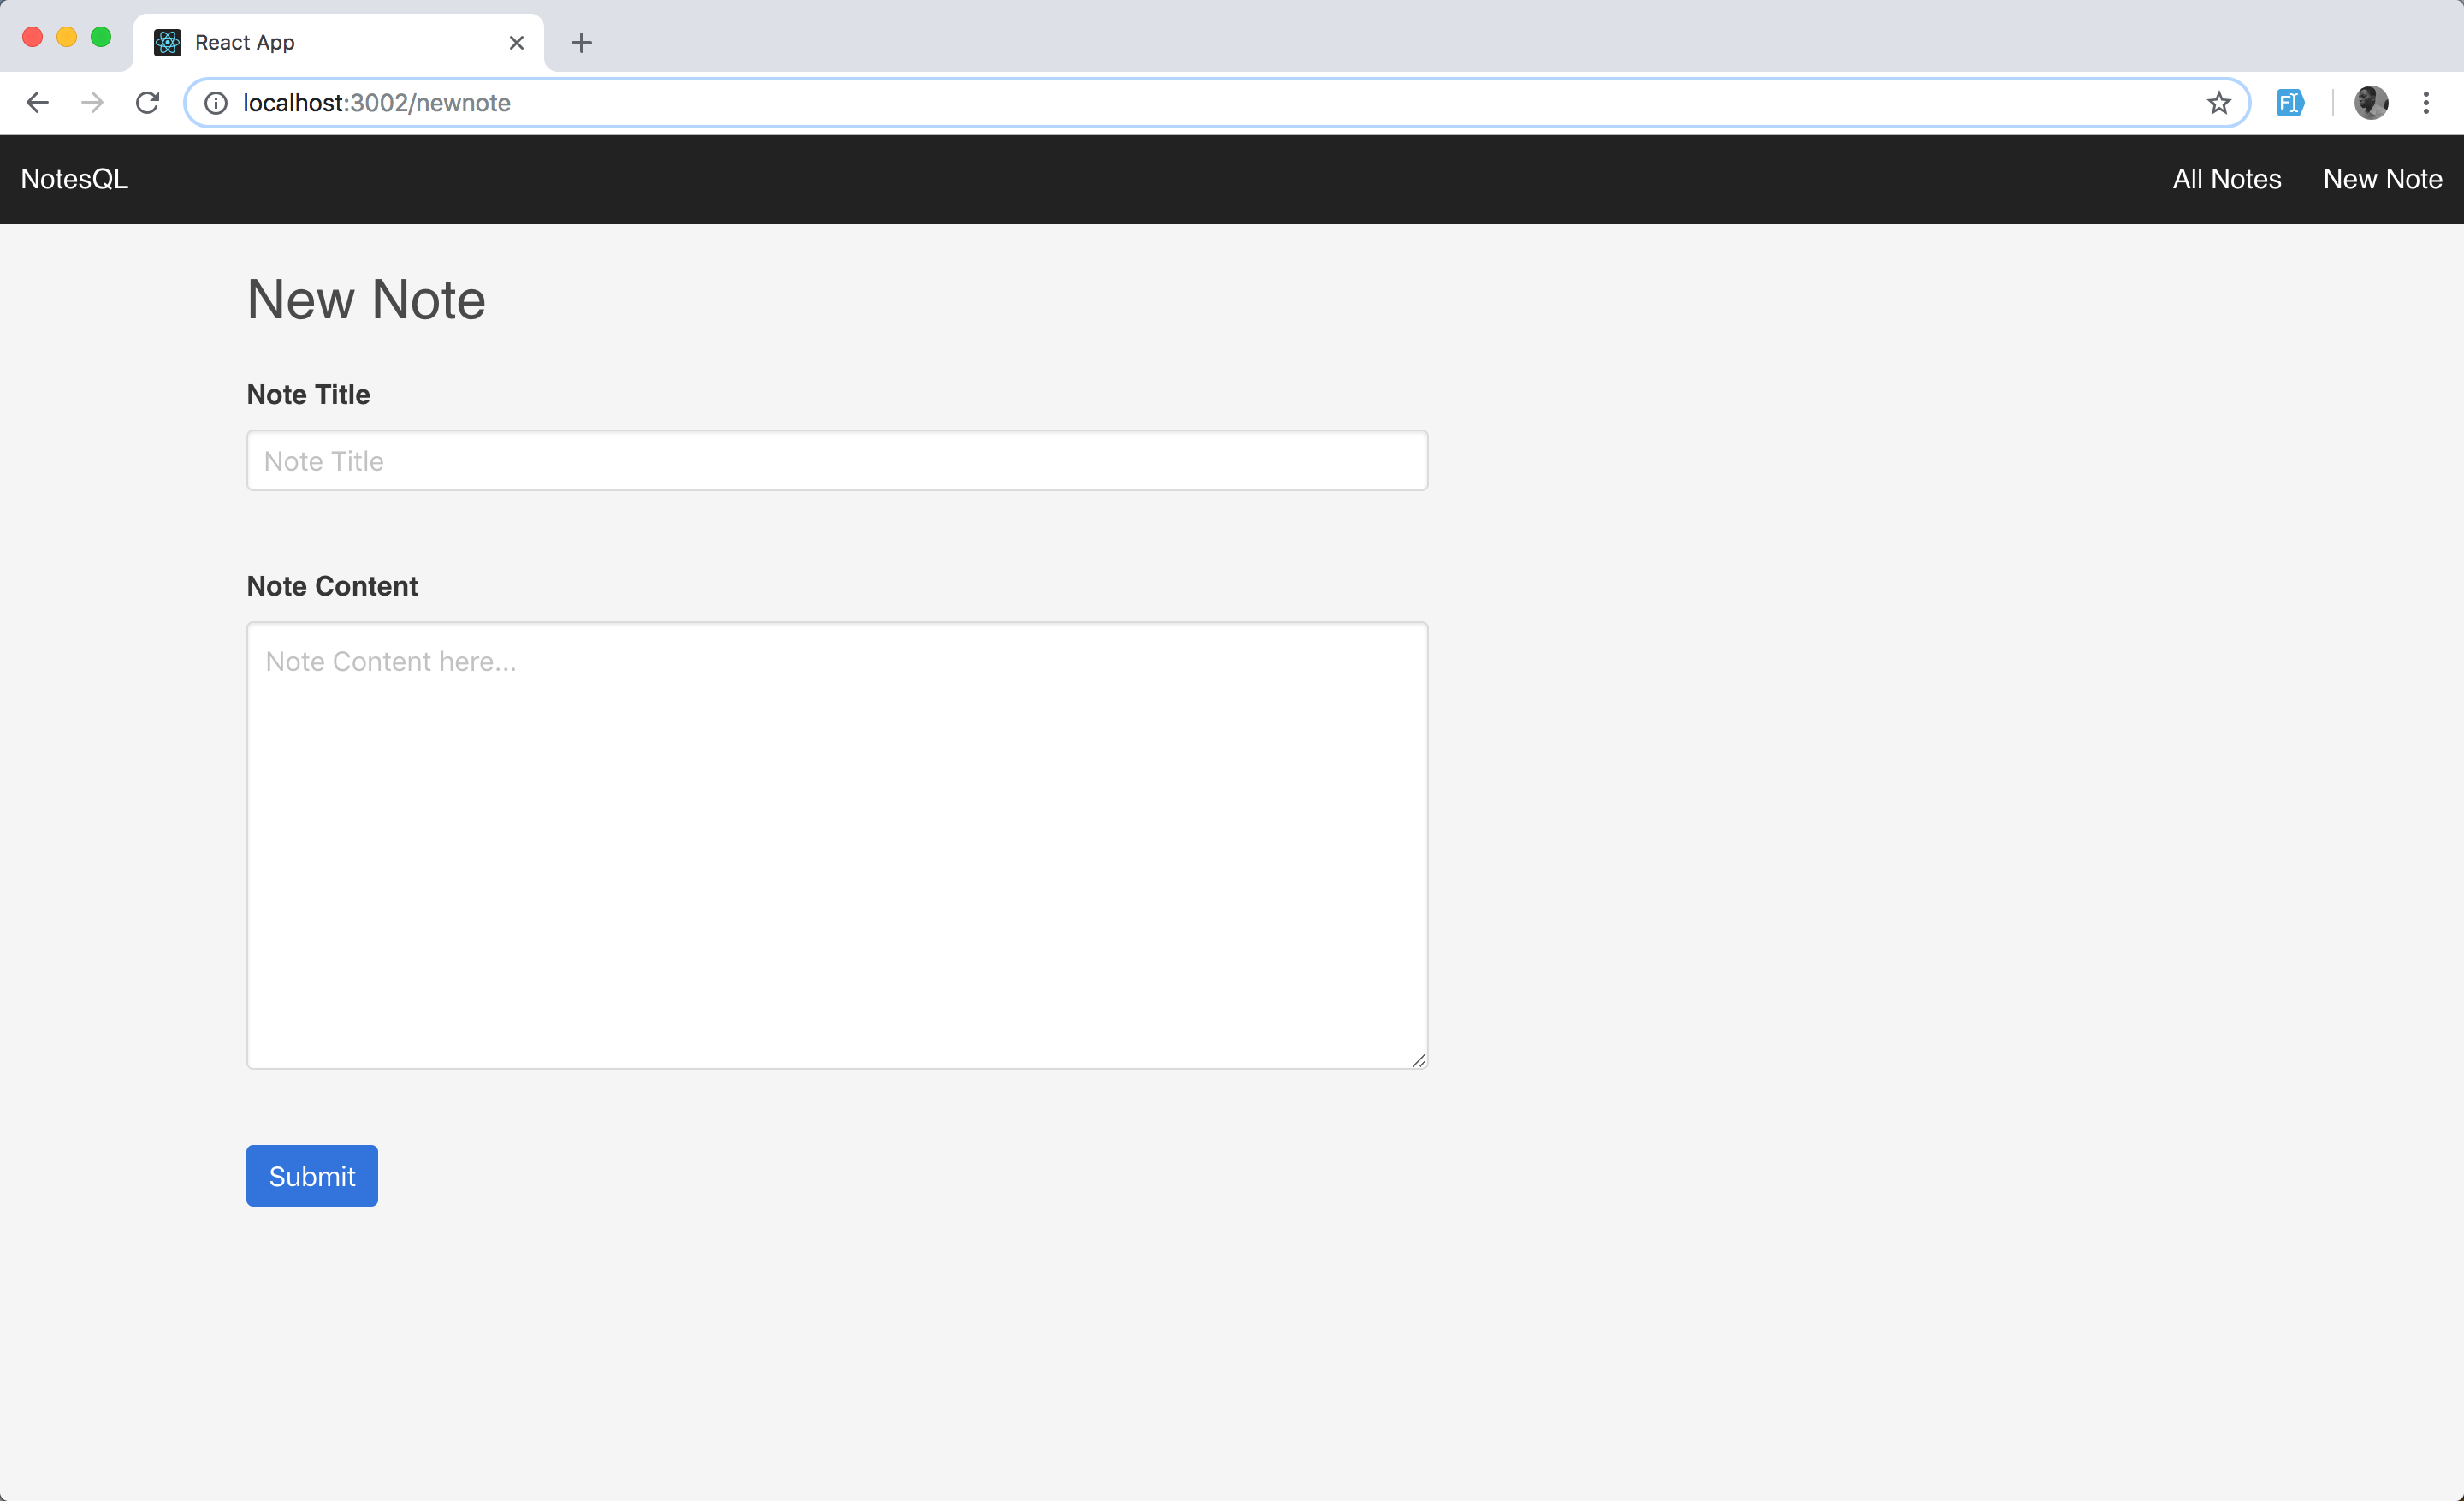
Lastly for the views, let’s add the code for editing an existing view. Open up the EditNote.js file and add the code below to the file.
import React from "react";
const EditNote = () => {
return (
<div className="container m-t-20">
<h1 className="page-title">Edit Note</h1>
<div className="newnote-page m-t-20">
<form>
<div className="field">
<label className="label">Note Title</label>
<div className="control">
<input className="input" type="text" placeholder="Note Title" />
</div>
</div>
<div class="field">
<label class="label">Note Content</label>
<div class="control">
<textarea
class="textarea"
rows="10"
placeholder="Note Content here..."
></textarea>
</div>
</div>
<div class="field">
<div class="control">
<button class="button is-link">Submit</button>
</div>
</div>
</form>
</div>
</div>
);
}
export default EditNote;
In the code bock above, a form is created and it features and input field and a textarea field for the note title and note content respectively.
We’ll hook the form up to a function that does the actual editing of the note data later on.
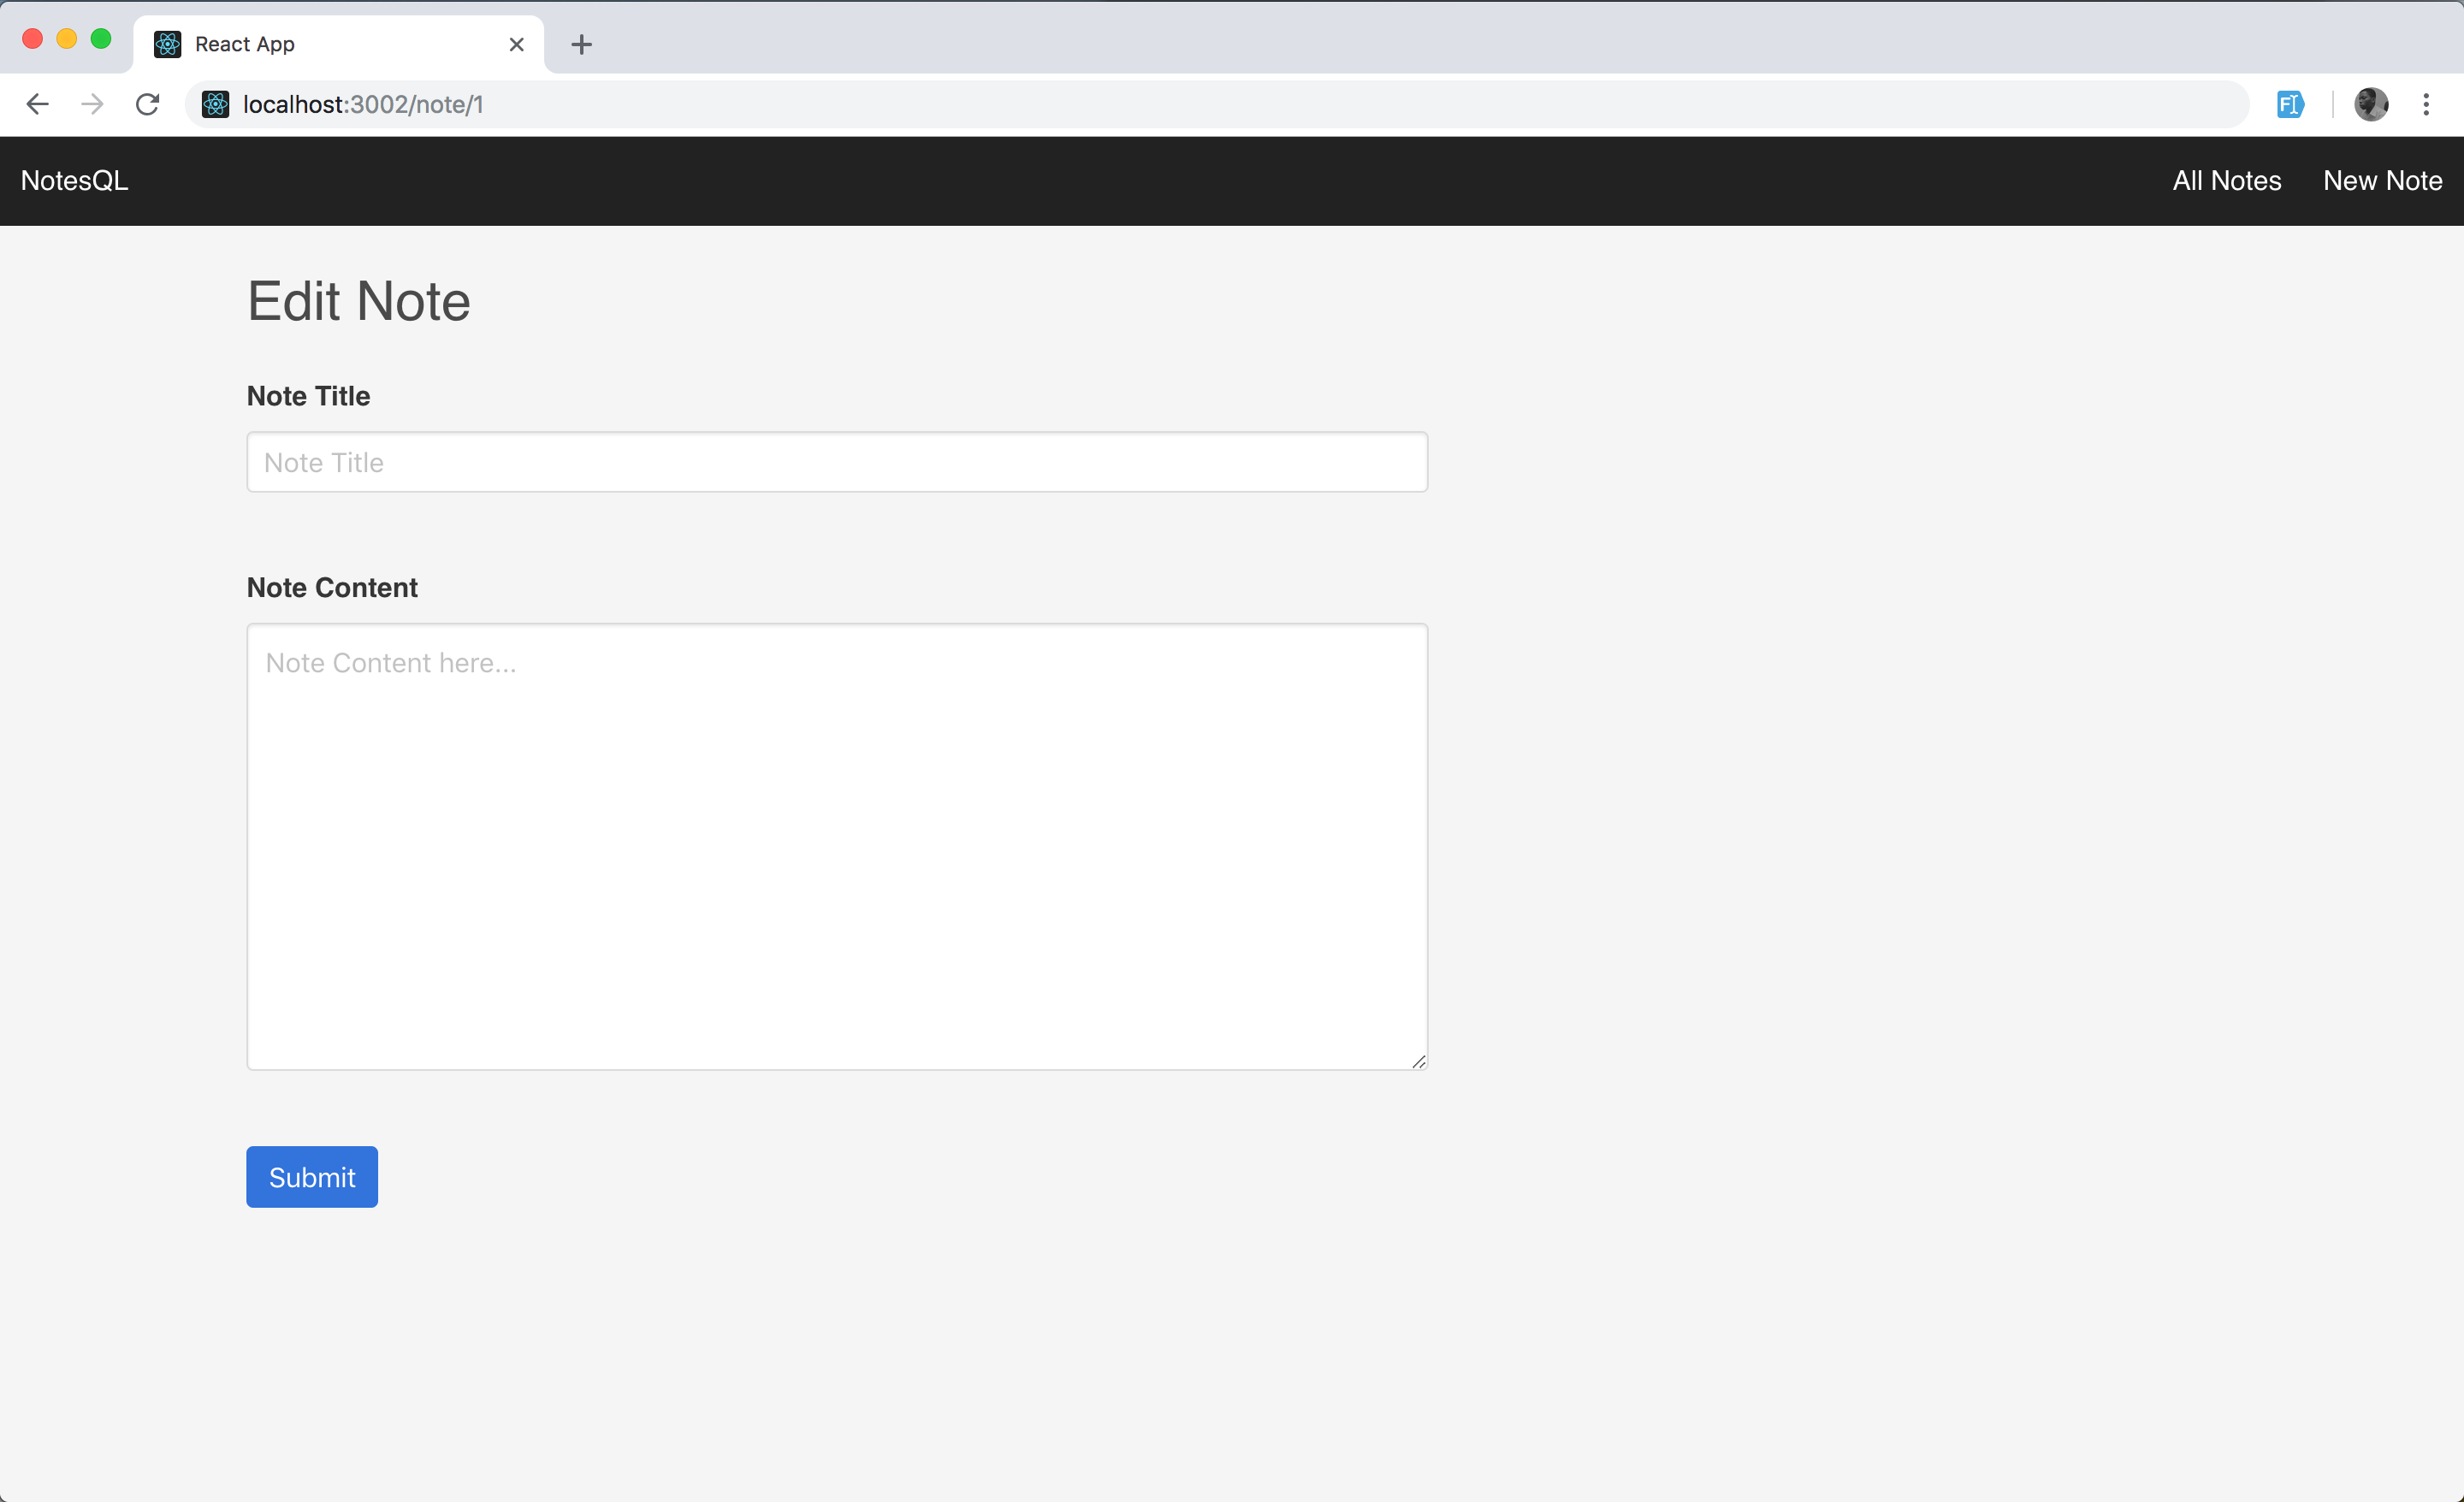
In the step above, the following views were created for the note-taking app:
- View all existing notes
- Add a new note
- Edit an existing note
You can go ahead to start the app in development mode to see the progress made so far. Remember the command yarn start starts the React app in development mode.
In the next step, the functionality required to add, delete and view existing notes will be added to the React app.
Connecting the React App to the GraphQL API
The next step in this tutorial is connecting the React app to the GraphQL API. You’ll be using ApolloClient to interface with the GraphQL API.
ApolloClient is a GraphQL client that help with declarative data fetching from a GraphQL server. It has some built in features that help to implement data caching, pagination, subscriptions e.t.c out of the box.
This helps developers to write less code and with a better structure. One of the best parts about ApolloClient is that it’s adoptable anywhere, in the sense that it can be dropped into any JavaScript app with a GraphQL server and it works.
Let’s get started on connecting the React app to the GraphQL server. The first thing to do is install the various ApolloClient dependencies.
yarn add apollo-boost @apollo/react-hooks graphql graphql-tag apollo-cache-inmemory apollo-link-http
apollo-boost: A package containing everything you need to set up ApolloClient.@apollo/react-hooks: React hooks based view layer integration.graphql: Used in parsing your GraphQL queries.graphql-tag: Helpful utilities for parsing GraphQL queries.apollo-cache-inmemory: cache implementation for ApolloClient.apollo-link-http: a standard interface for modifying control flow of GraphQL requests and fetching GraphQL results.
With that done, let’s initiate ApolloClient in our React app. The only thing needed here is the endpoint to our GraphQL server. In our index.js file, let’s import ApolloClient from apollo-boost and add the endpoint for our GraphQL server to the uri property of the client config object.
Edit thesrc/index.js file with the following code.
import React from "react";
import ReactDOM from "react-dom";
import { ApolloProvider } from "@apollo/react-hooks";
import { ApolloClient } from "apollo-client";
import { createHttpLink } from "apollo-link-http";
import { ApolloLink } from "apollo-link";
import { InMemoryCache } from "apollo-cache-inmemory";
import "./index.css";
import App from "./App";
import * as serviceWorker from "./serviceWorker";
const httpLink = createHttpLink({ uri: "http://localhost:4300/graphql" });
const link = ApolloLink.from([httpLink]);
const client = new ApolloClient({
  link,
  cache: new InMemoryCache()
});
ReactDOM.render(
  <ApolloProvider client={client}>
    <App />
  </ApolloProvider>,
  document.getElementById("root")
);
// If you want your app to work offline and load faster, you can change
// unregister() to register() below. Note this comes with some pitfalls.
// Learn more about service workers: https://bit.ly/CRA-PWA
serviceWorker.unregister();
In the code block above, the required dependencies are imported from the installed packages. Next, an httpLink constant variable is created and connected to the ApolloClient instance with the GraphQL API. Recall that the GraphQL server is running on http://localhost:4300. ApolloClient is then initialized by passing in the httpLink and a new instance of an InMemoryCache.
Finally, the app is rendered with the root component. App is wrapped with the higher-order component ApolloProvider that gets passed the client as a prop.
Fetching all notes from the GraphQL server
Next thing to do is fetching the all the notes from the GraphQL API and displaying them with the UI already built. To do that, you’ll need to define the query to be sent to GraphQL. Remember while building the GraphQL server we wrote the query to be used in fetching notes on the GraphiQL interface. We’ll do the same here.
Let’s add this query to the AllNotes component. Navigate to the src/AllNotes.js file and let’s start editing.
import React, { Component } from 'react';
import { useQuery } from '@apollo/react-hooks';
import gql from 'graphql-tag';
import { Link } from 'react-router-dom';
const NOTES_QUERY = gql`
{
  allNotes {
    title
    content
    _id
    date
  }
}
`
The query is written here as a JavaScript constant and being parsed with gql. Next, let’s get the display the result from the API and display them with the UI built. In the same AllNotes.js file, replace the existing function with the one below.
const AllNotes = () => {
const { loading, error, data } = useQuery(NOTES_QUERY);
if (loading) return "Loading...";
if (error) return `Error! ${error.message}`;
return (
<div className="container m-t-20">
<h1 className="page-title">All Notes</h1>
<div className="allnotes-page">
<div className="columns is-multiline">
{data.allNotes.map(note => (
<div className="column is-one-third" key={note._id}>
<div className="card">
<header className="card-header">
<p className="card-header-title">{note.title}</p>
</header>
<div className="card-content">
<div className="content">
{note.content}
<br />
</div>
</div>
<footer className="card-footer">
<Link to={`note/${note._id}`} className="card-footer-item">
Edit
</Link>
<a href="#" className="card-footer-item">
Delete
</a>
</footer>
</div>
</div>
))}
</div>
</div>
</div>
);
};
Here we’re using the useQuery React Hook to fetch some notes from our GraphQL server and displaying them on the UI. useQuery is the primary API for executing queries in an Apollo application. To run a query within a React component, call useQuery and pass it a GraphQL query string like we did above.
useQuery returns an object from Apollo Client that contains loading, error, and data properties. These props help provide information about the data request to the GraphQL server.
loading: Istrueas long as the request is still ongoing and the response hasn’t been received.error: In case the request fails, this field will contain information about what exactly went wrong.data: This is the actual data that was received from the server.
Let’s check our progress. You can do a page refresh or start the app if you haven’t with the command yarn start. You should see an error message, specifically, the error message we set above.

Upon further inspection which can be done by checking the console of the browser, we can ascertain that it’s a CORS issue.

Cross-Origin Resource Sharing (CORS) is a mechanism that uses additional HTTP headers to tell a browser to let a web application running at one origin (domain) have permission to access selected resources from a server at a different origin. - MDN
Simply put this means we have to enable our GraphQL server to accept requests from the React app. This can be done by using the cors package which is a node.js package that can be used to enable CORS with various options.
So go back to the notetaking-api project and install the package with the command below.
npm i cors
And proceed to use it in your server by editing the index.js file in the notetaking-api project with the following.
import cors from "cors";
import express from "express";
import graphlHTTP from "express-graphql";
import mongoose from "mongoose";
import schema from "./schema";
mongoose.Promise = global.Promise;
mongoose.connect("mongodb://localhost/notetaking_db", {
useNewUrlParser: true,
useUnifiedTopology: true
});
const app = express();
const PORT = 4300;
app.use(cors());
app.get("/", (req, res) => {
res.json({
message: "Notetaking API v1"
});
});
app.use(
"/graphql",
graphlHTTP({
schema: schema,
graphiql: true
})
);
app.listen(PORT, () => {
console.log(`Server is listening on PORT ${PORT}`);
});
Now if you refresh the React app, you should get the data from the GraphQL being fetched and displayed.

Awesome! You’ve now handled fetching data from the GraphQL server by fetching the list of notes.
Before we go any further, let’s handle errors from the GraphQL server and add a notification system to the React app. To handle errors from the GraphQL server and notifications generally, we’d need to make use of react-notify-toast and apollo-link-error.
react-notify-toast is a React library that help with toast notifications for React apps and apollo-link-error helps to capture GraphQL or network errors. Install both packages with the command below.
yarn add react-notify-toast apollo-link-error
Once installation is done, modify your index.js file to look like the one below.
...
import { onError } from 'apollo-link-error'
import Notifications, {notify} from 'react-notify-toast';
...
const errorLink = onError(({ graphQLErrors }) => {
if (graphQLErrors) graphQLErrors.map(({ message }) => notify.show(message, 'error'))
})
const httpLink = createHttpLink({ uri: 'http://localhost:4300/graphql' });
const link = ApolloLink.from([
errorLink,
httpLink,
]);
const client = new ApolloClient({
link,
cache: new InMemoryCache()
})
ReactDOM.render(
<ApolloProvider client={client}>
<Notifications />
<App />
</ApolloProvider>,
document.getElementById('root')
);
registerServiceWorker();
In the code above, the important bit is where the errorLink variable is being created. We are essentially looking out from errors from GraphQL and then displaying them nicely with the notify component.
In the preceding code block, you added the errorLink constant variable which essentially uses the onError function to show a notification whenever there’s an error from the GraphQL server.
Adding notes to GraphQL Server
Let’s see how to add notes to the GraphQL server from the React app. You’ll be editing the NewNote.js file in the src folder.
...
import { useMutation } from "@apollo/react-hooks";
import gql from 'graphql-tag';
const NEW_NOTE = gql`
mutation createNote($title: String! $content: String!) {
createNote( input: {title: $title, content: $content}) {
_id
title
content
date
}
}
`
...
In the code block above, we’re utilising the createNote mutation that was defined earlier when we were building out the API.
The useMutation React hook is the primary API for executing mutations in an Apollo application. To run a mutation, you first call useMutation within a React component and pass it a GraphQL string that represents the mutation.
Therefore, we’ll create a GraphQL mutation named NEW_NOTE. The server expects a title and a content to successfully create a new entry, and it returns the id, title, content upon creation.
Next step is to edit the NewNote function so that it utilizes the NEW_NOTE mutation . Edit the file with the code below.
import React, { useState } from "react";
import { withRouter } from "react-router-dom";
import { useMutation } from "@apollo/react-hooks";
import gql from "graphql-tag";
const NEW_NOTE = gql`
  mutation createNote($title: String!, $content: String!) {
    createNote(input: { title: $title, content: $content }) {
      _id
      title
      content
      date
    }
  }
`;
const NOTES_QUERY = gql`
  {
    allNotes {
      title
      content
      _id
      date
    }
  }
`;
const NewNote = () => {
  const [title, setTitle] = useState("");
  const [content, setContent] = useState("");
const [createNote] = useMutation(NEW_NOTE, {
    update(
      cache,
      {
        data: { createNote }
      }
    ) {
      const { allNotes } = cache.readQuery({ query: NOTES_QUERY });
cache.writeQuery({
        query: NOTES_QUERY,
        data: { allNotes: allNotes.concat([createNote]) }
      });
    }
  });
return (
    <div className="container m-t-20">
      <h1 className="page-title">New Note</h1>
<div className="newnote-page m-t-20">
        <form
          onSubmit={e => {
            e.preventDefault();
createNote({
              variables: {
                title,
                content,
                date: Date.now()
              }
            });
            history.push("/");
          }}
        >
          <div className="field">
            <label className="label">Note Title</label>
            <div className="control">
              <input
                className="input"
                name="title"
                type="text"
                placeholder="Note Title"
                value={title}
                onChange={e => setTitle(e.target.value)}
              />
            </div>
          </div>
<div className="field">
            <label className="label">Note Content</label>
            <div className="control">
              <textarea
                className="textarea"
                name="content"
                rows="10"
                placeholder="Note Content here..."
                value={content}
                onChange={e => setContent(e.target.value)}
              ></textarea>
            </div>
          </div>
<div className="field">
            <div className="control">
              <button className="button is-link">Submit</button>
            </div>
          </div>
        </form>
      </div>
    </div>
  );
};
export default NewNote;
When your component renders, useMutation returns a tuple that includes:
- A mutate function that you can call at any time to execute the mutation
- An object with fields that represent the current status of the mutation’s execution
The form also has a onSubmit function which allows you to pass title and content as variables props to the GraphQL server.
One other thing we’re doing in the useMutation query is updating the cache otherwise known as interface update. This is essentially ensuring that whatever updates we make to the GraphQL server is also effected on the client in realtime without the need for a page refresh. To do this, the call to useMutation includes an update function. Let’s have a closer look at the update function.
const [createNote] = useMutation(NEW_NOTE, {
    update(cache, { data: { createNote } }) {
      const { allNotes } = cache.readQuery({ query: NOTES_QUERY });
cache.writeQuery({
        query: NOTES_QUERY,
        data: { allNotes: allNotes.concat([createNote]) }
      });
    }
  });
The update function is passed a cache object that represents the Apollo Client cache and a data property that contains the result of the mutation. The cache object provides readQuery and writeQuery functions that enable you to execute GraphQL operations on the cache as though you’re interacting with a GraphQL server.
In the code block above, the update function first reads the existing notes from the cache with cache.readQuery. It then adds the newly created note from our mutation to the existing list of notes and writes it back to the cache with cache.writeQuery.
Now, whenever you add a new note, the UI will update to reflect newly cached values.
Next, let’s edit the code so that after a note has been added, the app automatically redirects the notes listing page. To do that, you’d need to import withRouter from react-router-dom in the NewNote.js file. withRouter will be used as a higher order function so that means the NewNote function will be enclosed inside the withRouter function as seen below.
...
import {withRouter} from 'react-router-dom';
...
const NewNote = withRouter(({ history }) => {
  ...
});
...
With that done, go ahead to add the line of code below immediately after the createNote function that takes in the variables.
...
createNote({
  variables: {
    title,
    content
  }
});
history.push("/");
...
You’ve now handled the functionality for adding new notes to the GraphQL server. Next, you’ll see how to handle the functionality for editing existing notes.
Editing notes in the GraphQL Server
As seen in the initial React app view, there’s an Edit button that allows you to edit the data in the database. The Edit button is hooked up to the route note/:id where id is the ID of the note we wish to edit. This is done so that we can easily use the ID to find the data in the database and update using Mongoose’s findOneAndUpdate function.
If you check the AllNotes component, you’d see that we’re already passing the ID to the Link component.
<Link to={`note/${note._id}`} className="card-footer-item">Edit</Link>
If you click on the Edit button, it takes you to the Edit Note view but we don’t have the logic to either fetch that particular note’s detail or edit it. Let’s do that now. You start by fetching the note’s details itself.
To fetch the details for a particular note, you’ll first have to write a GraphQL query to fetch the note from the server. In the EditNote.js file, add the code below.
import React, { useState } from "react";
import { useQuery, useMutation } from "@apollo/react-hooks";
import {notify} from 'react-notify-toast';
import gql from 'graphql-tag';
const NOTE_QUERY = gql`
query getNote($_id: ID!) {
  getNote (_id: $_id) {
    _id
    title
    content
    date
  }
}
`
...
In the query above, you’re utilising the getNote earlier defined when building the API. The server expects just the _id to successfully fetch the note.
Next, we’ll write the query that will help with updating the notes and since we’ll be sending data, it’s going to be a mutation. Add the block of code below just after the NOTE_QUERY.
...
const UPDATE_NOTE = gql`
  mutation updateNote($_id: ID!, $title: String, $content: String) {
    updateNote(_id: $_id, input: { title: $title, content: $content }) {
      _id
      title
      content
    }
  }
`;
...
In the query above, we’re creating a mutation function that accepts the _id_, title and content as variables. These variables will be sent to the GraphQL server where the appropriate action will be carried out, that is, updating a note.
Next, you’ll define the state using useState that will hold both the title and content of the note we’d like to edit and also implement the Query that will fetch the data from the GraphQL server.
Replace the entire EditNote function with the one below.
const EditNote = ({ match }) => {
  const [title, setTitle] = useState("");
  const [content, setContent] = useState("");
const { loading, error, data } = useQuery(NOTE_QUERY, {
    variables: {
      _id: match.params.id
    }
  });
const [updateNote] = useMutation(UPDATE_NOTE);
if (loading) return <div>Fetching note</div>;
  if (error) return <div>Error fetching note</div>;
// set the  result gotten from rhe GraphQL server into the note variable.
  const note = data;
return (
    <div className="container m-t-20">
      <h1 className="page-title">Edit Note</h1>
<div className="newnote-page m-t-20">
        <form
          onSubmit={e => {
            // Stop the form from submitting
            e.preventDefault();
// set the title of the note to the title in the state, if not's available set to the original title gotten from the GraphQL server
            // set the content of the note to the content in the state, if not's available set to the original content gotten from the GraphQL server
            // pass the id, title and content as variables to the UPDATE_NOTE mutation.
            updateNote({
              variables: {
                _id: note.getNote._id,
                title: title ? title : note.getNote.title,
                content: content ? content : note.getNote.content
              }
            });
notify.show("Note was edited successfully", "success");
          }}
        >
          <div className="field">
            <label className="label">Note Title</label>
            <div className="control">
              <input
                className="input"
                type="text"
                name="title"
                placeholder="Note Title"
                defaultValue={note.getNote.title}
                onChange={e => setTitle(e.target.value)}
                required
              />
            </div>
          </div>
<div className="field">
            <label className="label">Note Content</label>
            <div className="control">
              <textarea
                className="textarea"
                rows="10"
                name="content"
                placeholder="Note Content here..."
                defaultValue={note.getNote.content}
                onChange={e => setContent(e.target.value)}
                required
              ></textarea>
            </div>
          </div>
<div className="field">
            <div className="control">
              <button className="button is-link">Submit</button>
            </div>
          </div>
        </form>
      </div>
    </div>
  );
};
In the code block above, the useQuery hook contains the NOTE_QUERY query string and an object that contains a variable. In this case the variable is the match.params.id 's value.
useQuery returns an object from Apollo Client that contains loading, error, and data properties. These props help provide information about the data request to the GraphQL server.
The result of the query to the GraphQL server will be stored in the data property which is later set to the const note .
In the form, you’re setting the defaultValue for the input field and textarea to the values gotten from the GraphQL server.
Finally, the form has its own onSubmit function that handles the actual editing of the note. In the onSubmit function, the title and content of the note is sent to the updateNote function which is in turn attached to the useMutation hook.
You’ve now handled the functionality for editing existing notes in the GraphQL server. Next thing to do is to handle deletion of notes from the GraphQL server.
Deleting notes from the GraphQL Server
To delete notes in the database via the React app, you’ll need to make use of the useMutation hook and then use it to send a mutation query (deleteNote) to the GraphQL server.
The first thing we need to do is import the useMutation hook from apollo/react-hooks in the AllNotes.js file and write the query that performs the delete action and that will be sent to the GraphQL server, and then use the useMutation hook to send the query to the server. Edit the AllNotes.js file with the code below.
...
import { useQuery, useMutation } from "@apollo/react-hooks";
import { notify } from "react-notify-toast";
...
const DELETE_NOTE_QUERY = gql`
mutation deleteNote($_id: ID!) {
  deleteNote (_id: $_id) {
    title
    content
 _id
  }
}
`
const AllNotes = () => {
  const { loading, error, data } = useQuery(NOTES_QUERY);
const [deleteNote] = useMutation(DELETE_NOTE_QUERY, {
    update(cache, { data: { deleteNote }}) {
      const { allNotes } = cache.readQuery({ query: NOTES_QUERY });
      const newNotes = allNotes.filter(note => note._id !== deleteNote._id);
cache.writeQuery({
        query: NOTES_QUERY,
        data: { allNotes: newNotes }
      });
    }
  });
if (loading) return "Loading...";
  if (error) return `Error! ${error.message}`;
return (
    <div className="container m-t-20">
      <h1 className="page-title">All Notes</h1>
<div className="allnotes-page">
        <div className="columns is-multiline">
          {data.allNotes.map(note => (
            <div className="column is-one-third" key={note._id}>
              <div className="card">
                <header className="card-header">
                  <p className="card-header-title">{note.title}</p>
                </header>
                <div className="card-content">
                  <div className="content">
                    {note.content}
                    <br />
                  </div>
                </div>
                <footer className="card-footer">
                  <Link to={`note/${note._id}`} className="card-footer-item">
                    Edit
                  </Link>
                  <button
                    onClick={e => {
                      e.preventDefault();
                      deleteNote({ variables: { _id: note._id } });
                      notify.show("Note was deleted successfully", "success");
                    }}
                    className="card-footer-item"
                  >
                    Delete
                  </button>
                </footer>
              </div>
            </div>
          ))}
        </div>
      </div>
    </div>
  );
};
...
In the code block above, we create the deleteNote function and set it to useQuery hook which contains a GraphQL query string. The deleteNote function is later used in the delete’s button onClick handler. It accepts the note’s ID as a variable and then that ID is used to find and delete the entry.
We’re also carrying out interface update here when we delete a note. The useMutation hook also accepts an object which contains an update function in which we’ll be carrying out the interface update.
update(cache, { data: { deleteNote }}) {
  const { allNotes } = cache.readQuery({ query: NOTES_QUERY });
  const newNotes = allNotes.filter(note => note._id !== deleteNote._id);
cache.writeQuery({
    query: NOTES_QUERY,
    data: { allNotes: newNotes }
  });
}
In the function above, we first read the available notes using the cache.readQuery method. The readQuery allows us to fetch data without actually making a request to the GraphQL server.
The .filter method is used to check for the particular note that deleted from the page. It works by comparing the _id_ of the deleted note with that of all existing notes and then returns only items that don’t match that of the deleted item. The _id_ of the deleted item is gotten by using payload. payload contains the data that’s being sent to the server. Finally, the cache is updated with the newly filtered data.
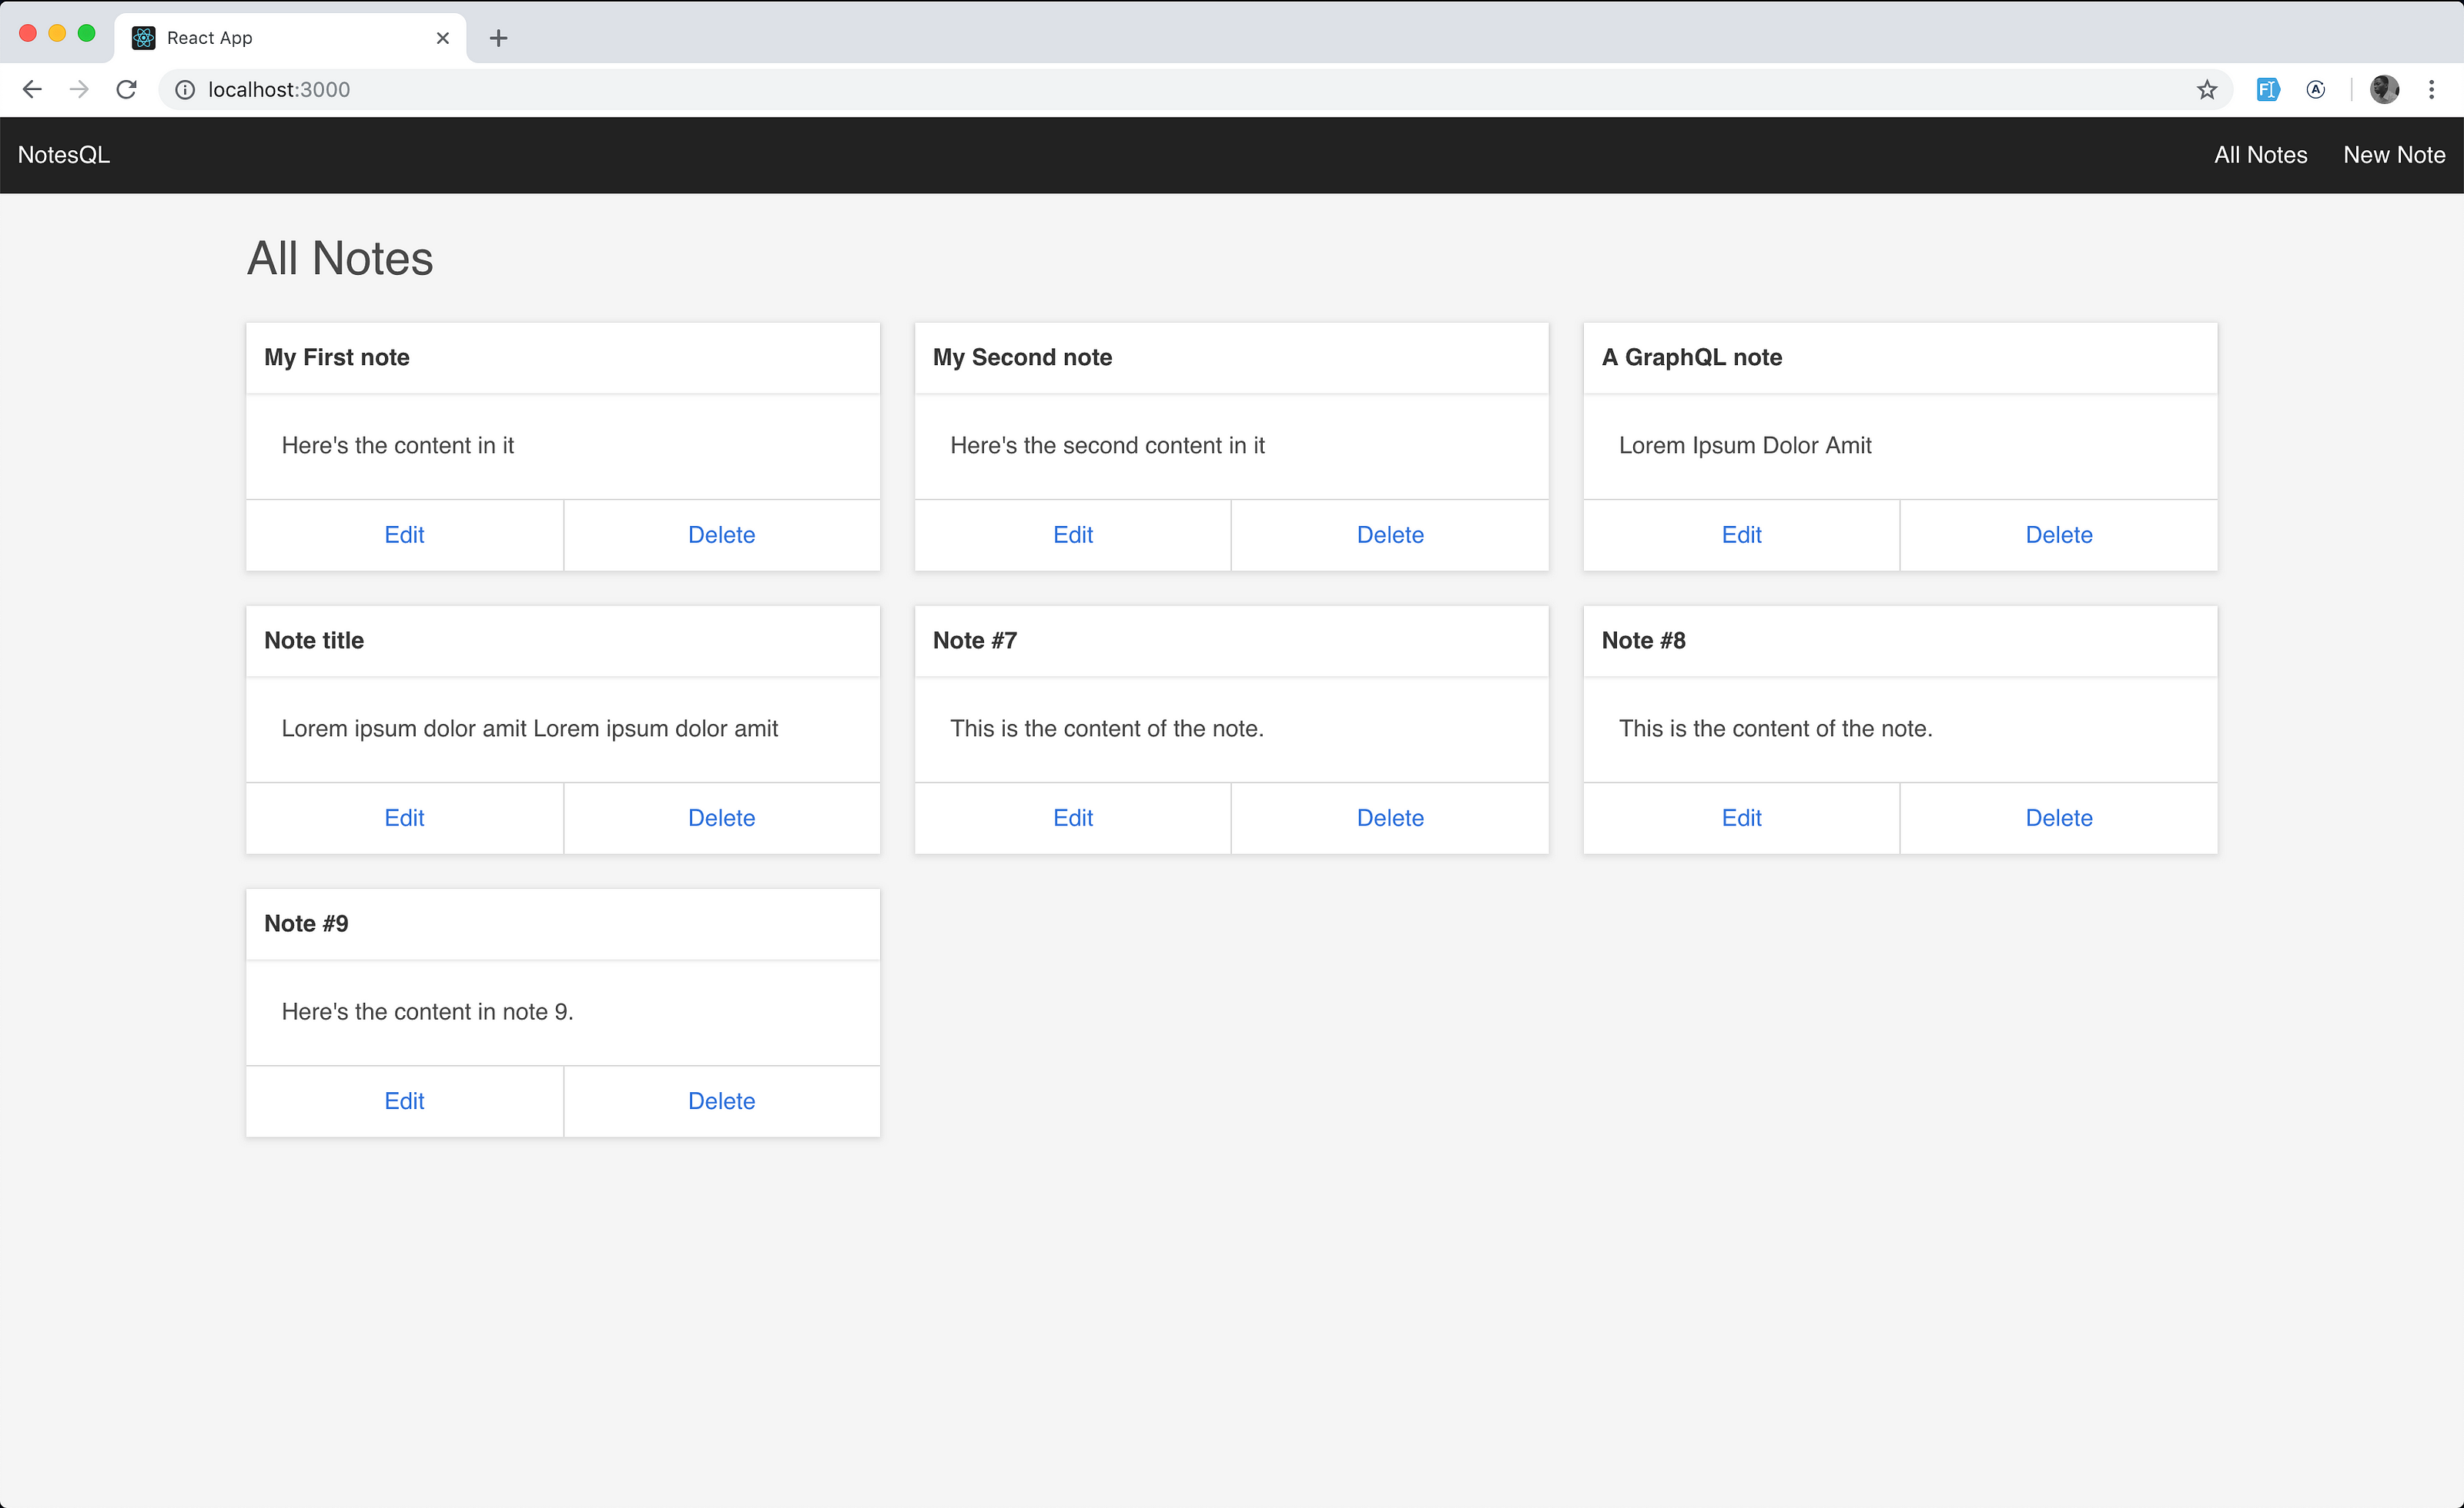
That’s it! We have now successfully built a functional web app that has GraphQL as its server and React as its frontend.
Conclusion
In this part of the tutorial, you learnt how to build a React app that works with a GraphQL API server. You first started by building a Node.js GraphQL API in the previous part of the tutorial and then you built a frontend app using React.
You also saw how to use Apollo Client to build React apps that interface with a GraphQL server. The React app built in this article allows you to communicate with the GraphQL thanks to Apollo Client.
You can go ahead to extend the application by having some additional features such as pagination, caching, realtime subscriptions e.t.c.
One other thing that was explored was GraphQL’s unique features and some of its advantages over the traditional REST methodology.
If you want to dive deeper and learn more about building web applications with React and GraphQL, you can use any of the resources below:
The code for the GraphQL API can be seen here on GitHub and that of the React app can be seen here.
#reactjs #javascript #react
