Visual Studio 2019 for Mac version 8.7 is available today and includes support for gRPC / OpenAPI client generation and improved unit testing integration. Additionally, it includes several improvements for Xamarin developers, including Xamarin.Forms 4.8 Support. This release also includes initial support for macOS Big Sur, with the exception of Xamarin support. macOS Big Sur support for Xamarin is expected in one of the first servicing releases for Visual Studio for Mac 8.7.
Are you ready for the latest version of Visual Studio 2019 for Mac? If so, version 8.7 is available for you to download today! With this release, we’ve continued to polish the existing experience, paying close attention to many of the problem areas mentioned by our users.
gRPC and OpenAPI Client Generation
Visual Studio for Mac now includes support for generating an API client from an OpenAPI or gRPC service. This allows you to generate the client from a local file or URL, manage service references, and regenerate the client code if the service changes.
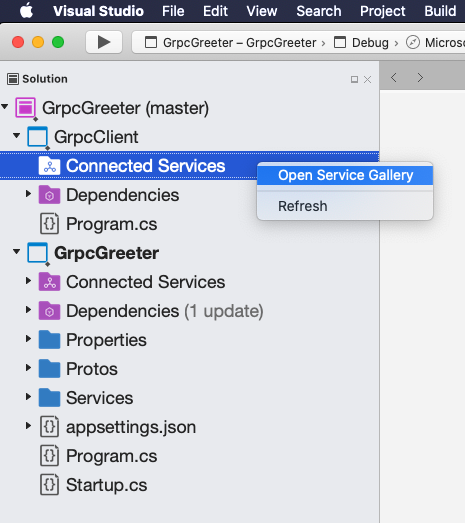
To add a new reference to an OpenAPI or gRPC service, right-click on the Connected Services node in the Solution pad and select Open Service Gallery.
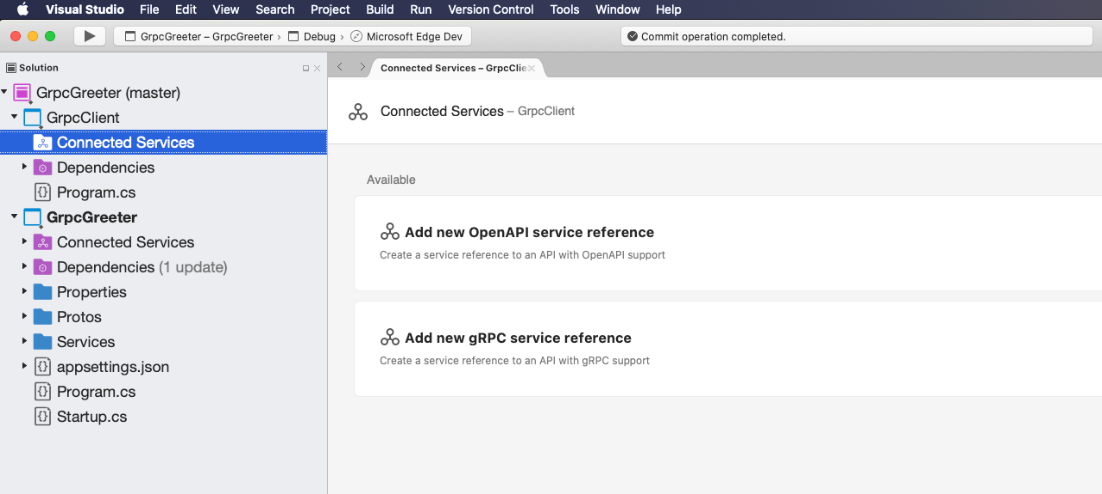
Once you’ve opened the Connected Services Gallery, you have the option to add either an OpenAPI or gRPC reference.
Clicking on either of the options will launch a prompt allowing you to enter the service reference, either by file path or URL.
You can also select whether to generate the following client class types when generating a gRPC client:
- Client
- Server
- Client and Server
- Messages Only (used to generate strongly typed classes based on message properties, with no generated server or client code)
When generating an OpenAPI client, you can specify the namespace and additional options which are passed through to the code generator. Code generation is based on the dotnet-grpc and dotnet-openapi command-line tools.
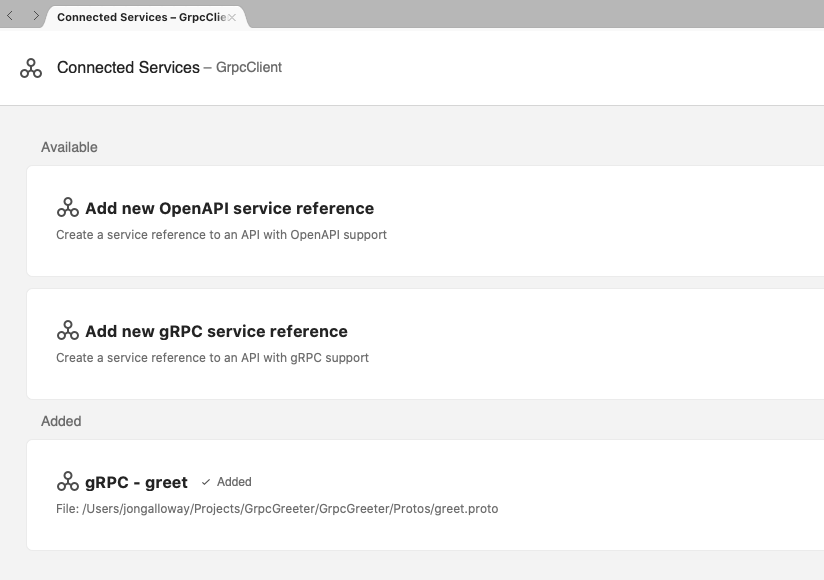
After generating a service reference, you can view and modify it in the Connected Services Gallery as shown below.
For more information on using a generated OpenAPI client, see the Getting Started with NSwag tutorial.
For more information on using a generated gRPC client, see the Create a gRPC client and server in ASP.NET Core tutorial.
Right-Click to Run Unit Tests
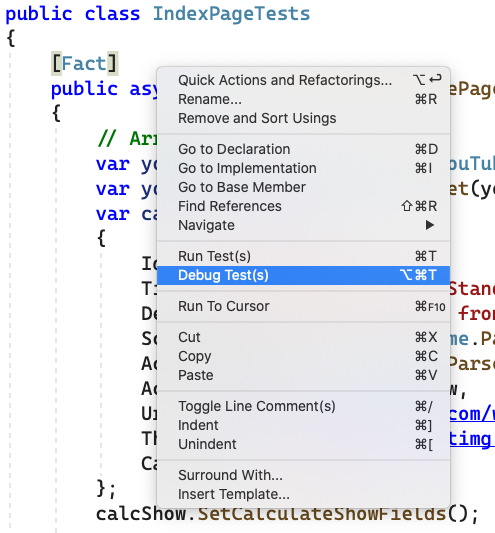
When editing a C## class that contains unit tests, a developer can run tests using the “Run Test(s)” item in a context menu by right clicking in the file, the body of a test class, or the body of a test method. The context menu for the editor has been updated to include Run/Debug Test options:
These new commands can be run using the following keyboard shortcuts (in the Visual Studio for Mac key bindings):
- Run Test(s): ⌘T
- Debug Test(s): ⌘⌥T
The Run command will run tests based on the rules below, in the “Rules for determining which tests to run” section. Running a test is the same as selecting it in the Unit Test pad and running that test.
The Debug command will run tests the same as described above but will also attach the debugger when running the tests. You can customize these key bindings in the Visual Studio for Mac preferences (Visual Studio > Preferences > Environment > Key Bindings) as explained in the documentation.
Rules for determining which tests to run
The Run/Debug Test(s) commands will run one or more tests, based on the following rules.
- Run all tests in a file by right-clicking in the body of a file with test methods, and choose Run Tests.
- Run a single test by right-clicking in a test method, or on the method signature, and choose Run Test.
- Run all tests in a single class by right clicking in the body of a class definition, or the method signature, and choose Run Tests.
As an example, using the code below…
using Microsoft.VisualStudio.TestTools.UnitTesting;

namespace GardenTracker.Test
{
    [TestClass]
    public class UnitTest1
    {
        [TestMethod]
        public void TestMethod1()
        {
        }

        [TestMethod]
        public void TestMethod2()
        {
            Assert.IsTrue(true);
        }
    }

    [TestClass]
    public class UnitTest2
    {
        [TestMethod]
        public void TestMethod3()
        {
            Assert.IsTrue(true);
        }
    }
}
Here’s what happens when you right-click in different places:
- When you right-click inside a test method (e.g. inside
TestMethod1()), just that test is executed. - When you right-click inside a test class but not in a specific test method (e.g. directly on the
UnitTest1class), all tests in that class are executed. - When you right-click outside of a class, all tests in that file are executed.
#visual studio #mac #microsoft #dev