Disclaimer: I assume you have some knowledge in unit testing with Vue.js, and what is TDD in general. I will go straight to the point without telling you what each function do. If you don’t have this knowledge, you can go to https://vue-test-utils.vuejs.org/ to learn more about it.
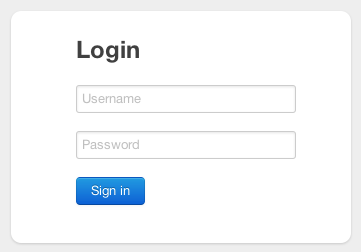
In this part, I will show you a step-by-step guide to do TDD with Vue.js on a simple login page. A very simple login page consists of text input for username, text input for the password, and a submit button. Here is an example:
Forget what you’ve learned, because TDD will introduce a new mindset, a conflicting one. Please bear with me, because I’ve had a lot of questions when learning TDD too.
The first step in TDD is to create a failing test case. It’s okay for it to fail, as long as it contains what you really need for your component. Create a test file LoginPage.spec.js and the first test case. We will check the required elements upon loaded. It checks whether the elements is there or not and also check some labeling. You don’t need to do any refactoring in this step, since it will be done later.
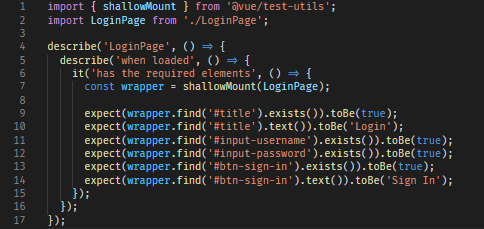
Tip: use
_describe()_to group your test cases. So you or other people can grasp what your component can do by looking at the test results.
Tip: on most cases, you only need
_shallowMount()_instead of_mount()_. You want to isolate the test as much as possible to make it easier to test.
If you run npx jest LoginPage this test will fail and shows something likeCannot find module ‘./LoginPage’ from ‘LoginPage.spec.js’
Tip: use
_npx jest LoginPage --watch_to make your life easier. The_--watch_flag will watch for file changes, and rerun the test automatically.
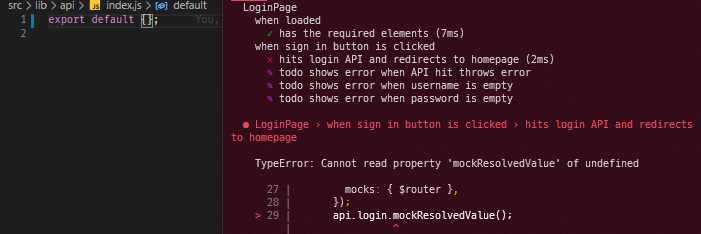
The next step is to make it green. However, please remember, in TDD you have to do minimum implementation to make it green, don’t add any other code. So, create a LoginPage.vue file with minimum implementation and rerun the test.

It fails because there is no element with #title. So we need to add the title element. See what happens to the test result.

Now add a little code to the implementation to make it green. Remember, don’t refactor at this point.
By this point, I assume you have some ideas of how this works. For the next few steps, I will show the implementation and the test result in a series to make this tutorial simpler.


Now the test has passed (green), we can continue to the next step: refactor. Take a look at your code, both the test and the implementation. Is there anything that appears more than once? Or is there anything to simplify? Do refactor on those code, but do not over-refactor it. Refactor as needed.

Tip: don’t forget to retest after you refactor.
Now we can add a new test case. This time we will check for the submit button behavior. The submit button will hit try to call the login API and redirect you to homepage when clicked. However it will try to validate the username and password first. In this section, we will learn how to mock external library and the router.
First create test case, however this time, some test cases. Most of the time you know what your component will do, so by leveraging it.todo() , you can list your component specification and structure your test files.
Tip: It’s better to organize your test with positive test cases (normal, success flow) first, then the negative cases (failing flow), and edge cases.
Tip: Test the expected behavior, not the method. Ask yourself: what is the outcome of an action in the UI.
Tip: In most cases, these are the entry point of things you should test: UI actions (
_v-on_), emitted values, component life cycles (_created_,_mounted_, etc), store state changes, props changes. Avoid test using_wrapper.vm.*_unless necessary.
Tip: In most cases, these are the behavior you should expect: UI changes (including sub-component attribute changes), library function calls, emitted values, store mutations and actions, route changes.
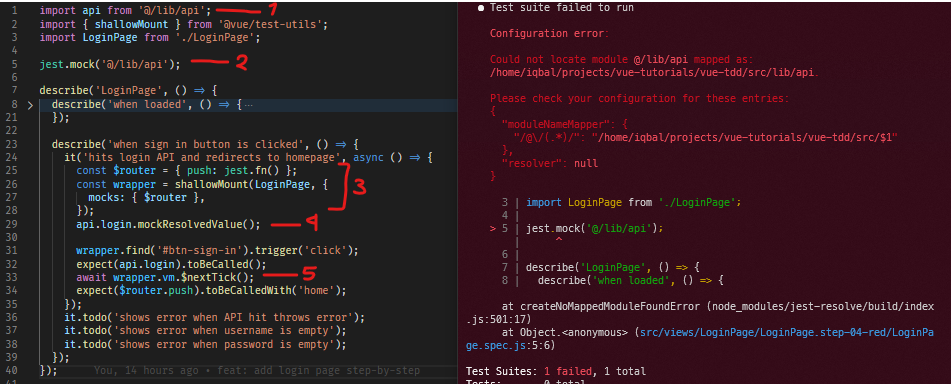
Let’s take a look at the test file first.
- Import API library
- I use Jest’s module name mapper for this shortcut.
- Mock the API library
- You can use
jest.mock()to the implementation. If you use this, then ALL members of@/lib/apiwill be doubled (mocked) even in the implementation. This is very useful if you want to mock external libraries. - Mock
$routerimplementation - As I said earlier, you want to isolate the test, and that is including the router, vuex, store, sub component, other libraries, etc. It’s a different story if you want to do E2E or integration tests.
- Mock implemenatation of
api.login()function - Since we mocked the
@/lib/apiearlier, every member of it becomes ajest.fn()instance (a synchronous function). We also know that API call is handled asynchronously. So, let’s mock it to return a resolved promise. - Wait for promise to be resolved
Now let’s create the implementation. Remember: As minimum as possible.


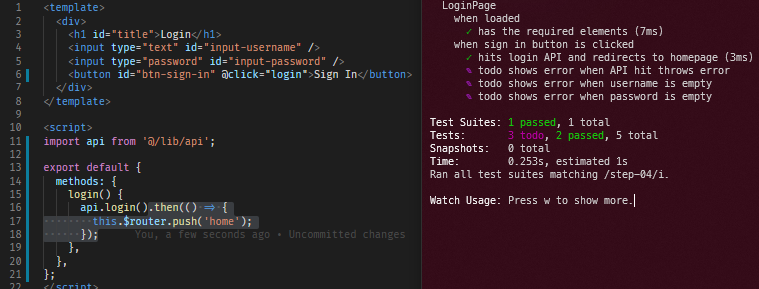
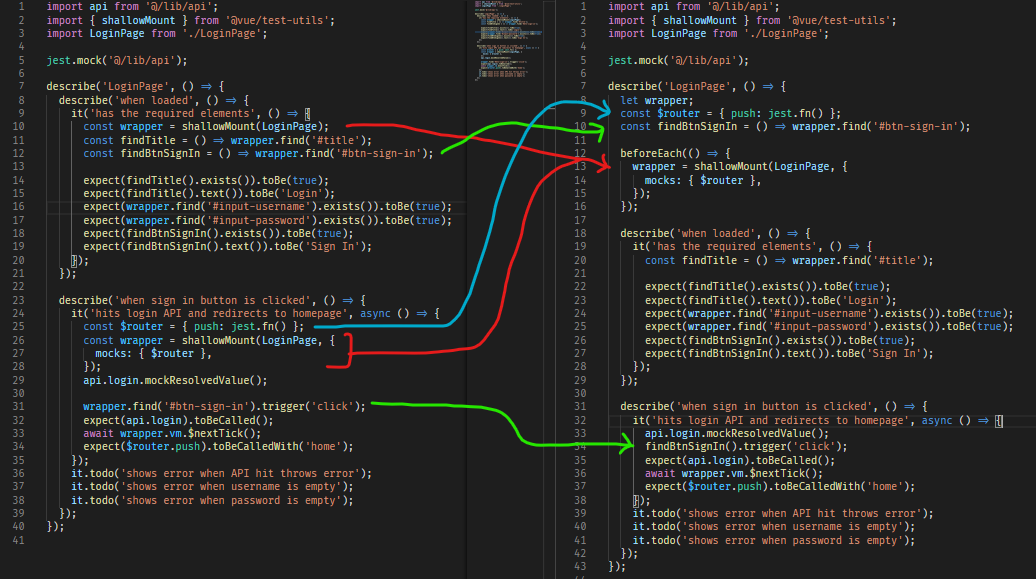
Now, let’s refactor. The code will look more organized, and we didn’t repeat anything. Be careful not to over-refactor.
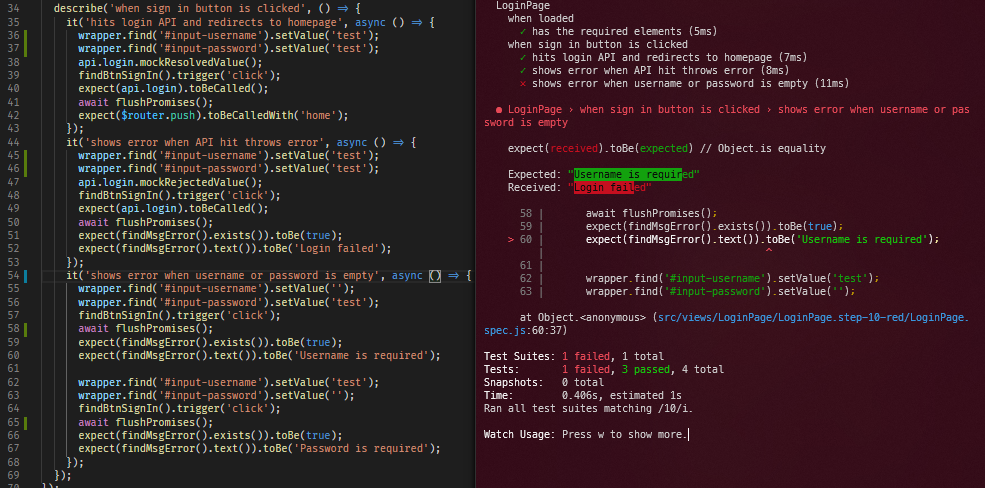
Onward to the next test case. We will test for case when login API sends error that makes the login failed. Write the test case when api.login() promise is rejected an error message is shown, but the error message is not shown when this component is loaded.
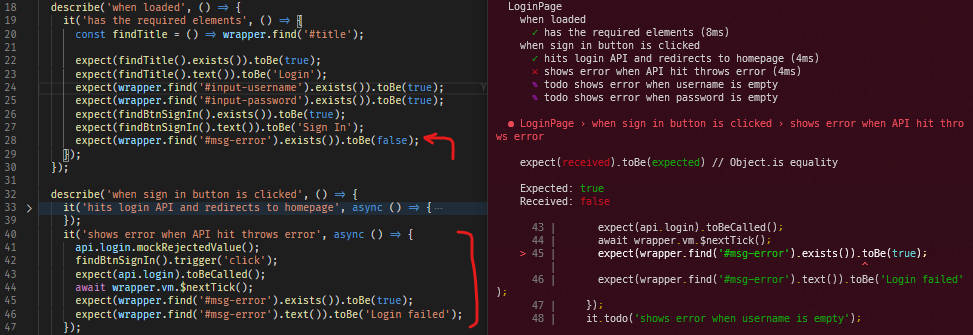
Next, create the implementation. Remember, only code what you need to make this test green.
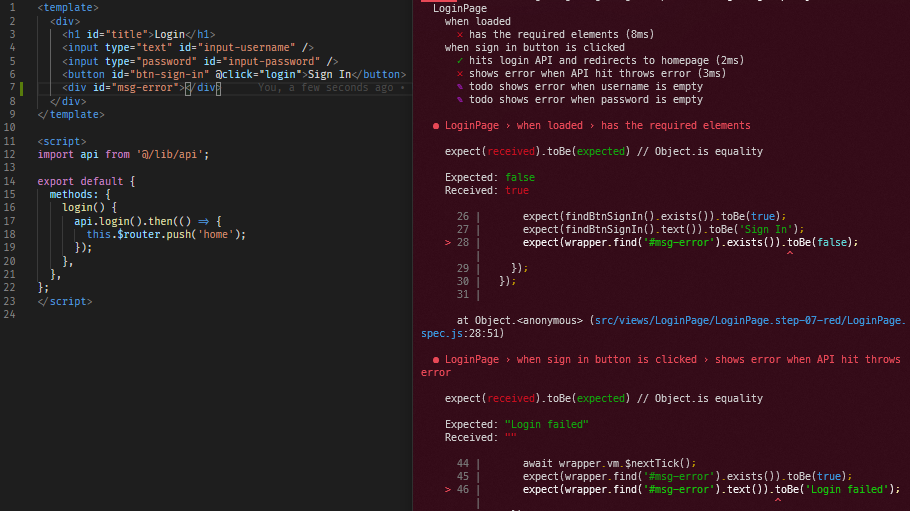
What?! We got 2 errors?
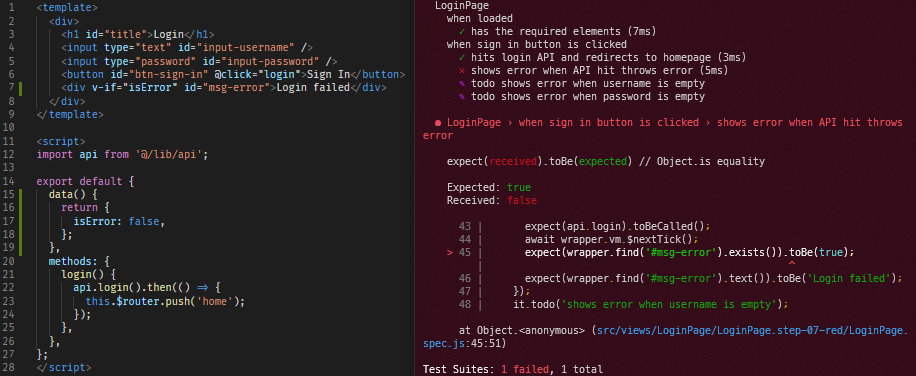
No need to panic, this is expected since we add a test case in the another it(). This is a common occurrence in TDD. We just have to make it green.
#javascript #tdd #tutorial #testing #vuejs
