Real-time Document Editing App with Node.js, React & WebSocket
This tutorial will explain the theoretical concepts behind the WebSocket protocol and build a real-time collaborative document editing app with a Node.js backend and React frontend using the WebSocket protocol.
It was previously quite common for most web apps to have a closely connected backend and frontend, so the apps served data with the view content to the user’s browser. Nowadays, we typically develop loosely coupled, separate backends and frontends by connecting the two with a network-oriented communication line.
For example, developers often use the RESTful pattern with the HTTP protocol to implement a communication line between the frontend and backend for data transferring. But the HTTP-based RESTful concept uses a simplex communication (one-way), so we can’t send data directly from the client (frontend) to the server (backend) without implementing workarounds such as polling.
The WebSocket protocol solves this drawback of the traditional HTTP pattern, offers a full-duplex (or two-way) communication mechanism, and helps developers build real-time apps.
In this article, I will explain the theoretical concepts behind the WebSocket protocol and demonstrate how to build a real-time collaborative document editing app with a Node.js backend and React frontend using the WebSocket protocol.
Contents:
- What is WebSocket?
- How is WebSocket different from HTTP polling, HTTP streaming, and server-sent events?
- Why you should use WebSockets
- How to use WebSockets with Node.js and React
- Agenda 1: WebSocket establishes a handshake between server and client
- When the HTTP connection is accepted
- Creating a handshake request at the client level
- Agenda 2: Real-time message transmission
- Sending and listening to messages on the client side using
react-use-websocket - Sending and listening to messages on the Node.js WebSocket server
What is the WebSocket protocol?
The WebSocket protocol offers persistent, real-time, full-duplex communication between the client and the server over a single TCP socket connection.
The WebSocket protocol has only two agendas: To open up a handshake and to help the data transfer. Once the server accepts the handshake request sent by the client and initiates a WebSocket connection, they can send data to each other with less overhead at will.
WebSocket communication takes place over a single TCP socket using either WS (port 80) or WSS (port 443) protocol. Almost every browser except Opera Mini provides admirable support for WebSockets at the time of writing, according to Can I Use.
How is WebSocket different from HTTP polling, HTTP streaming, and server-sent events?
Historically, creating web apps that needed real-time data (like gaming or chat apps) required an abuse of HTTP protocol to establish bidirectional data transfer. There were multiple methods used to achieve real-time capabilities, but none of them were as efficient as WebSocket. HTTP polling, HTTP streaming, Comet, and SSE (server-sent events) all have their drawbacks.
HTTP polling
The very first attempt to solve the problem was by polling the server at regular intervals. The normal polling approach fetches data from the server frequently based on an interval defined on the client side (typically using setInterval or recursive setTimeout). On the other hand, the long polling approach is similar to normal polling, but the server handles the timeout/waiting time.
The HTTP long polling lifecycle is as follows:
- The client sends out a request and waits for a response
- The server defers its response until there’s a change, update, or timeout. The request stays “hanging” until the server has something to return to the client
- When there’s some change or update on the server end, it sends a response back to the client
- The client sends a new long poll request to listen to the next set of changes
There were a lot of loopholes in long polling — header overhead, latency, timeouts, caching, and so on.
HTTP streaming
This mechanism saved the pain of network latency because the initial request is kept open indefinitely. The request is never terminated, even after the server pushes the data. The first three lifecycle methods of HTTP streaming are the same in HTTP long polling.
When the response is sent back to the client, however, the request is never terminated; the server keeps the connection open and sends new updates whenever there’s a change.
Server-sent events (SSE)
With SSE, the server pushes data to the client, similar to HTTP streaming. SSE is a standardized form of the HTTP streaming concept and comes with a built-in browser API. A chat or gaming application cannot completely rely on SSE. The perfect use case for SSE would be, for example, the Facebook News Feed: whenever new posts come in, the server pushes them to the timeline. SSE is sent over traditional HTTP and has restrictions on the number of open connections.
Learn more about the SSE architecture from this GitHub Gist file. These methods were not just inefficient compared to WebSockets. The code that went into them appeared as a workaround to make a request-reply-type protocol full-duplex-like.
Why you should use WebSockets
WebSockets are designed to supersede the existing bidirectional communication methods. The existing methods described above are neither reliable nor efficient when it comes to full-duplex real-time communications.
WebSockets are similar to SSE but also triumph in taking messages back from the client to the server. Connection restrictions are no longer an issue because data is served over a single TCP socket connection.
How to use WebSockets with Node.js and React
As mentioned in the introduction, the WebSocket protocol has only two agendas: 1) to open up a handshake, and 2) to help the data transfer. Let’s see how WebSockets fulfills those agendas. To do that, I’m going to spin off a Node.js server and connect it to a client built with React.js.
First, download or clone this GitHub repository into your computer. This repository contains the source code of the sample collaborative document editing app. Open it with your favorite code editor. You will see two directories as follows:
server: A Node.js WebSocket server that handles the document editor’s backend logicclient: The React app that connects to the WebSocket server for real-time features
You can start the document editor app with the following commands:
#-- Setup and start the server
cd server
npm install # or yarn install
npm start # or yarn start
#-- Setup and start the client
cd client
npm install # or yarn install
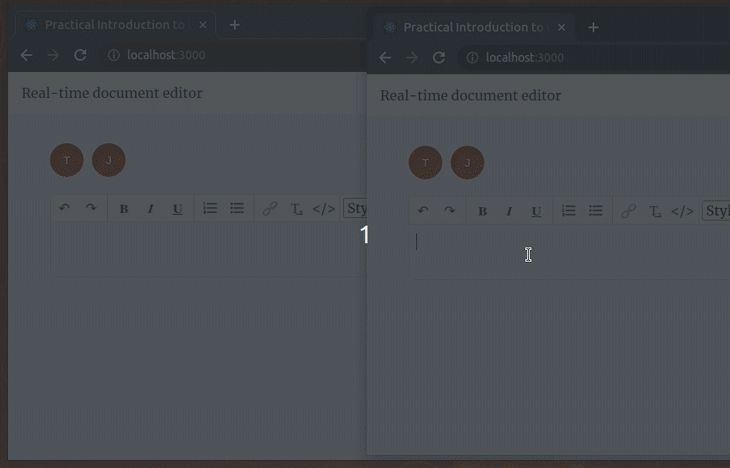
npm start # or yarn startRun the app with the above commands, try to open it with two browser windows, then edit the document from both:
Let’s study the source code and learn how it works using WebSockets!
Agenda 1: WebSocket establishes a handshake between server and client
Creating a handshake at the server level with Node.js
We can make use of a single port to spin off the HTTP server and to attach the WebSocket server. The gist below (taken from server/index.js) shows the creation of a simple HTTP server. Once it is created, we tie the WebSocket server to the HTTP port:
const { WebSocketServer } = require('ws');
const http = require('http');

// Spinning the http server and the WebSocket server.
const server = http.createServer();
const wsServer = new WebSocketServer({ server });
const port = 8000;
server.listen(port, () => {
  console.log(`WebSocket server is running on port ${port}`);
});
In the sample project, I used the popular ws library to attach a WebSocket server instance to an HTTP server instance. Once the WebSocket server is attached to the HTTP server instance, it will accept the incoming WebSocket connection requests by upgrading the protocol from HTTP to WebSocket.
I maintain all the connected clients as an object in my code with a unique key generated via the uuid package on receiving their request from the browser:
// I'm maintaining all active connections in this object
const clients = {};

// A new client connection request received
wsServer.on('connection', function(connection) {
  // Generate a unique code for every user
  const userId = uuidv4();
  console.log(`Recieved a new connection.`);

  // Store the new connection and handle messages
  clients[userId] = connection;
  console.log(`${userId} connected.`);
});
When the HTTP connection is accepted
While sending the regular HTTP request to establish a connection, in the request headers, the client sends Sec-WebSocket-Key. The server encodes and hashes this value and adds a predefined GUID. It echoes the generated value in the Sec-WebSocket-Accept in the server-sent handshake.
Once the request is accepted in the server (after necessary validations in production), the handshake is fulfilled with status code 101 (switching protocols). If you see anything other than status code 101 in the browser, the WebSocket upgrade has failed, and the normal HTTP semantics will be followed.
The Sec-WebSocket-Accept header field indicates whether the server is willing to accept the connection or not. Also, if the response lacks an Upgrade header field, or the Upgrade does not equal websocket, it means the WebSocket connection has failed.
The successful WebSocket server handshake looks like this:
HTTP GET ws://127.0.0.1:8000/ 101 Switching Protocols
Connection: Upgrade
Sec-WebSocket-Accept: Nn/XHq0wK1oO5RTtriEWwR4F7Zw=
Upgrade: websocket
Creating a handshake request at the client level
At the client level, I use the react-use-websocket library to initiate a WebSocket connection. We can also use the built-in WebSocket browser API without any third-party package, but using the browser API directly in React functional components typically generates complex code.
As a solution, we can create a custom React hook for WebSocket connections, but then we will re-invent the wheel and create a react-use-websocket clone. react-use-websocket offers the useWebSocket hook to manage WebSocket connections from React functional components. Check the react-use-websocket documentation to become more familiar with the particular React hook’s design.
As soon as the request is accepted by the server, we will see WebSocket connection established on the browser console.
Here’s the initial scaffold to create the connection to the server via the App component (in client/src/App.js):
import React from 'react';
import useWebSocket from 'react-use-websocket';

import './App.css';

const WS_URL = 'ws://127.0.0.1:8000';

function App() {
  useWebSocket(WS_URL, {
    onOpen: () => {
      console.log('WebSocket connection established.');
    }
  });

  return (
    <div>Hello WebSockets!</div>
  );
}

export default App;
The following headers are sent by the client to establish the handshake:
HTTP GET ws://127.0.0.1:8000/ 101 Switching Protocols
Upgrade: websocket
Connection: Upgrade
Sec-WebSocket-Key: vISxbQhM64Vzcr/CD7WHnw==
Origin: http://localhost:3000
Sec-WebSocket-Version: 13
Now that the client and server are connected via the WebSocket handshake event, the WebSocket connection can transmit messages as it receives them, thereby fulfilling the second agenda of WebSocket protocol.
Agenda 2: Real-time message transmission
Users can join together and edit a document in the sample React app. The app tracks two events:
- User activities: Every time a user joins or leaves, I broadcast the message to all the other connected clients
- Content changes: Every time content in the editor is changed, it is broadcast to all the other connected clients
The protocol allows us to send and receive messages as binary data or UTF-8 (N.B., transmitting and converting UTF-8 has less overhead).
Understanding and implementing WebSockets is very easy as long as we have a good understanding of the socket events: onopen, onclose, and onmessage. The terminologies are the same on both the client and the server side.
Sending and listening to messages on the client side using react-use-websocket
From the client, when a new user joins in or when content changes, we trigger a message to the server using sendJsonMessage to take the new information to the server:
/* When a user joins, I notify the
server that a new user has joined to edit the document. */
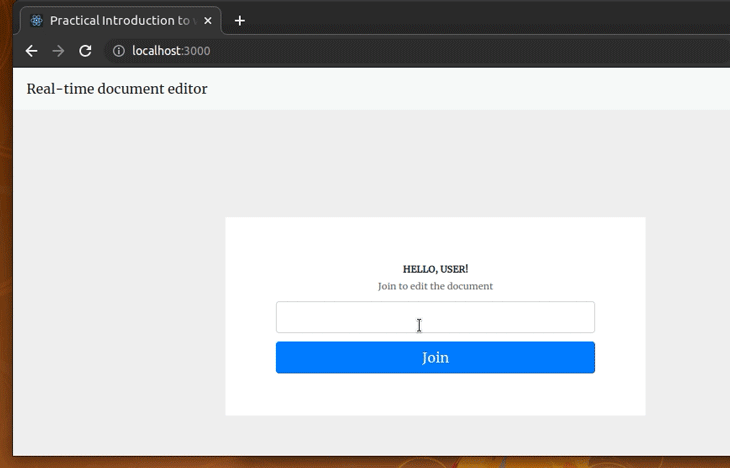
function LoginSection({ onLogin }) {
const [username, setUsername] = useState('');
useWebSocket(WS_URL, {
share: true,
filter: () => false
});
function logInUser() {
if(!username.trim()) {
return;
}
onLogin && onLogin(username); // Triggers sendJsonMessage in App
}
// ----
// ----
/* When content changes, we send the
current content of the editor to the server. */
function handleHtmlChange(e) {
sendJsonMessage({
type: 'contentchange',
content: e.target.value
});
}
return (
<DefaultEditor value={html} onChange={handleHtmlChange} />
);Listening to messages from the server are pretty simple. For example, see how the History component listens to user events and renders the activity log:
function History() {
  const { lastJsonMessage } = useWebSocket(WS_URL, {
    share: true,
    filter: isUserEvent
  });
  const activities = lastJsonMessage?.data.userActivity || [];
  return (
    <ul>
      {activities.map((activity, index) => <li key={`activity-${index}`}>{activity}</li>)}
    </ul>
  );
}
Here we used the share: true setup to reuse the existing WebSocket connection we initiated in the App component. By default, the useWebSocket hook re-renders the component whenever the WebSocket connection receives a new message from the server and the connection state changes.
As a result, the History component will re-render for user and editor events. So, as a performance enhancement, we use the filter: isUserEvent setup to re-render the component only for user events.
Sending and listening to messages on the Node.js WebSocket server
In the server, we simply have to catch the incoming message and broadcast it to all the clients connected to the WebSocket. And this is one of the differences between the infamous Socket.IO and WebSocket: we need to manually send the message to all clients when we use WebSocket. Socket.IO is a full-fledged library, so it handles that on its own.
See how we handle broadcasting in the backend:
function broadcastMessage(json) {
  // We are sending the current data to all connected active clients
  const data = JSON.stringify(json);
  for(let userId in clients) {
    let client = clients[userId];
    if(client.readyState === WebSocket.OPEN) {
      client.send(data);
    }
  };
}
What happens when the browser is closed?
When the browser is closed, the WebSocket invokes the close event, which allows us to write the logic to terminate the current user’s connection. In my code, I broadcast a message to the remaining users when a user leaves the document:
function handleDisconnect(userId) {
    console.log(`${userId} disconnected.`);
    const json = { type: typesDef.USER_EVENT };
    const username = users[userId]?.username || userId;
    userActivity.push(`${username} left the document`);
    json.data = { users, userActivity };
    delete clients[userId];
    delete users[userId];
    broadcastMessage(json);
}

// User disconnected
connection.on('close', () => handleDisconnect(userId));
Conclusion
WebSockets are one of the most interesting and convenient ways to achieve real-time capabilities in an application. It gives us a lot of flexibility to leverage full-duplex communications. I’d strongly suggest working with WebSocket before trying out Socket.IO and other available libraries.
Happy coding!
Source: https://blog.logrocket.com
#websocket #node #react