Webpack for Vue.js 3 from Scratch. A fully fledged webpack configuration can be daunting. Build one from the ground up, learning what each tool does and how they fit together.
In this article I will start with an empty folder and create a webpack build for a Vue.js application including:
- Hot Module loading with webpack-dev-server
- Linting using eslint
- CSS pre-processing with stylus
- Testing using @vue/test-utils and Jest
The only pre-requisite is having node and npm installed, although I will be using VSCode as my editor.
As this is quite a long process I will divide the article into parts, this first part will take us from an empty folder up to a simple page containing a Vue component bundled with webpack and opened in a browser window.
The first thing to do is create a new folder, cd into it and initialise NPM:
npm init
You will be asked to provide some information about the project, it’s safe to accept defaults at this stage, and once completed you will have a package.json file entirely empty of anything other than meta-information. Now we can begin adding our packages.
npm install --save vue vue-router
This installs our application dependencies.
npm install --save-dev webpack webpack-cli
This installs webpack to allow us to begin building our application bundle.
Application Structure
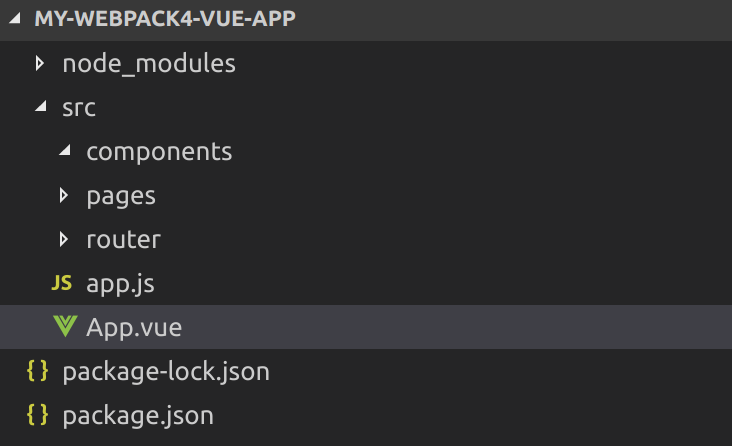
I like to put all the application code, our javascript and vue components, in a subfolder called src. In here I will add:
- app.js : The application entrypoint.
- App.vue: The root component
- pages: A folder containing all top-level components, each of these will have a route entry associated with it.
- components: A folder containing our building block components. Components will be organised into sub-folders based on feature.
- router: A folder for all our vue-router configuration.
If I was using vuex I would create another folder called store to contain all our actions/mutations etc.
When I create these, the folder structure should look like this:
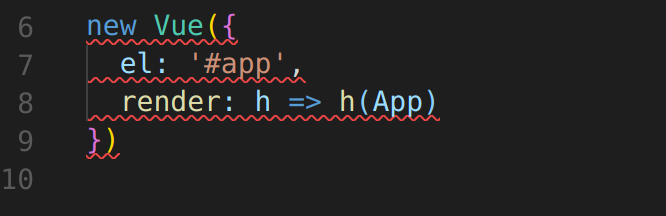
We’ll start our app.js with possibly the simplest entrypoint possible:
import Vue from 'vue'
import App from './App.vue'new Vue({
  el: '#app',
  render: h => h(App)
})
This will pull in our App component and render it into the DOM element with id “app”. Our App component is just as simple for the moment:
<template>
  <div>
    <h1>Hello World!</h1>
  </div>
</template>
Now we have some Vue code, we need to bundle it using Webpack so it can be pulled into our html.
Webpack
Webpack is a module bundler for Javascript applications, when we run the webpack command we are asking it to start at our entrypoint and then build a dependency graph of the whole application, pulling those dependencies into one or more bundles that can be included in our application. It supports multiple different file types through loaders, loaders will take files that have no concept of modules (e.g. css) and process them in a way that allows them to participate in the overall dependency graph that webpack is building.
Webpack 4 was just released with a ton of new features including:
- Built-in chunking support with the optimization API.
- Support for 5 different module types, including Web Assembly modules.
- A “mode” configuration setting that applies a sensible set of defaults, simple projects can be built relying on this alone to determine how to build your application.
- Zero-config setups (#0CJS). If you supply the mode then Webpack will use default entry and output settings to build your application without the need for a config file.
All this plus smaller bundle sizes and faster build times!
Let’s try out a simple webpack build.
In the root of our project create a folder called build and add a file called webpack.config.dev.js. We will use this to configure a loader for our Vue single-file components.
'use strict'const { VueLoaderPlugin } = require('vue-loader')module.exports = {
  mode: 'development',
  entry: [
    './src/app.js'
  ],
  module: {
    rules: [
      {
        test: /\.vue$/,
        use: 'vue-loader'
      }
    ]
  },
  plugins: [
    new VueLoaderPlugin()
  ]
}
The module section will contain all our loaders, each loader declaration consists of a minimum of 2 properties, test and loader. Test is a regular expression that webpack will use to identify which file types to be processed by this loader and loader is the name of the loader itself.
For this to work we need to install some more dependencies:
npm install --save-dev vue-loader vue-template-compiler vue-style-loader css-loader
And add an npm build script:
"build": "webpack --config build/webpack.config.dev.js"
We also need to add an index.html file to pull in our built bundle, place this in the root of the project:
<!DOCTYPE html>
<html>
  <head>
    <meta charset="utf-8">
    <meta name="viewport" content="width=device-width,initial-scale=1.0">
    <title>My Vue app with webpack 4</title>
  </head>
  <body>
    <div id="app"></div>
    <script src="dist/main.js" type="text/javascript"></script>
  </body>
</html>
If you now run the build script you should see something like this:

And if you open index.html in your browser you should see:

As an aside, there is an extension for VSCode, “Live Server”, that allows you to right-click on html files and launch them in an on-demand web server as opposed to opening them from your file system. Eventually we will serve our application using webpack-dev-server with hot module reloading but for the meantime this is an excellent stopgap.
Let’s start by getting webpack-dev-server setup, by doing this we won’t need to keep running our build script to see the changes in the browser.
We’ll need to install the npm module:
npm install --save-dev webpack-dev-server
And change our build script to run this instead of webpack, at the same time I’m going to rename the command from build to dev:
"dev": "webpack-dev-server --config build/webpack.config.dev.js"
Running this now and the browser starts up on http://localhost:8080 and I can see my app. All with zero config! However, there’s a slight problem, if I change my App.vue to say “Good Evening San Dimas!” instead of “Hello World!” then the browser does not update.
If I check my console I can see the application is building so what is wrong? Well when we setup our index.html we hardcoded the path to our javascript, for hot module reloading to work we need to allow this path to be injected, that way the dev server can update the html to include the changes as and when they are made.
Go to the index.html and remove the script tag that points to dist/main.js, then install the html-webpack-plugin:
npm install --save-dev html-webpack-plugin
Now we need to add this to our webpack config file, so it ends up looking like this:
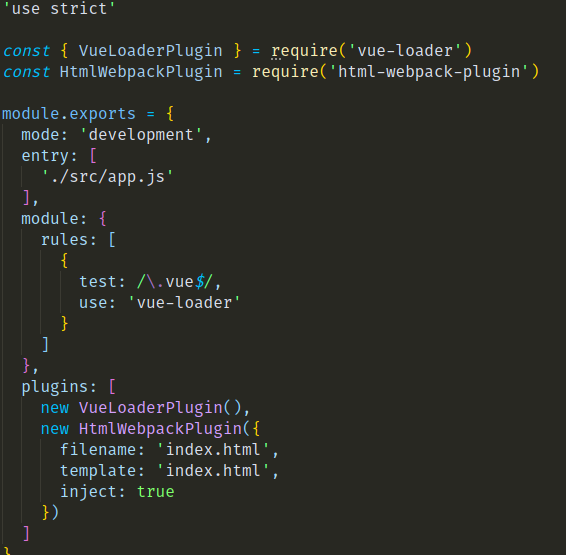
If you now run the application up you can change the message in App.vue and it is immediately reloaded in the browser window!
This is awesome, however we haven’t yet got true HMR, if you look in the browser devtools you can see that the whole page is refreshed when we make a change. To fix this we need to add one more piece of configuration:
'use strict'const webpack = require('webpack')
const { VueLoaderPlugin } = require('vue-loader')
const HtmlWebpackPlugin = require('html-webpack-plugin')module.exports = {
  mode: 'development',

  entry: [
    './src/app.js'
  ],  devServer: {
    hot: true,
    watchOptions: {
      poll: true
    }
  },  module: {
    rules: [
      {
        test: /\.vue$/,
        use: 'vue-loader'
      }
    ]
  },  plugins: [
    new webpack.HotModuleReplacementPlugin(),
    new VueLoaderPlugin(),
    new HtmlWebpackPlugin({
      filename: 'index.html',
      template: 'index.html',
      inject: true
    })
  ]
}
With this in place you should be able to see the changes hot loaded into the page without refreshing, something like this:

Now we have our app auto-updating we should be able to move much quicker so let’s add some CSS. Change the App.vue file so it looks like this:
<template>
  <div class="full-width center-content">
    <h1>Hello World!</h1>
  </div>
</template><style scoped>
.full-width {
  width: 100%;
}.center-content {
  display: flex;
  justify-content: center;
  align-items: center;
}
</style>
This change used to get applied automatically in the browser however now you will see an error message:
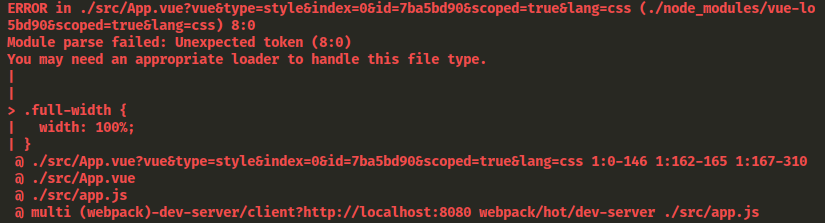
There is a similar issue if the CSS is in a file of its own. Create a folder called assets in the root, add a file called app.css and copy the full-width and center-content classes into it. To include it in our app, we can import it in out app.js….
import '../assets/app.css'
…and remove the styles from App.vue.
Now, when you try to run your app there is an error:

To fix this we need to configure the css loader in our webpack config, add this to rules:
{
  test: /\.css$/,
  use: [
    'vue-style-loader',
    'css-loader'
  ]
}
And install the style-loaders:
npm install --save-dev css-loader vue-style-loader
The css should then load and we have css processing in both our external assets and our single-file components.
One final change here, I like using stylus for CSS pre-processing so I’ve installed the loader:
npm install --save-dev stylus stylus-loader
Added a rule:
{
  test: /\.styl(us)?$/,
  use: [
    'vue-style-loader',
    'css-loader',
    'stylus-loader'
  ]
}
And convert my app.css to app.styl:
.full-width
  width 100%.center-content
  display flex
  justify-content center
  align-items center
At this point if you’re using VSCode there’s a stylus extension which will colour-code your styles correctly.
So far we have managed to get by without adding any script sections to our components, as this is such a simple application we’re not going to do anything too ambitious, let’s just create a HelloComponent that takes name as a prop and issues the appropriate greeting.
Under the components folder, add HelloComponent.vue, it should look like this:
<template>
  <h1>Hello {{ name }}!</h1>
</template><script>export default {
  props: {
    name: {
      type: String,
      required: true
    }
  }
}
</script><style lang="stylus" scoped>
h1
  color red
</style>
Then change App.vue to use the new component:
<template>
  <div class="full-width center-content">
    <hello-component name="World" />
  </div>
</template><script>
import HelloComponent from './components/HelloComponent.vue'export default {
  components: {
    HelloComponent
  }
}
</script>
This works, however older browsers may struggle with this ES6 syntax (and this is something we will come up against when we start testing) so we are going to install Babel to transpile our code to ES5 which can be understood by all browsers.
First, install the npm modules:
npm install --save-dev @babel/core babel-loader @babel/preset-env
Then add the loader config:
{
  test: /\.js$/,
  use: 'babel-loader'
}
It is important at this stage that this loader config comes after vue-loader in your config, vue-loader will split out your single-file components into separate modules for your html, js and styles, we want babel-loader to process the js part of this.
Finally in the root of the project create a file called .babelrc, this is where we will put babel-specific configuration. At the moment we are going to keep this as simple as possible:
{
  "presets": [
    ["@babel/env", {
      "modules": false,
      "targets": {
        "browsers": ["> 1%", "last 2 versions", "not ie <= 8"]
      }
    }]
  ]
}
We can now run our application up and we see no surface changes however under the hood our ES6 code has been transpiled to ES5 and will work on a much wider range of browsers.
In practice I often have multiple entrypoints as I use this configuration to add polyfills to support older browsers such as Internet Explorer but in this case it’s a change I should have thought of. Changing the name of the file means that the current webpack configuration is as below.
'use strict'const webpack = require('webpack')
const { VueLoaderPlugin } = require('vue-loader')
const HtmlWebpackPlugin = require('html-webpack-plugin')module.exports = {
  mode: 'development',

  devServer: {
    hot: true,
    watchOptions: {
      poll: true
    }
  },  module: {
    rules: [
      {
        test: /\.vue$/,
        use: 'vue-loader'
      }, {
        test: /\.js$/,
        use: 'babel-loader'
      }, {
        test: /\.styl(us)?$/,
        use: [ 'vue-style-loader', 'css-loader', 'stylus-loader' ]
      }
    ]
  },plugins: [
    new webpack.HotModuleReplacementPlugin(),
    new VueLoaderPlugin(),
    new HtmlWebpackPlugin({
      filename: 'index.html',
      template: 'index.html',
      inject: true
    })
  ]
}
Linting
Linting is the process of applying static analysis to your codebase to detect issues or enforce style guidelines. It is very useful when working with dynamically typed languages such as javascript. ESLint is the standard linter, it allows you to define sets of rules to run against your codebase, or use plugins to use a pre-defined set. We will use the Vue eslint plugin to enforce the recommended rules for a Vue application.
There are quite a few npm packages we need to install to enable linting:
npm install --save-dev eslint eslint-plugin-import eslint-plugin-node eslint-plugin-promise eslint-plugin-standard eslint-config-standard babel-eslint eslint-loader eslint-plugin-vue
Once this is done, we need to tell eslint which rules we want to use, create a file called .eslintrc.js in the project root and and add these settings:
module.exports = {
  parserOptions: {
    parser: 'babel-eslint'
  },
  extends: [
    'plugin:vue/recommended',
    'standard'
  ],
  plugins: [
    'vue'
  ]
}
Here we are telling eslint that we want to use babel to parse our javascript and then apply the standard linting rules and the recommended rules from the vue plugin.
The easiest way to run ESLint is via an npm script. Add this to package.json in the scripts section:
"lint": "eslint --ext .js,.vue src"
We’re running ESLint against anything in our src folder with the file extension .js or .vue. Running this now and you should actually get an error already.
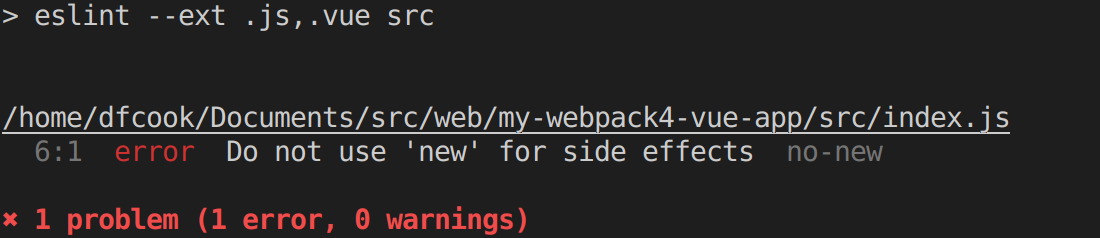
This is pointing at these lines in our index.js, I have the eslint extension for VSCode installed so if I open this file now I can see another visual cue that something is wrong.
There are various ways to fix this, we could export the new Vue object for instance, however let’s tell ESLint that this line is actually OK and we want it to ignore it. Add this comment immediately before the offending code:
/* eslint-disable-next-line no-new */
Now when you rerun our lint script it should report no errors.
ESLint also supports autofixing some classes of errors, I like to add a shortcut script to my npm config to allow me to run the autofix when required:
"lint:fix": "eslint --ext .js,.vue src --fix"
Once our linting is configured to run on-demand we want to change our webpack build so it runs automatically. For this we need to install the webpack loader:
npm install --save-dev eslint-loader
And change our webpack config to add a rule to associate our .js and .vue files with the ESLint loader:
{
  test: /\.(js|vue)$/,
  use: 'eslint-loader',
  enforce: 'pre'
}
This rule has one change to our others, enforce: ‘pre’. This means the ESLint loader is a pre-loader, it will run before the other loaders and apply the linting rules before the babel-loader kicks in and start processing the javascript.
Static Assets
Static assets are things like images and video, they will not be processed by Webpack but we will require them to be copied to our dist folder so they will be available to the built application.
To do this we use the copy-webpack-plugin. Following the by-now familiar path we need to install the package:
npm install --save-dev copy-webpack-plugin
Then in our webpack config we pull the plugin in and add it to our plugins section.
const CopyWebpackPlugin = require('copy-webpack-plugin')
const path = require('path')function resolve (dir) {
  return path.join(__dirname, '..', dir)
}plugins: [
  new CopyWebpackPlugin([{
    from: resolve('static/img'),
    to: resolve('dist/static/img'),
    toType: 'dir'
  }])
]
This is pretty straightforward, all the images we put in our static/img folder will be copied to the equivalent folder in our dist build folder.
Testing
Part of the Vue ecosystem, vue-test-utils is the official unit testing library for Vue.js. It supports multiple test runners, shallow rendering, simulating user interactions, mocking vuex and vue-router and synchronous updates (removing the need for calling nextTick to trigger dom updates).
In this example, I’m going to use jest for running the tests. Jest is from facebook and is closely associated with React, however it is can adapt to any Javascript library or framework and there is a vue-specific ecosystem allowing us to run our tests without any difficulty.
Let’s install jest:
npm install --save-dev jest babel-jest vue-jest jest-serializer-vue @vue/test-utils
Jest is the test-runner, vue-jest is a package for transforming vue components into the correct format for jest and jest-serializer-vue is a package that supports taking snapshots of vue components. Snapshot testing allows rendering of a complete DOM and then performing comparisons to ensure it does not change.
Instead of a standalone configuration file, Jest is configured from our package.json. Add this to the end of our json object:
"jest": {
  "moduleFileExtensions": [
    "js",
    "vue"
  ],
  "moduleNameMapper": {
    "^@/(.*)$": "<rootDir>/src/$1"
  },
  "transform": {
    "^.+\\.js$": "<rootDir>/node_modules/babel-jest",
    ".*\\.(vue)$": "<rootDir>/node_modules/vue-jest"
  },
  "snapshotSerializers": [
    "<rootDir>/node_modules/jest-serializer-vue"
  ]
}
While we’re in package.json let’s add a script to actually run our tests:
"test": "jest"
We need to configure babel to transpile our tests, add this to the .babelrc file:
"env": {
  "test": {
    "presets": [
      ["env", { "targets": { "node": "current" }}]
    ]
  }
}
And tell ESLint about our test environment by adding this to the .eslintrc.js file:
env: {
  browser: true,
  node: true,
  mocha: true
},
globals: {
  expect: true
}
Now jest is configured we can actually write a test. Keeping it simple we will just mount our App component and verify that it has the “.center-content” class. Jest will by default look for tests in a folder called tests so create this under the src folder and add a file called App.spec.js.
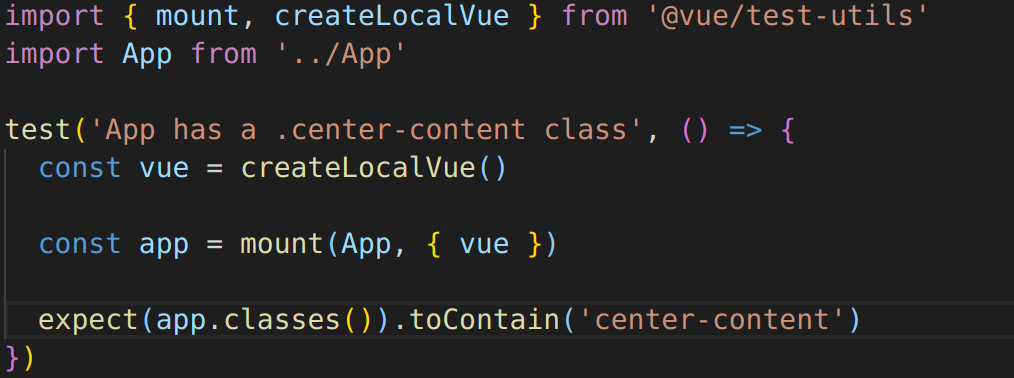
We use Vue test-utils to mount the app and then run a simple expect against the returned wrapper.
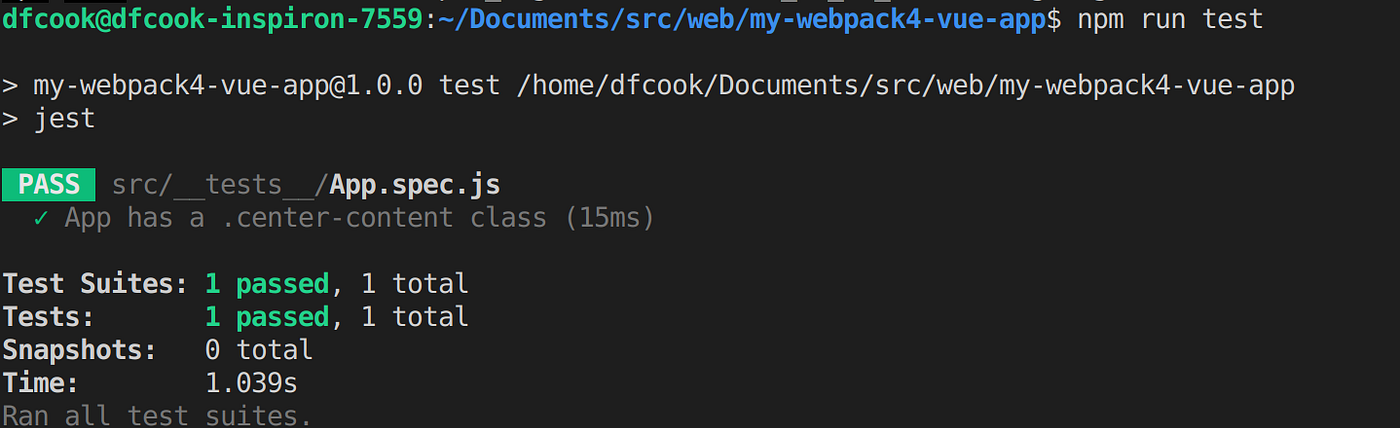
To run this test it’s as simple as:
npm run test
Extracting CSS
It’s a testament to the pace of change in the webpack arena that in the week since I published that the method of extracting CSS into a separate file has changed completely. With the release of vue-loader 15 MiniCssExtractPlugin is the standard way to extract CSS from your Vue single-file-components.
Install the plugin from npm:
npm install --save-dev mini-css-extract-plugin
Add it to the plugins in our webpack config file:
const MiniCssExtractPlugin  = require('mini-css-extract-plugin').
.
plugins: [
  new MiniCssExtractPlugin({
    filename: 'main.css'
  })
]
And finally configure our stylus loader to use this plugin to extract the css and the vue loader to extract the CSS from our single file components:
module: {
  rules: [
    {
      test: /\.vue$/,
      use: 'vue-loader'
    }, {
      test: /\.styl(us)?$/,
      use: [
        MiniCssExtractPlugin.loader,
        'css-loader',
        'stylus-loader'
      ]
    }
  ]
}
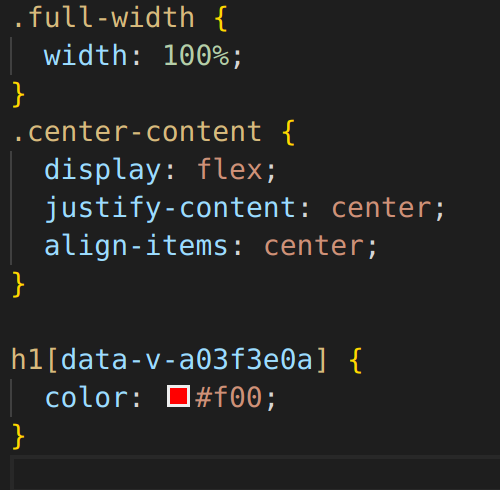
Now when our application builds all the stylus will be extracted and placed in a single css file (main.css) under our dist folder. Scoped CSS from our single-file-components will also be included, for example:
That’s All Folks
I hope these articles have been helpful. With the imminent arrival of vue-cli 3 there is an element of obsolescence to them already, the method of working with webpack will go through significant changes. However, it will always be important to have some knowledge of how these things are configured under the hood, and there is no better way to do that than working through from scratch.
The final code is available on github.
#vue-js #webpack #javascript #web-development