Learn about Basics of Redux for React
What is React and Redux? When and how do you use them together?
Often used to create Single-Page App (SPA), React is a component-based framework that can add unlimited amount of independent components to websites. Redux is an open-source state management system built-in with a set of developer tools useful of debugging.
Today, we’ll learn the basics of Redux and React by building a simple app and will secure the app using Okta for authentication.
When to Use Redux With React
React components can accept properties as well as manage their own state. Redux provides a global app state that any component can link into.
Redux is not something that every app needs. While it has its advantages, it can also add quite a bit of complexity. There is also a myriad of variants on Redux to try to simplify it, and there are countless ways to architect the files needed. Generally, Redux should not be added to any project without a good understanding of why you need it. Here are a few examples of what React-Redux can give you over a vanilla React approach:
- Redux gives you a global state. This can be helpful when you have deeply nested components that need to share the same state. Rather than passing unrelated properties down the component tree, you can simply access the Redux store.
- Debugging can be much simpler.
- You can rewind the data to specific points to see the state of the app before or after any given action.
- It’s possible to log all actions a user took to get to a specific point (say an app crash, for example).
- Hot-reloading is more reliable if the state is stored outside the component itself.
- Business logic can be moved into the Redux actions to separate business logic from components.
Create a Search App in React
This will be a pretty simplified example, but hopefully gives you an idea what some of the benefits are of using Redux in a React app. TV Maze provides an open API for querying TV shows. I’ll show you how to create an app that lets you search through TV shows and display details for each show.
Assuming you have Node installed on your system, you’ll next need to make sure you have yarn and create-react-appin order to complete this tutorial. You can install both by using the following command line:
npm i -g yarn@1.13.0 create-react-app@2.1.3
Now you can quickly bootstrap a new React app with the following command:
create-react-app react-redux
That will create a new directory called react-redux, add some files for a skeleton project, and install all the dependencies you need to get up and running. Now you can start the app with the following:
cd react-redux
yarn start
Set Up Redux for Your React App
First, you’ll want to install the dependencies you’ll need. Use the following command:
yarn add redux@4.0.1 react-redux@6.0.0 redux-starter-kit@0.4.3
Redux Actions
Redux has a few moving parts. You’ll need actions that you can dispatch to tell redux you want to perform some action. Each action should have a type, as well as some sort of payload. Create a new file, src/actions.js with the following code:
export const SEARCH_SHOWS = 'SEARCH_SHOWS'; export const SELECT_SHOW = 'SELECT_SHOW';export const searchShows = term => async dispatch => {
const url = new URL(‘https://api.tvmaze.com/search/shows’);
url.searchParams.set(‘q’, term);const response = await fetch(url);
const results = await response.json();dispatch({ type: SEARCH_SHOWS, results, term });
};export const selectShow = (id = null) => ({ type: SELECT_SHOW, id });
You’ll be using redux-thunk, which allows us to handle actions asynchronously. In the example above, selectShow is a simple, synchronous action, which just selects a show using a given ID. On the other hand, searchShows is async, so instead of returning a JSON object, it returns a function that accepts a dispatch function. When the action is finished, instead of returning the payload, you pass it into the dispatch function.
Redux Reducers
The next thing you’ll need is a reducer to tell Redux how an action should affect the data store. Reducers should be pure functions that return a new state object rather than mutating the original state. Create a new file, src/reducers.js with the following code:
import { combineReducers } from ‘redux’;

import { SEARCH_SHOWS, SELECT_SHOW } from ‘./actions’;
const initialShowState = {

 detail: {},

 search: {},

 selected: null,

};
const shows = (state = initialShowState, action) => {

 switch (action.type) {

  case SEARCH_SHOWS:

   const detail = { …state.detail };

   action.results.forEach(({ show }) => {

    detail[show.id] = show;

   });

   return {

    detail,

    search: {

     …state.search,

     [action.term]: action.results.map(({ show }) => show.id),

    },

   };

  case SELECT_SHOW:

   return {

    …state,

    selected: action.id,

   };

  default:

   return state;

 }

};
export default combineReducers({

 shows,

});
In this example, you have a single shows reducer, and its state will be stored in state.shows. It’s common to separate logic into different sections using this method, combining them using combineReducers.
The reducer takes the current state object. If the state is undefined, which will be true during initialization, then you will want to provide a default, or initial, state. You then need to look at the type of the action to determine what you should do with the data.
Here, you have the SEARCH_SHOWS action, which will update the detail cache for each object and store a list of search results by ID. The data that TV Maze returns looks like:
[

{ score: 14.200962, show: { id: 139, name: “Girls”, /* … / } },

{ score: 13.4214735, show: { id: 23542, name: “Good Girls”, / … */ } },

// …

]
This was simplified in the reducer, so the detail for each show is stored by ID, and the search results are just an array of IDs stored by the search term. This will cut down on memory because you won’t need a separate copy of each show detail for each search term.
For the SELECT_SHOW action, you just set selected to the ID of the show.
If you don’t recognize the action, you should just return the state as it is currently. This is important so that the state doesn’t become undefined.
Redux Store
Now that you have your reducer, you can create the store. This is made easy by redux-starter-kit. A lot of the boilerplate has been moved into that, making it customizable but with some very reasonable defaults (such as including Redux Thunk to handle async actions and hooking into Redux Devtools for better debugging). Create a new file src/store.js with the following code:
import { configureStore } from ‘redux-starter-kit’;
import reducer from ‘./reducers’;

export default configureStore({ reducer });
React Redux
React and Redux are really two separate concepts. In order to get Redux working with your app, you’ll need to use react-redux to bridge the two pieces (strictly speaking, it’s not 100% necessary to use react-redux, but it makes things a lot simpler). Replace the contents of src/App.js with the following:
import React from ‘react’;import { Provider } from ‘react-redux’;
import store from ‘./store’;const App = () => (
<div>TODO: Build TV search components</div>
);export default () => (
<Provider store={store}>
<App />
</Provider>
);
The Provider component has access to the store and passes it along to child components using context. A component, later on, can access the store, even if it is deeply nested in the React tree.
Create the Search and Detail Components for Your React App
Before you get started building out the components, I’ll have you install a few more dependencies.
- To make the UI look somewhat decent, without a lot of work, you can use Bootstrap.
- There’s a search component called React Bootstrap Typeahead that will work and look nice with minimal setup.
- The summary data that comes from TV Maze contains some HTML, but it’s bad practice to insert that directly because it could contain some cross-site scripting attacks. To display it, you’ll need an HTML parser like React HTML Parser that will convert the raw HTML to safe React components.
Install these with the following command:
yarn add bootstrap@4.2.1 react-bootstrap-typeahead@3.3.4 react-html-parser@2.0.2
Then, in src/index.js, you’ll need to add required CSS imports. You also will no longer need the default CSS from create-react-app. Replace this line:
import ‘./index.css’;
with the following two lines:
import ‘bootstrap/dist/css/bootstrap.min.css’;

import ‘react-bootstrap-typeahead/css/Typeahead.css’;
Search Component
Create a new file src/Search.js containing the following:
import React, { useState } from ‘react’;

import { connect } from ‘react-redux’;

import { AsyncTypeahead } from ‘react-bootstrap-typeahead’;
import { searchShows, selectShow } from ‘./actions’;
const Search = ({ shows, fetchShows, selectShow, onChange }) => {

const [value, setValue] = useState(‘’);

const options = (shows.search[value] || []).map(id => shows.detail[id]);
return (

<AsyncTypeahead

autoFocus

labelKey=“name”

filterBy={() => true}

onSearch={term => {

fetchShows(term);

setValue(term);

}}

onChange={selectShow}

placeholder=“Search for a TV show…”

isLoading={Boolean(value) && !shows.search[value]}

options={options}

/>

);

};
const mapStateToProps = state => ({

shows: state.shows,

});
const mapDispatchToProps = dispatch => ({

fetchShows: value => dispatch(searchShows(value)),

selectShow: ([show]) => dispatch(selectShow(show && show.id)),

});
export default connect(

mapStateToProps,

mapDispatchToProps

)(Search);
React-Redux’s connect function is the glue that connects a component to the Redux store. It requires a mapStateToPropsfunction that will transform the Redux state into properties that will be passed to your component. In this case, it is getting the shows subset of the store, which contains the detail, search, and selected you set up earlier.
The connect function also takes an optional mapDispatchToProps function, which allows your component to receive function properties that will dispatch actions. Here, you’re getting a function fetchShows to search for shows with the search term you pass in, and another function selectShow that will tell redux which show you’ve selected.
The AsyncTypeahead component from react-bootstrap-typeahead gives you a few hooks to trigger a search or select an option. If the user has started typing but the redux store doesn’t have any results yet (not even an empty array), then this adds a loading icon to the search box.
Detail Component
Next, to display the details of the selected show, create a new file src/Detail.js containing the following:
import React from ‘react’;
import ReactHtmlParser from ‘react-html-parser’;
import { connect } from ‘react-redux’;const Detail = ({ show }) =>
show ? (
<div className=“media”>
{show.image && (
<img
className=“align-self-start mr-3”
width={200}
src={show.image.original}
alt={show.name}
/>
)}
<div className=“media-body”>
<h5 className=“mt-0”>
{show.name}
{show.network && <small className=“ml-2”>{show.network.name}</small>}
</h5>
{ReactHtmlParser(show.summary)}
</div>
</div>
) : (
<div>Select a show to view detail</div>
);const mapStateToProps = ({ shows }) => ({
show: shows.detail[shows.selected],
});export default connect(mapStateToProps)(Detail);
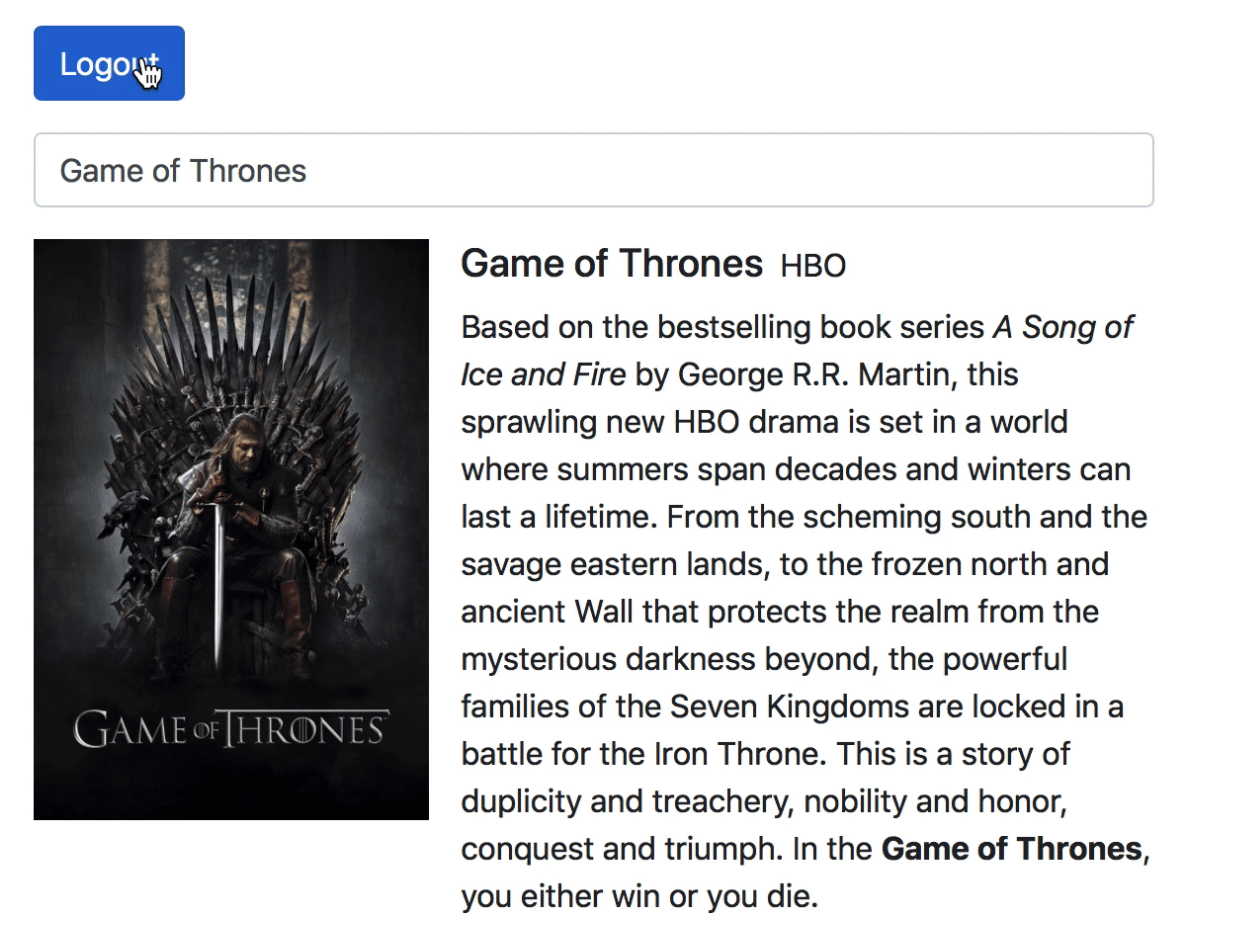
If there is no show selected, you’ll get a simple message to select a show first. Since this is connected to the Redux store, you can get the detail for a selected show with shows.detail[shows.selected], which will be undefined if there is no show selected. Once you’ve selected one, you’ll get the detail passed in as the show prop. In that case, you can show the artwork, name, network, and summary for the show. There’s a lot more information contained in the details, so you can display quite a bit more information if you want to play around with the detail page some more.
Add the Components to Your React App
Now that you’ve created the Search and Detail components, you can tie them into your app. Back in src/App.js, replace the placeholder App functional component (containing the TODO) with the following:
<div className=“m-3”>

<Search />

<div className=“my-3”>

<Detail />

</div>

</div>
You’ll also need to make sure to import those components at the top of the file:
import Search from ‘./Search’;

import Detail from ‘./Detail’;
For reference, here’s the full
import React from ‘react’;import { Provider } from ‘react-redux’;
import store from ‘./store’;import Search from ‘./Search’;
import Detail from ‘./Detail’;const App = () => (
<div className=“m-3”>
<Search />
<div className=“my-3”>
<Detail />
</div>
</div>
);export default () => (
<Provider store={store}>
<App />
</Provider>
);
Profit
You should now have a fully functional web app where you can search for TV shows and get some details.

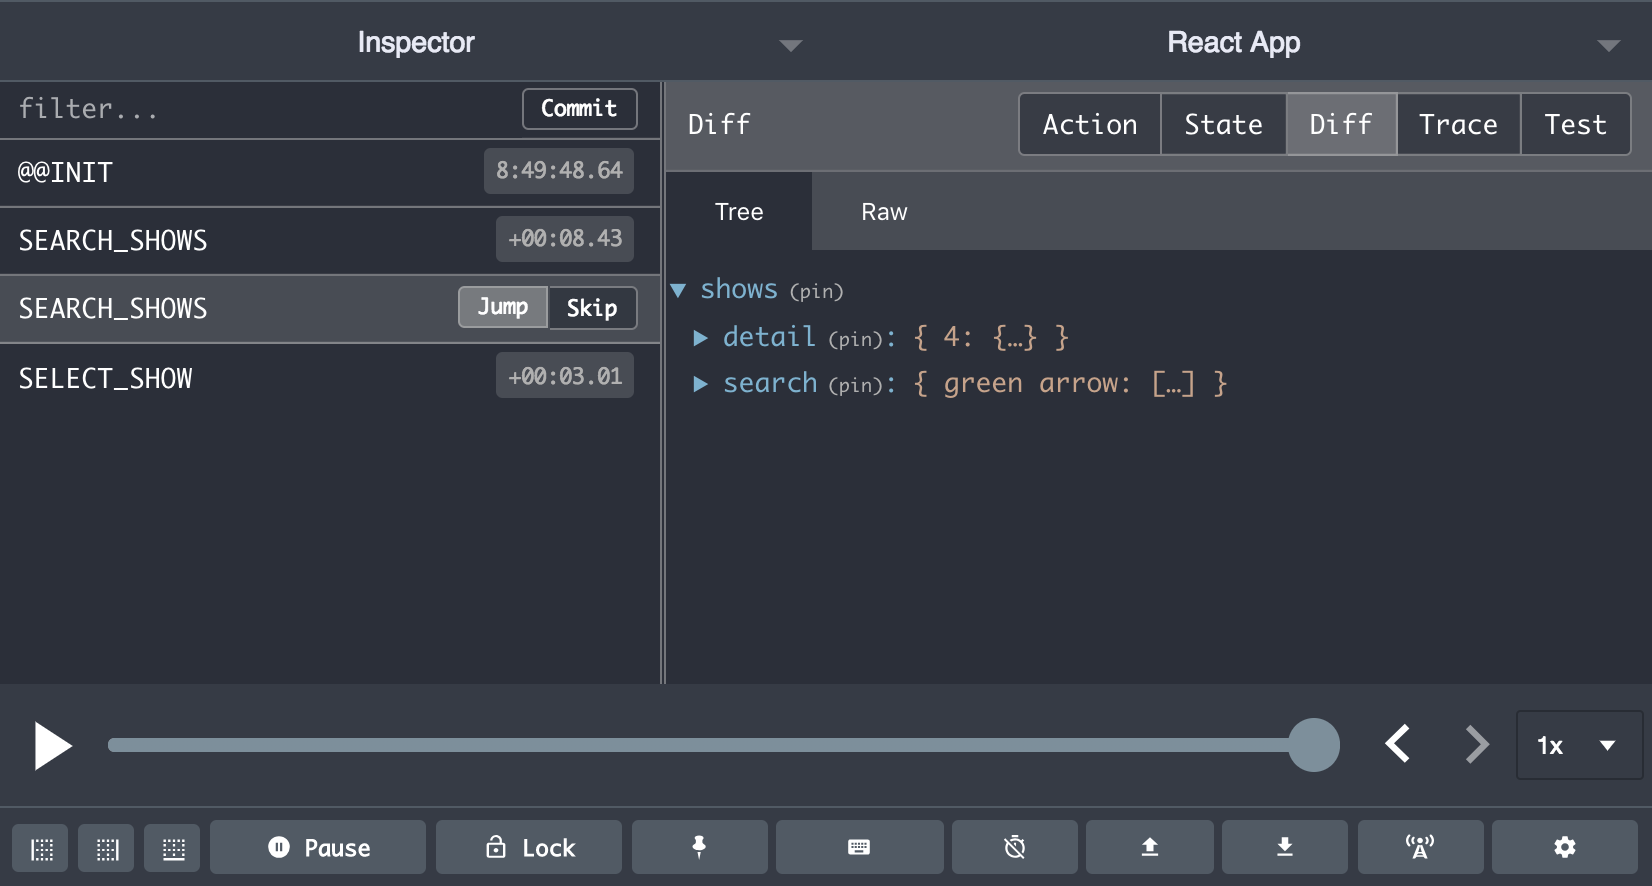
If you install the Redux DevTools Extension you’ll also be able to replay actions, view the data in the store, and much more.

Add User Authentication to Your React Redux App
Okta is a cloud service that allows developers to create, edit, and securely store user accounts and user account data, and connect them with one or multiple applications. If you don’t already have one, sign up for a forever-free developer account. Log in to your developer console, navigate to Applications, then click Add Application. Select Single-Page App, then click Next.
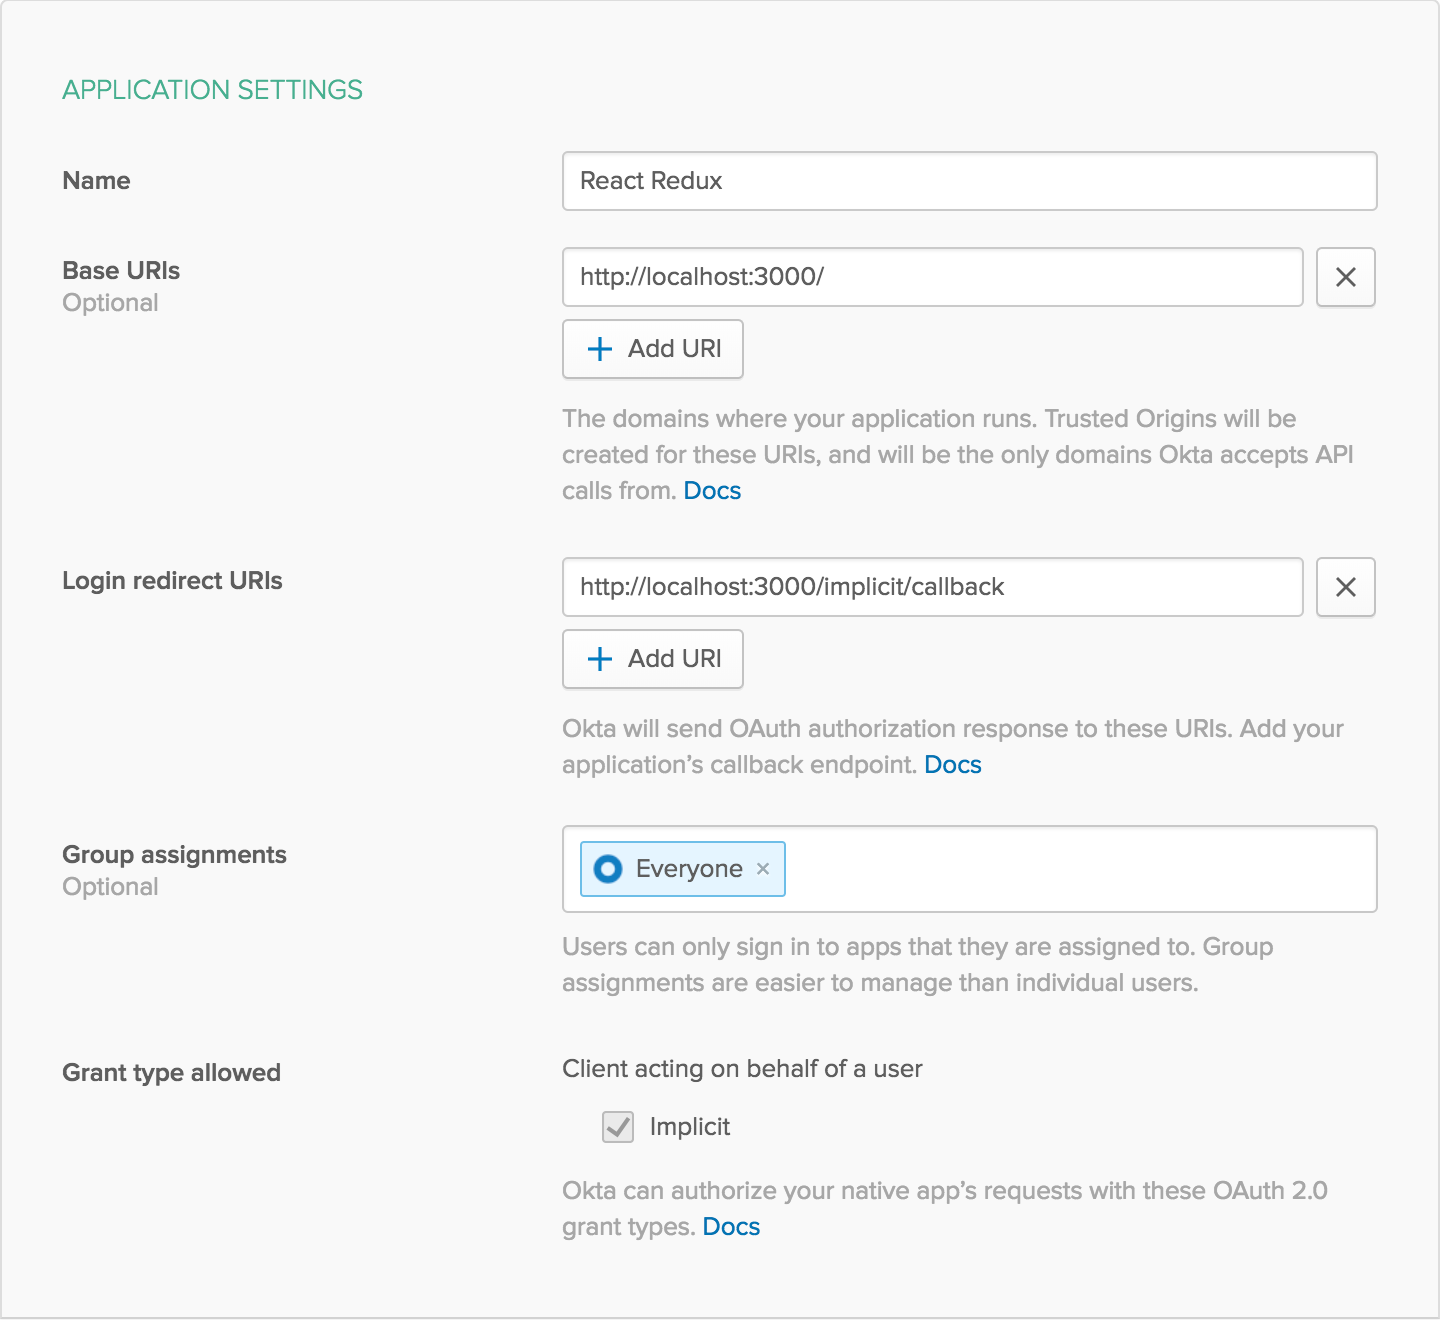
Since Create React App runs on port 3000 by default, you should add that as a Base URI and Login Redirect URI. Your settings should look like the following:

Click Done to save your app, then copy your Client ID and paste it as a variable into a file called .env.local in the root of your project. This will allow you to access the file in your code without needing to store credentials in source control. You’ll also need to add your organization URL (without the -admin suffix). Environment variables (other than NODE_ENV) need to start with REACT_APP_ in order for Create React App to read them, so the file should end up looking like this:
REACT_APP_OKTA_ORG_URL=https://{yourOktaDomain}

REACT_APP_OKTA_CLIENT_ID={yourClientId}
You may need to restart your server before it will recognize these changes. You can find the running instance and then hit ctrl-c to close it. Then run it again with yarn start.
The easiest way to add Authentication with Okta to a React app is to use Okta’s React SDK. You’ll also need to add routes, which can be done using React Router. Go ahead and add these dependencies:
yarn add @okta/okta-react@1.1.4 react-router-dom@4.3.1
You’ll need to make some changes to src/App.js now. Here’s what the final output should be, but I’ll go over what the differences are:
import React, { useState, useEffect } from ‘react’;

import { BrowserRouter as Router, Route } from ‘react-router-dom’;

import { Security, ImplicitCallback, withAuth } from ‘@okta/okta-react’;
import { Provider } from ‘react-redux’;

import store from ‘./store’;
import Search from ‘./Search’;

import Detail from ‘./Detail’;
const App = withAuth(({ auth }) => {

const [authenticated, setAuthenticated] = useState(null);
useEffect(() => {

auth.isAuthenticated().then(isAuthenticated => {

if (isAuthenticated !== authenticated) {

setAuthenticated(isAuthenticated);

}

});

});
return (

<div className=“m-3”>

{authenticated ? (

<>

<div className=“mb-3”>

<button className=“btn btn-primary” onClick={() => auth.logout()}>

Logout

</button>

</div>

<Search />

<div className=“my-3”>

<Detail />

</div>

</>

) : authenticated === null ? (

<h4>Loading…</h4>

) : (

<button className=“btn btn-primary” onClick={() => auth.login()}>

Login to search TV Shows

</button>

)}

</div>

);

});
export default () => (

<Provider store={store}>

<Router>

<Security

issuer={${process.env.REACT_APP_OKTA_ORG_URL}/oauth2/default}

client_id={process.env.REACT_APP_OKTA_CLIENT_ID}

redirect_uri={${window.location.origin}/implicit/callback}

>

<Route path=“/” exact component={App} />

<Route path=“/implicit/callback” component={ImplicitCallback} />

</Security>

</Router>

</Provider>

);
The main App functional component now uses a piece of state to track whether or not a user is authenticated. Whenever the component renders, an effect checks whether or not authentication has changed. This makes sure that if a user logs in or out the component will properly update. Because it’s wrapped with Okta’s withAuth, it can now access the auth prop in order to check for authentication.
The main portion of the return statement in App now renders the same thing it previously did, but only if the user is authenticated. It also adds a Logout button in that case. If authenticated is null, that means Okta hasn’t yet told you whether or not you’re authenticated, so it just shows a simple “Loading” text. Finally, if you’re not authenticated, it just shows a login button that will redirect you to your Okta org to sign in.
The default export now wraps the app with React Router and Okta, as well as Redux. This now allows you to use withAuth to pull authentication information out of context. It also uses Okta and React Router to decide whether to render App or redirect you to log in or out.

It’s important to keep in mind that there are limitations to Redux.
I’m hoping that after reading this tutorial you’ve learned more about what Redux is and how it can be useful, particularly when paired with React. While not always necessary for small apps, I hope you can see how Redux can be a really powerful tool for larger applications with a lot of moving parts.
Thanks for reading. If you liked this post, share it with all of your programming buddies!
Further reading
☞ React - The Complete Guide (incl Hooks, React Router, Redux)
☞ Modern React with Redux [2019 Update]
☞ Best 50 React Interview Questions for Frontend Developers in 2019
☞ Learn React - Full Course for Beginners - React Tutorial 2019
☞ React (without Redux) - JWT Authentication Tutorial & Example
☞ React vs Angular vs Vue.js by Example
Originally published on https://dzone.com
#reactjs #react-native #web-development #redux
