Install lamp stack with phpmyadmin on ubuntu amazon ec2. Here, we will show you step by step on how to install lamp stack with phpmyadmin on ubuntu 18.04 ec2 aws.
How to Install LAMP Stack, PHPmyadmin on Ubuntu 18.04 AWS EC2
Follow the following easy steps to install lamp(Linux, apache 2, PHP and MySQL) and PHPMyAdmin on ubuntu 18.04 amazon(aws) ec2:
- Step 1: Launch New AWS ec2 Instance
- Step 2: Connecting your AWS EC2 Instance from SSH
- Step 3: Install Apache 2 on ubuntu 18.04
- Step 4: Install MySql
- Step 5: Install PHP 7.3
- Step 6: Install, Configure and Access phpMyAdmin
Step 1 – Launch New AWS ec2 Instance
First of all, you need to launch aws ec2 instance. If you have already launch new ec2 instance, so you can move next step. Otherwise you need to read this tutorial “how to launch ec2 instance in aws step by step“ for launch aws ec2 instance.
Step 2 – Connecting your AWS EC2 Instance from SSH
In this step, you need to connect your aws ec2 instance from ssh terminal. If you are new to connect aws ec2 instance with windows, ubuntu and mac system. So you can read this tutorial “How to Connect to ec2 Instance From Putty and SSH Terminal” to connect your ec2 instance from ssh.
Step 3 – Install Apache 2 on ubuntu 18.04
3.1 – Update Ubuntu System Repositories
sudo apt update
3.2 – Update Ubuntu System Repositories
sudo apt install apache2
3.3 – List the UFW application profiles
sudo apt install apache2
3.4 – sudo ufw allow ‘Apache Full’
sudo ufw allow 'Apache Full'
3.5 – Verify that the Apache service is running
sudo systemctl status apache2
3.6 – Open Browser and type EC2 intance IP
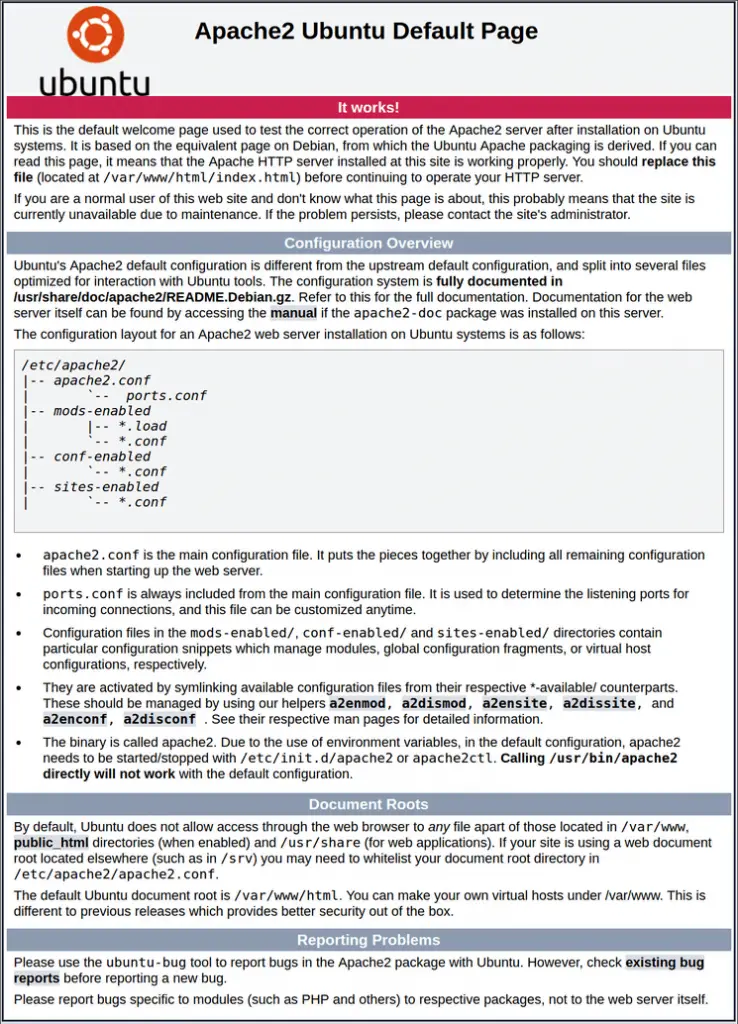
Finally, open your browser and type your AWS ec2 instance IP address. And, it will be looks like the Apache 2 page in the following picture:
 install apache 2 web server on amazon ec2
#aws #mysql #php #ubuntu
