Xamarin Forms Shell reduces the complexity of mobile application development by providing the fundamental features that most mobile applications require. Shell has a declarative application structure and can easily create a consistent, dynamic, customized, and featured filled UI. In other words, shell is a new replacement for every one of your Xamarin forms pages.
It provides out of the box infrastructure to deliver Xamarin forms features, a simplified navigation system, and customization.
Advantages of Shell:
- Common navigation user experience
- Supports URI based navigation (navigation to any page in the application)
- Integrated search handler
- Allows a single place to describe the visual hierarchy
- Reduces memory consumption
- Increases the rendering speed
Prerequisites:
Xamarin forms shell is available in Xamarin forms 4.0.0 and supports completely on Android and iOS. It is partially available, and is in the experimental phase on UWP. In order to use it in UWP applications, the below code needs to be added in the App class before calling Forms.Init
global::Xamarin.Forms.Forms.SetFlags("Shell_UWP_Experimental");
Getting Started: Shell Requirements
The specialty of shell is to have a built-in container that includes a flyout menu, tab page, and navigation page. So let’s create a demo app having these features.
- Visual studio also provides a shell template. But let’s add shell to our blank Xamarin forms application for better understanding.
Firstly create a blank Xamarin forms project in visual studio and name it “MovieBookingApp”. In this demo app, we are going to have two categories of movies i.e. comedy movies and thriller movies. With these two categories, let’s create tabbed pages and a flyout menu.
-
Now let’s add a new content page with code-behind class to our project and name it as “MainShell”. Change a contentPage to Shell in the XAML page. It should look like the below code.
-
Once the above step is done, similarly change the content page to shell in MainShell.xaml.cs. Our code-behind class has to inherit from Shell.
using System;
using System.Collections.Generic;
using Xamarin.Forms;
namespace MovieBookingApp
{
    public partial class MainShell : Shell
    {
        public MainShell()
        {
            InitializeComponent();
        }
    }
}
- In the App.xaml.cs constructor, add the below code. Here we are making MainShell the root page. Once done, run the code to ensure your project builds successfully.
public App()
        {
            InitializeComponent();
            MainPage = new MainShell();
        }
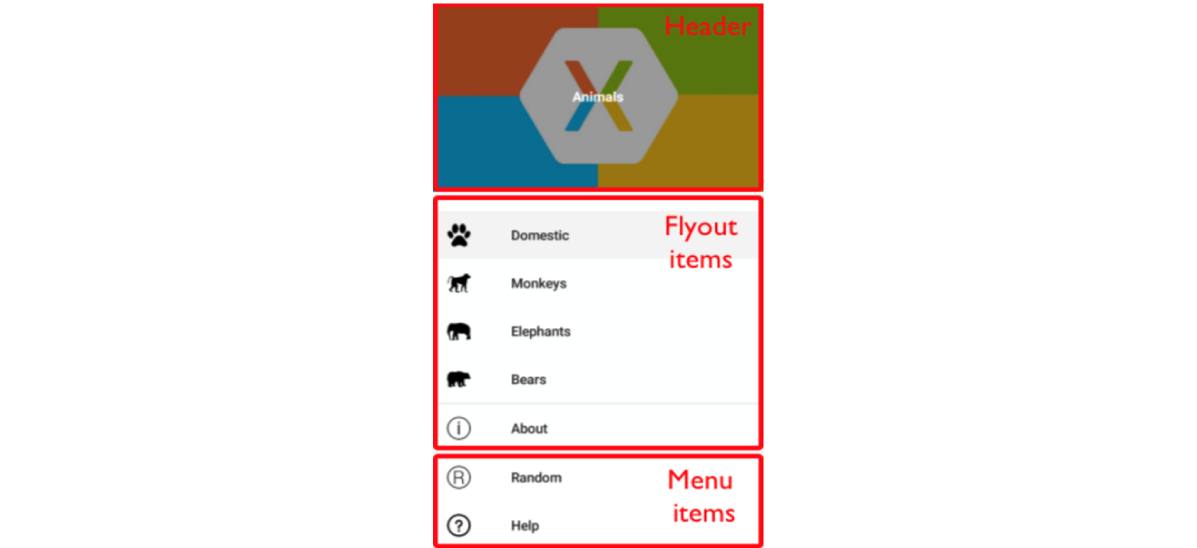
Flyout Menu:
The flyout menu is also called a side drawer or hamburger menu. We have seen multiple applications having a flyout menu. A flyout menu consists of a header which is optional, menu items(optional), and flyout items as shown in the below picture.
To create the flyout menu, add the below code in MainShell.xaml and you will see the flyout menu coming up after running the project.
We can set the background color to the flyout menu, which is a bindable property:
Shell.Flyout.BackgroundColor= Color.Red
To customise the flyout menu items, by adding the optional header, or adding an icon please read about it in the below link
https://docs.microsoft.com/en-us/xamarin/xamarin-forms/app-fundamentals/shell/flyout
#xamarin #mobile-apps #programming #developer