On the search for running development environments on cloud I stumbled upon service calles Visual Studio Codespaces. It’s nice service that moves development and debugging workloads to cloud and it makes it possible to use lightweight machines like tablets and hybrids for development. Here’s my overview of how to build ASP.NET Core web applications on codespaces and Visual Studio Code.
Visual Studio Codespaces (previously known as Visual Studio Online) is online IDE for building and running applications on cloud. It seems to be excellent choice for those who want development environment hosted in cloud. It’s accessible over internet and it doesn’t need powerful machine.
On tooling side there are three options:
- Online editor – imitation of Visual Studio Code running in browser
- Visual Studio – there’s experimental support for codespaces in Visual Studio 2019
- Visual Studio Code – there’s extension available to work with codespaces
Although I’m focusing here on Visual Studio Code as it is cross-platform and doesn’t have high demands on hardware, I still show you how online editor looks like. Maybe some of my readers find it to be enough for development works they do.
I tried to set up Visual Studio Codespaces for building ASP.NET Core web applications using Visual Studio Code on my Surface Go 2.
Creating Codespace
Creating a codespace through browser was not possible. UI found only one Azure subscription for my account and sadly it was one of those where I cannot use any services without confirmation by subscription owner. I didn’t found any option to get rid of this issue.
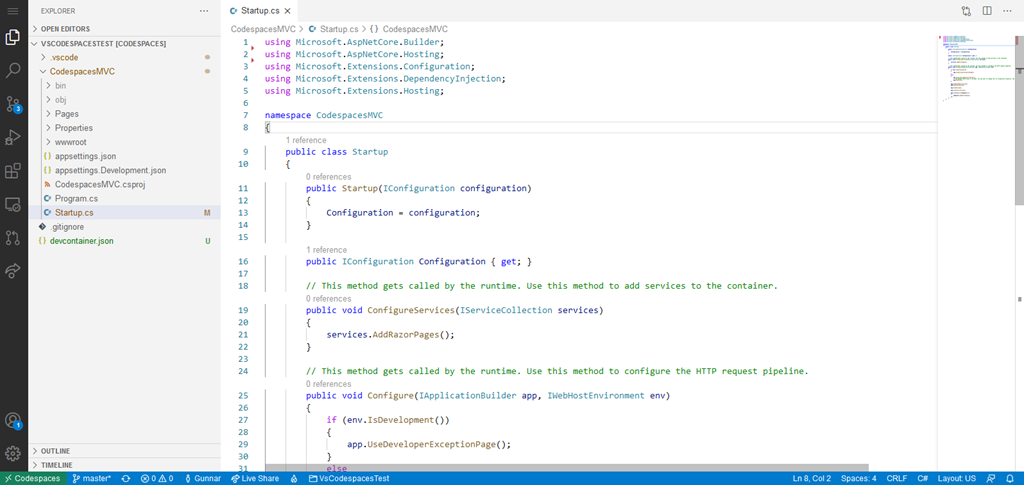
I managed to create Codespace using Visual Studio Code and it was possible there to select correct Azure subscription, resource group etc. I got few errors but on second attempt my codespace was created successfully.
Here are the steps in glance:
- Have a Git repository accessible from internet
- Create Azure subscription if you don’t have one
- Install Visual Studio Code if you don’t have it
- Install Codespaces and Azure Account extensions
- Open Remote Explorer and click on “Create new Codespace…”
- You are asked for the following information:
- Azure subscription
- Resource group name
- Region
- Codespaces plan name
- Default instance type
- Source code repository URL
- Auto-suspend Setting
- Visual Studio Code will create codespace and connect to it
- Use dotnet new command to create application if your repository is empty
Full guide to set up codespaces support in Visual Studio Code is provided in Microsoft document Visual Studio Codespaces VS Code How-to.
If you started with empty repository then you need also .gitignore file. For this you can install .gitignore Generator extension by Piotr Palarz. Open command palette and launch the following command: Generate .gitignore File. .gitignore file is automatically added to root folder of your project.
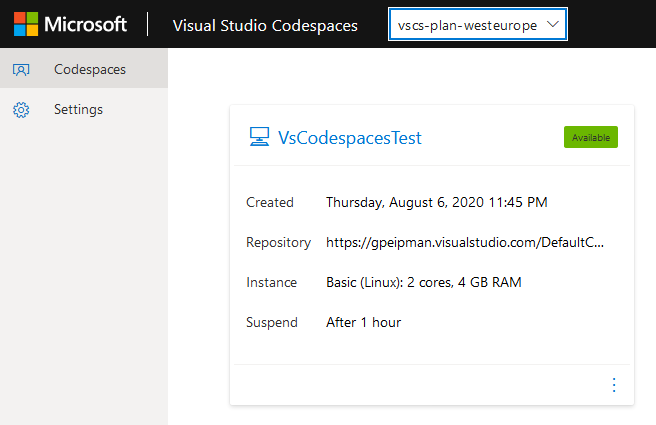
If everything went well then you should see your new codespace in browser too – there’s new card on Visual Studio Codespaces page.
Before getting to ASP.NET Core there few things to configure.
Configuring codespaces
Codespaces have two important settings that affect billing:
- Instance type – how much resources has the environment that runs your application
- **Suspend – **how long is the idle time after what codespace is suspended
#asp.net #azure #linux #visual studio