Learn Serverless from the beginning using Azure functions
Serverless is Cloud-computing execution model in which the cloud provider runs the server, and dynamically manages the allocation of machine resources. So essentially you can focus on writing code as your Cloud Provider does the rest
The series:
- Serverless — from the beginning, using Azure functions ( Azure portal ), part I: This part focuses on presenting the concept Serverless and also shows how you can build your first Azure function using the portal
- Serverless — from the beginning, using Azure functions ( Azure portal ), part II: In this part we take a deeper look at the Azure portal as an IDe and how we can install dependencies and work with more than one file among other things.
- Serverless — from the beginning, using Azure functions ( VS Code ), part III:
- Serverless — from the beginning, using Azure functions ( Azure CLI ), part IV, in progress
Serverless — from the beginning, using Azure functions ( Azure portal ), part I
In this article we will cover the following:
- Serverless , What is Serverless and why it may be a good choice
- Function apps , triggers, and bindings
- Functions in function apps, Here we will cover things like languages it supports, authoring choices, testing it out, monitoring logging and setting of authorization level and much more
We already assume that putting your apps in the Cloud is a given. With that we mean you’ve seen the benefits that mean in terms of not having to maintain hardware, only pay for what you actually use and so on.
TLDR; if you just want to learn how to build an Azure function, and don’t want a long speech on theory, then jump to the headline called “Creating a function app”, you can always read some Serverless and Azure theory later :)
Resources
There is so much to learn on this topic and there are some great docs as well as LEARN modules to help you in your learning process:
Azure function LEARN modules
- Create your first Azure function
- Execute Azure functions with triggers
- Chain Azure functions together
The many choices in the Cloud
Now, being in the Cloud means you have options, A LOT of options in fact. You can be on the lowest level deciding exactly what memory, or hard drive type, your apps can run on. Then you can be on a more managed level where you are happy to create a Virtual Machine, a so-called VM, where you can install the OS and software you need. There are still more steps on this ladder namely running your applications in App Services where you don’t have a VM anymore, just a place for your code to reside and yes you can decide what OS to run this on but that’s pretty much it, it’s a SaaS, software as a Service platform. BUT, there is a step above that — Serverless.
Introduction to Serverless
So what does Serverless mean? Serverless is Cloud-computing execution model in which the cloud provider runs the server, and dynamically manages the allocation of machine resources. So essentially you can focus on writing code as your Cloud Provider does the rest.
FaaS — function as a service
A FaaS, function as a service is a category of Cloud Computing Services and is about offering a Platform where the infrastructure is maintained and your main worry is the code you write. An application built following the above model is said to use a serverless architecture
All the great Cloud providers have a FaaS offering:
- AWS , has AWS Lambda
- Google , has Google Cloud Functions
- IBM/Apache , has OpenWhisk
- Oracle , has Cloud Fn
- Microsoft , has Microsoft Azure Functions
Ok, what benefits does it offer then?
- Everything is functions , Your business logic runs as functions
- NO Manual provisioning , you don’t have to manually provision or scale infrastructure.
- Managed infrastructure , The cloud provider manages infrastructure.
- Automatic scaling , Your app is automatically scaled out or down depending on load.
Serverless on Azure
Azure has two kinds of approaches for Serverless architecture
- Azure Logic Apps, intro, Azure Logic Apps enables you to create powerful workflows
- Azure Functions, Azure Functions is a serverless application platform. Developers can host business logic that can be executed without provisioning infrastructure
What else is there to know about Serverless?
Is it all unicorns and rainbows?
Well, Serverless is definitely great but there are some things we need to know about them like:
- They are stateless , function instances are created and destroyed on demand. If state is required, it can be stored in an associated storage service
- They are event-driven , they run only in response to an event (called a “trigger”), such as receiving an HTTP request, or a message being added to a queue. So essentially you declare where data comes from and where it goes. You do this declaratively with something called bindings which means you don’t need to code to talk to queues, blobs, hubs, only business logic is needed
They do have Drawbacks , drawbacks are in the form of limitations on execution time and execution frequency.
- Timeout , The timeout is 5 minutes, This timeout is configurable to a maximum of 10 minutes. If your function requires more than 10 minutes to execute, you can host it on a VM. Additionally, if your service is initiated through an HTTP request and you expect that value as an HTTP response, the timeout is further restricted to 2.5 minutes, BUT there’s also an option called Durable Functions that allows you to orchestrate the executions of multiple functions without any timeout
- Execution frequency , If you expect your function to be executed continuously by multiple clients, it would be prudent to estimate the usage and calculate the cost of using functions accordingly. It might be cheaper to host your service on a VM
Serverless vs App Services
It’s easy to think that your first go-to, for putting apps in Azure, is AppService that fits most likely with your mental model as a developers, you want to move the app that you have from On-Premise to the Cloud and to do so you need to provision databases, creating your Services in App Service and that’s it right? Well, most applications are seldom that simple, they tend to need to talk to a number of subsystems to maybe log in, or grab a piece of data somewhere or perform a computation.
All these side things are maybe the concern of more than one app in your ecosystem so it makes sense to move them out into separate services. Then you might realize you only need to call on these services very seldom like when a new user is created or there is an incoming request. Your response at that point is maybe to place that incoming message on a Queue, or insert a row in a Database or maybe create a Slack notification.
What we are saying here is that maybe we don’t need to pay for a full AppService and the uptime and responsiveness it gives us, but instead we need a framework that can trigger a function based on a predefined event and that can then carry out a computation that results in a side effect like calling another service/database/queue/whatever.
Now we have come to the sweet spot where Serverless really shines, seldom called services that need to do something in response to some kind of event happening.
In a word
Serverless computing helps solve the allocation problem by scaling up or down automatically, and you’re only billed when your function is processing work. Speaking of billed, if your FaaS is reading/writing towards a storage that you provisioned, then you are paying for function execution as well as that storage, so keep that in mind authoring your FaaS.
What is a function app?
Functions are hosted in an execution context called a function app. Which means what? Think of the Function app as the project you host your functions in.
Prerequisites
Ok, there are some things that need to exist before we can get our function up there in the cloud. Those are:
- Service plan , There are two choices of plans Consumption service plan, CSP and Azure App Service plan, ASP CSP has automatic scaling and bills you when your functions are running and configurable timeout period for the execution of a function. By default, it is 5 minute, ASP allows you to avoid timeout periods by having your function run continuously on a VM that you define
- Storage account , function app must be linked to a storage account. It uses this for internal operations such as logging function executions and managing execution triggers. Also, function code and configuration file are stored here
Creating a function app
Now there are different ways of creating a Function app, namely:
- Portal , Using the Azure Portal
- CLI , Using the Azure CLI
- VS Code , Using VS Code to scaffold an Azure Function app and Azure Functions using some amazing plugins made for the purpose.
In this article, we will focus on the first option but in doing so we will put some focus on some great concepts you need to know about, so stay with me cause we are about to do some coding next:

Select the correct template, Function App
Let’s head to the portal and log in at
Once logged in select the following :

So that’s, selecting Create a resource, followed by Compute and finally selecting the Function App template.
Make the choices in the template
Once we’ve selected the Function app template we need to select a few more things. Your UI will at this point look something like this:

Ok so the following choices need to be made:
- Enter an app name , App name must be globally unique as it will serve as part of base URL
- Select a subscription , well pick out one of the ones you have
- Select a resource group , you can choose an existing resource group or create a new one, up to you
- Select an OS , choices here are Windows or Linux, we opt for Windows cause we need to select something :)
- Select Hosting plan , this should be Consumption plan, we mentioned Consumption plans earlier in this article and why it’s the better choice
- Select geography , well select the region closest to you
- Runtime stack , this is the language you are going to be coding in so we select Javascript
- Create a new storage account , let’s take an existing or create a new one
- Enable application insights , for stats and other types of application tracking
Now hit the button CREATE
This takes a while, like a few minutes. Have some coffee or other hot beverage at this point:

Verify your app
Check that it has a public URL and it is possible to navigate to its default page

Ok great we have a default page, now what? Well, it’s time to add a function to our Function app.
Creating a Function, for your Function app
There are two UI behaviors here depending on whether you have no functions added to your Function app, so you are starting out fresh or the second option being that you have an existing Function app with at least one function in it.
When you create a new function there are some decisions you need to make before you can start coding like:
- Trigger type , this is about deciding what should trigger the invocation of your function like an HTTP call or maybe a change to a database row or something else
- Authoring , there are three ways to author your function, in VS Code, Any editor + Core Tools or In-portal
Starting fresh — no functions added (yet)
When adding your first function, you are presented with the Quickstart screen.
At this point, the following is shown in the middle of the page

Let’s create that function by hitting New function
Select authoring type
Now you are faced with the choice of how to author your Function:
- VS Code , this is a great choice, plenty of plugins supporting this option
- Any editor + Core tools, a more agnostic choice, but definitely a good choice as well
- In-portal , you will write code in the Portal

For now, we will go with the In-portal option
Select trigger type
We are now faced with:
- Webhook + API , function will run as soon as a certain URL is hit
- Timer , function will run according to a schedule
- More templates , there a ton more templates worth exploring

For now, we will go with the Webhook + API option.
It’s a long list of templates to choose from. Don’t you feel excited that there is so much more? :)
Voila, your function is scaffolded
This is now our coding environment:

Pre-existing functions
In this scenario, we already have at least one function in our Function app. You want to look for a text saying Function + on in the left menu, it should look like this:

Select trigger type
Clicking the + sign will present you with the following screen in the main field:

This screen allows you to choose a trigger type (HTTP, Timer, or Data) and programming language (C#, JavaScript, F# or Java). Then, based on your selections, Azure will generate the function code and configuration for you with some sample code provided to display out the input data received in the log
We choose HTTP Trigger, so the first option.
We are then faced with naming our function and doing an initial selection on authorization level (we can change that part later on)

Taking it for a spin
We can test it in the portal or hit the URL. To get a URL we click get function URL and test it in a browser:

After you’ve chosen to copy the URL you head to the browser input the URL and make sure to add &name=chris. Cause if you look at your Javascript code you see that it expects the parameter name in either the body or as a URL parameter. It should look like this:

Build our service
Ok then shall we build something more fun than a hello world? Ok, it’s not going to be a ton more fun but it’s at least something you can cringe over like a colleague of mine did look Adam you’ve made it into the blog post haha.
Ok, we are going to build a… wait for it, drumrolls, a dad jokes service. You know those really bad puns told by a parent that compels you to deny any relations to them, yes those jokes. Google is my friend, so let’s start Googling for some jokes and store them in a list:
var dadJokes = [
 "Did you hear about the restaurant on the moon? Great food, no atmosphere.",
 "What do you call a fake noodle? An Impasta.",
 "How many apples grow on a tree? All of them.",
 "Want to hear a joke about paper? Nevermind it's tearable.",
 "I just watched a program about beavers. It was the best dam program I've ever seen.",
 "Why did the coffee file a police report? It got mugged.",
 "How does a penguin build it's house? Igloos it together."
];
There, if I can’t unsee it, neither can you ;)
Ok, next step is to find some pictures of dogs looking like they are laughing because of the Internet right ;)
var punDogs = [
 "image1.jpg",
 "image2.jpg"
]
What, I didn’t give you the actual image URL, you’re a big developer, I’m sure you can find pictures of dogs on the Internet, or why not cats ;)
Now to select a random dad joke and random image:
var newNumber = Math.floor(Math.random() * dadJokes.length);
var dogImageUrl = Math.floor(Math.random() * punDogs.length);
Lastly, let’s answer with an HTML response:
context.res = {
 status: 200,
 headers: {
 "Content-Type": "text/html"
 },
 body: '<h3>'+dadJokes[newNumber]+'</h3>' + '<br><img src="'+ punDogs[dogImageUrl] +'"/>' };
Let’s save our code and make sure to set the authorization level to Anonymous.

Above we are describing how to click the menu option Integrate in our left menu followed by selecting Anyonymous in our Authorization level dropdown.
Because why would we want to restrict the usage of this profound function to the outside world? ;)
Taking our app for a spin it now looks like this:

That’s it for this time. We’ve taken you through building your very first app, it wasn’t that hard, was it? :)
Summary Part I
There is so much more to say on the Serverless topics. So many different ways we can trigger this function other than HTTP and integrations that are already there and waiting for you to use them. But we have to save something for future parts of this series. Hopefully, you’ve gotten a good idea of what Serverless is and when to use it and how to create your first one of many Azure functions.
Most of all think about the old ways of doing things like handling infrastructure yourself, and thinking about for example load balancing is a thing you barely need to consider yourself with.
Serverless — from the beginning, using Azure functions ( Azure portal ), part II
In this article we will cover the following:
- Getting to know the IDE generally , The portal may not be the ideal IDE to write your Azure Functions in but it does contain a lot of great functionality to author your function
- Splitting up in modules , As this is Node.js we can definitely use the CommonJS module system
- Using libraries, You can definitely use NPM to install libraries
- Use HTTP and async/await , you can definitely call other endpoints from our function and present the result
- Logging , there are different ways we can work with logging, let’s see how we can log statements and log at them afterward
Getting to know your portal IDE
Once your function has been generated it’s time to get to know your portal IDE. It looks like this:

It consists of the following:
Left menu , this is placed on the left side right under your function
- Integrate , this lets you control things like allowed HTTP method, Authorization level, and probably most important Inputs and Outputs, here you can configure what type of events can trigger our function but also what kind of events we can trigger in turn by returning something from the function
- Manage, this is where we manage function keys and host keys. Depending on authorization level you will need one or more of these keys in your requests to be able to call a specific function in your Function app
- Monitor, this shows all the executions of a function, if it went well and how long it took
Toolbar, this is placed at the top and lets you do things like Save, Run and get a URL for your function
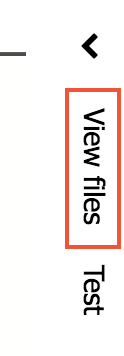
The right menu, this is a tabulated menu on your left that allows you to do two things:
- add/remove files to your project, yes you can have a project consisting of many files. It’s Node.js and CommonJS so we can expect things like require and module.exports to work
- Test , we get help constructing requests towards our service, both choice of HTTP method and payload
The bottom menu, this contains two different things:
- Logs, this will show you log output from your function
- Console, this is a terminal window that allows you to browse the directory your Function app project is in and allows you to do most things a terminal would allow
Refactoring
Ok, so we understand better what parts our Portal IDE consists of, let’s now have a look at our code we created in the first part of this series. The first thing we have is this static list of questionable jokes:
// index.js

module.exports = async function (context, req) {

let jokes = [

  "Did you hear about the restaurant on the moon? Great food, no atmosphere.",

  "What do you call a fake noodle? An Impasta.",

  "How many apples grow on a tree? All of them.",

  "Want to hear a joke about paper? Nevermind it's tearable.",

  "I just watched a program about beavers. It was the best dam program I've ever seen.",

  "Why did the coffee file a police report? It got mugged.",

  "How does a penguin build it's house? Igloos it together.",

];

// the rest of the code omitted for brevity
What we normally do in Node.js project is to move those to a separate file that we call jokes.js. So, therefore, let’s use our right menu and create a file. We need to take the following steps:
- Expand the right menu
- Add a new file by clicking
+ Add - enter the filename jokes.js
- move our list to jokes.js
- import jokes.js as a module from our main file
index.js
Expand menu
This is pretty straight forward, just click on the menu itself, like so:
and it ends up looking like so:

Add a new file and move the list in there
Ok, so we click + Add and end up with this:

We fill in our filename jokes.js and move over the content from index.js and we should now have:

Don’t forget to addmodule.exports = jokes at the end of
jokes.jsto ensure we can import our jokes list properly.
Import our jokes.js file as a Node module
At the top of our index.js file we can now write:
// index.js

const jokes = require('./jokes');
and that’s enough to make it work.
Move remaining static content to separate files
We also had a list of URLs for pictures of laughing Dogs that we found on the Internet. Let’s create a file dogUrls.js and place all the URLs in there. It should look something like this:
// dogUrls.js

let dogUrls = [

// your URLs

];

module.exports = dogUrls;
Just like with jokes.js we can now import dogUrls.js as a Node module as well. So the top of our index.js should now look like this:
// index.js

const jokes = require('./jokes');

const dogUrls = require('./dogUrls');
A new project using a REST endpoint
At this point we will move away from our DadJokes service, it’s probably as good as it’s ever going to get, which isn’t saying much ;) It’s time to take on another favorite of the Internet, cat pictures !!.
I think I heard your squeal of despair all the way from here. Don’t worry this is just for educational purposes so we learn how to work with HTTP calls and downloading dependencies :).
Because we are building a new function we need to first create a new function and give it a suitable name so first click on adding a new function:

and then when you are presented with Triggers choose HTTP trigger:

Thereafter set authorization level to Anonymous and give it the name CatsAsAService , like so:

Adding a library
At this point, we have a new function but we need to add the capability to do HTTP calls. To make that happen we need to use a library that can do that for us. We could use the built-in http library but we opt to install the node-fetch library instead with is just like the fetch that you use in the browser. We need to do two things at this point:
- Initialize a proper Node.js project, we do that by running the command
npm init -yin the terminal - install the node-fetch library, we do that by running the command
npm install node-fetch
To accomplish the above we need to head to the bottom menu and click Console, like so:

Ok, let’s first hit the command dir, to list our files, we are inside of Windows system :)

Ok, above we can see we have the files function.json and index.js. Lets now run our commands npm init -y followed by npm install node-fetch. Those commands create a package.json file and a package-lock.json as a result of us initializing our Node project but also downloading node-fetch.

We can also see that node-fetch have been installed by inspecting package.json:

Great, so node-fetch is there and we can thereby use it to make HTTP calls.
Working with logs
With Azure functions, we have an excellent way of logging namely by using our first argument in our Azure function called context. context has a log() method on it that when used can log to our Logs window in our bottom menu.
Let’s do the following:
- Import node-fetch and make a fetch call towards an API
- log the resulting JSON using context.log()
Ok let’s first declare a function that will do the HTTP call, like so:
const fetch = require('node-fetch');

async function getHttp(context) {
 context.log('calling HTTP service')

 return fetch('https://swapi.co/api/people/')

.then(res => res.json());
}
Above we declare the method getHttp() and then we use our fetch() method and give it a URL. In the then() callback we ensure that we transform the result into JSON, so far so good.
For our next step, we go into our Azure function and invoke getHttp(),. Because it’s using the async keyword we can use await to wait for the result to come back and then log it out, like so:
// excerpt from index.js
module.exports = async function (context, req) {
 const json = **await** getHttp(context);

 context.log(json);

// rest of the function down here
}
Running the function at this point gives us the following output in Logs :

As you can see above we get a nice response, however, it returns 87 records so I cut it after the first item in the list it returns. The URL we were using was for the open Star Wars API and it contains everything we could possibly want to know about the franchise. Let’s stay on mission however and go back to Cats…

Sorry Luke :)
Not at all surprising, trying to Google a Cat API you get a HUGE amount of responses, cause we all know that Internet was designed to support Cat memes, right ;) I’ve decided on a specific API, cause it didn’t require me to sign up for an API key. I went with thecatapi and the following URL in particular:
You can definitely sign up and get an API key and get a richer experience, but we will only use the free version and we end up getting a response looking something like this:
[
 {
 "breeds": [

 ],
 "id": "26k",
 "url": "[https://cdn2.thecatapi.com/images/26k.jpg](https://cdn2.thecatapi.com/images/26k.jpg)",
 "width": 3817,
 "height": 2553
 }
]
We can definitely work with the above and try presenting that in an HTML image, as we did with our Dad Jokes, so let’s do that next:
const [cat] = json;

context.res = {
 status: 200,
 headers: {
 "Content-Type": "text/html"
 },
 body: '<h3>Cat</h3>' + '<br><img src="'+ cat.url +'"/>'
};
The above digs out the URL from the response and we populate a response object, give it the response type HTML and we let the body consist of an IMG tag with its src set to our JSON URL. The result looks like:

Isn’t that something :)
That was the end of this part. In our next part, we will show you how to work with functions in VS Code, cause let’s face it, even though the Portal seems to have some nice functions it’s not really the IDE of our dreams. See you in VS Code.
Summary Part II
We aimed to describe the IDE in the portal a bit better and we managed to describe and explain what parts it consisted of and what their purpose was. Moving on we took our old DadJokesAsAService function and refactored it and we thereby introduced how you could be using Node modules. Thereafter we created a new Azure function and learned how we could install a library like node-fetch. We then used node-fetch to call a Cat API responding with JSON and we ended up responding with yet another page with cats on it. Thereby we contributed to Internets original purpose ;)
Serverless — from the beginning, using Azure functions ( VS Code ), part III
In this article, we will cover:
-
Why VS Code as authoring env. There are more than one option here. The Azure portal, VS Code, Azure-cli, any IDE really. VS Code is one of the better thanks to its plugins
-
Dependencies and set up , There is not a lot we need to get going it’s pretty much a few core libs that we install with either brew or NPM depending on our OS and of course the highly recommended Azure function extension.
-
Hello world and running your function. This is about getting an app up and running and trust me on this, this is lightning fast
-
Debugging locally, it doesn’t get any easier than this, however, there is something you should know when it comes to Project generation that might break your ability to Debug, but don’t worry I got your back with two solutions. Symptom and solution are well described.
Why VS Code as an authoring environment?
There are many ways to author a Serverless app. VS Code is one of the better ones and the main reason for that is the extensions that make things like scaffolding projects/functions and debugging — a real joy.
Dependencies and Set up
There are two ways to install the dependencies we need, depending on if you are using either Windows or Mac OS.
For Mac run the following command:
brew tap azure/functions

brew install azure-functions-core-tools
for Windows:
npm install -g azure-functions-core-tools@2
Installing the VS Code extension
To make the authoring experience really nice you need an Extension for VS Code:
Search for Azure functions in the extension search field inside of VS Code, the extension should look like this:

Your first Azure function in VS Code
To create and run an Azure function we need to do the following:
-
Create a new Azure functions project
-
Create a new Azure function, in our new project
-
Run our function
Create an Azure Functions project
We can create an Azure functions project by using a command installed when we installed the extension. The command is called
Azure Functions: Create new Project
We can access said command by going to the menu View and select Command Palette. If you are on a Mac you can just type Command + Shift + P. Then select our command above:

There we will be asked where to place our project:

You select the folder you want the project to end up in.
Thereafter you are asked to select the language you will code in:

Select JavaScript, but do remember there are other choices that can be made here
This is followed by it querying for what trigger type the function will have, i.e what type of trigger will invoke the function:
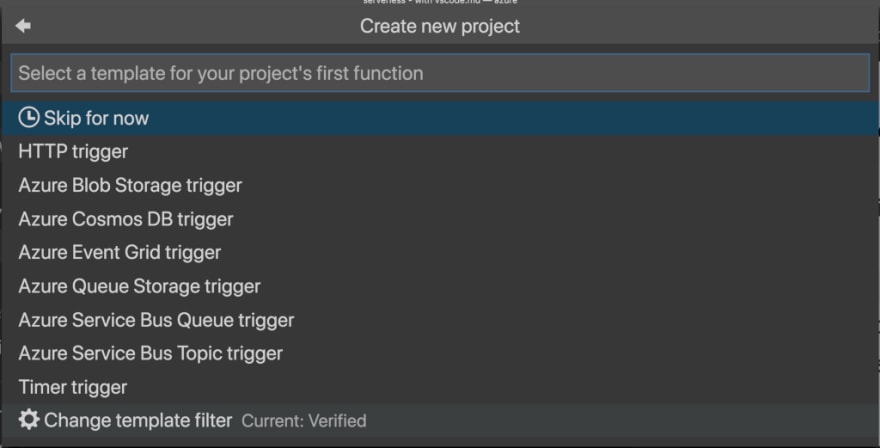
Select HTTP trigger for now but just as with language, remember that we can trigger our functions in more than one way.
The next thing is being asked for what to call the function that is created when we create the project. Yes, it does create a first function for us when we create a project, so it’s a two in one.

Let’s call it hello for now:
Lastly, we will be asked for authorization level, i.e what credentials are needed for us to be able to allow the function.
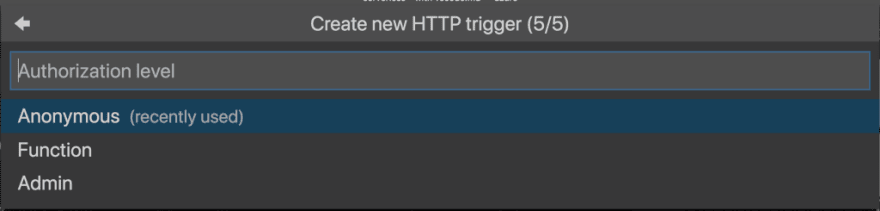
For now, let’s go with anonymous, we will discuss authorization in later parts of this serverless series.
Project anatomy
At this point you should have the following files created:

Let’s talk about the files that matter for this article:
- /hello , this a directory containing our Azure function
In the hello directory there are also:
-
function.json , this contains a lot of settings regarding your function like authLevel, what type it is, what methods it allows. It contains declarations for both in and out. In, means what triggers the function and out means what type of response it generates. In our case it has a httpTrigger as in and HTTP response as out.
-
index.js , this contains our Azure function and it has given us a basic implementation that we can alter to suit our needs
Running and debugging
Ok, so we’ve managed to create an Azure project and an Azure function, now what? Well, it’s time to test it of course. There are two ways we can do so:
-
Start the project with a debugger
-
Start the project from the terminal
Run the debugger
This is about using the built-in debugging functionality in VS Code. We will cover two things here.
-
The happy path of debugging, if your project was correctly generated this is as simple as pressing a button
-
If you are in the wrong place generating a project, you might have some initial struggle, however, I will show how to fix even that
Debugging
To Debug select Debug / Start debugging in the menu. This set VS Code in Debug mode and you should see this menu to the left:
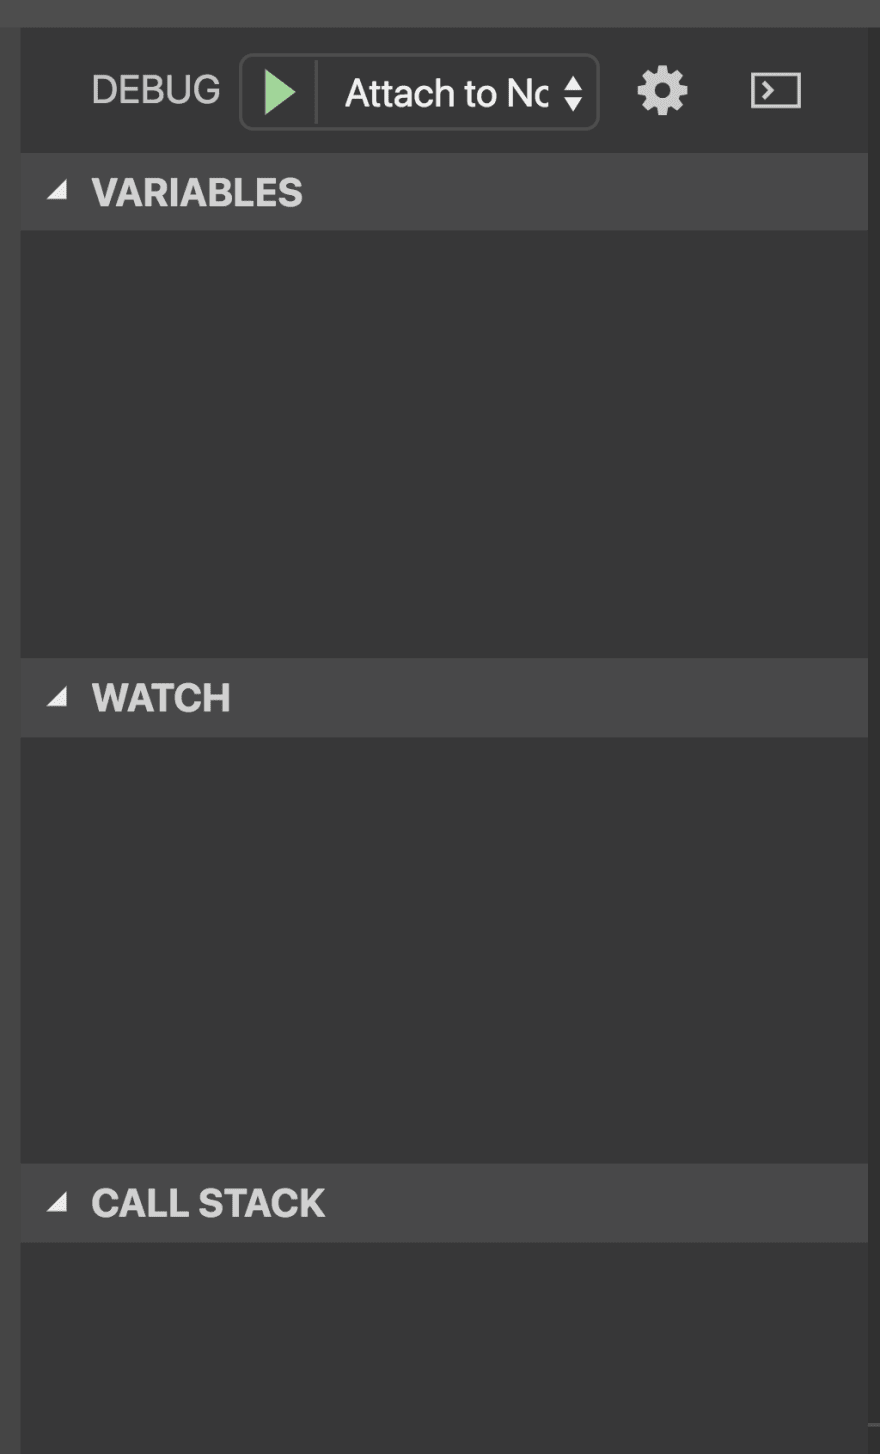
In the terminal in the main area you should see the following message at the bottom:

Now set a breakpoint at the first line in your function. Now go to the browser and navigate to http://localhost:7071/api/hello and you should see this in VS Code:
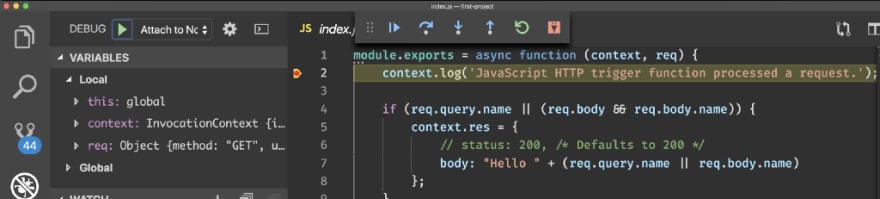
As you can see above our breakpoint is hit and the menu to the left gives us valuable info on the stack trace and other things.
Generate your project in the correct place
I learned something the first time I generated an Azure Functions project, using VS Code. What I learned is that it matters where I was generating the project. Why does that matter for debugging? Well, it generates a .vscode directory for the workspace you are standing in, NOT the target directory of your Azure Functions project.
What can go wrong? If you open up VS Code in say directory tmp and then you select the directory tmp/project as your target dir for generating the project then your .vscode directory is generated in tmp.
If you select to Debug from tmp it WILL work, however, if you forgot that you were in the directory tmp and next time you open up the project and you do so in tmp/project, it WON’T work. It won’t work because tmp/project is missing the .vscode directory, that contains the files launch.json and tasks.json that is needed for the debugging to work.
There are two ways to solve this if it happens to you:
-
Open VS Code in the directory that you aim to use for Azure Function Project targetDir. E.g open it up in tmp and select tmp as targetDir when you generate the project
-
Move the generated .vscode directory into the project file and open up tasks.json and ensure that the property cwd looks like this ”cwd”: “${workspaceFolder}”
Start from terminal
To start the project make sure you are in the project root and that you have opened a terminal, View / Open view / Terminal
Type the following in the terminal:
func host start
This should tell us two things, the URL we can reach our function on and the supported HTTP Verbs.
It should give an output looking like this:

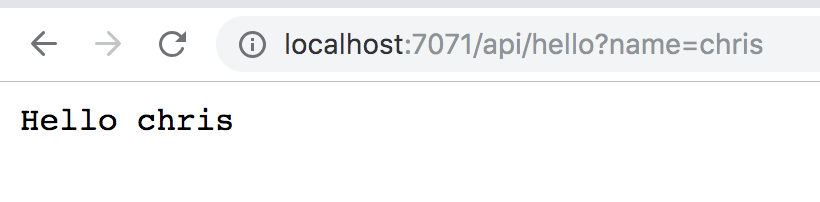
Lets go to the suggested URL in the browser http://localhost:7071/api/hello
The browser should show the following:

This is actually running the code that was generated in hello/index.js. If we zoom in a bit on the code:
// excerpt from index.js

if (req.query.name || (req.body && req.body.name)) {
 context.res = {
 // status: 200, /\* Defaults to 200 \*/
 body: "Hello " + (req.query.name || req.body.name)
 };

}

else {
 context.res = {
 status: 400,
 body: "Please pass a name on the query string or in the request body"
 };
}
We can see above that if req.query.name or req.body.name is empty it should construct a message with status 400.
We can fix this by calling the URL with an added ?name=chris, like so:
Summary Part III
This concludes this first part on VS Code and Azure Functions. We’ve learned how to generate an Azure functions project and a function and we’ve also learned to navigate around in our project structure and especially learned how to debug in two different ways.
#Serverless #Azure