Beginner’s guide to SASS
Let’s face it, writing css is messy. More so when reviewing the code which other people have written. I find SASS is the answer to that. It helps you to write clean code which is readable.
Let’s jump into it. Let’s create a simple HTML which has nested div’s , hover, focus, repeated CSS properties, you know standard HTML we face in daily life.
It is important to understand why are we using classses parent1__link1. It is a part of BEM (Block Element Modifier) methodology where **parent1 **is block and **link1 **is element. BEM follows **simple **rules to name and organise your CSS and gives everyone on a project a declarative syntax which they can use so that they’re on the same page.
You can read about it here
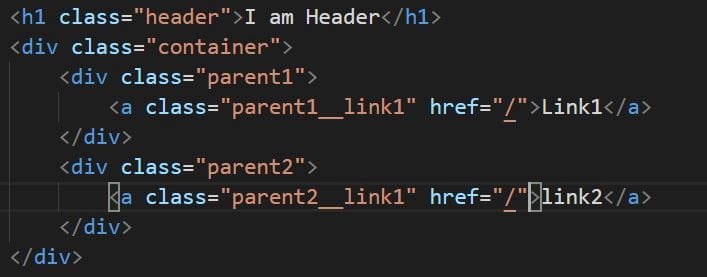 Example HTML Markup
Variables
Let’s start with writing css for header. Pretty simple stuff, background-color and color properties.
 CSS for header class
Here with help of SASS we can change **color codes to variable *so that it can be reused . So, let’s create variables for our color codes (you can use this to come up with names for color variables) using *$ (this is important to create variables in SASS). **Our new css for header would look like this. We can also use variable for many things padding, margins, color basically anything you want to reuse.
 Use variable for reusable properties
Imports
To make css even more modular, SASS provides import functionality. We can put all the color names, mixins, common styles in different files and import them. So, let’s create a _color.scss file.
Note the name of** _color.scss** file. This is called a partial file meaning this file contains little snippets of CSS that you can include in other Sass files. The **underscore **lets SASS know that the file is only a partial file and that it should not be generated into a CSS file
 _color.scss file
And we can import this file in our main scss file. using command
@import ‘./_color.scss’
and continue using color variables same way as depicted above.
Nesting
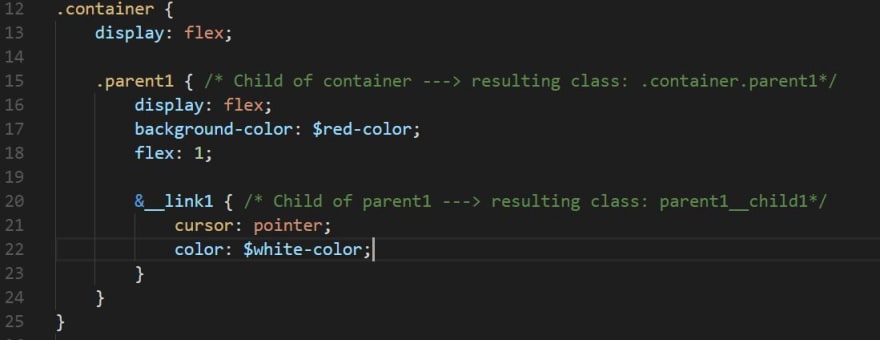
Next we jump to **parent1 *(please refer HTML Markup above)*and it’s children.
Problem statement 1: Write CSS for **parent1 *and *parent1__link1**
For the this problem, we will use **& *for concatenation of classes *parent1** and parent1__link1. Please refer to image below (pay attention to use of variables here as well)
Problem statement 2: Write **hover *and *after **classes for element
For this problem we will concatenate pseudo classes and elements to parent1__link1 **using &**.
Make a note: pseudo classes are concatenated using &: and pseudo elements are concatenated with &::
Comprehensive list of pseudo classes and pseudo link is available here
 Use of Pseudo classes in SASS
Mixins
As described above we have written CSS for parent1. We will write same CSS for parent two as well.
 complete css file with styles for parent1 and parent2
As we can see in above file, parent1 and parent2 share many common css properties. We could make this css cleaner, simpler and more readable using *MIXINS. *Here is how mixin works:
We create a custom common style using @mixin keyword like depicted in image below. It contains all the property that is common to both parent1 and parent2.
 Mixin for common style of parent
Next, we include the mixin in our parent styles.
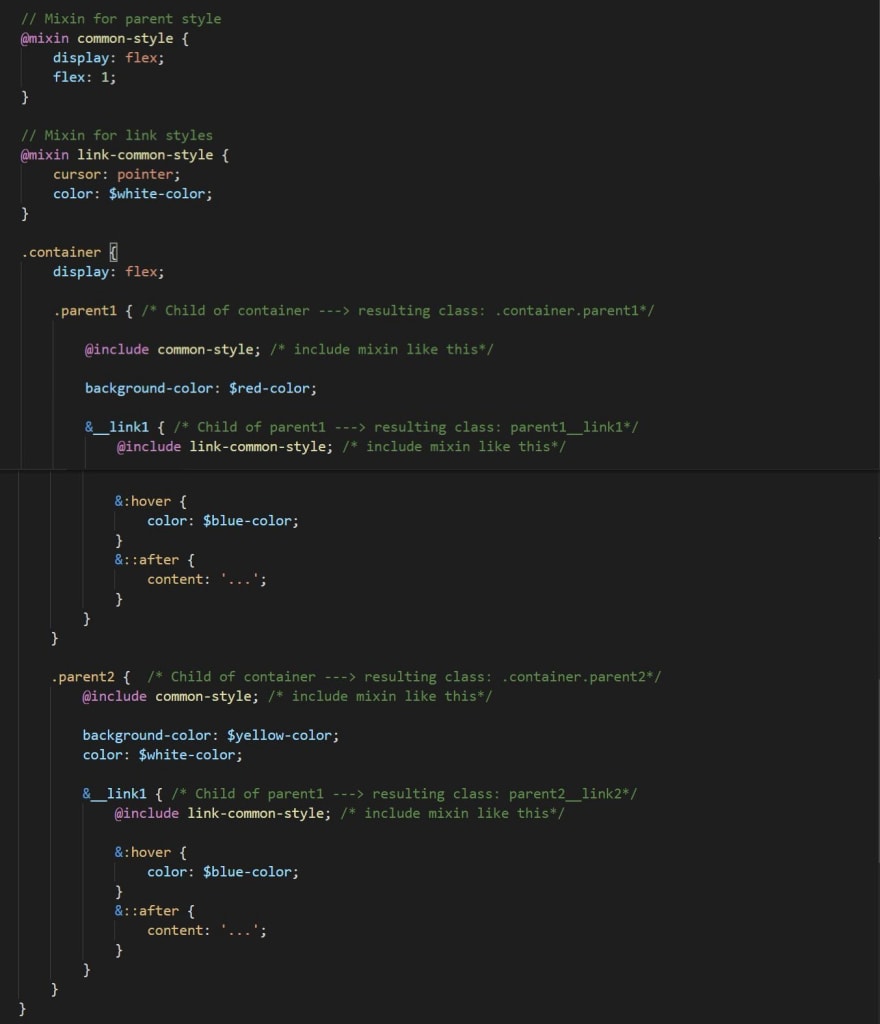 Usage of Mixins
Here, I have created mixin for both link style and parent style. It makes code much more cleaner and readable.
This is a basic guide to get started with SASS. Of course, SASS provides great variety of functionalities that can be used to make your life easier when writing CSS. You can refer to full guide for SASS here.
By : Akanksha Sharma
#sass #css