Image Annotation App in Ruby on Rails Using Annotorious Library
Image annotation is the process of labeling various objects in an image. The main application of image annotation is the generation of data, which can be used to train machine-learning algorithms. Image annotation is a task mainly done manually. Image annotation work is now an inevitable part of machine learning and AI and is mainly outsourced to countries like India and the Philippines. In this piece, we will be building an image annotation app that lets you mark and save annotations on a given image.
There are lots of libraries and tools that let us do image annotations, including many priced options like Labelbox, but for this app, we’ll be using a free library called Annotorious.
Before starting development of the image annotation part, let’s quickly take a look at the back-end of our application. Annotorious is a javascript library that can be used with any back-end frameworks. Since I’m more comfortable in rails, we’ll be building a rails app. Let’s quickly set up our app and back-end.
Let’s create a new app. Type in Terminal:
rails new image_annotater
Our app should contain two tables an Item table to store various Images and a Labels table to store the annotations. The goal is to create multiple labels on an Item image.
In our items, we need to upload images. For that, we can use the carrierwave gem. Add the following lines to GemFile:
gem ‘carrierwave’, ‘~> 0.11.2’
gem ‘mini_magick’, ‘~> 4.8’
I am not going to the details of carrierwave implementation.
Let us generate the Items model.
rails g model Item
Also, add the following line to the routes.rb
resources :items
The model migration must have the following fields:
image_annotater/db/migrate/20190123073338_create_items.rb
class CreateItems < ActiveRecord::Migration[5.2]
 def change
   create_table :items do |t|
     t.string :name
     t.text :description
     t.string :image
     t.timestamps
   end
 end
end
Now let us create the Labels model:
rails g model Label
Also, add this to the routes.rb:
resources :labels
This is the most important table in this app. The coordinates of the annotations or rectangle boxes created by Annotorious must be saved in this model. So, the migration should look like this:
class CreateLabels < ActiveRecord::Migration[5.2]
  def change
    create_table :labels do |t|
      t.string :text
      t.string :context
      t.decimal :x_value
      t.decimal :y_value
      t.decimal :width
      t.decimal :height
      t.references :item, index: true
      t.timestamps
    end
  end
end
We can see that x and y coordinates, along with height and width, are expected in an annotation, along with a text. The context is the path to the image. We can also see there is a reference to an Item. This means that one Item or Image can have multiple labels.
The Item model must be like this:
/image_annotater/app/models/item.rb
class Item < ApplicationRecord
 mount_uploader :image, ImageUploader
 has_many :labels
end
The Label model must be like this:
/image_annotater/app/models/label.rb
class Label < ApplicationRecord
 belongs_to :item
end
The ItemsControllerwill be a normal CRUD controller.
LabelsController will be like this:
class LabelsController < ApplicationController
  before_action :set_label, only: [:show, :edit, :update, :destroy]
  def index
    @labels = label.all
  end

  # GET /labels/1.json
  def show
  end
  def new
    @label = label.new
  end
  def edit
  end

  def create
    @label = Label.new(label_params)
    @label.save
    render(:json => {}, :status => :created)
  end
  def update
    respond_to do |format|
      if @label.update(label_params)
        render(:json => {}, :status => :updated)
      else
        render(:json => {}, :status => :not_created)
      end
    end
  end

  def destroy
    @label.destroy
    render(:json => {}, :status => :removed)
  end
private

    def set_label
      @label = Label.find(params[:id])
    end
    def label_params
      params.require(:label).permit(:text, :context, :x_value, :y_value, :width, :height, :item_id)
    end
end
You can see that our LabelsController has the option to create, update, and delete new labels.
Our back-end is almost done. Let’s build two UIs.
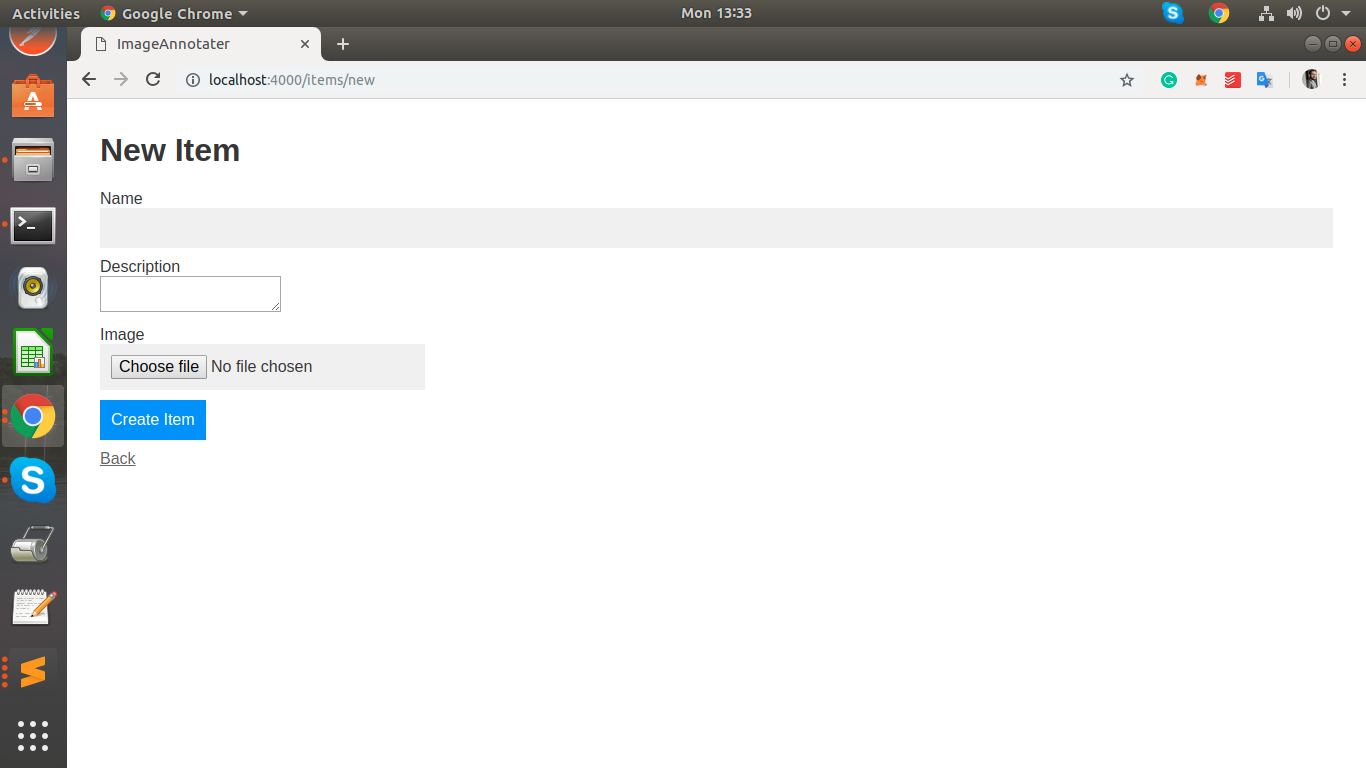
The first will be the form to create Items. Users will be able to upload an image and create Item from this page.
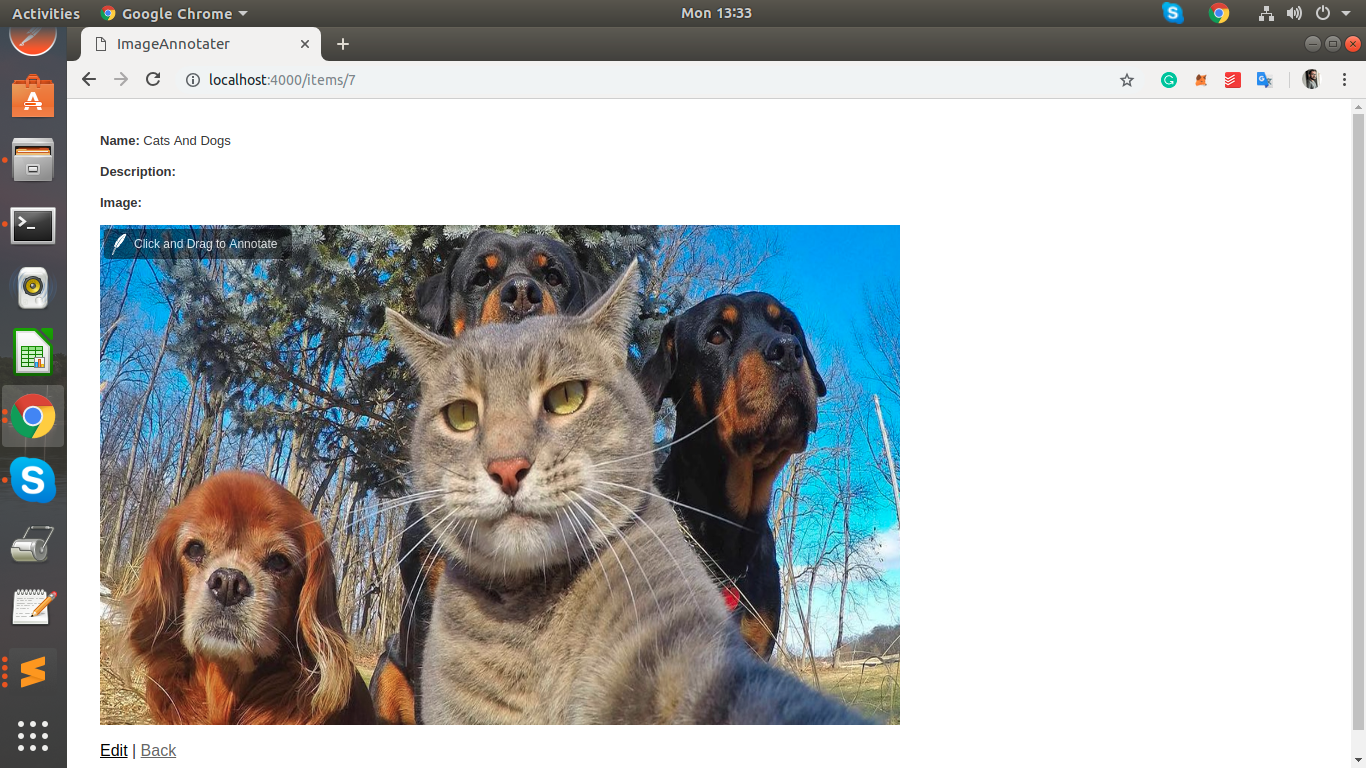
The next will be a show page to display the Items. This page is important as the Annotation (creating the labels) will be done on this page.
<p>
  <strong>Name:</strong>
  <%= @item.name %>
</p>
<p>
  <strong>Description:</strong>
  <%= @item.description %>
</p>
<p>
  <strong>Image:</strong>
  <div>
  <%= image_tag(@item.image.url, size: "800x500")%>
  </div>
<%= hidden_field_tag 'item_id', @item.id %>
</p>
Annotorious Implementation
To set up Annotorious on our app, first, download the latest version of Annotorious from the official site. The downloaded zip contains an annotorious.min.js file, a CSS folder with the annotorious.css file. The CSS folder will also contain some image files required.
If we’re adding annotorious to a simple HTML file, we only need to add the following lines to the page head:
<link type=”text/css” rel=”stylesheet” href=”css/annotorious.css” /><script type=”text/javascript” src=”annotorious.min.js”></script>
But since we’re using this on a rails app, separate the files and place the js file in the app/assets/javascripts folder, the CSS file in app/assets/stylesheets andimagesinapp/assets/images.
Now we can make our image annotatable. There are two ways to do this. The Annotorious Javascript API is now available in our pages which can be invoked by the anno variable
Option 1. The annotatable CSS class
Add a CSS class annotatable to the image tag. On page load, Annotorious will automatically scan your page for images with this class, and make them annotatable.
Example:
<img src="example.jpg" class="annotatable" />
Option 2: Using JavaScript
The Annotorious Javascript API can be used to make images annotatable ‘manually’.
Example:
<script>
  function init() {
    anno.makeAnnotatable(document.getElementById('myImage'));
  }
</script>
...
<body onload="init();">
  <img src="example.jpg" id="myImage" />
</body>
We will be using Option 2.
Our image is in app/views/items/show.html.erb. Add an id to it so that we can uniquely identify it.
<%= image_tag(@item.image.url, size: "800x500", id: "annotatable")%>
Now in the JS part. Add a function to make the image with ‘annotatable’ id annotatable.
function init() {
   anno.makeAnnotatable(document.getElementById(‘annotatable’));
 }
Call this function when the document is ready.
$( document ).ready(function() {
  init();
  function init() {
    anno.makeAnnotatable(document.getElementById('annotatable'));
    }
}
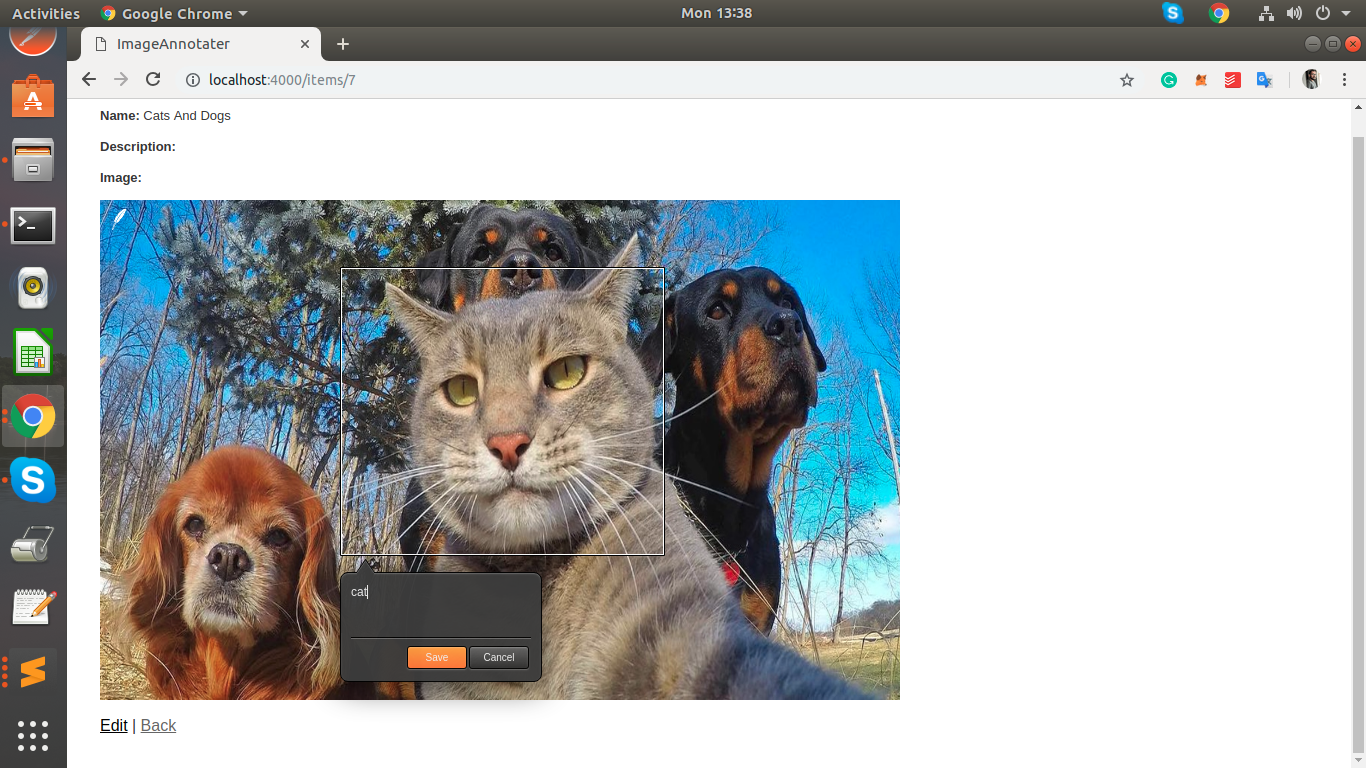
Now, if we check the item’s show page again and drag the mouse on the image, we can see that we can create annotations on the image.
Awesome!!
The Annotorious library does all the work for us and the option to annotate is done. But two more things remain.
- Options to create, update and delete labels/annotations from the UI
- Display all labels on the item image when the page is loaded.
The Create, Delete, and Update labels can be handled by the event handlers provided by the Annotorious.
The idea is to get the annotation data and pass it as an AJAX function to the LabelsController, when events like creation, editing, and deletion of annotation occur**.**
All the following code must be written inside our init()function.
Create the Labels
Whenever an annotation is drawn and the save button is clicked, we can trigger the event handler onAnnotationCreated(annotation)on theannovariable. So in our case, we can write the event handler as:
anno.addHandler('onAnnotationCreated', function(annotation) {
     var text = annotation.text;
     var context = annotation.src;
     var x = annotation.shapes[0].geometry.x;
     var y = annotation.shapes[0].geometry.y;
     var width = annotation.shapes[0].geometry.width;
     var height = annotation.shapes[0].geometry.height;
     var id = $("#item_id").val();
     $.ajax({
         type: 'POST',
         url: "/labels/",
         data: {
           label :{
                 text:text,context:context,
                 x_value:x,y_value:y,width:width,
                 height:height,item_id:id
            }
          },
       success: function(data) {}
     });
    });
We can see how the coordinates and text from the annotation object are extracted and then passed as an AJAX to the Create function in LabelController.
Display All Labels
Before going to update and delete, we can use this option to display all annotations or labels on the page load. For this, we need to add a new function to ItemsControllerto get all labels for an item.
#app/controllers/items_controller.rb
def get_labels
  labels = Item.find(params[:id]).labels
  render json: labels
end
In the JS part, we need to call the CreateAnnotation method of annotorious to redraw all saved labels. This can be done like this:
$.ajax({
        type: "POST",
        dataType: "json",
        url: "/items/get_labels",
        data: {
         id: 6
        },
        success: function(data){
         $.each(data, function() {
          var myAnnotation = {}
          $.each(this, function(k, v) {
          if(k == 'text'){
            myAnnotation["text"] = v;
          }
          if(k == 'id'){
           myAnnotation["id"] = v;
          }
          if(k == 'context'){
           myAnnotation["src"] = v;
          }
          if(k == 'x_value'){
           myAnnotation['x_value'] = v;
          }
          if(k == 'y_value'){
           myAnnotation['y_value'] = v;
          }
          if(k == 'height'){
           myAnnotation['height'] = v;
          }
          if(k == 'width'){
           myAnnotation['width'] = v;
          }
         });
         var annotation = create_annotation(myAnnotation);
         anno.addAnnotation(annotation)
        });
        }
    });
create_annotation = function(myAnnotation_hash){
     var myAnnotation = {
      src : myAnnotation_hash["src"],
      text : myAnnotation_hash["text"],
      shapes : [{
          type : 'rect',
          geometry : {
            x : parseFloat(myAnnotation_hash["x_value"]),
            y: parseFloat(myAnnotation_hash["y_value"]),
            width : parseFloat(myAnnotation_hash["width"]),
            height: parseFloat(myAnnotation_hash["height"]),
            label_id: myAnnotation_hash["id"] }
      }]
  }
     return myAnnotation;
    }
  }
  });
Notice that we created a hash of annotations data from the database and used that hash to create annotations. Also, you can see that I also added the primary key of the label to the geometry of annotation as label_id. The created annotation is added to the anno object as anno.addAnnotation(annotation).
Updating the Labels
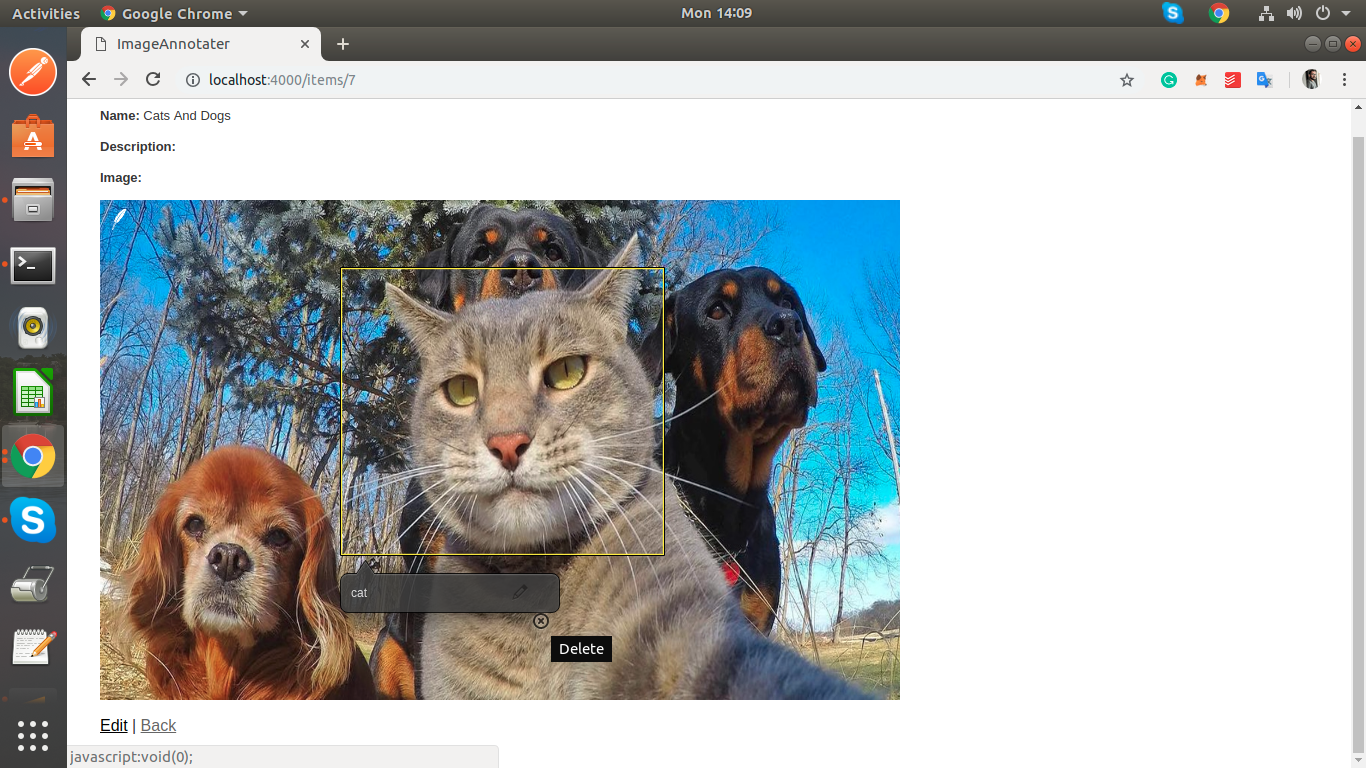
To update the text in an existing label, click on the pencil icon on the annotation. The option to add new text will be prompted:
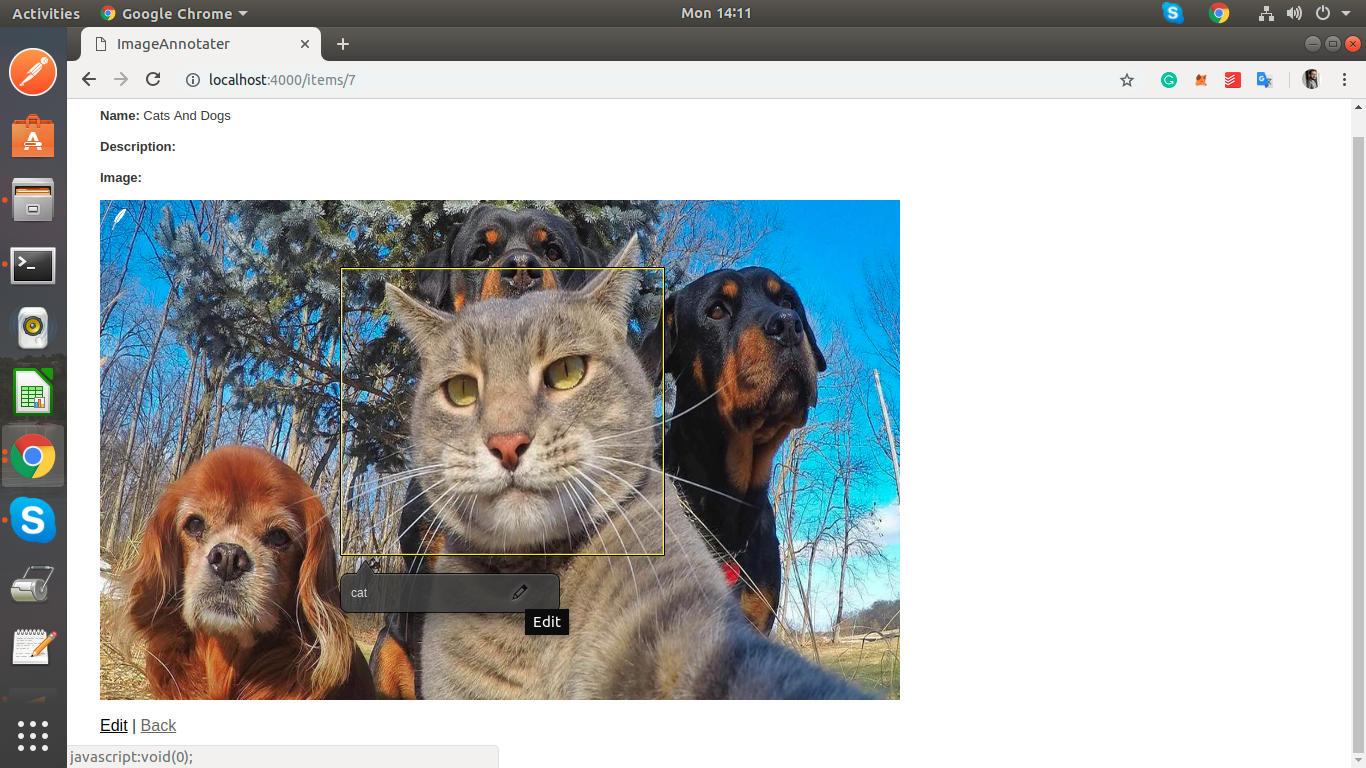
When we click on the Edit option, the event handler onAnnotationUpdated(annotation)is triggered. We can use this to update the label.
anno.addHandler('onAnnotationUpdated', function(annotation) {
 var label_id = annotation.shapes[0].geometry["label_id"];
if(label_id == "" || label_id != null){
   var text = annotation.text;
   var context = annotation.src;
   var x = annotation.shapes[0].geometry.x;
   var y = annotation.shapes[0].geometry.y;
   var width = annotation.shapes[0].geometry.width;
   var height = annotation.shapes[0].geometry.height
   var item_id = $("#item_id").val();
   $.ajax({
       type: 'PUT',
       url: "/labels/"+label_id,
       data: {
        label :{
           text:text,
           context:context,
           x_value:x,
           y_value:y,
           width:width,
           height:height,
           item_id: item_id
        }
       },
       success: function(data) {}
     });
     }
  });
Removing the Labels
To remove a saved annotation, click on the X mark on the annotation. It will trigger the anno.onAnnotationRemovedcallback**.**
anno.addHandler('onAnnotationRemoved', function(annotation) {
 var label_id = annotation.shapes[0].geometry["label_id"];
 if(label_id == "" || label_id != null){
   $.ajax({
       type: 'DELETE',
       url: "/labels/"+label_id,
       data: {
       },
       success: function(data) {}
     });
     }
  });
That’s it.
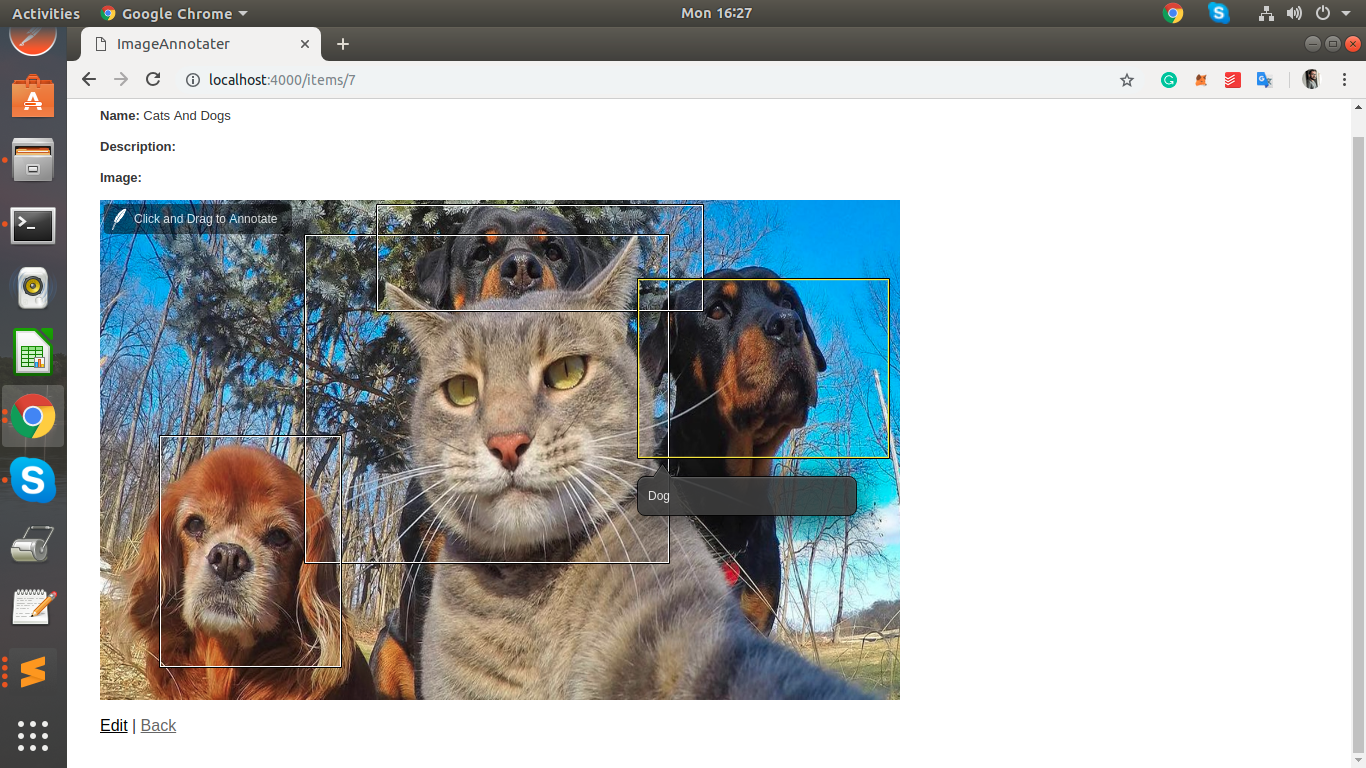
We can now create, update and delete labels and retrieve them on page reload. One drawback of the current implementation is that to remove or edit a created label we have to reload the page now because the creation happens via AJAX.
There are many othereventhandlersand functions available in Annotorious not discussed in this piece. Check them out at their official documentation.
Also, many plugins are available in Annotorious, check them out as well. Creating plugins is so easy — I have even created a plugin to add a dropdown to the Annotations text field.
I hope this was helpful!
#ruby #Ruby on Rails
