Build a boilerplate BigCommerce app using Laravel on the back-end and React on the front-end to fast track your development process.
As Head of Product Strategy at BigCommerce, I often get to work with developers that are looking to quickly extend what our platform can do and enable a UI for merchants to interface with the new functionality they create. Something I’ve been wanting to offer those developers is a way to fast-track their concepts into a functional app on our platform — a boilerplate app using a popular BE and FE framework that is easily accessible.
While waiting for that problem to be magically solved, I had been prototyping a concept on my own time using some of our new Widget APIs, and realized out of necessity I had already created the foundation for a simple Laravel & React based app in the process.
This article documents those steps: what it took to get to a functional app using Laravel on the back-end and React on the front-end. Hopefully it fast-tracks your understanding of what it takes to quickly build your first BigCommerce app using approachable, modern frameworks. At the end, you’ll have a basic two-screen app (with BE and FE routing) you can run locally, which can be installed on a BigCommerce store and run API requests against it.
And yes, the link to GitHub with the final code is at the bottom.
Baseline Needs
Before jumping in, you’ll want to make sure you have installed the following dependencies on your dev machine:
- PHP (Installation Guide)
- Composer (Installation Guide)
- Laravel (Installation Guide)
To ease PHP development and enable the app you develop to be easily shared, you’ll want to use either Valet or Homestead, depending on your OS:
- Mac OS: Valet (Installation Guide)
- Windows / Linux: Homestead (Installation Guide)
We’ll be using Valet for some of the steps below, but the functionality to host and share sites is similar across both Valet and Homestead. What’s more important in this tutorial is how to configure Laravel to use React and connect with BigCommerce.
Step 1: Getting Laravel and React Running Together
This is where we will create a baseline for future development: a simple application that loads at a specific URL in your browser and loads a React component instead of the default Laravel screen.
Set up a directory to serve the app
We need to first set up a directory to store this and any future app you develop this way. You may have already run this during the Valet set-up process — in that case jump to the next step.
mkdir ~/Sites
cd ~/Sites
valet park
Create a new Laravel codebase
Use the Laravel command that creates the initial boilerplate for an app in the ~/Sites directory:
laravel new laravel-react-bigcommerce-app
You should see the command run its course, like this:
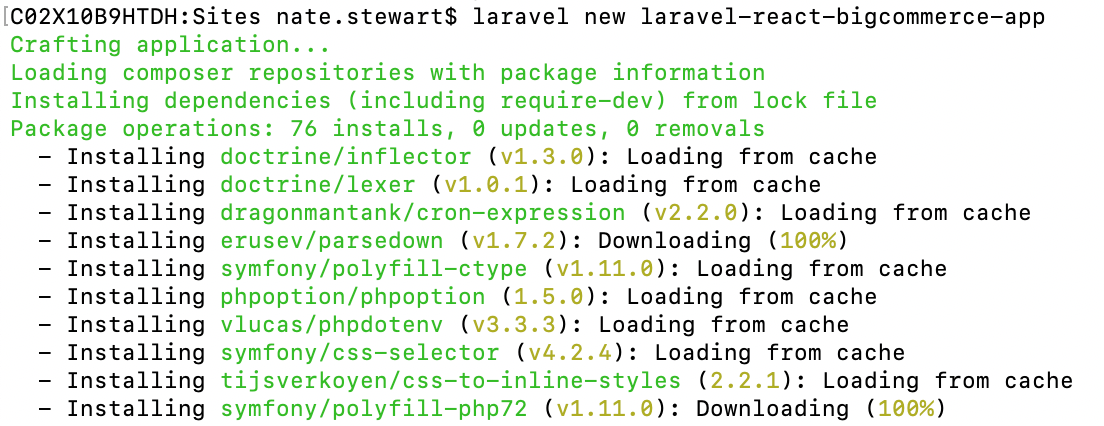
This command usually completes with a ‘Application ready! Build something amazing.’
Visit the app address to make sure it’s live locally
After the command above completes, you should be able to visit the following URL in your browser and see the default Laravel welcome screen:
http://laravel-react-bigcommerce-app.test
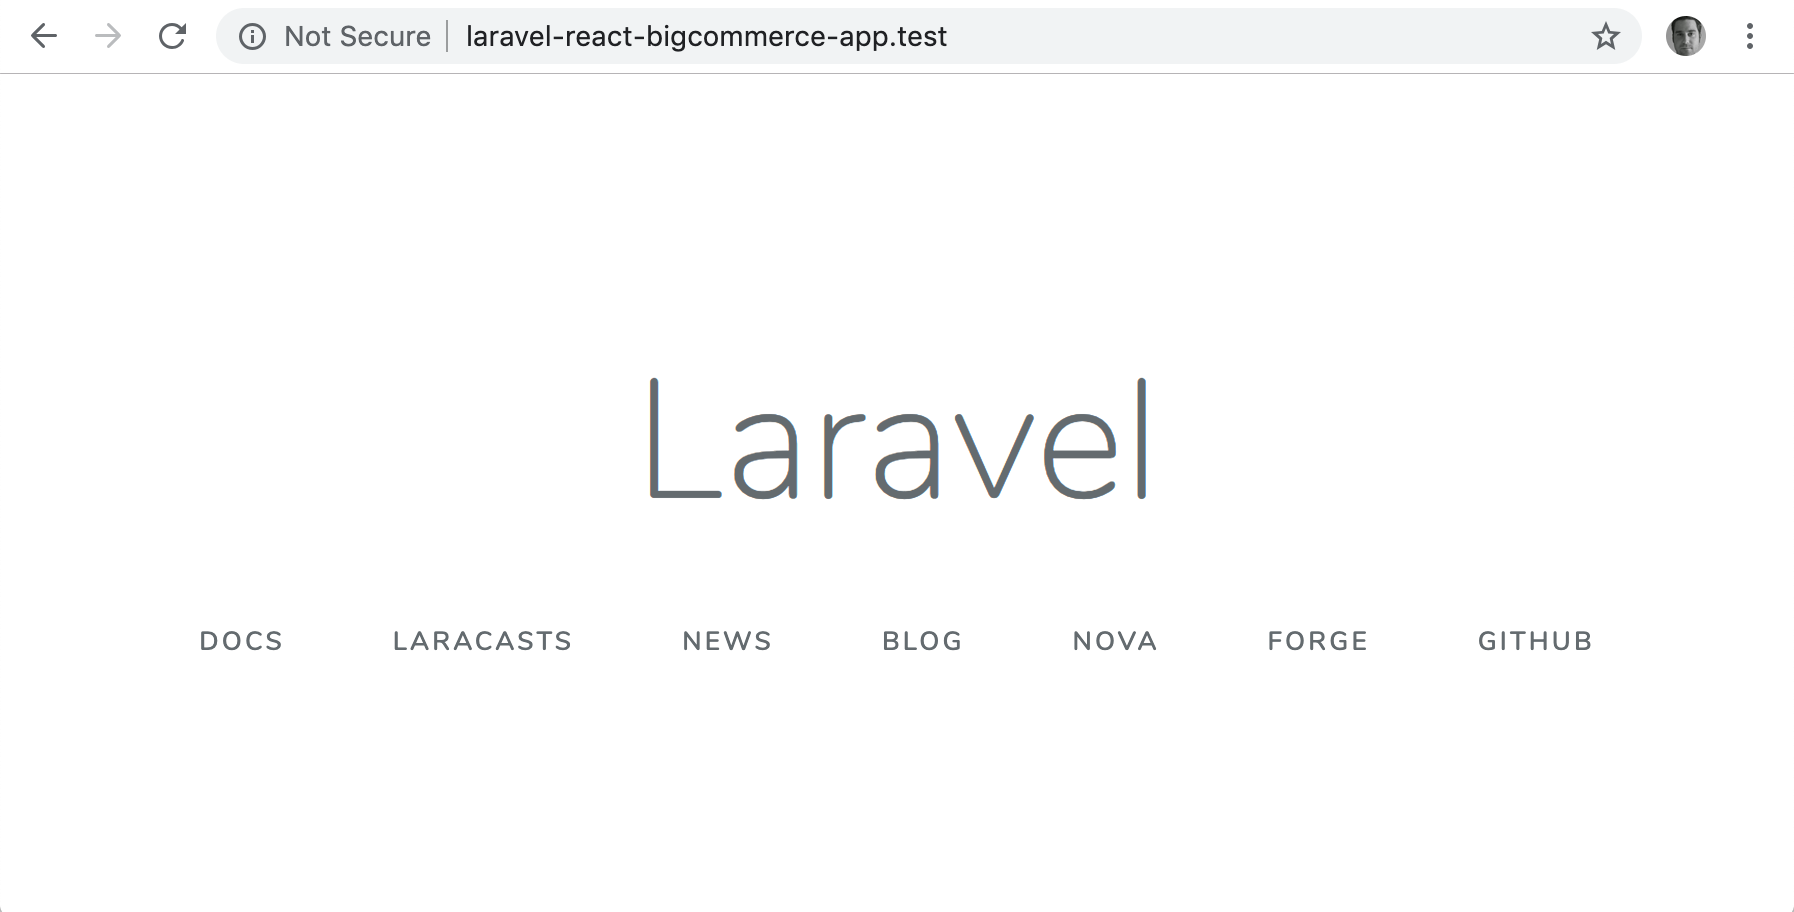
You should be looking at the Laravel welcome screen at this point.
Note: If you see It Works! instead, you’ll need to stop the Apache server running on localhost. See this Stack Overflow post for more details.
Make sure your app runs over HTTPS
As you can see by the ‘Not Secure’ that shows in the browser, the app by default will be served via HTTP. To serve via HTTPS instead, run the following command in the app directory:
valet secure
Now https://laravel-react-bigcommerce-app.test should work. If it doesn’t and you receive a connection refusal in the browser, try editing the Site.php Valet file as described here and rerunning valet secure (as noted in this GitHub issue comment).
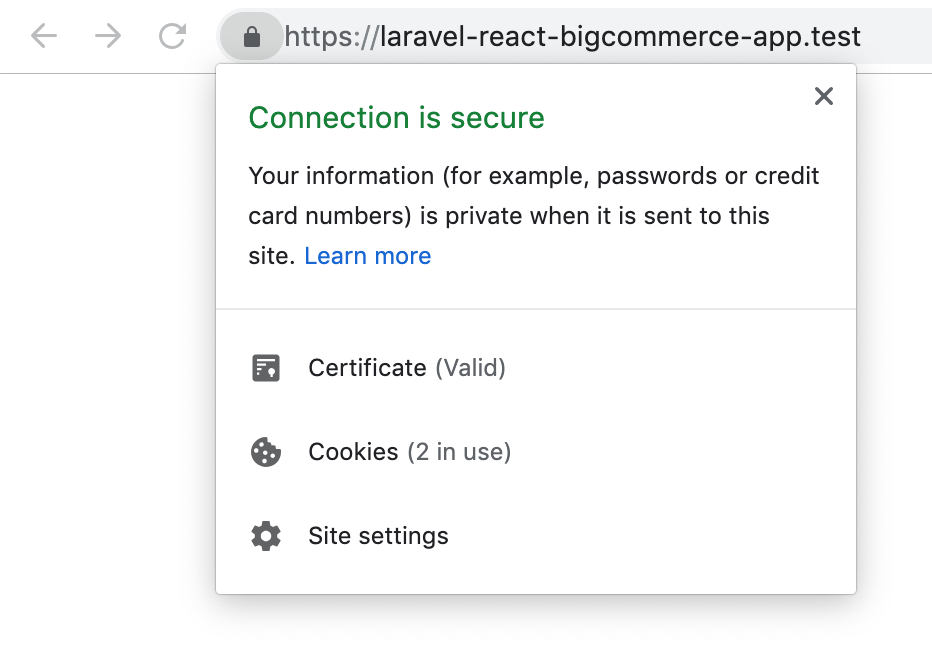
Your app should now be served over HTTPS.
Set up React as the JS framework
By default Laravel comes pre-configured with Vue.js. We want to use React, so we’ll switch to it using the following command in your app root dir:
php artisan preset react
Now you are set up with React scaffolding in Laravel. However, you’ll still be getting the same Laravel welcome screen. We’ll fix that next.
Set up index page template to load the React app
The default page for a Laravel app is the welcome screen that’s in the welcome.blade.php file. We want to initialize React instead.
To do this, make the following changes:
- Add an app.blade.php file into the /resources/views directory with the contents below.
- Update the main route in /routes/web.php point to ‘app’ instead of ‘welcome’.
- Delete welcome.blade.php
<!DOCTYPE html>
<html>
<head>
@yield('title')
<meta name="csrf-token" content="{{csrf_token()}}" />
<meta name="viewport" content="width=device-width, initial-scale=1.0">
<link rel="stylesheet" type="text/css" href="{{mix('/css/app.css')}}">
<script src="https://unpkg.com/react@16.6.3/umd/react.production.min.js"></script>
<script src="https://unpkg.com/react-dom@16.6.3/umd/react-dom.production.min.js"></script>
<script src="https://unpkg.com/moment@2.22.1/min/moment.min.js"></script>
<script src="https://code.jquery.com/jquery-1.12.4.min.js" integrity="sha256-ZosEbRLbNQzLpnKIkEdrPv7lOy9C27hHQ+Xp8a4MxAQ=" crossorigin="anonymous"></script>
</head>
<body>
<div id="root"></div>
<script type="text/javascript" src="{{mix('/js/app.js')}}"></script>
</body>
</html>
<?php
/*
|--------------------------------------------------------------------------
| Web Routes
|--------------------------------------------------------------------------
|
| Here is where you can register web routes for your application. These
| routes are loaded by the RouteServiceProvider within a group which
| contains the "web" middleware group. Now create something great!
|
*/
Route::get('/', function () {
    return view('app');
});
Note that we’re including jQuery and Moment.js as dependancies as well, since they are extremely common needs when building out an app. They are not required for React to function.
Check Node.js version and install JS dependancies
For the initial JS compile and future steps, I was using Node v10.14.1. While it’s not required and you should be able to use new versions, I recommend using NVM or a similar library to help you manage your different Node versions easily. You can learn more about NVM and alternate managers here.
Now, install any dependancies your JS app needs by running this command your root app directory:
npm install
After a minute or two, you should have all the dependancies loaded.
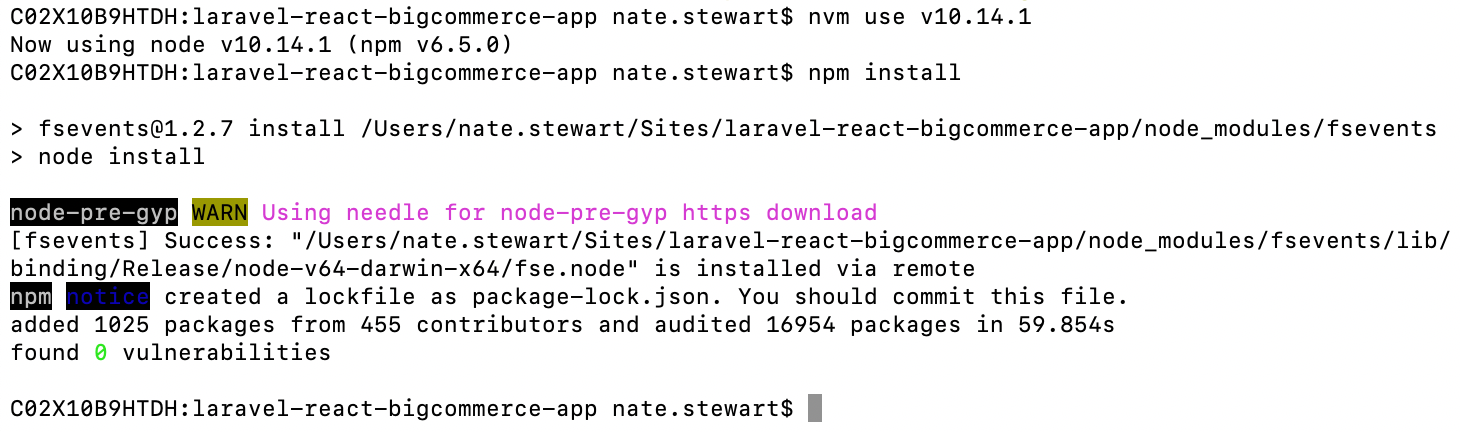
Here’s an example of NVM being used to pick a specific Node version before installing dependancies.
Compile JS assets
Now that the dependancies are installed, you are ready to compile the JS assets into something that loads in the browser. Run:
npm run dev
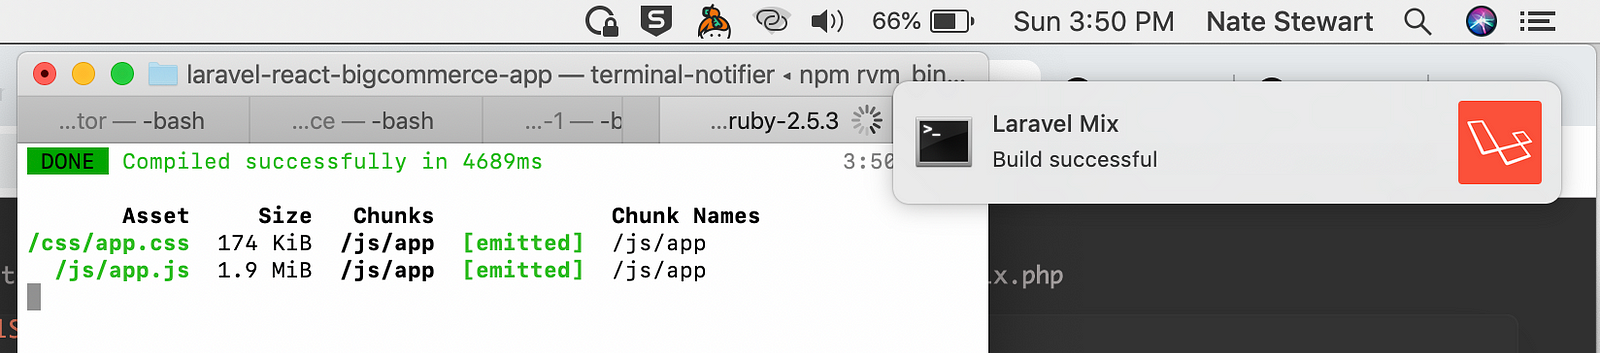
You’ll notice you get a readout of how long certain assets took to compile and a notification from Laravel Mix when it’s done building.
Note that Mix is effectively a convenience wrapper around webpack, which can be confusing at first to understand. If you don’t already know about it, put webpack on your bucket list of research items. It’s a good tool to know how to wield within more complex projects.
Ok, let’s view https://laravel-react-bigcommerce-app.test/ now:
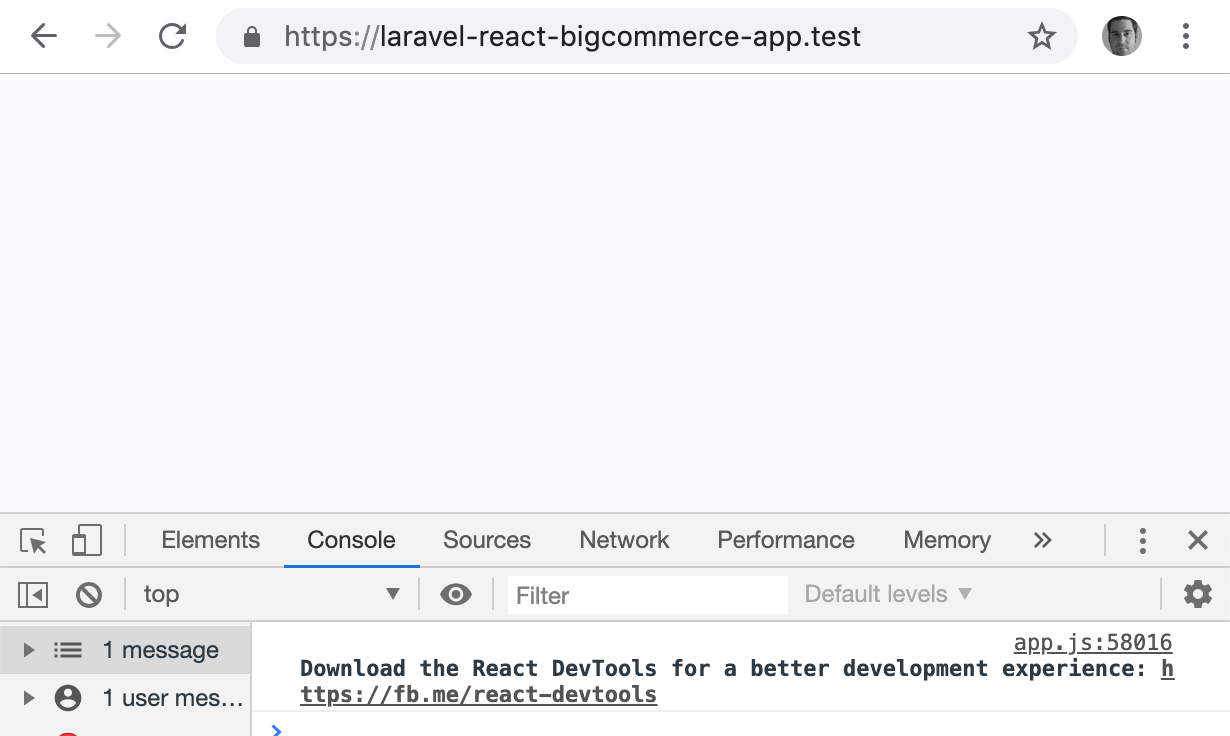
Wait… nothing is loading!?
Actually. React is, as you can see from the React DevTools being suggested. However, we don’t have any React components displaying.
Render your first React component
The Laravel React preset actually contains an example component that is already included in the initialization. By default it is looking for a DOM id that isn’t in the app.blade.php template.
To fix that, change the ‘example’ id references in /resources/js/components/example.js to ‘root’, which does exist as a DOM id in the template.
So this, at the bottom of that component file:
if (document.getElementById('example')) {
    ReactDOM.render(<Example />, document.getElementById('example'));
}
Changes into this:
if (document.getElementById('root')) {
    ReactDOM.render(<Example />, document.getElementById('root'));
}
After that change. Run the compile assets command again:
npm run dev
And when it’s complete, refresh you browser to see the component!
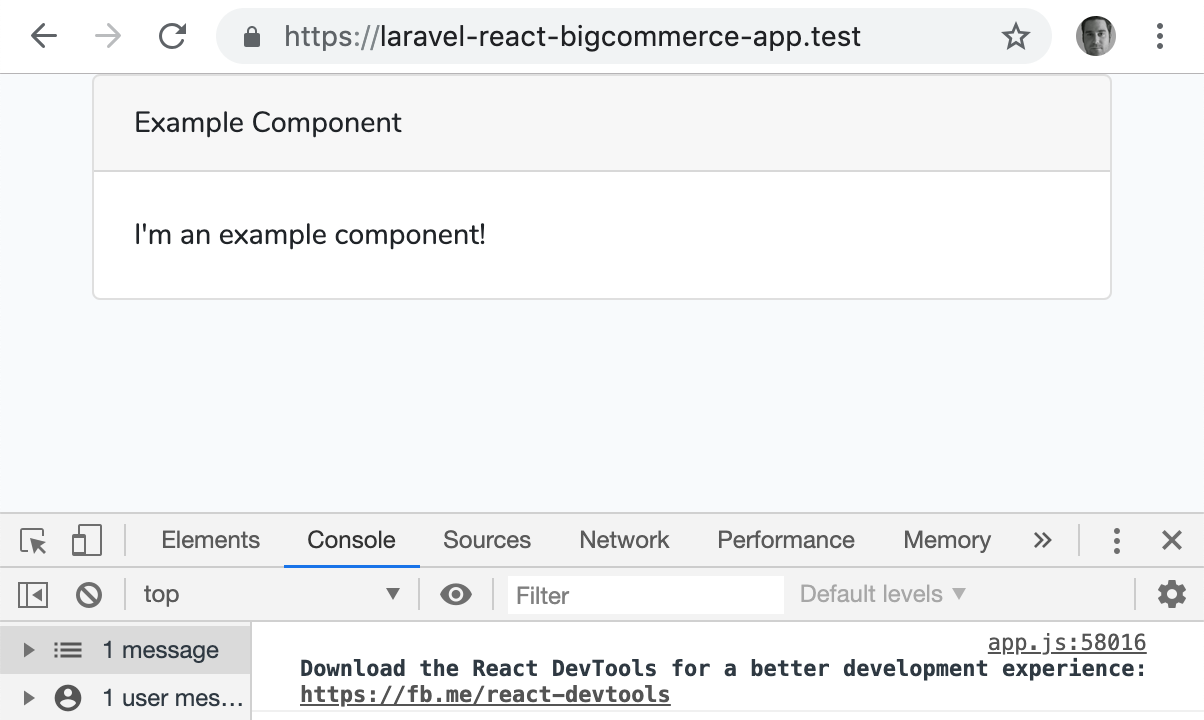
Our example React component loaded in the browser.
Note that this React component and others in this article are all using Bootstrap for layout and styling.
Step 2: Set up Basic App Routes
Now you are set up for React development with a Laravel back-end. However for a functional ecommerce app you’ll want two more pieces in place: routing and access to external data via an API. We’ll focus on routing first.
We’ll be using React Router for this. To install the dependency, run:
npm install --save react-router-dom
Once that is added, you are ready to implement routes within the app. Using the code below as a reference for changes needed, alter the following files:
- /resources/js/app.js -> remove the example component require and instead require a new index.js file
- /resources/js/screens/home.js -> new file that will render the home screen
- /resources/js/index.js -> new file that will handle routing and render the nav
- /resources/js/screens/list.js -> new file that will render the list screen
- /routes/web.php -> update the back-end route that loads the main app to also load for the new ‘list’ route, which will enable the browser to load the right screen for https://laravel-react-bigcommerce-app.test/listregardless if it is navigated to directly (url) or indirectly (app link click)
Note that we’re including jQuery and Moment.js as dependancies as well, since they are extremely common needs when building out an app. They are not required for React to function.

Check Node.js version and install JS dependancies

For the initial JS compile and future steps, I was using Node v10.14.1. While it’s not required and you should be able to use new versions, I recommend using NVM or a similar library to help you manage your different Node versions easily. You can learn more about NVM and alternate managers here.

Now, install any dependancies your JS app needs by running this command your root app directory:

npm install
After a minute or two, you should have all the dependancies loaded.


Here’s an example of NVM being used to pick a specific Node version before installing dependancies.
Compile JS assets

Now that the dependancies are installed, you are ready to compile the JS assets into something that loads in the browser. Run:

npm run dev

You’ll notice you get a readout of how long certain assets took to compile and a notification from Laravel Mix when it’s done building.

Note that Mix is effectively a convenience wrapper around webpack, which can be confusing at first to understand. If you don’t already know about it, put webpack on your bucket list of research items. It’s a good tool to know how to wield within more complex projects.
Ok, let’s view https://laravel-react-bigcommerce-app.test/ now:


Wait… nothing is loading!?

Actually. React is, as you can see from the React DevTools being suggested. However, we don’t have any React components displaying.

Render your first React component

The Laravel React preset actually contains an example component that is already included in the initialization. By default it is looking for a DOM id that isn’t in the app.blade.php template.

To fix that, change the ‘example’ id references in /resources/js/components/example.js to ‘root’, which does exist as a DOM id in the template.

So this, at the bottom of that component file:

if (document.getElementById('example')) {
    ReactDOM.render(<Example />, document.getElementById('example'));
}
Changes into this:

if (document.getElementById('root')) {
    ReactDOM.render(<Example />, document.getElementById('root'));
}
After that change. Run the compile assets command again:

npm run dev
And when it’s complete, refresh you browser to see the component!


Our example React component loaded in the browser.
Note that this React component and others in this article are all using Bootstrap for layout and styling.

Step 2: Set up Basic App Routes
Now you are set up for React development with a Laravel back-end. However for a functional ecommerce app you’ll want two more pieces in place: routing and access to external data via an API. We’ll focus on routing first.

We’ll be using React Router for this. To install the dependency, run:

npm install --save react-router-dom
Once that is added, you are ready to implement routes within the app. Using the code below as a reference for changes needed, alter the following files:

/resources/js/app.js -> remove the example component require and instead require a new index.js file
/resources/js/screens/home.js -> new file that will render the home screen
/resources/js/index.js -> new file that will handle routing and render the nav
/resources/js/screens/list.js -> new file that will render the list screen
/routes/web.php -> update the back-end route that loads the main app to also load for the new ‘list’ route, which will enable the browser to load the right screen for https://laravel-react-bigcommerce-app.test/listregardless if it is navigated to directly (url) or indirectly (app link click)
import React, { Component } from 'react';

export default class Home extends Component {
  render() {
    return (
      <div className="container">
        <div className="row">
          <div className="col-md-8">
            <div className="card">
              <div className="card-header">Home Page</div>

              <div className="card-body">
                This is the Home Page.
              </div>
            </div>
          </div>
          <div className="col-md-4">
            <div className="card">
              <div className="card-header">Side Bar</div>

              <div className="card-body">
                This is a Side Bar.
              </div>
            </div>
          </div>
        </div>
      </div>
    );
  }
}
import React from 'react';
import ReactDOM from 'react-dom';
import { BrowserRouter, Switch, Route, Link } from 'react-router-dom';

import Home from './screens/home';
import ListOfThings from './screens/list';

ReactDOM.render((
  <BrowserRouter>
    <div>
      <nav className="container">
        <ul className="nav mt-2 mb-2">
          <li className="nav-item">
            <Link className="nav-link" to="/">Home</Link>
          </li>
          <li className="nav-item">
            <Link className="nav-link" to="/list">List</Link>
          </li>
        </ul>
      </nav>

      <Switch>
        <Route exact path="/list" component={ ListOfThings } />
        <Route component={ Home } />
      </Switch>
    </div>
  </BrowserRouter>
), document.getElementById('root'));
import React from 'react';

export default class List extends React.Component {
  render() {
    return (
      <div className="container">
        <div className="row">
          <div className="col-md-12">
            <div className="card">
              <div className="card-header">List Page</div>

              <div className="card-body">
                This is the List Page.
              </div>
            </div>
          </div>
        </div>
      </div>
    );
  }
}
<?php
/*
|--------------------------------------------------------------------------
| Web Routes
|--------------------------------------------------------------------------
|
| Here is where you can register web routes for your application. These
| routes are loaded by the RouteServiceProvider within a group which
| contains the "web" middleware group. Now create something great!
|
*/
Route::get('/{url?}', function () {
  return view('app');
})->where('','list');
After all those changes, run:
npm run dev
Reload your browser at https://laravel-react-bigcommerce-app.test and you’ll now see a functional layout for an app, including navigation, appear!
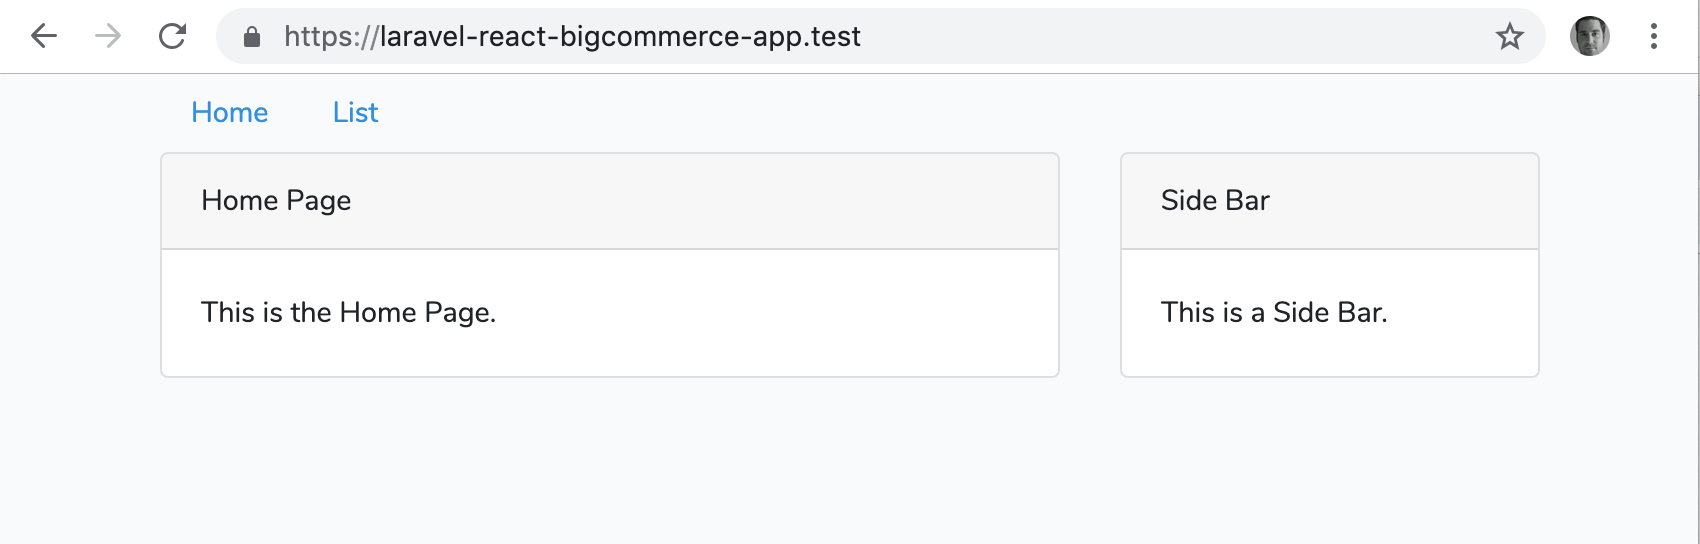
Looking more like an app, eh?
Step 3: Connect the App With BigCommerce
Alright, we have a good base now with React routing, so it’s time to start connecting the app to real data inside a BigCommerce store.
Create app in BC dev tools area
Head to devtools.bigcommerce.com and log in with your BigCommerce store account. Create an app and go to the ‘Technical’ step in them modal.
To start, you want at least the auth and load callback URLs to be set, since those are what BC will use to initiate the install process and enable the app to load within the BC control panel.
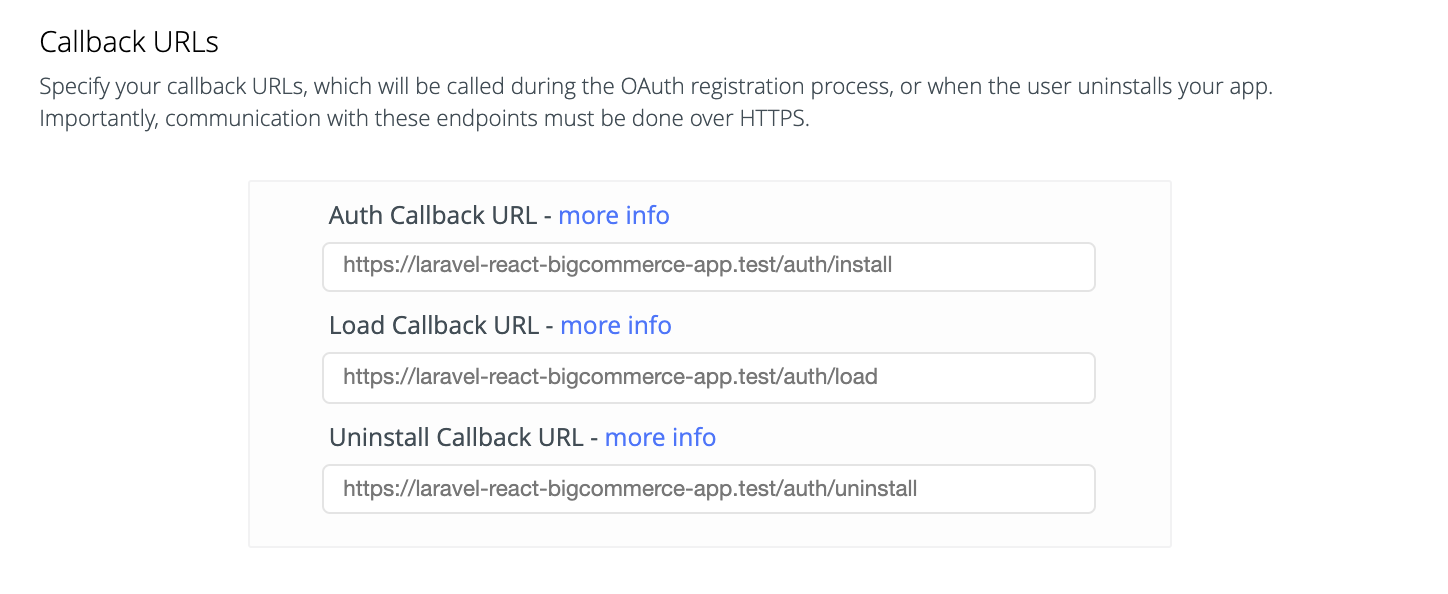
The callback URLs I used when developing.
After setting the callback URLs, you need to select which scopes your app will need. Keep track of this because your app will need to check the proper scopes have been granted when installed. If you were making a real app, you would only select what the app actually needs here, as BigCommerce will work to ensure you don’t have too many permissions.
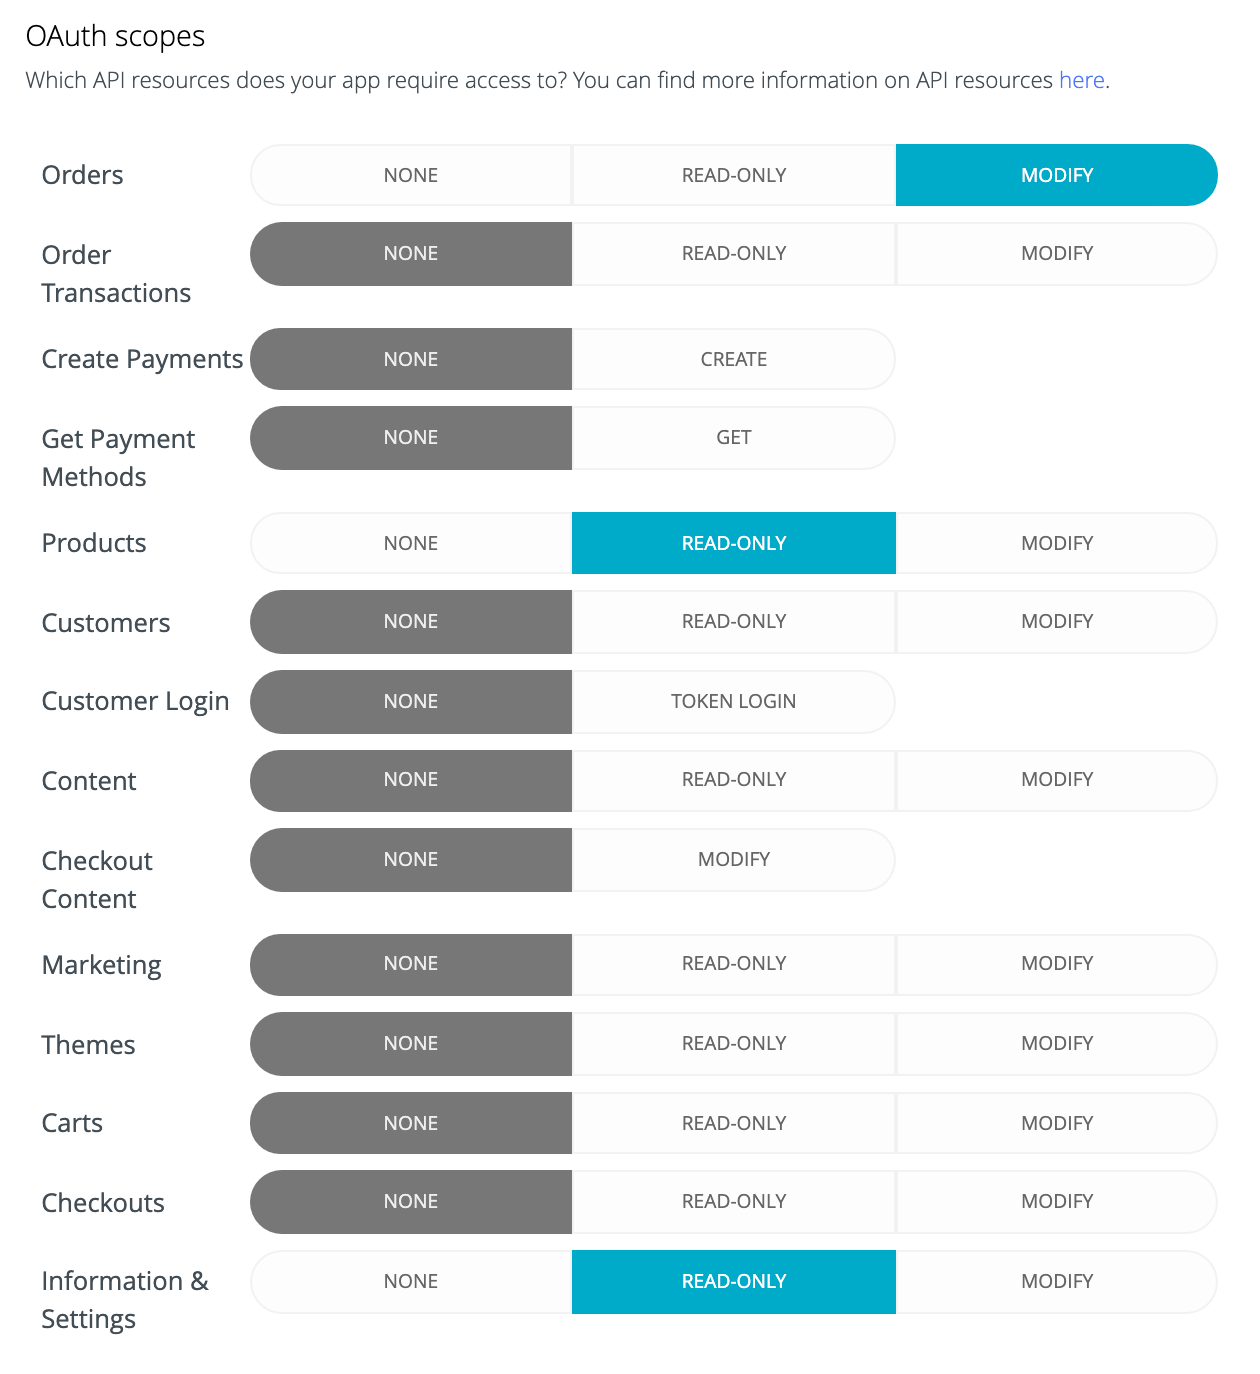
The scopes I used when developing. Only select what you’ll actually use!
Save your app’s client ID and secret
The client ID and Secret are used to verify that your app requests are valid. Save these into environment variables within your app. In the sample Laravel app, we’re saving these in the .env file along with the scopes so each piece of app info is able to be set in one place.
Update your .env file (in the root app directory) to have the APP_URL set as https://laravel-react-bigcommerce-app.test and add new env variables at the bottom of the file for your BC App IDs and test API credentials for local dev.
# Existing env variable. Make sure it matches the base URL of your app
APP_URL=https://laravel-react-bigcommerce-app.test

[ ... other existing variables ... ]

# New env variables for BC app and a test API credentials for local dev
# The Client ID and Secret can be found at https://devtools.bigcommerce.com/my/apps by selecting 'View Client ID'
BC_APP_CLIENT_ID=xxxxxxxxxxxxxxxxxxxxxxxxxxxxxxxx
BC_APP_SECRET=xxxxxxxxxxxxxxxxxxxxxxxxxxxxxxxx

# These local credentials can be created by creating an API Account within your BigCommerce store (Advanced Settings > API Accounts)
BC_LOCAL_CLIENT_ID=xxxxxxxxxxxxxxxxxxxxxxxxxxxxxxxx
BC_LOCAL_SECRET=xxxxxxxxxxxxxxxxxxxxxxxxxxxxxxxx
BC_LOCAL_ACCESS_TOKEN=xxxxxxxxxxxxxxxxxxxxxxxxxxxxxxxx
BC_LOCAL_STORE_HASH=stores/xxxxxxxxxxx
Install Guzzle dependency
You can see above that there are calls to the BC API which are using Guzzle. To add that as a dependency, in the root of the development directory run:
composer require guzzlehttp/guzzle
Set up the install, load and BC API proxy routes
When the app is installed, it will look to the callbacks that are defined in the dev tools area.
Add the web routes below, so Laravel knows to route to the specific controller methods for each callback. We are implementing install and load here, to get the baseline experience working, however there are stubbed routes for future functionality like uninstall and remove-user too.
<?php
/*
|--------------------------------------------------------------------------
| Web Routes
|--------------------------------------------------------------------------
|
| Here is where you can register web routes for your application. These
| routes are loaded by the RouteServiceProvider within a group which
| contains the "web" middleware group. Now create something great!
|
*/
Route::get('/{url?}', function () {
    return view('app');
})->where('', 'list');
Route::group(['prefix' => 'auth'], function () {
  Route::get('install', 'MainController@install');
  Route::get('load', 'MainController@load');
  Route::get('uninstall', function () {
    echo 'uninstall';
    return app()->version();
  });
  Route::get('remove-user', function () {
    echo 'remove-user';
    return app()->version();
  });
});
Route::any('/bc-api/{endpoint}', 'MainController@proxyBigCommerceAPIRequest')
  ->where('endpoint', 'v2\/.*|v3\/.*');
Create controller to handle app install and load requests, proxy BC API
You can see above that there are references to ‘MainController’. That is where we’ll put the logic that handles the OAuth handshake and stores the credentials generated for the store. Keep in mind this uses session based storage, so when the browser session expires, the app will stop working.
The last route is a proxy through to the BigCommerce v2 and v3 APIs. We’ll use that to enable a bc-api endpoint we can hit on the front-end, which helps us bypass CORs issues.
To power these routes, add the following MainController.php file into your /app/Http/Controllers directory:
<?php
namespace App\Http\Controllers;
use Illuminate\Routing\Controller as BaseController;
use Illuminate\Http\Request;
use GuzzleHttp\Psr7;
use GuzzleHttp\Exception\RequestException;
use GuzzleHttp\Client;
class MainController extends BaseController
{
    protected $baseURL;
    public function __construct()
    {
        $this->baseURL = env('APP_URL');
    }
    public function getAppClientId() {
        if (env('APP_ENV') === 'local') {
            return env('BC_LOCAL_CLIENT_ID');
        } else {
            return env('BC_APP_CLIENT_ID');
        }
    }
    public function getAppSecret(Request $request) {
        if (env('APP_ENV') === 'local') {
            return env('BC_LOCAL_SECRET');
        } else {
            return env('BC_APP_SECRET');
        }
    }
    public function getAccessToken(Request $request) {
        if (env('APP_ENV') === 'local') {
            return env('BC_LOCAL_ACCESS_TOKEN');
        } else {
            return $request->session()->get('access_token');
        }
    }
    public function getStoreHash(Request $request) {
        if (env('APP_ENV') === 'local') {
            return env('BC_LOCAL_STORE_HASH');
        } else {
            return $request->session()->get('store_hash');
        }
    }
    public function install(Request $request)
    {
        // Make sure all required query params have been passed
        if (!$request->has('code') || !$request->has('scope') || !$request->has('context')) {
            return redirect()->action('MainController@error')->with('error_message', 'Not enough information was passed to install this app.');
        }
        try {
            $client = new Client();
            $result = $client->request('POST', 'https://login.bigcommerce.com/oauth2/token', [
                'json' => [
                    'client_id' => $this->getAppClientId(),
                    'client_secret' => $this->getAppSecret($request),
                    'redirect_uri' => $this->baseURL . '/auth/install',
                    'grant_type' => 'authorization_code',
                    'code' => $request->input('code'),
                    'scope' => $request->input('scope'),
                    'context' => $request->input('context'),
                ]
            ]);
            $statusCode = $result->getStatusCode();
            $data = json_decode($result->getBody(), true);
            if ($statusCode == 200) {
                $request->session()->put('store_hash', $data['context']);
                $request->session()->put('access_token', $data['access_token']);
                $request->session()->put('user_id', $data['user']['id']);
                $request->session()->put('user_email', $data['user']['email']);
                // If the merchant installed the app via an external link, redirect back to the
                // BC installation success page for this app
                if ($request->has('external_install')) {
                    return redirect('https://login.bigcommerce.com/app/' . $this->getAppClientId() . '/install/succeeded');
                }
            }
            return redirect('/');
        } catch (RequestException $e) {
            $statusCode = $e->getResponse()->getStatusCode();
            $errorMessage = "An error occurred.";
            if ($e->hasResponse()) {
                if ($statusCode != 500) {
                    $errorMessage = Psr7\str($e->getResponse());
                }
            }
            // If the merchant installed the app via an external link, redirect back to the
            // BC installation failure page for this app
            if ($request->has('external_install')) {
                return redirect('https://login.bigcommerce.com/app/' . $this->getAppClientId() . '/install/failed');
            } else {
                return redirect()->action('MainController@error')->with('error_message', $errorMessage);
            }
        }
    }
    public function load(Request $request)
    {
        $signedPayload = $request->input('signed_payload');
        if (!empty($signedPayload)) {
            $verifiedSignedRequestData = $this->verifySignedRequest($signedPayload, $request);
            if ($verifiedSignedRequestData !== null) {
                $request->session()->put('user_id', $verifiedSignedRequestData['user']['id']);
                $request->session()->put('user_email', $verifiedSignedRequestData['user']['email']);
                $request->session()->put('owner_id', $verifiedSignedRequestData['owner']['id']);
                $request->session()->put('owner_email', $verifiedSignedRequestData['owner']['email']);
                $request->session()->put('store_hash', $verifiedSignedRequestData['context']);
            } else {
                return redirect()->action('MainController@error')->with('error_message', 'The signed request from BigCommerce could not be validated.');
            }
        } else {
            return redirect()->action('MainController@error')->with('error_message', 'The signed request from BigCommerce was empty.');
        }
        return redirect('/');
    }
    public function error(Request $request)
    {
        $errorMessage = "Internal Application Error";
        if ($request->session()->has('error_message')) {
            $errorMessage = $request->session()->get('error_message');
        }
        echo '<h4>An issue has occurred:</h4> <p>' . $errorMessage . '</p> <a href="'.$this->baseURL.'">Go back to home</a>';
    }
    private function verifySignedRequest($signedRequest, $appRequest)
    {
        list($encodedData, $encodedSignature) = explode('.', $signedRequest, 2);
        // decode the data
        $signature = base64_decode($encodedSignature);
            $jsonStr = base64_decode($encodedData);
        $data = json_decode($jsonStr, true);
        // confirm the signature
        $expectedSignature = hash_hmac('sha256', $jsonStr, $this->getAppSecret($appRequest), $raw = false);
        if (!hash_equals($expectedSignature, $signature)) {
            error_log('Bad signed request from BigCommerce!');
            return null;
        }
        return $data;
    }
    public function makeBigCommerceAPIRequest(Request $request, $endpoint)
    {
        $requestConfig = [
            'headers' => [
                'X-Auth-Client' => $this->getAppClientId(),
                'X-Auth-Token'  => $this->getAccessToken($request),
                'Content-Type'  => 'application/json',
            ]
        ];
        if ($request->method() === 'PUT') {
            $requestConfig['body'] = $request->getContent();
        }
        $client = new Client();
        $result = $client->request($request->method(), 'https://api.bigcommerce.com/' . $this->getStoreHash($request) . '/' . $endpoint, $requestConfig);
        return $result;
    }
    public function proxyBigCommerceAPIRequest(Request $request, $endpoint)
    {
        if (strrpos($endpoint, 'v2') !== false) {
            // For v2 endpoints, add a .json to the end of each endpoint, to normalize against the v3 API standards
            $endpoint .= '.json';
        }
        $result = $this->makeBigCommerceAPIRequest($request, $endpoint);
        return response($result->getBody(), $result->getStatusCode())->header('Content-Type', 'application/json');
    }
}
**Major Note: **By default, your app is set to use your hardcoded API credentials in the .env file. When you install the app within BigCommerce, you want your app to use the credentials passed back during the OAuth token exchange. To do this, make sure your APP_ENV config value in your .env file is set to production, like so:
APP_ENV=production
Now, if you head to your BC store admin, to the **Apps -> My Apps -> My Draft Apps **section, you can install your app and see it successfully load inside the control panel.
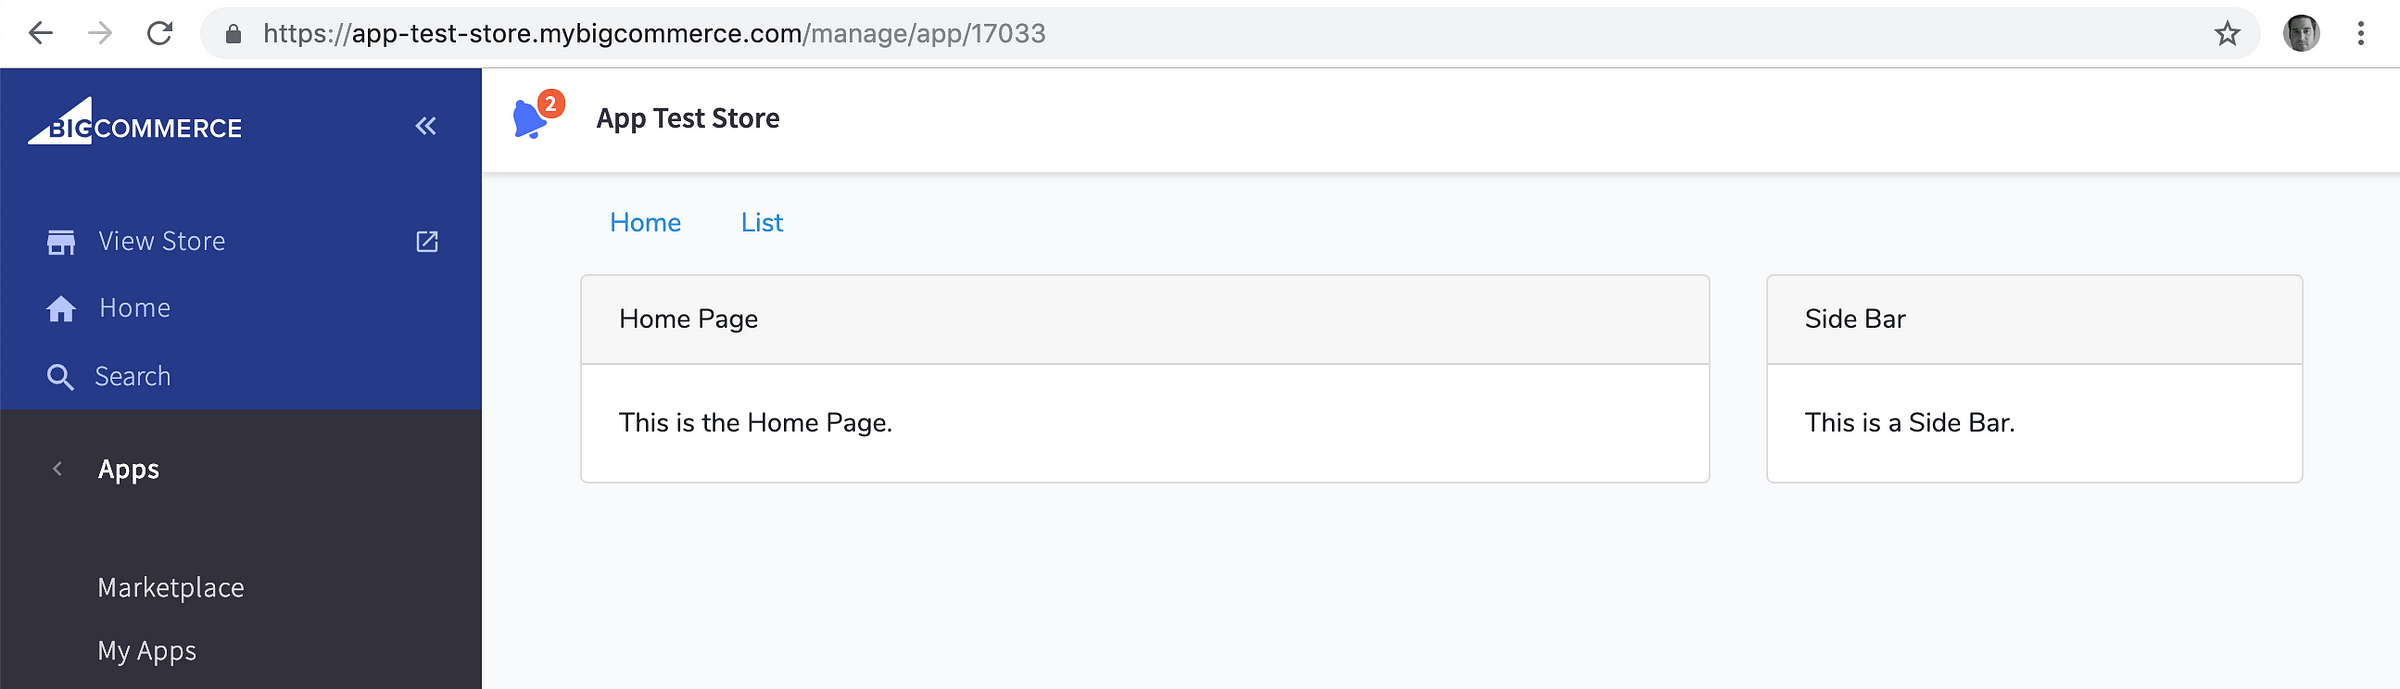
Now the app is installable within BigCommerce.
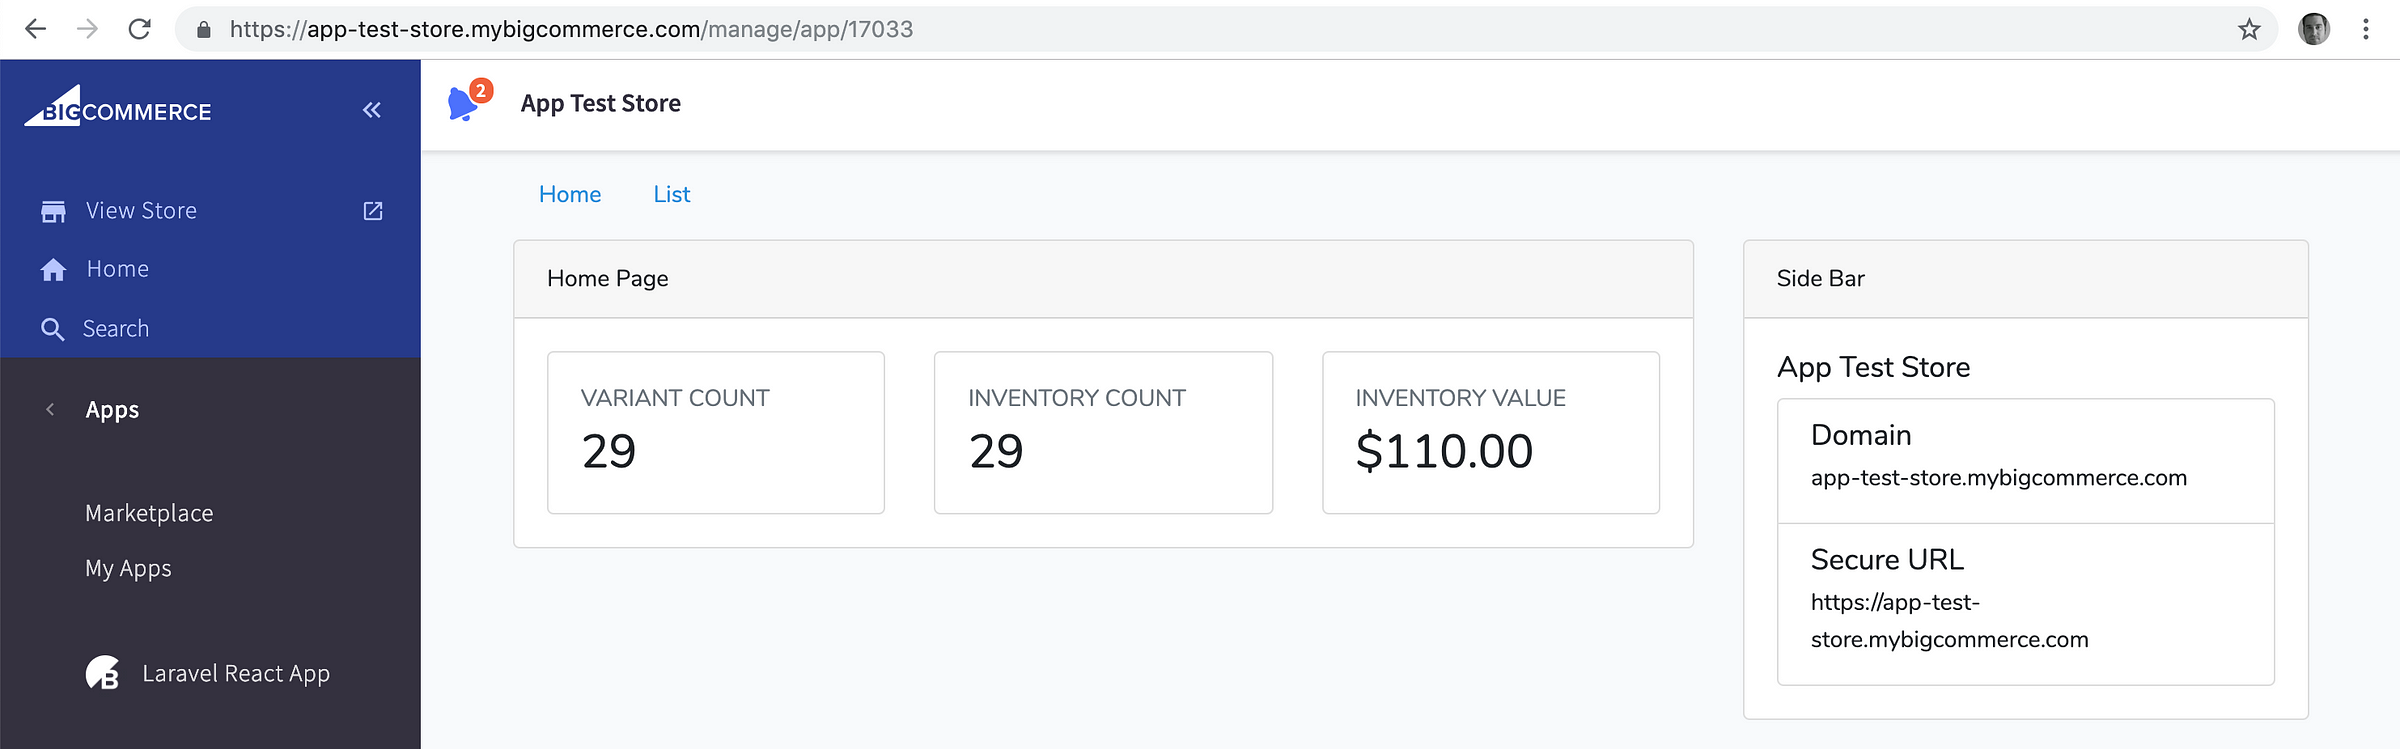
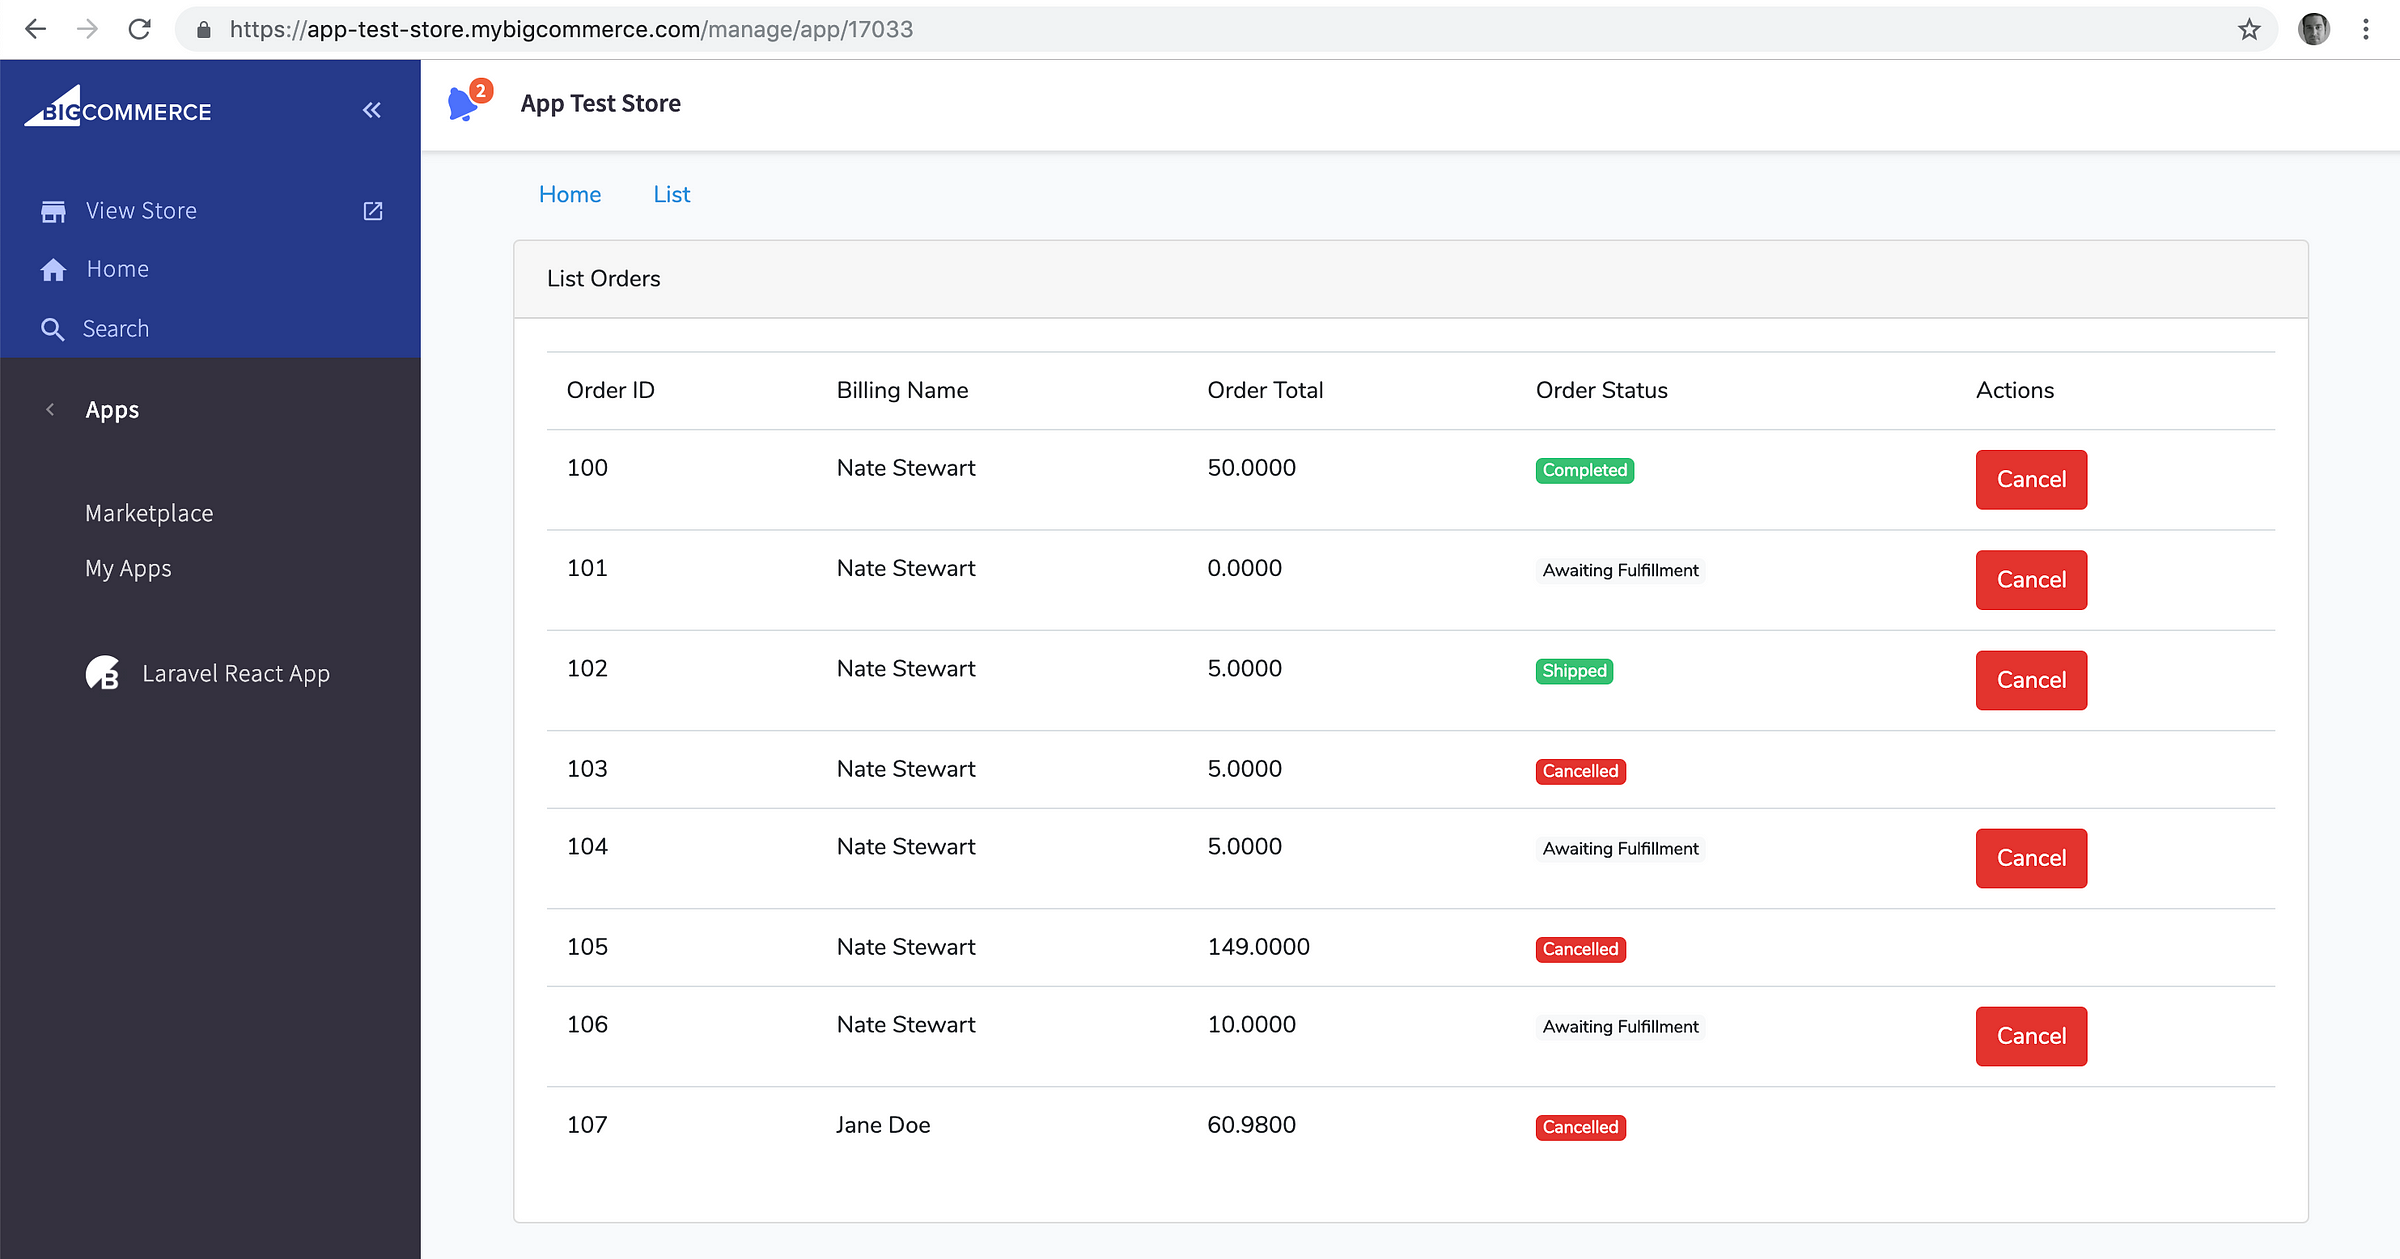
Create a front-end experience that surfaces data in BigCommerce
All the pieces are in place to create front-end components that actually do something, so I created a simple set of React components and screens that:
- Load brief catalog summary and store information
- List the last 10 orders and enable the user to cancel them
The scopes that are required were:
- Orders: Modify
- Products: Read-only
- Information and Settings: Read-only
To enable the front-end components to hit the API using the back-end BigCommerce API Proxy endpoints in MainController.php, add the following files to a new /resources/js/services/ directory:
export const ApiService = {
  getOrders(params) {
    params = Object.assign({
      page: 1,
      limit: 10,
    }, params);

    return axios({
      method: 'get',
      url: '/bc-api/v2/orders',
      params,
    });
  },

  updateOrder(orderId, data) {
    return axios({
      method: 'put',
      url: `/bc-api/v2/orders/${orderId}`,
      data,
    });
  },

  deleteOrder(orderId) {
    return axios({
      method: 'delete',
      url: `/bc-api/v2/orders/${orderId}`,
    });
  },

  getResourceCollection(resource, params) {
    params = Object.assign({
      page: 1,
      limit: 10,
    }, params);

    return axios({
      method: 'get',
      url: `/bc-api/${resource}`,
      params,
    });
  },

  getResourceEntry(resource, params) {
    return axios({
      method: 'get',
      url: `/bc-api/${resource}`,
      params,
    });
  },

  updateResourceEntry(resource, data) {
    return axios({
      method: 'put',
      url: `/bc-api/${resource}`,
      data,
    });
  },

  deleteResourceEntry(resource, data) {
    return axios({
      method: 'delete',
      url: `/bc-api/${resource}`,
    });
  },
};
import {ApiService} from './ApiService';

export {
  ApiService,
};
The actual components are nice and light. Which is the point, right? Three files handle this:
- /resources/js/components/index.js -> new file that handles importing multiple components (simplifies inclusion into screens)
- /resources/js/components/Table/index.js -> new file that contains a basic Table component
- /resources/js/components/Spinner/index.js -> new file that contains a basic Spinner component
/resources/js/components/index.js
import {Spinner} from './Spinner';
import {Table} from './Table';

export {
  Spinner,
  Table,
};
/resources/js/components/Table/index.js
import React from 'react';

export class Table extends React.Component {
  constructor(props) {
    super(props);
  }

  getTableRow(data, index) {
    return (
      <tr key={index}>
      {this.props.tableHeaders.map(function(header, index) {
        let value = data;
        if (header.index) {
          value = data[header.index];
        }

        if (header.callback) {
          value = header.callback(value);
        }

        return <td key={index}>{value}</td>
      })}
      </tr>
    );
  }

  render() {
    return (
      <table className="table">
        <thead className="table-thead">
          <tr>{this.props.tableHeaders.map(function(header, index) {
            return <td key={index}>{header.label}</td>;
          })}</tr>
        </thead>
        <tbody className="table-tbody">
          {this.props.tableData.map(this.getTableRow.bind(this))}
        </tbody>
      </table>
    );
  }
}
/resources/js/components/Spinner/index.js
import React from 'react';

export class Spinner extends React.Component {
  render() {
    return (
      <div className="text-center">
        <div className="spinner-border m-5" role="status">
          <span className="sr-only">Loading...</span>
        </div>
      </div>
    );
  }
}
Now, with the API service and components in place, the screens can be updated to produce something functional. To bring it all together, change the following files:
resources/js/screens/home.js
import React from 'react';
import {Spinner} from '../components';
import {ApiService} from '../services/ApiService';

export default class Home extends React.Component {
  constructor(props) {
    super(props);

    this.state = {
      isCatalogSummaryLoading: true,
      isStoreInfoLoading: true,
      catalogSummary: {},
      storeInfo: {},
    };
  }

  componentWillMount() {
    ApiService.getResourceEntry('v2/store').then(this.handleStoreInfoResponse.bind(this));
    ApiService.getResourceEntry('v3/catalog/summary').then(this.handleCatalogSummaryResponse.bind(this));
  }

  handleStoreInfoResponse(response) {
    this.setState({
      isStoreInfoLoading: false,
      storeInfo: response.data,
    });
  }

  handleCatalogSummaryResponse(response) {
    this.setState({
      isCatalogSummaryLoading: false,
      catalogSummary: response.data.data,
    });
  }

  render() {
    const fieldsInSummary = [
      {
        label: "Variant Count",
        index: "variant_count",
        format: "number",
      },
      {
        label: "Inventory Count",
        index: "variant_count",
        format: "number",
      },
      {
        label: "Inventory Value",
        index: "inventory_value",
        format: "currency",
      },
    ];

    return (
      <div className="container">
        <div className="row">
          <div className="col-md-8">
            <div className="card">
              <div className="card-header">Home Page</div>

              <div className="card-body">
                {
                  (this.state.isStoreInfoLoading || this.state.isCatalogSummaryLoading)
                  ?
                  <Spinner/>
                  :
                  <div className="row">
                    {fieldsInSummary.map(function(summaryItem, index) {
                      return  <div className="col-12 col-lg-6 col-xl" key={index}>
                                <div className="card">
                                  <div className="card-body">
                                    <div className="row align-items-center">
                                      <div className="col">
                                        <h6 className="card-title text-uppercase text-muted mb-2">
                                          { summaryItem.label }
                                        </h6>
                                        <span className="h2 mb-0">
                                          {
                                            summaryItem.format === 'currency'
                                            ?
                                            new Intl.NumberFormat(undefined, { style: 'currency', currency: this.state.storeInfo.currency }).format(this.state.catalogSummary[summaryItem.index])
                                            :
                                            this.state.catalogSummary[summaryItem.index]
                                          }
                                        </span>
                                      </div>
                                    </div>
                                  </div>
                                </div>
                              </div>
                      }.bind(this))}
                  </div>
                }
              </div>
            </div>
          </div>
          <div className="col-md-4">
            <div className="card">
                <div className="card-header">Side Bar</div>

                <div className="card-body">
                  {
                    this.state.isStoreInfoLoading
                    ?
                    <Spinner/>
                    :
                    <section>
                      {
                        this.state.storeInfo.logo.url
                        ?
                        <img src={ this.state.storeInfo.logo.url } className="img-fluid img-thumbnail" />
                        :
                        <h5>{ this.state.storeInfo.name }</h5>
                      }

                      <ul className="list-group">
                        <li className="list-group-item">
                          <div className="d-flex w-100 justify-content-between">
                            <h5 className="mb-1">Domain</h5>
                          </div>
                          <p className="mb-1">{ this.state.storeInfo.domain }</p>
                        </li>
                        <li className="list-group-item">
                          <div className="d-flex w-100 justify-content-between">
                            <h5 className="mb-1">Secure URL</h5>
                          </div>
                          <p className="mb-1">{ this.state.storeInfo.secure_url }</p>
                        </li>
                      </ul>

                    </section>
                }
                </div>
            </div>
          </div>
        </div>
      </div>
    );
  }
}
resources/js/screens/list.js
import React from 'react';
import {Spinner, Table} from '../components';
import {ApiService} from '../services/ApiService';

export default class List extends React.Component {
  constructor(props) {
    super(props);

    this.state = {
      isOrdersLoading: true,
      orders: {
        data: [],
        pagination: {},
      },
      tableHeaders:
        [
          {
            label: "Order ID",
            index: "id",
            callback: function(orderId) {
              return orderId;
            },
          },
          {
            label: "Billing Name",
            index: "billing_address",
            callback: function(billingAddress) {
              return `${billingAddress.first_name} ${billingAddress.last_name}`;
            },
          },
          {
            label: "Order Total",
            index: "total_inc_tax",
            callback: function(orderTotal) {
              return orderTotal;
            },
          },
          {
            label: "Order Status",
            callback: function(data) {
              let badgeClass = 'badge badge-';
              if (data.status_id === 5) {
                badgeClass += 'danger';
              } else if (data.status_id === 2 || data.status_id === 10) {
                badgeClass += 'success';
              } else {
                badgeClass += 'light';
              }

              return (
                <span className={ badgeClass }>{ data.status }</span>
              );
            },
          },
          {
            label: "Actions",
            callback: function(data) {
              if (data.status_id !== 5) {
                return (
                  <button type="button" className="btn btn-danger" onClick={(e) => this.cancelOrder(data.id, e)}>Cancel</button>
                );
              }
            }.bind(this),
          },
        ],
    };
  }

  componentWillMount() {
    this.loadOrders();
  }

  loadOrders() {
    ApiService.getOrders({
      limit: 5
    }).then(this.handleOrdersResponse.bind(this));
  }

  handleOrdersResponse(response) {
    this.setState({
      isOrdersLoading: false,
      orders: {
        data: response.data
      }
    });
  }

  cancelOrder(orderId) {
  	const newOrderData = { status_id: 5 };

    this.setState({
      isOrdersLoading: true,
    });

    ApiService.updateOrder(orderId, newOrderData)
    .then(this.loadOrders.bind(this));
  }

  hasOrders() {
    return (this.state.orders.data.length > 0);
  }

  render() {
    return (
      <div className="container">
        <div className="row">
          <div className="col-md-12">
            <div className="card">
                <div className="card-header">List Orders</div>

                <div className="card-body">
                  {
                    this.state.isOrdersLoading
                    ?
                    <Spinner/>
                    :
                    this.hasOrders()
                    ?
                    <section>
                      <Table tableHeaders={this.state.tableHeaders} tableData={this.state.orders.data} />
                    </section>
                    :
                    <section>
                      <div className="emptyTable">No orders exist yet!</div>
                    </section>
                  }
                </div>
            </div>
          </div>
        </div>
      </div>
    );
  }
}
And as the final step, compile the JS assets again:
npm run dev
After a successful compile, you’ll now have a functional Laravel React app which can be loaded inside of BigCommerce!
Next Steps
If you got this far, congrats! You have a great base to work on as you experiment with all the BigCommerce APIs.
To launch a real app, aside from hosting it on a server other than your dev box, you’ll still need to add some persistent storage for API credentials, storing the store and user info received from the OAuth token request during app install so users can load the app after the initial session expires. Error handling, especially for failed requests to the API, should be handled and surfaced to the merchant. And tests, once you get to a state you are reasonably happy with, will help keep regressions at bay.
The Code
https://github.com/bigcommerce/laravel-react-sample-app/releases/tag/1.0
#laravel #reactjs #javascript #web-development