Written by Matt Rešetár This post was first published at Reso Coder. Blog for high quality Flutter & Dart app development tutorials to get you prepared for the real app development - from robust and clean architecture to deplyoment.
You are tweaking an app which is already in production. You are implementing code that allows a user to delete his data. All of a sudden, you realize that you made a huge mistake! By providing a wrong ID, you accidentally deleted data of an actual user!
Horror stories like this one can truly become a reality if you don’t have separate production and development environments. Thankfully, it’s very easy to set all of this up with Codemagic which is a CI/CD service dedicated specifically for Flutter apps.
Our multi-environment project
Environments can be used for just about anything - from supplying a different Firebase config file, so that you won’t accidentally delete production data from Firestore, to changing the UI and even logic based on the current app environment.
To keep this tutorial in a reasonable time-span, we won’t deal with Firebase but we will instead create environments for a counter app! Yay 🎉 But seriously, have you never wanted to change the increment amount from 1 to 5 by reading a configuration JSON file? No? Well, now you’ll see what you missed!
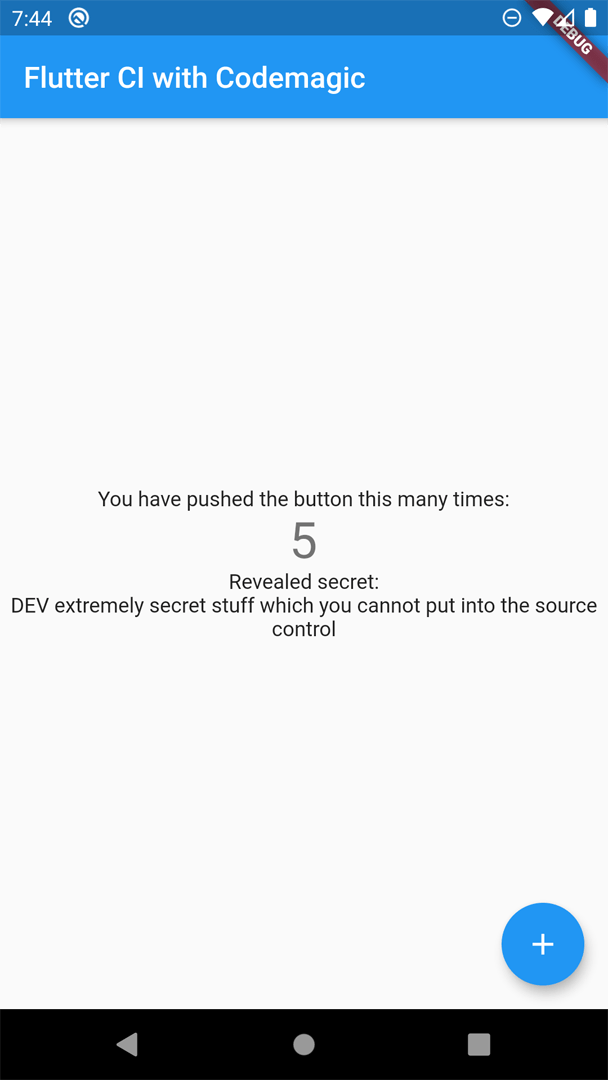 Development environment, increments by 5, the “secret” says “DEV”
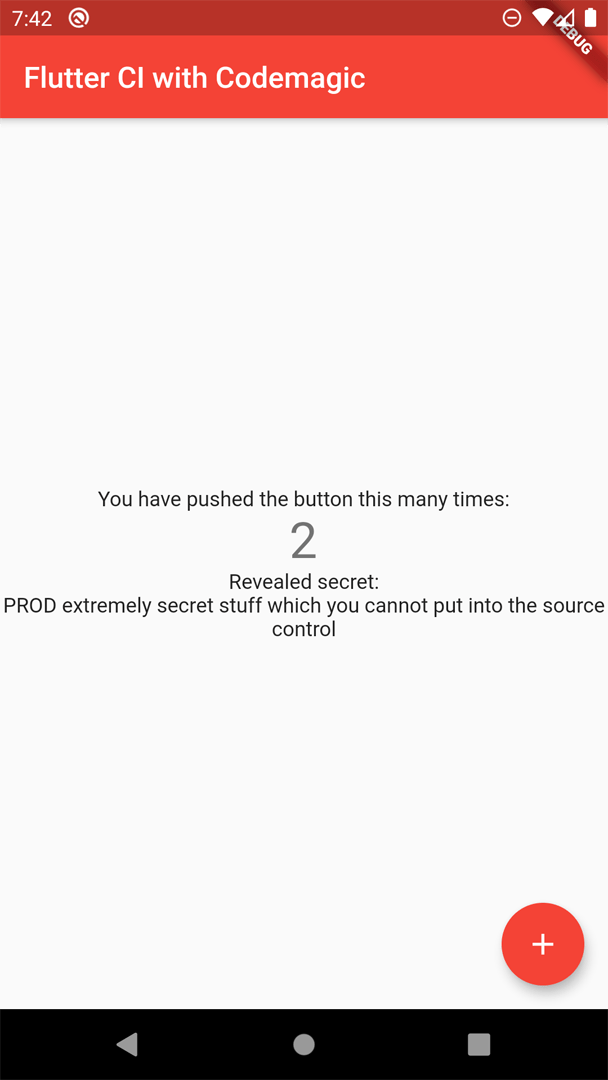 Production environment, increments by 1, the “secret” says “PROD”
There are 2 ways in which to configure multiple environments - either by providing a config file (this is the case with Firebase) or by passing around an Environment enum or a constant String (this is usually used with dependency injection). We’re going to tackle both of these approaches.
Environments are very close to flavors but they cannot change native configuration such as the bundle ID or app icon. Once you know how to configure environments, flavors are easy to set up. I’d recommend you to check out flutter.dev docs or a post by Dominik Roszkowski if you’d like to learn more.
Also, how can we use the proper environment when we build the app? Additionally, config files can contain sensitive information which we don’t want to check into source control… How can we handle that? The answer is Codemagic and multiple branches in a git repo. However, before we can set up that kind of stuff, we have to first create a Flutter project.
The Flutter project
As you already know, we will build yet another variant of the counter app. The UI code will remain fairly unchanged. To follow along, create a new Flutter project and paste the following code into lib/app_widget.dart. Changes to the default counter app are highlighted.
app_widget.dart
import 'package:flutter/material.dart';
import 'package:provider/provider.dart';

import './config_reader.dart';

class MyApp extends StatelessWidget {
  @override
  Widget build(BuildContext context) {
    return MaterialApp(
      title: 'Flutter CI with Codemagic',
      theme: ThemeData(
        primarySwatch: Provider.of<Color>(context),
      ),
      home: MyHomePage(title: 'Flutter CI with Codemagic'),
    );
  }
}

class MyHomePage extends StatefulWidget {
  MyHomePage({Key key, this.title}) : super(key: key);

  final String title;

  @override
  _MyHomePageState createState() => _MyHomePageState();
}

class _MyHomePageState extends State<MyHomePage> {
  int _counter = 0;

  void _incrementCounter() {
    setState(() {
      _counter += ConfigReader.getIncrementAmount();
    });
  }

  @override
  Widget build(BuildContext context) {
    return Scaffold(
      appBar: AppBar(
        title: Text(widget.title),
      ),
      body: Center(
        child: Column(
          mainAxisAlignment: MainAxisAlignment.center,
          children: <Widget>[
            Text(
              'You have pushed the button this many times:',
            ),
            Text(
              '$_counter',
              style: Theme.of(context).textTheme.display1,
            ),
            Text(
              'Revealed secret:\n${ConfigReader.getSecretKey()}',
              textAlign: TextAlign.center,
            ),
          ],
        ),
      ),
      floatingActionButton: FloatingActionButton(
        onPressed: _incrementCounter,
        tooltip: 'Increment',
        child: Icon(Icons.add),
      ),
    );
  }
}
Pretty standard stuff, if you ask me. The difference from the default counter app lies in getting the increment value and also a “secret key” from a config JSON file using a ConfigReader. The primary theme color is gotten using Provider - changing the color is accomplished using environment const String. You’ll see how it’s all done in just a bit 😉
#flutter
