In the final part of our series (we’ve arrived!) we’ll add some polish to our game. To do this, we’ll refine our level by adding a menu system (main and pause menus), which is a necessary part of any game. We will also add background sound to our game.
Before proceeding forward, a quick recap. We started by learning Unreal basics—how to navigate and create a HUD (heads up display). We also created some enemy AI and winning and losing mechanisms. We even tested the game on an Android device. These are core components of any mobile side-scroller game. In this final part we’ll polish our game so that it can be presentable.
You can find the other parts of the series here.
Personalization, instant expertise, game-changing user experiences — these are just a few of the values machine learning can add to mobile apps. Subscribe to the Fritz AI Newsletter to discover more.
Main Menu
Open the content browser and navigate to the maps folder. The idea behind creating a main menu is pretty similar to creating a level/map. If you think about it, a main-menu is also a type of level/map. The function of the menu is to list options and load our gameplay levels.

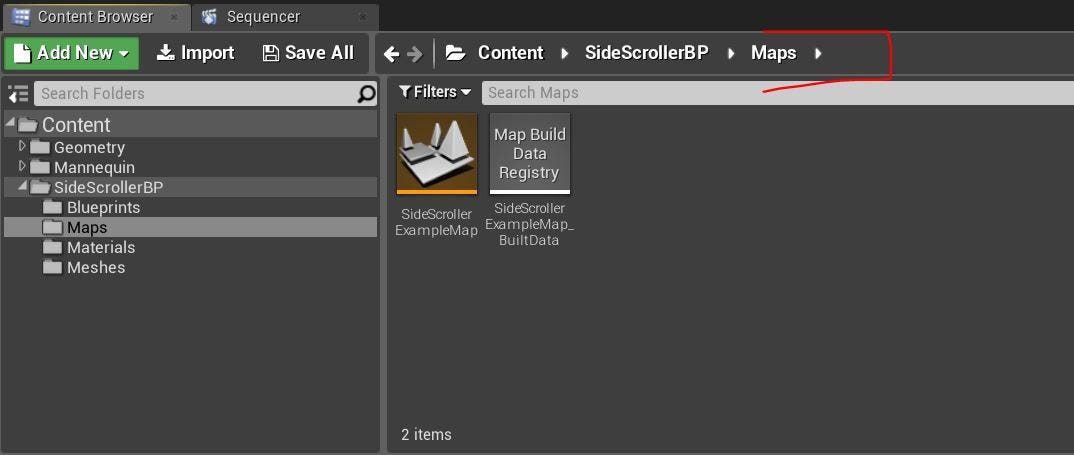
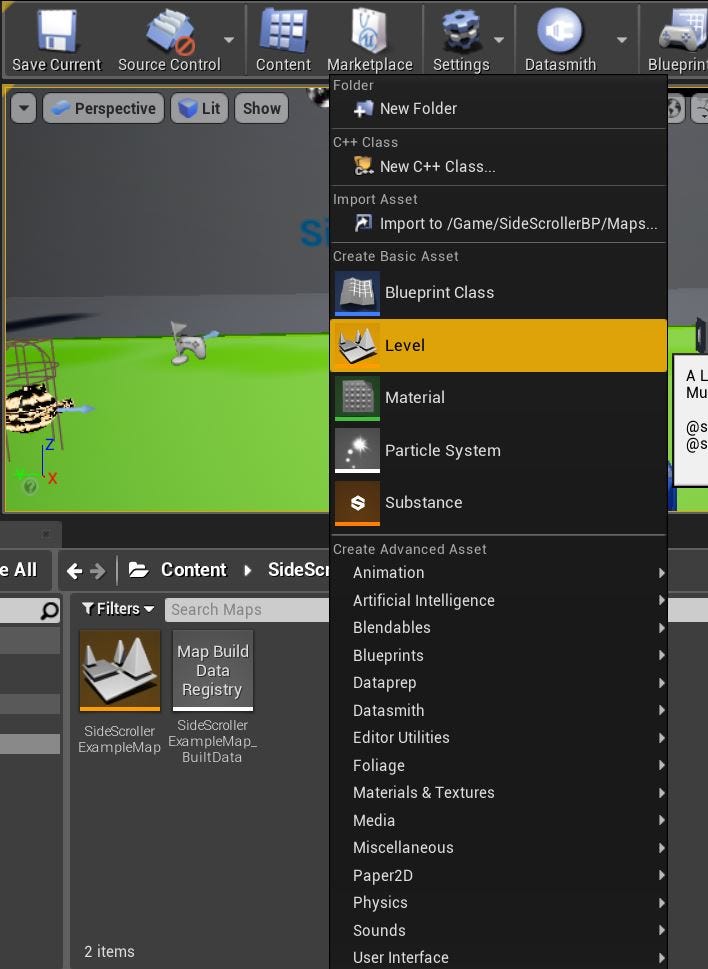
Go to the content browser panel and navigate to the Maps folder (Content->SideScrollerBp->Maps). Right click on the Maps folder, click “Level”, and name it “MainMenu”. Open it by pressing Enter.
When you open the level you will see a black screen in viewport (that’s normal). This level is empty it has nothing inside it. That’s exactly what we want for our menu. We only want to display buttons that can perform some action or another.
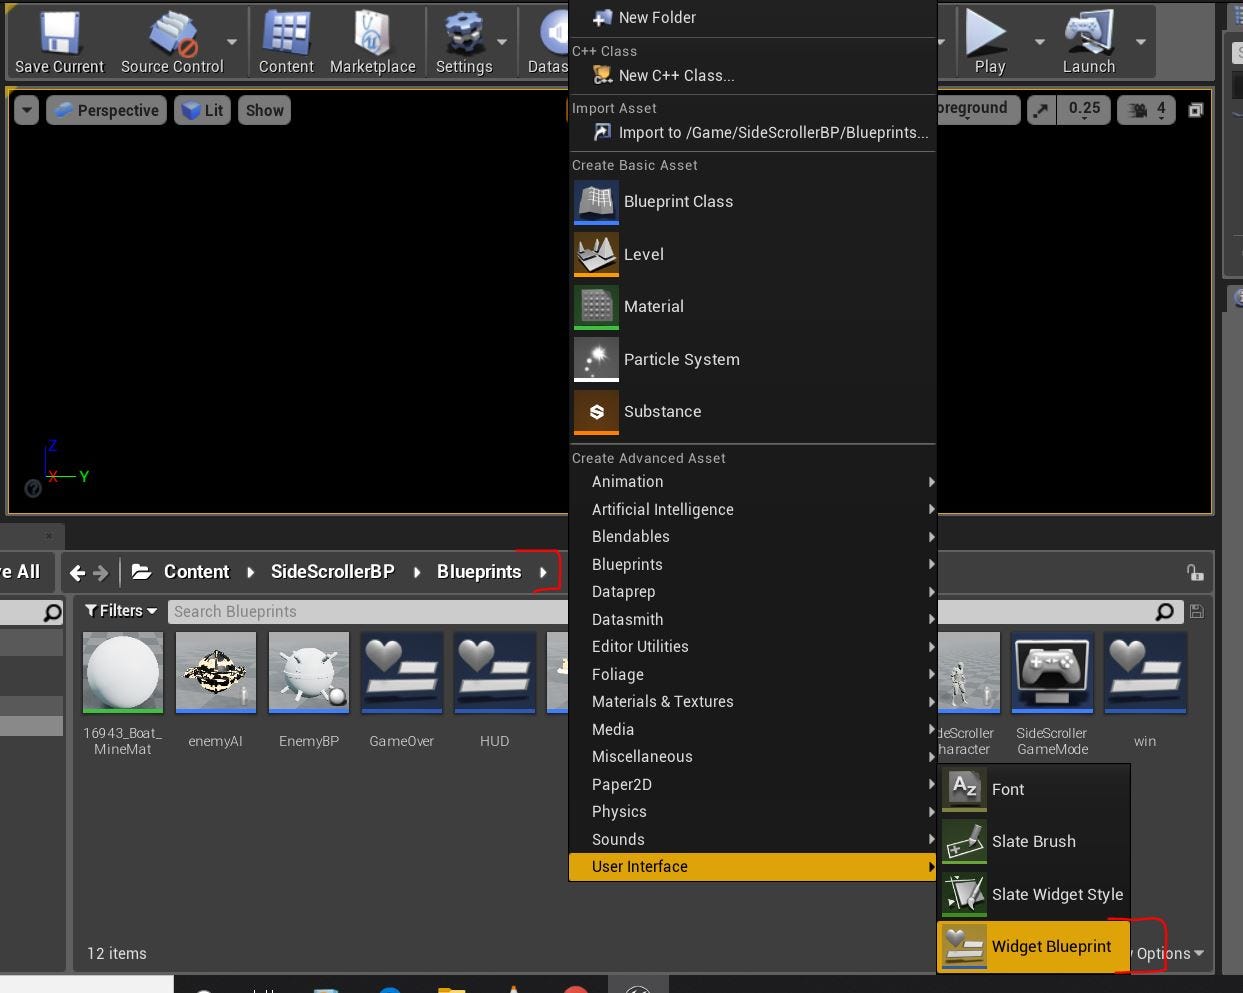
Switch over to the Blueprints folder (Content->SideScrollerBP->Blueprints) and create a new widget blueprint and name it “Menu”. Double click to open it.
If you remember from previous articles, we used widget blueprints to display information such as time, coins, and health. We can also create buttons that can perform various actions.

Add 2 buttons and 2 text fields on the canvas. You can probably see where this is going…
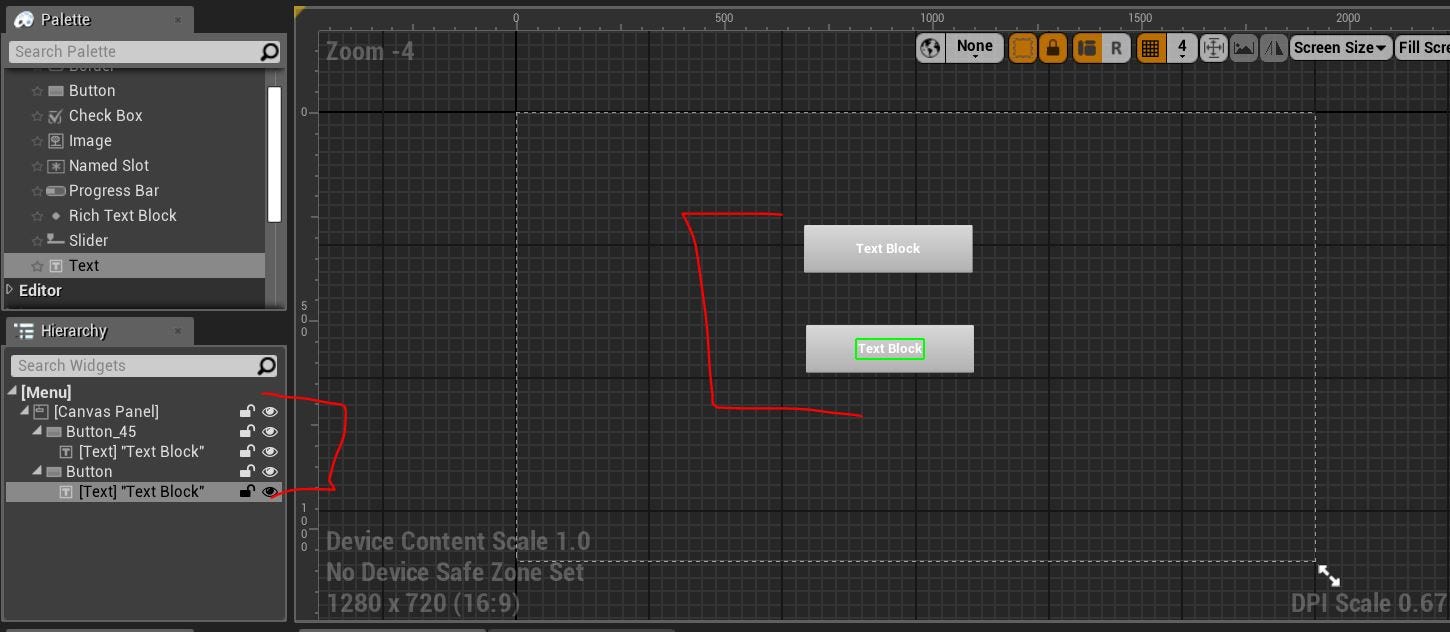
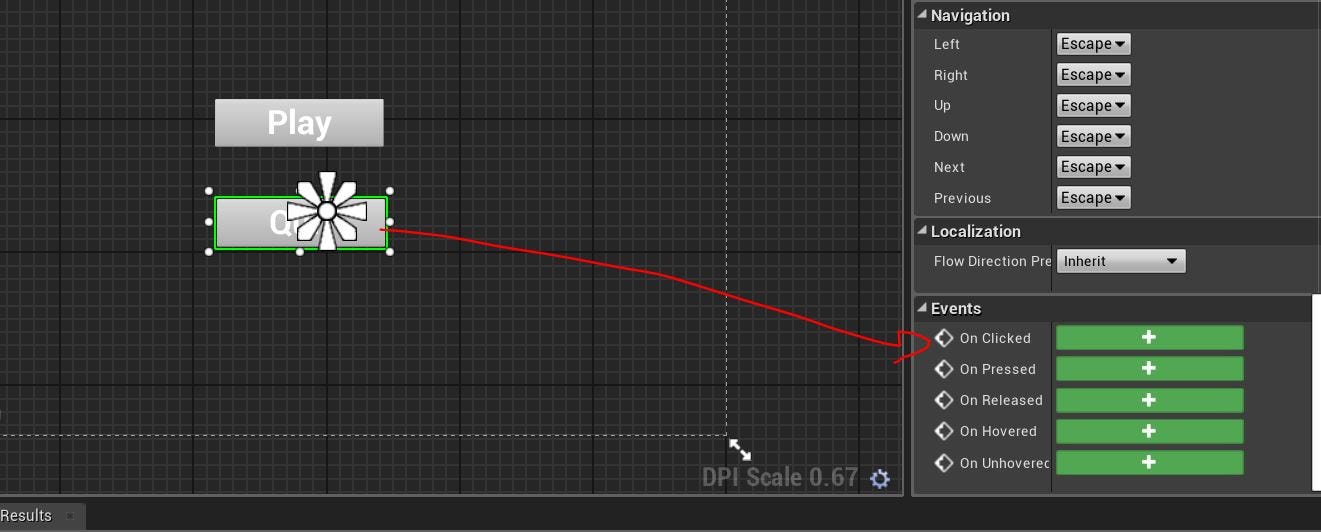
We’re aiming for a quite simple main menu that has only 2 buttons: “Play” and “Quit”.
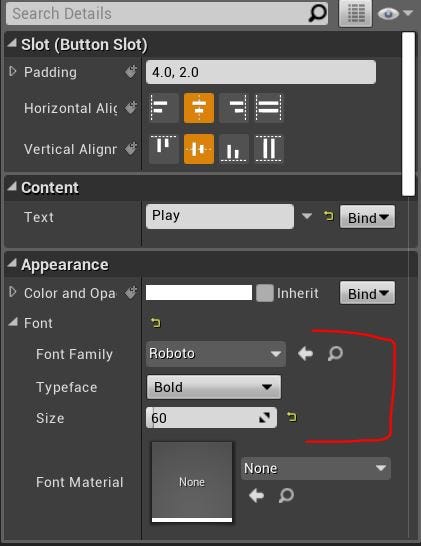
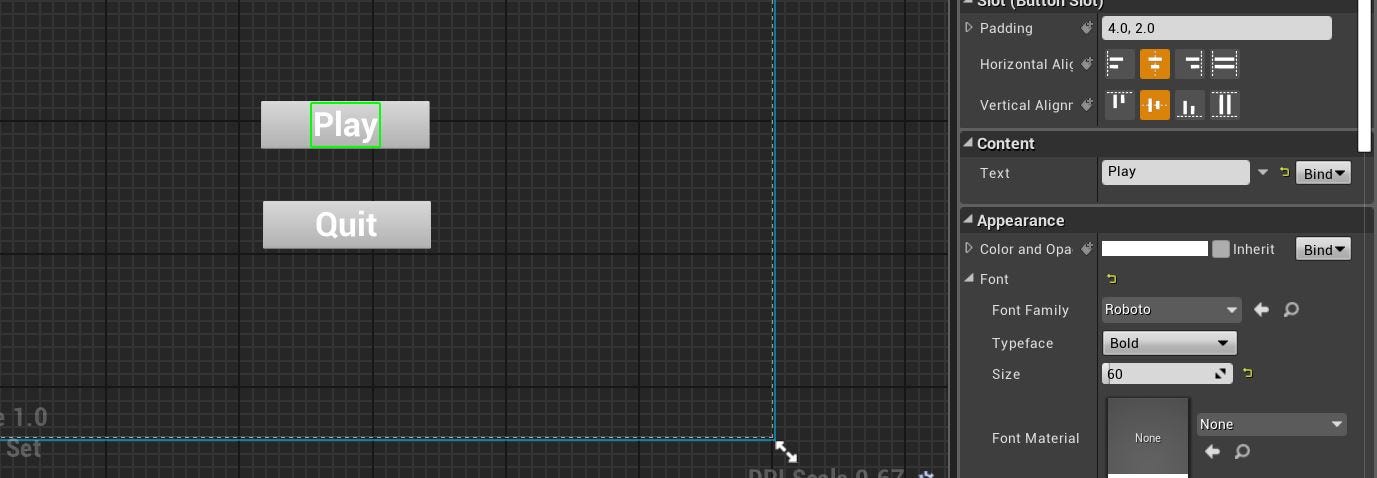
Change the text to “Play” for first button and “Quit” for the second button. Change their properties, as shown below (both buttons should have the same properties, except for their texts). You can change the font to your personal preference, but keep in mind it should not overflow the button.
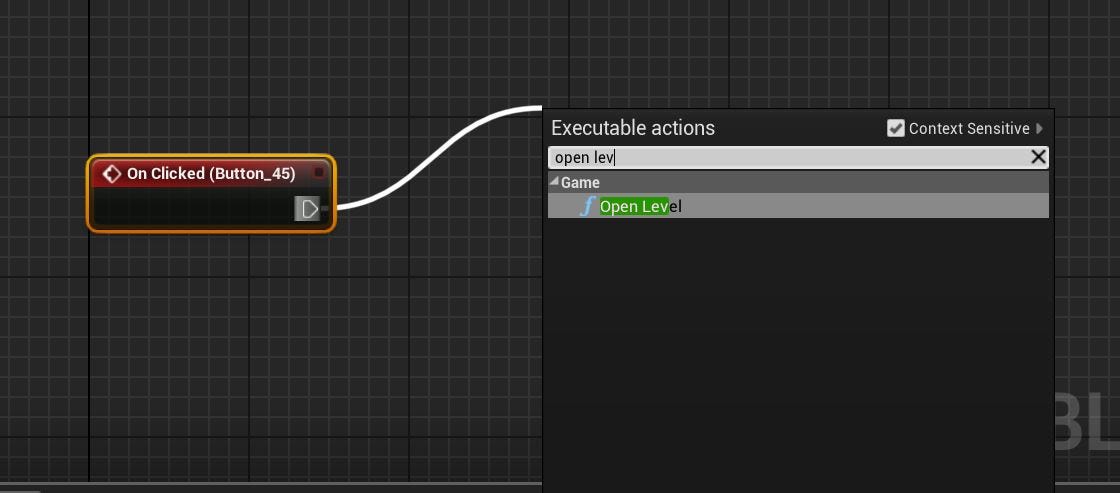
Highlight the “Play” button and add an “on clicked” property. The “on clicked” property is used to perform an action when a button is clicked. This action can be anything—in our case, we want to open a level.
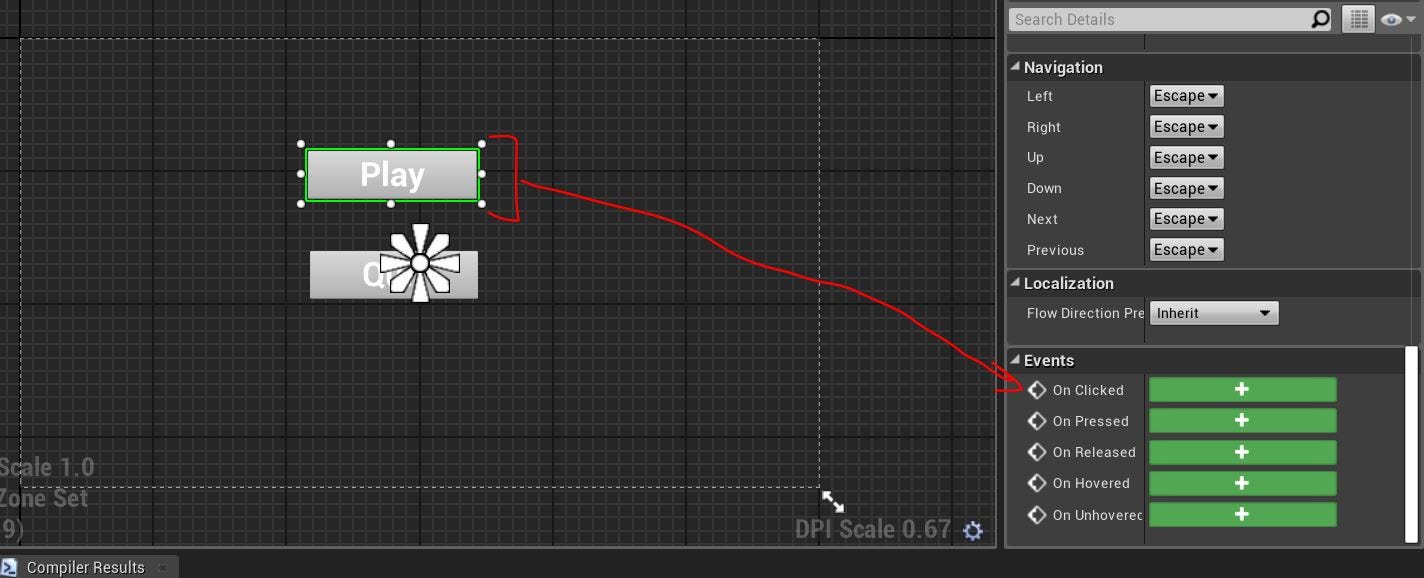
Drag a node from the button and type “open level”.
Type the level name — “SideScrollerExampleMap”. Hit compile and save.
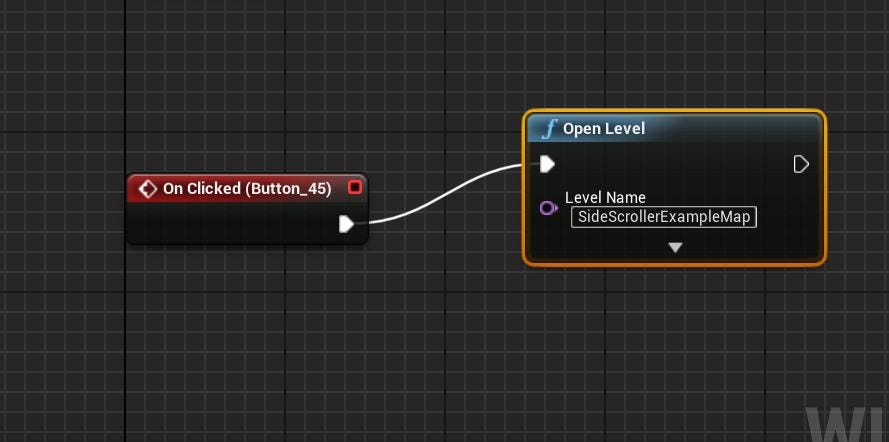
Here, we’re specifying which level well be opened when the “Play” button is clicked—hence the name “SideScrollerExampleMap”. If you go into the Maps folder, you’ll find your level names there.
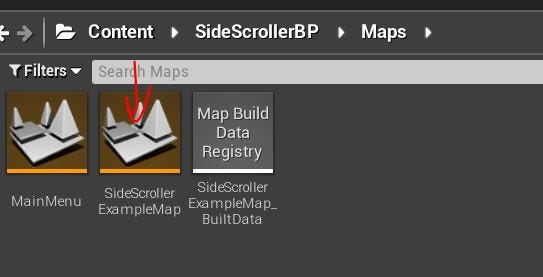
You can change the name of the level by pressing F2. (If you change the level/map name make sure to change it in “open level”, too)
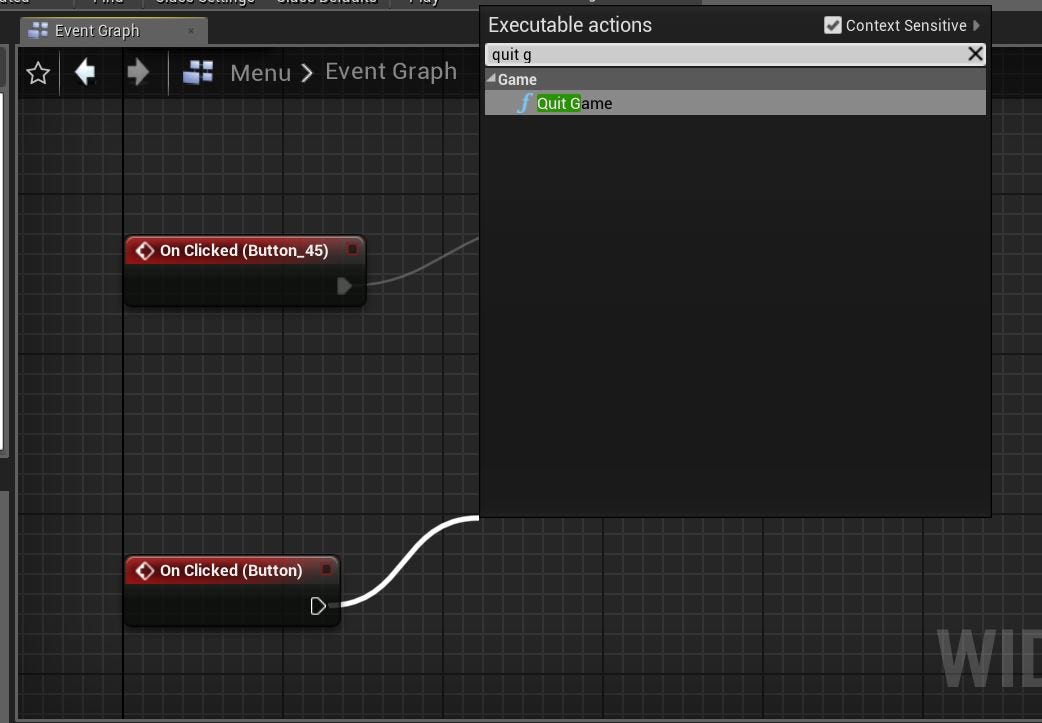
Now click on “Quit” button and select add another “on clicked” event. This time we want to exit our game.
Bring out the node from the button and type “Quit game”.
#unreal-engine-4 #unreal-engine #game-development #heartbeat #mobile-games #mobile app