Notifying Users using Firebase Notifications involves 3 important pieces,
- Configuring Firebase Notification on your app
- Server-side code to send the notifications to a device i.e Cloud function or any server code.
- Flutter App changes to identify the device token and react to the message received.
I have documented steps for (1) and (2) in my other articles. This article is the last in that trilogy and will share with you the code changes on the Flutter side to make your app ready to receive and react to notification messages.
USE CASE
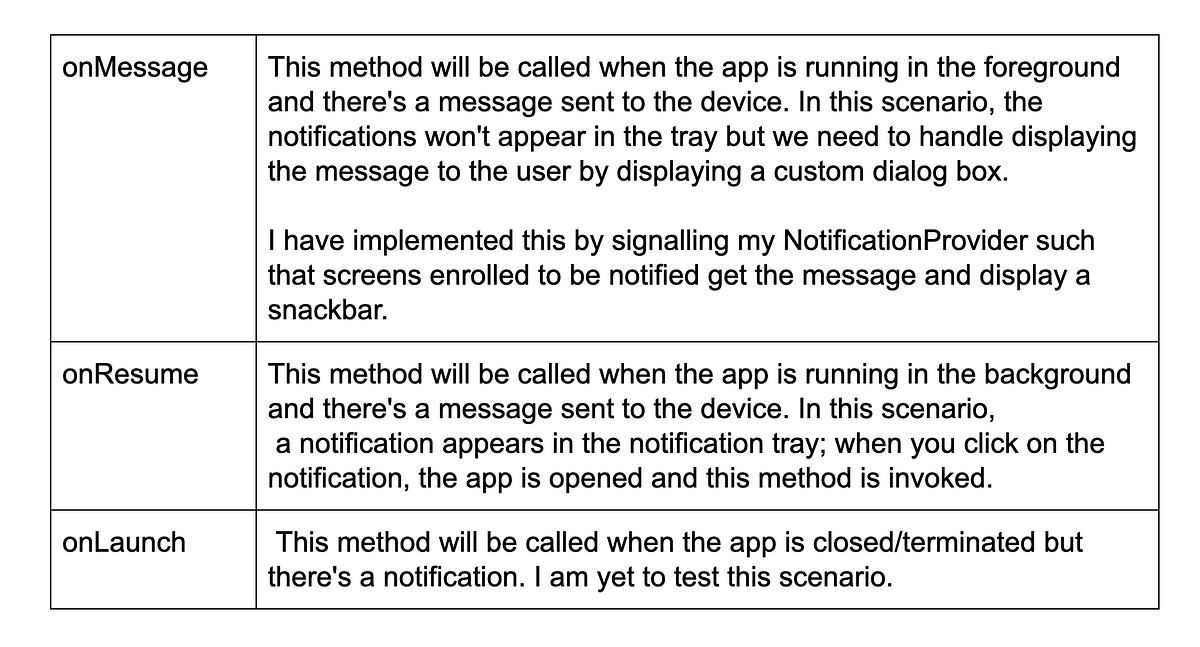
Flutter App changes to;
- Capture device tokens (a unique identifier) for the device that is running the app. This device token will need to be further saved on the server-side and used as input to the cloud function to send messages to the device.
- Receive and react to notification messages
HOW TO CAPTURE DEVICE TOKEN
- Include the Firebase Messaging library in your pubspec.yaml.
- This library has a method “_firebaseMessaging.getToken()” that will let you capture the device token.
- Refer to the method “getDeviceToken()” in the “PushNotify.dart” gist below.
- Please note that the device tokens are regenerated when the app is reinstalled.
- Thus, you will have to make sure you are capturing the device token at an appropriate point in your app’s life cycle.
#firebasecloudmessaging #flutter #flutter-app-development #firebasenotifications
2.25 GEEK