How to Implement Routing in React Apps with React Router
This tutorial will demonstrate how to implement routing in your React apps with the React Router library v6 with practical examples.
Single-page applications (SPAs) with multiple views need to have a mechanism of routing to navigate between those different views without refreshing the whole webpage. We can dynamically change application views by switching the app state with conditional rendering, but in most scenarios, we need to sync the application URL with views.
For example, when the user visits the profile page, you may need to use /profile in the browser URL. You don’t need to implement this routing logic yourself — this can be handled by using a fully-featured React routing library, such as React Router. In this tutorial, I’ll explain how to implement routing in your React apps with the React Router library v6 with practical examples.
Contents:
- What is React Router?
- Why use React Router for routing?
- Getting started with React Router
- React Router project packages
- Different routers in React Router DOM library
- Creating routes with React Router v6
- Building functional components
- Implementing a 404 view
- Adding a navigation menu
- How to handle nested routes
- Accessing URL parameters and dynamic parameters of a route
- Using the
useRoutesHook - How to protect routes
What is React Router?
React Router is a fully-featured routing solution for React apps. It offers pre-developed components, Hooks, and utility functions to create modern routing strategies. The React Router project offers two separate packages for implementing routing in React Web and React Native projects. Moreover, it offers various router mechanisms for the web version, such as URL path-based routing, URL-hash routing, and invisible routing (known as memory routing).
Most developers created React routing with React Router v5. In 2021, React Router’s maintainers released v6 by solving some issues that existed in v5, such as somewhat large bundle size, inconsistent APIs, path ranking problems, and more.
React Router v6’s consistent API, modern features (for example, relative nested routes, optimistic UI features, and more), and developer-friendly Hooks motivated every v5 user and Reach Router v1.x users to migrate their apps to React Router v6.
Why use React Router for routing?
Traditional multi-page web apps typically have multiple view files (pages) for rendering different views, but modern SPAs use component-based views. So, you need to switch components based on the URL via the routing concept. Every development requirement that occurs in React app development doesn’t need a third-party library. Still, routing-like requirements are undoubtedly complex and need a pre-developed library for creating apps productively.
React Router is the most popular and fully-featured routing library for React-based SPAs. It comes with a lightweight size, easy-to-learn API, and well-written documentation so that every React developer can implement routing productively in any React app. Besides, React Router is now a Remix-maintained project with active development and developer support.
Getting started with React Router
To take full advantage of this tutorial, please make sure you have the following installed in your local development environment:
- Node.js v14.x.x (or greater) installed
- Access to one package manager such as npm or Yarn
- Basic knowledge of JavaScript, React, and React Hooks
Start by creating a new React app. Use the following command from a terminal window to generate the project directory, then navigate inside the project directory and install the required dependencies to add React Router v6 library:
npx create-react-app react-router-v6-example
cd react-router-v6-example

npm install react-router-dom
# --- or ---
yarn add react-router-dom
Once the dependency is installed, open the package.json file in your favorite code editor, and you are going to see the dependency version of the react-router-dom library:
“dependencies": {
    // rest of the dependencies installed
    "react-router-dom": "^6.10.0",
  },
React Router project packages
React Router is a monorepo project containing five different npm packages, each of which has a different purpose. Let’s explore these packages!
- react-router-dom: This package offers routing features for React web applications by importing code from the react-router and @remix-run/router packages
- react-router-native: React Native apps can import routing features from this package. react-router-native also uses core logic from react-router and @remix-run/router packages
- react-router: This package implements common core logic for react-router-dom and react-router-native packages by including React-specific code
- @remix-run/router: This is a frontend-library-agnostic implementation of the application routing concept. Other packages import this package’s code to access the low-level implementation of routing. The developer community implemented React Router-like routing for Vue.js and Svelte with @remix-run/router by porting react-router-dom
- react-router-dom-v5-compat: This package helps to do an incremental v5-to-v6 migration process by running v5 and v6 parallelly, so developers can migrate component-by-component without modifying the whole codebase at once
You can browse the source code and learn more about each package by navigating to the React Router GitHub repository.
Different routers in React Router DOM library
In this article, we’ll implement routing for a React app with the react-router-dom package. The react-router-dom package offers three higher-level, ready-to-use router components, as explained below:
BrowserRouter: TheBrowserRoutercomponent handles routing by storing the routing context in the browser URL and implements backward/forward navigation with the inbuilt history stackHashRouter: UnlikeBrowserRouter, theHashRoutercomponent doesn’t send the current URL to the server by storing the routing context in the location hash (i.e.,index.html#/profile)MemoryRouter: This is an invisible router implementation that doesn’t connect to an external location, such as the URL path or URL hash. TheMemoryRouterstores the routing stack in memory but handles routing features like any other router
Now that we have that covered, let’s build the first route with BrowserRouter.
Creating routes with React Router v6
To create the first route using React Router library, open src/App.js file and add the following import statement:
// after other import statements
import { BrowserRouter as Router } from 'react-router-dom';
This is the first component to import from the react-router-dom library. It is used to wrap different routes. It uses the HTML5 history API to keep track of routes history in the React app. The Router part in the above snippet is the alias that makes it easier to write. It is recommended to import and use it at the top level component in a React app’s component hierarchy:
function App() {
  return <Router>{/* All routes are nested inside it */}</Router>;
}
The next component to import from react-router-dom is the new Routes:
import { BrowserRouter as Router, Routes } from 'react-router-dom';This new element is an upgrade of the previous Switch component in React Router v5. It includes features like relative routing and linking, automatic route ranking, nested routes, and layouts. The last component from react-router-dom required is called Route and is responsible for rendering the UI of a React component:
import { BrowserRouter as Router, Routes, Route } from 'react-router-dom';It has a prop called path which always matches the current URL of the application. The second required prop is called element that tells the Route component when a current URL is encountered and which React component to be rendered. The element keyword here is also a new addition.
Building functional components
Previously, with React Router v5, you would be using the prop called component. To create the first route in the following demo, let’s create a basic functional component called Home that returns some JSX:
function Home() {
  return (
    <div style={{ padding: 20 }}>
      <h2>Home View</h2>
      <p>Lorem ipsum dolor sit amet, consectetur adip.</p>
    </div>
  );
}
Next, update the App functional component with the following route. Another feature of v6 library to notice here is that the element prop of a Route component now allows you to pass a React component rather than just the name of that React component. This makes it easy to pass props down the routes:
function App() {
  return (
    <Router>
      <Routes>
        <Route path="/" element={<Home />} />
      </Routes>
    </Router>
  );
}
Here is the complete source code of our first route:
import { BrowserRouter as Router, Routes, Route } from 'react-router-dom';
function Home() {
return (
<div style={{ padding: 20 }}>
<h2>Home View</h2>
<p>Lorem ipsum dolor sit amet, consectetur adip.</p>
</div>
);
}
function App() {
return (
<Router>
<Routes>
<Route path="/" element={<Home />} />
</Routes>
</Router>
);
}
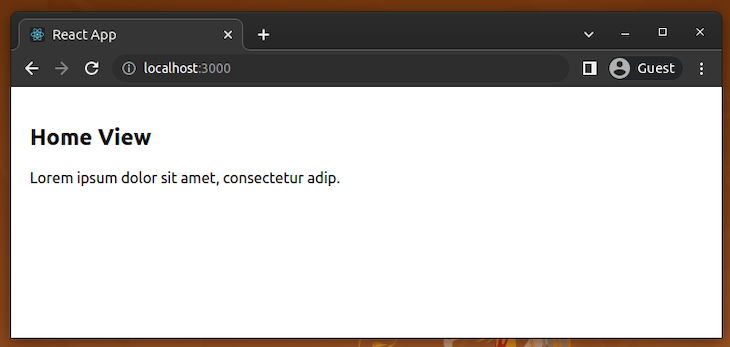
export default App;To see it working, go back to the terminal window and start the development server using the npm start or yarn start command . Next, visit the URL http://localhost:3000 in a browser window. Here is the output after this step:
Let’s quickly create another functional component called About that is only rendered when the URL in a browser window is http://localhost:3000/about:
function About() {
  return (
    <div style={{ padding: 20 }}>
      <h2>About View</h2>
      <p>Lorem ipsum dolor sit amet, consectetur adip.</p>
    </div>
  );
}
Then, add the Route for the About component:
<Routes>
  <Route path="/" element={<Home />} />
  <Route path="/about" element={<About />} />
</Routes>
Now, go back to the browser window and navigate to the URL http://localhost:3000/about, as shown in the following preview:

As shown in the preview above, you can navigate to the About page using the /about route. The browser’s forward/back button also works and changes views based on the history stack.
Implementing a 404 view
You can implement a 404 view for invalid route entries by adding a no-match route with the * syntax as follows:
// -----
// -----
function NoMatch() {
  return (
    <div style={{ padding: 20 }}>
      <h2>404: Page Not Found</h2>
      <p>Lorem ipsum dolor sit amet, consectetur adip.</p>
    </div>
  );
}

function App() {
  return (
    <Router>
      <Routes>
        <Route path="/" element={<Home />} />
        <Route path="/about" element={<About />} />
        <Route path="*" element={<NoMatch />} />
      </Routes>
    </Router>
  );
}

// -----
Once you use the above code segment in your App.js source, you will see a 404 page once you enter an invalid route in the browser URL:
Here is the complete source code of all routes — you can copy and paste and get the above output:
import { BrowserRouter as Router, Routes, Route } from 'react-router-dom';

function Home() {
  return (
    <div style={{ padding: 20 }}>
      <h2>Home View</h2>
      <p>Lorem ipsum dolor sit amet, consectetur adip.</p>
    </div>
  );
}

function About() {
  return (
    <div style={{ padding: 20 }}>
      <h2>About View</h2>
      <p>Lorem ipsum dolor sit amet, consectetur adip.</p>
    </div>
  );
}

function NoMatch() {
  return (
    <div style={{ padding: 20 }}>
      <h2>404: Page Not Found</h2>
      <p>Lorem ipsum dolor sit amet, consectetur adip.</p>
    </div>
  );
}

function App() {
  return (
    <Router>
      <Routes>
        <Route path="/" element={<Home />} />
        <Route path="/about" element={<About />} />
        <Route path="*" element={<NoMatch />} />
      </Routes>
    </Router>
  );
}

export default App;
Adding a navigation menu
To navigate at a particular route within the React app, or the two currently existing routes in the demo app, let’s add a minimal navigation bar with the help of the Link component from react-router-dom. Begin by importing Link from the library:
import { BrowserRouter as Router, Routes, Route, Link } from 'react-router-dom';The concept of navigating between different webpages in HTML is to use an anchor tag, as shown below:
<a href="">Some Link Name</a>Using this approach in a React app is going to lead to refreshing a webpage each time a new view or page itself is rendered. This is not the advantage you are looking for when using a library like React. To avoid refreshing the webpages, the react-router-dom library provides the Link component. Next, inside the App function component, create a nav bar as shown in the code snippet:
function App() {
  return (
    <Router>
      <nav style={{ margin: 10 }}>
          <Link to="/" style={{ padding: 5 }}>
          Home
          </Link>
          <Link to="/about" style={{ padding: 5 }}>
          About
          </Link>
      </nav>
      <Routes>
        <Route path="/" element={<Home />} />
        <Route path="/about" element={<About />} />
        <Route path="*" element={<NoMatch />} />
      </Routes>
    </Router>
  );
}
Go to the browser window to see the navigation bar in action:
How to handle nested routes
Nesting routing is an important concept to understand. When routes are nested, it is generally assumed that a certain part of a webpage remains constant and only the child part of the webpage changes. For example, if you visit a simple blog, the title of the blog is always displayed, with a list of posts displayed beneath it.
However, when you click a post, the list of posts is replaced by the contents or the description of that specific post. This is an example that is going to be performed in this section to understand how to handle nested routes in the latest version of the React Router library. In React Router v5, nested routes have to be defined explicitly by using the absolute path in child components with an additional Routes-based definition.
This is not the case with React Router v6. It picks one of the best elements from the React Router library component called Outlet to render any matching children for a particular route with relative path definitions. To start, import the Outlet from the react-router-dom library:
import {
  BrowserRouter as Router,
  Routes,
  Route,
  Link,
  Outlet } from 'react-router-dom';
To mimic a basic blog, let’s add some mock data in the App.js file. The code snippet consists of an object called BlogPosts, that further consists of different objects as properties. Each object is constituted of three things:
- A unique slug of a post
- Title of that post
- Description of that post
Add the following BlogPosts constant to your App.js file’s beginning (after all imports):
const BlogPosts = {
  'first-blog-post': {
    title: 'First Blog Post',
    description: 'Lorem ipsum dolor sit amet, consectetur adip.'
  },
  'second-blog-post': {
    title: 'Second Blog Post',
    description: 'Hello React Router v6'
  }
};
This unique slug is going to be used in the URL of a web browser to see the contents of each post. Next, create a functional component called Posts, where a list of all posts is displayed:
function Posts() {
  return (
    <div style={{ padding: 20 }}>
      <h2>Blog</h2>
      <Outlet />
    </div>
  );
}
The above Outlet component definition will render child components based on nested routing definitions. Define another component called PostLists that is going to display a list of all posts whenever the URL in the browser window hits http://localhost:3000/posts. Let’s use JavaScript Object.entries() method to return an array from the object BlogPosts. This array is then mapped to display a list of titles of all posts:
function PostLists() {
  return (
    <ul>
      {Object.entries(BlogPosts).map(([slug, { title }]) => (
        <li key={slug}>
          <h3>{title}</h3>
        </li>
      ))}
    </ul>
  );
}
Modify the routes in the App function component like this:
<Routes>
  <Route path="/" element={<Home />} />
  <Route path="/posts" element={<Posts />}>
    <Route index element={<PostLists />} />
  </Route>
  <Route path="/about" element={<About />} />
  <Route path="*" element={<NoMatch />} />
</Routes>
Here we used the index prop for the PostLists route to specify the index of /posts. This indicates that whenever the URL http://localhost:3000/posts is triggered, a list of posts is going to be rendered, hence, the component PostsLists. Next, update the navigation by adding a link to the Posts page:
<nav style={{ margin: 10 }}>
    <Link to="/" style={{ padding: 5 }}>
    Home
    </Link>
    <Link to="/posts" style={{ padding: 5 }}>
    Posts
    </Link>
    <Link to="/about" style={{ padding: 5 }}>
    About
    </Link>
</nav>
After doing the above updates, look at your browser window. You’ll see the following output:
Note: Here we render the
BlogListschild component within theBlogparent component via the library’s inbuiltOutletcomponent.
Accessing URL parameters and dynamic parameters of a route
To visit the individual post by clicking the post title from the rendered list of posts, all you have to do is wrap the title of each post within a Link component in the PostsLists component. Then, define the path to each post using the slug of each post. The /posts/ prefix allows the path in the web browser to be consistent:
function PostLists() {
  return (
    <ul>
      {Object.entries(BlogPosts).map(([slug, { title }]) => (
        <li key={slug}>
          <Link to={`/posts/${slug}`}>
            <h3>{title}</h3>
          </Link>
        </li>
      ))}
    </ul>
  );
}
At this stage, you can also test your 404 page since we haven’t added a page for a single post. You’ll get your 404 page whenever you click a post title:
Let’s continue the development process and display a single post. Import a Hook called useParams from the react-router-dom library. This Hook allows you to access any dynamic parameters that a particular route (or slug, in this case) may have. The dynamic parameters for each slug are going to be the title and the description of each blog post.
The need to access them is to display the content of each blog post when a particular slug of a blog post is triggered as the URL in the browser window:
import {
  BrowserRouter as Router,
  Routes,
  Route,
  Link,
  Outlet,
  useParams } from 'react-router-dom';
Create a new functional component called Post. This component is going to get the current slug of the post from useParams Hook. Using the bracket square notation syntax in JavaScript, a new post variable is created that has the value of the properties or the current contents of a post. Destructuring the contents of this post variable, you can render them, like so:
function Post() {
  const { slug } = useParams();
  const post = BlogPosts[slug];
  if(!post) {
    return <span>The blog post you've requested doesn't exist.</span>;
  }
  const { title, description } = post;
  return (
    <div style={{ padding: 20 }}>
      <h3>{title}</h3>
      <p>{description}</p>
    </div>
  );
}
Lastly, add a dynamic route called :slug in the App function component to render the contents of each post:
<Route path="/posts" element={<Posts />}>
  <Route index element={<PostLists />} />
  <Route path=":slug" element={<Post />} />
</Route>
Here is the complete source code of the final demo app:
import {
  BrowserRouter as Router,
  Routes,
  Route,
  Link,
  Outlet,
  useParams } from 'react-router-dom';

const BlogPosts = {
  'first-blog-post': {
    title: 'First Blog Post',
    description: 'Lorem ipsum dolor sit amet, consectetur adip.'
  },
  'second-blog-post': {
    title: 'Second Blog Post',
    description: 'Hello React Router v6'
  }
};

function Home() {
  return (
    <div style={{ padding: 20 }}>
      <h2>Home View</h2>
      <p>Lorem ipsum dolor sit amet, consectetur adip.</p>
    </div>
  );
}

function About() {
  return (
    <div style={{ padding: 20 }}>
      <h2>About View</h2>
      <p>Lorem ipsum dolor sit amet, consectetur adip.</p>
    </div>
  );
}

function Posts() {
  return (
    <div style={{ padding: 20 }}>
      <h2>Blog</h2>
      <Outlet />
    </div>
  );
}

function PostLists() {
  return (
    <ul>
      {Object.entries(BlogPosts).map(([slug, { title }]) => (
        <li key={slug}>
          <Link to={`/posts/${slug}`}>
            <h3>{title}</h3>
          </Link>
        </li>
      ))}
    </ul>
  );
}

function Post() {
  const { slug } = useParams();
  const post = BlogPosts[slug];
  if(!post) {
    return <span>The blog post you've requested doesn't exist.</span>;
  }
  const { title, description } = post;
  return (
    <div style={{ padding: 20 }}>
      <h3>{title}</h3>
      <p>{description}</p>
    </div>
  );
}

function NoMatch() {
  return (
    <div style={{ padding: 20 }}>
      <h2>404: Page Not Found</h2>
      <p>Lorem ipsum dolor sit amet, consectetur adip.</p>
    </div>
  );
}

function App() {
  return (
    <Router>
      <nav style={{ margin: 10 }}>
          <Link to="/" style={{ padding: 5 }}>
          Home
          </Link>
          <Link to="/posts" style={{ padding: 5 }}>
          Posts
          </Link>
          <Link to="/about" style={{ padding: 5 }}>
          About
          </Link>
      </nav>
      <Routes>
        <Route path="/" element={<Home />} />
        <Route path="/posts" element={<Posts />}>
          <Route index element={<PostLists />} />
          <Route path=":slug" element={<Post />} />
        </Route>
        <Route path="/about" element={<About />} />
        <Route path="*" element={<NoMatch />} />
      </Routes>
    </Router>
  );
}

export default App;
Here is the complete output after this step:

The complete source code of this sample app is available at this GitHub repository.
Using the useRoutes Hook
In the demo app, we defined and configured app routes via two JSX components: Routes and Route. The React Router library also lets you implement routing with a functional approach via the useRoutes Hook. So, you can define routes without using HTML-like nested JSX routing trees. Let’s understand the useRoutes Hook by re-writing our App component. First, remove all JSX-based routing components from the import statement since we don’t use them. Also, make sure to import useRoutes:
import {
  BrowserRouter as Router,
  useRoutes,
  Link,
  Outlet,
  useParams } from 'react-router-dom';
We can re-write our existing App component by separating the routing logic to Router as follows:
function Routes() {
  const element = useRoutes([
    { path: "/", element: <Home/> },
    { path: "/posts",
      element: <Posts/>,
      children: [
        { index: true, element: <PostLists/> },
        { path: ":slug", element: <Post/> }
      ],
    },
    { path: "/about", element: <About/> },
    { path: "*", element: <NoMatch/>}
  ]);
  return element;
}

function App() {
  return (
    <Router>
      <nav style={{ margin: 10 }}>
          <Link to="/" style={{ padding: 5 }}>
          Home
          </Link>
          <Link to="/posts" style={{ padding: 5 }}>
          Posts
          </Link>
          <Link to="/about" style={{ padding: 5 }}>
          About
          </Link>
      </nav>
      <Routes/>
    </Router>
  );
}
The above code snippet uses functional routing definitions in the Routes component with the useRoutes Hook.
Note: We can use any
Routeprop as a JavaScript attribute, for example,index: true. Once you run the above modification, your app routes will work as usual:

How to protect routes
An app can contain several restricted routes that only authenticated users can access. In some scenarios, frontend developers allow or restrict app routes based on user levels or privileges. In React Router-based apps, you can implement protected routes based on custom conditional checks to limit publicly available app routes.
To demonstrate the protected routes concept, I’ll implement a sample post statistics page that only authenticated admins can access. First, update your import statements to use the required components and Hooks:
import { useState } from 'react';
import {
  BrowserRouter as Router,
  Routes,
  Route,
  Link,
  Outlet,
  Navigate,
  useParams,
  useNavigate } from 'react-router-dom';
Next, use the following component implementations:
function Stats({ user }) {

  if(!user) {
    return (
      <Navigate to="/login" replace/>
    );
  }

  return (
    <div style={{ padding: 20 }}>
      <h2>Stats View</h2>
      <p>Lorem ipsum dolor sit amet, consectetur adip.</p>
    </div>
  );
}

function Login({ onLogin }) {
  const [creds, setCreds] = useState({});
  const navigate = useNavigate();

  function handleLogin() {
    // For demonstration purposes only. Never use these checks in production!
    // Use a proper authentication implementation
    if(creds.username === 'admin' && creds.password === '123') {
      onLogin && onLogin({username: creds.username});
      navigate('/stats');
    }
  }
  return (
    <div style={{ padding: 10 }}>
      <br/>
      <span>Username:</span><br/>
      <input
        type="text"
        onChange={(e) => setCreds({...creds, username: e.target.value})}/><br/>
      <span>Password:</span><br/>
      <input
        type="password"
        onChange={(e) => setCreds({...creds, password: e.target.value})}/><br/><br/>
      <button onClick={handleLogin}>Login</button>
    </div>
  );
}

function AppLayout() {
  const [user, setUser] = useState();
  const navigate = useNavigate();

  function logOut() {
    setUser(null);
    navigate("/");
  }

  return (
    <>
      <nav style={{ margin: 10 }}>
          <Link to="/" style={{ padding: 5 }}>
          Home
          </Link>
          <Link to="/posts" style={{ padding: 5 }}>
          Posts
          </Link>
          <Link to="/about" style={{ padding: 5 }}>
          About
          </Link>
          <span> | </span>
          { user && <Link to="/stats" style={{ padding: 5 }}>
          Stats
          </Link> }
          { !user && <Link to="/login" style={{ padding: 5 }}>
          Login
          </Link> }
          { user && <span onClick={logOut} style={{ padding: 5, cursor: 'pointer' }}>
          Logout
          </span> }
      </nav>
      <Routes>
        <Route path="/" element={<Home />} />
        <Route path="/posts" element={<Posts />}>
          <Route index element={<PostLists />} />
          <Route path=":slug" element={<Post />} />
        </Route>
        <Route path="/about" element={<About />} />
        <Route path="/login" element={<Login onLogin={setUser}/>} />
        <Route path="/stats" element={<Stats user={user}/>} />
        <Route path="*" element={<NoMatch />} />
      </Routes>
    </>
  );
}

function App() {
  return (
    <Router>
        <AppLayout/>
    </Router>
  );
}
Notice the following facts about the above source code. We implement a username and password-based login page in the /login route with the Login component. The blog admin can log in to the app by entering hardcoded credentials (username: admin, password: 123)
Once logged in, the admin can view the Stats view (via /stats). If a normal user enters the stats page, the user will be redirected to the login page. The protected routes concept uses the Navigate component for redirection. Update your app with the above code and run. First, try to access the stats page as a normal user. Then, you’ll see the login page:
Enter credentials and log in. You’ll see the stats page:
If you have multiple protected routes, you can avoid the repetition of the login check with a wrapper component:
function ProtectedRoute({ user, children }) {

  if(!user) {
    return (
      <Navigate to="/login" replace/>
    );
  }

  return children;
}
In route definitions, you can use the wrapper as follows:
<Route path="/stats" element={<ProtectedRoute user={user}><Stats/></ProtectedRoute>} />
<Route path="/settings" element={<ProtectedRoute user={user}><Settings/></ProtectedRoute>} />
Note: This sample app demonstrates the concept of protected routes with hardcoded credentials by holding the login state in memory. Read this tutorial for a complete React Router authentication implementation guide.
Conclusion
Hopefully, this post provides a great introduction if you are learning React Router for the first time. If you are already familiar with any of the previous versions of this routing library, I hope this post gives you an overview of the changes between the previous and the latest version.
Source: https://blog.logrocket.com
#react #reactrouter