Learn how to build a secure blogging service application with Ktor and Kotlin.
In this tutorial, you will build your very own Nano Blogging Service (nabl for short) using a modern JVM stack. This includes using the Kotlin programming language, the Ktor web framework, and securing it with Okta. Users can log in or sign up, post updates, and browse specific or global chronological feed without advertisements. The blogging service displays posts from the selected user or everyone in the chronological feed.
Kotlin is often considered a “better Java” and often becomes an easy, efficient substitution because it has excellent Java interoperability. That allows you to employ the largest ecosystem of existing JVM frameworks and libraries written and designed for Java in your Kotlin application and vice-versa. Kotlin works well with Spring Boot, Jersey, Dropwizard, and many others. “Kotlin-native” frameworks provide first-class language support, provide additional type-safety not available in the Java world, and often give competitive advantages.
Ktor is one of the most prominent “Kotlin-native” web frameworks officially supported by JetBrains, creators of the Kotlin language, and IntelliJ IDEA. It’s an unopinionated highly-customizable modular framework that gives developers full control over implementation while providing sensible defaults.
Prerequisites
- Computer with installed Java 8+, Git, bash-like command line
- Familiarity with Java or Kotlin
- Your favorite IDE, for instance, IntelliJ IDEA Community Edition
- A Free Okta Developer account
- 15 mins of your time
Build a Ktor Application with Kotlin
As with any web application framework, Ktor provides several libraries and imposes some conventions. Don’t worry—it doesn’t tell you how to write your code. The conventions are mostly for the HTTP layer and you’re free to write other lower layers the way you want. A few of the most notable things include:
- The web application is a pipeline processing incoming requests through features and route handlers.
- Request handling is non-blocking; it relies on Kotlin coroutines.
- The configuration file format is HOCON.
- Framework is employing DSL for the top-level declarations, e.g., modules setup, routing, etc.
- Pluggable features are configured using
install(FeatureObject) { config }. - Most of the functions and properties you use are extension functions.
Ktor Project Structure
The application in this example depends on several libraries:
- Kotlin programming language you use for this project
- Ktor server with Ktor server CIO - server implementation and coroutine-based HTTP engine core
- Ktor client with Ktor client CIO - client used to communicate to OAuth2 server
- Ktor Auth module to handle authorization flow
- kotlinx.html set of classes allowing to write type-safe HTML generators
- Okta JWT Verifier library helps to parse and verify access and id tokens
You can bootstrap this tutorial by cloning our Git repository and starting with the initial branch:
git clone -b initial https://github.com/oktadeveloper/okta-kotlin-ktor-example.git
cd okta-kotlin-ktor-example
NOTE: If you want to see the completed app, with Okta already integrated, you can check out the main branch. See the project’s README for instructions on how to configure it to work with your Okta account.
Start your Ktor Application
Use IntelliJ runner or type ./gradlew run in the command line to start your application, point your web browser to http://localhost:8080.
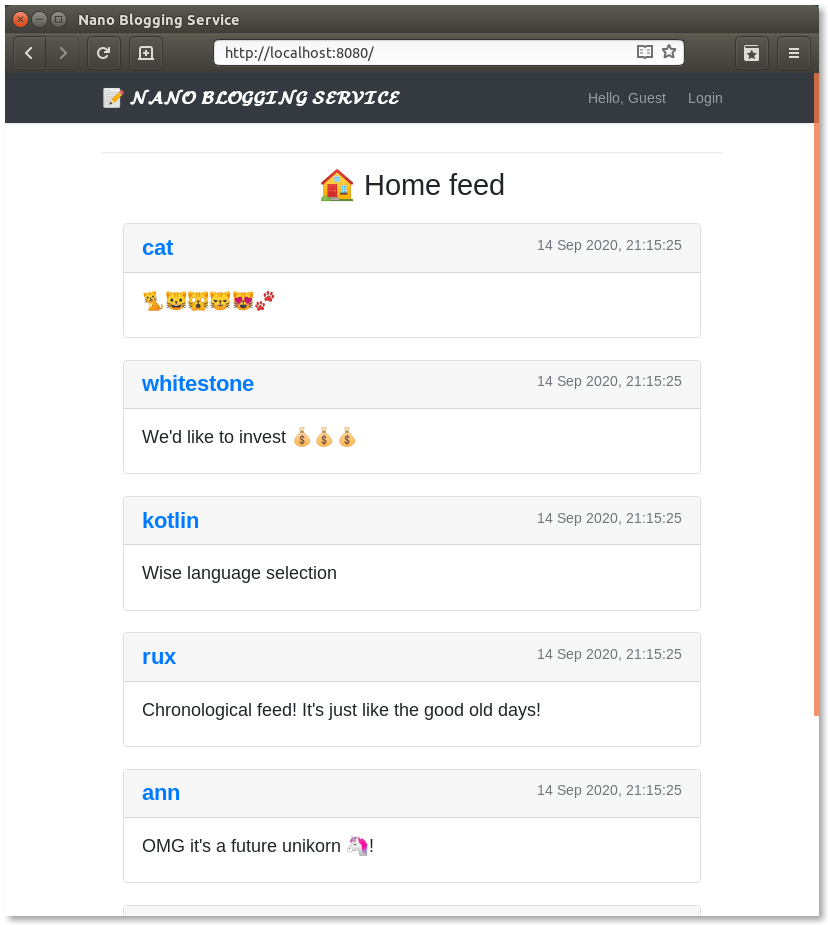
All the messages displayed are from the in-memory database. Note that at this stage, the user can’t log in; hence they can’t post messages.
Secure Your Ktor Application with Okta
Real-world applications often require users to log in to perform some actions or access information. User management and security are much more complicated than they might seem and it can be tough to make them right. If you have done it previously, you know what I’m talking about.
User management shouldn’t take much of your time because that problem is solved already, right? In this tutorial, you’ll be using Okta’s OAuth 2.0 authorization service along with OpenID Connect (OIDC). Okta provides many features for both enterprise and personal project needs - MFA, SAML, groups, policies, social media logins, and many more. We offer solutions for different size companies - from pet projects just for yourself to big enterprises such as FedEx, Box, HubSpot, Experian, and many others. Okta helps developers implement secure authentication, handles authorization, and can act as an identity provider with a minimum effort and lines of code.
If you haven’t created an Okta account yet, sign up first. It’s free, no credit card required.
Login to the Okta admin console. On the top menu select Applications → Add Application:
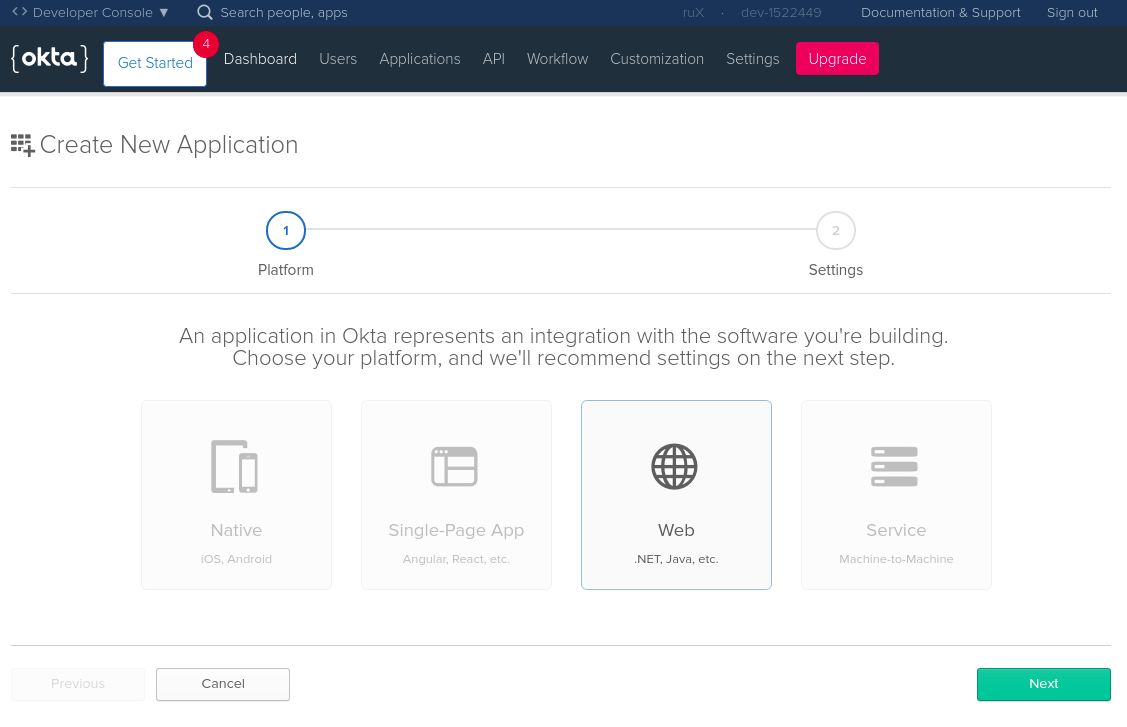
Then, configure your Okta application. Don’t worry, if you want to change anything it’s always possible to return to this screen. At the very least, you need to set the following settings:
- Name - give it a meaningful name, for instance,
My Ktor nano Blogging Service - Base URIs - put
http://localhost:8080/there. Multiple URI can be provided; you can add more URIs if needed. - Login redirect URIs - set it to
http://localhost:8080/login/authorization-callback. Upon successful login, the user will be redirected to URI provided with tokens in the query. - Logout redirect URIs - value
http://localhost:8080allows you to provide a redirect URL on successful logout.
Click Done to finish the initial setup.

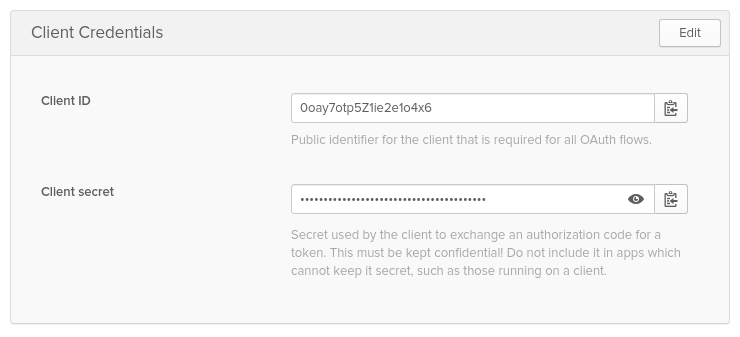
Take note of the following three values. You’ll use them in your Ktor application:
- Org URL: Hover over API on the top menu bar, and select Authorization Servers menu item, copy the value from Issuer URI
- Client ID and Client Secret as below:
Configure Ktor’s OAuth 2.0 Module
Ktor has an implementation of OAuth Client—it just needs to be configured. It’s always good practice to never insert any keys, tokens, or credentials directly into the code. Even for a demo project. To inject Okta parameters from environment variables, append a new block in resources/application.conf:
...
okta {
    orgUrl = ${OKTA_ORGURL}
    clientId = ${OKTA_CLIENT_ID}
    clientSecret = ${OKTA_CLIENT_SECRET}
}
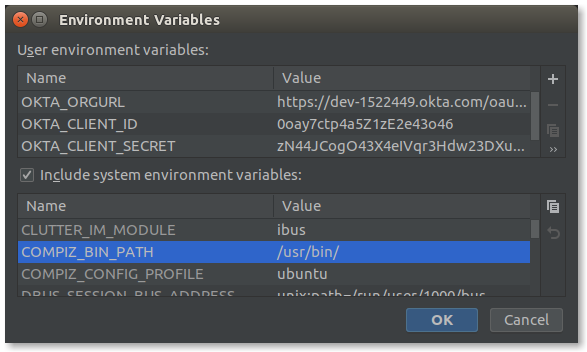
To start your application from IntelliJ IDEA or any other IDE, these environment variables must be provided. In the Run/Debug Configuration dialog, click on the Environment variables and specify them as I have below.
Then, create a src/auth-settings.kt file to contain all Okta-configuration related functions.
You could also create an okta.env file with the following code:
export OKTA_ORGURL=https://{yourOktaDomain}/oauth2/default
export OKTA_CLIENT_ID={yourClientId}
export OKTA_CLIENT_SECRET={yourClientSecret}
Next, run source okta.env before running your app.
If you’re on Windows, name the file _okta.bat_ and use _SET_ instead of _export_.
Add a generic configuration class for Okta services in src/auth-settings.kt.
data class OktaConfig(
    val orgUrl: String,
    val clientId: String,
    val clientSecret: String,
    val audience: String
) {
    val accessTokenUrl = "$orgUrl/v1/token"
    val authorizeUrl = "$orgUrl/v1/authorize"
    val logoutUrl = "$orgUrl/v1/logout"
}
Create a configuration reader in src/auth-settings.kt. This takes a Config object, reads from it, and creates an OktaConfig object.
fun oktaConfigReader(config: Config): OktaConfig = OktaConfig(
    orgUrl = config.getString("okta.orgUrl"),
    clientId = config.getString("okta.clientId"),
    clientSecret = config.getString("okta.clientSecret"),
    audience = config.tryGetString("okta.audience") ?: "api://default"
)
Finally, the Ktor Auth module is expecting configuration to be passed as OAuthServerSettings.OAuth2ServerSettings. For that, you need a mapping function in src/auth-settings.kt:
fun OktaConfig.asOAuth2Config(): OAuthServerSettings.OAuth2ServerSettings =
    OAuthServerSettings.OAuth2ServerSettings(
        name = "okta",
        authorizeUrl = authorizeUrl,
        accessTokenUrl = accessTokenUrl,
        clientId = clientId,
        clientSecret = clientSecret,
        defaultScopes = listOf("openid", "profile"),
        requestMethod = Post
    )
Setup a Ktor Authentication Module
All authentication configuration and handling happen inside the setupAuth() function of src/auth.kt file. Start filling it with configuration. Use oktaConfigReader() to read configuration from the application file. Then, install the Authentication feature and configure it to use OAuth, provide it a redirect callback, the Okta OAuth2 configuration, and a default HttpClient for the Ktor OAuth client features.
package com.okta.demo.ktor

import com.typesafe.config.ConfigFactory
import com.okta.jwt.JwtVerifiers
import io.ktor.application.*
import io.ktor.auth.*
import io.ktor.client.*

fun Application.setupAuth() {
    val oktaConfig = oktaConfigReader(ConfigFactory.load() ?: throw Exception("Could not load config"))
    install(Authentication) {
        oauth {
            urlProvider = { "http://localhost:8080/login/authorization-callback" }
            providerLookup = { oktaConfig.asOAuth2Config() }
            client = HttpClient()
        }
    }
}
To ensure that tokens provided are valid, they need to be verified. This can be done using theOkta JWT Verifier library. Construct access token and ID token verifiers as follows:
val accessTokenVerifier = JwtVerifiers.accessTokenVerifierBuilder()
    .setAudience(oktaConfig.audience)
    .setIssuer(oktaConfig.orgUrl)
    .build()
val idVerifier = JwtVerifiers.idTokenVerifierBuilder()
    .setClientId(oktaConfig.clientId)
    .setIssuer(oktaConfig.orgUrl)
    .build()
Next, configure three login-specific endpoints. Ktor DSL assumes the following structure:
fun Application.setupAuth() {
    ...
    routing {
        authenticate {
            // Okta calls this endpoint providing accessToken along with requested idToken
            get("/login/authorization-callback") {
                // ⚫ handle authorization
            }
            // When guest accessing /login it automatically redirects to okta login page
            get("/login") {
                // ⚫ perform login
            }
        }
        // Perform logout by cleaning cookies
        get("/logout") {
            // ⚫ perform logout
        }
    }
}
#kotlin #programming #developer #security #web-development