Introduction
Google Firebase provides phone authentication using SMS. The basic plan of Firebase includes 10k of free SMSes for a month. We will learn Firebase Phone Authentication in Flutter in this article. We will start from Firebase and will programmatically set up the actual integration in Flutter. So, let’s start!
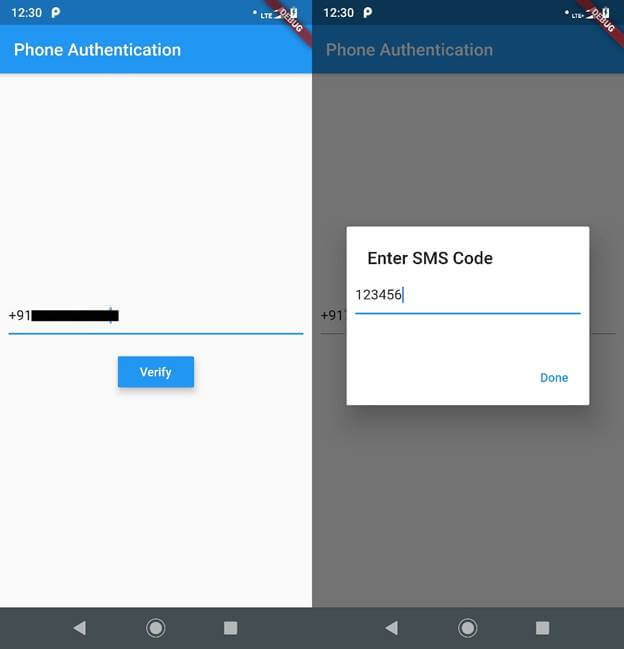
What we will achieve.
Step 1
The first and most basic step is to create a new application in Flutter. If you are a beginner in Flutter, then you can check my blog Create your first app in Flutter. I have created an app named “flutter_otp_auth”.
Step 2
Now, you need to set up a project in Google Firebase. Follow the below steps for that. Please follow the steps very carefully.
-
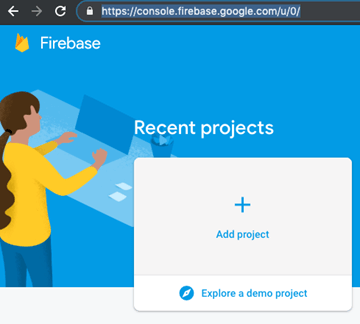
Go here and add a new project. I will share the screenshot of how it looks so you will get a better idea.
-
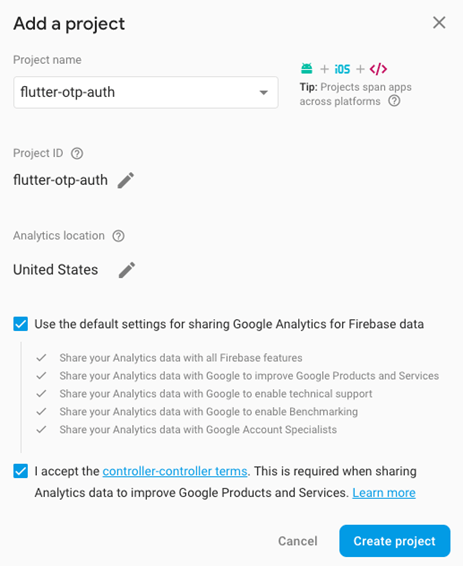
Click on “Add Project” to add the new project in Google Firebase. Then, you will find the below form.
-
Give a project name and accept the terms and conditions and click on “Create Project”. It will take some time to create a new project and redirect you to project the Overview page.
-
Now, you need to add an Android app in this project. You can add a new Android project from clicking on the Android icon. You can also add an iOS project if you want to create an iOS application for the same.
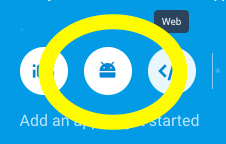
- In Project Overview add an Android app and for that, click on the Android icon. It will open the new form. Please check the below screenshot.
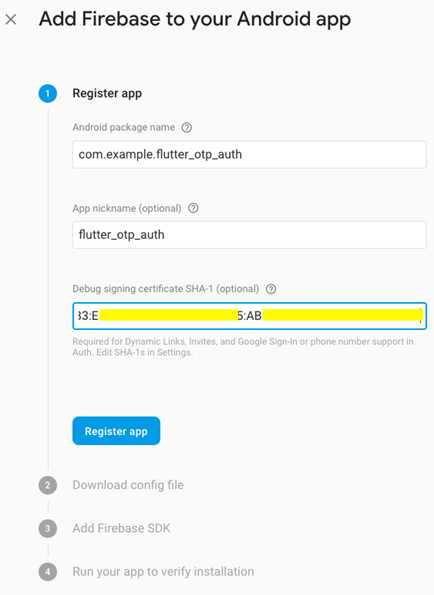
-
You will find the Android package name in the AndroidManifest.xml file in Android => App => main folder of your project.
-
App nickname is optional
-
For SHA-1 generation, go here.
-
In step 2, download google-service.json and put in Android => App folder of your project
-
In step 3, you can see that you need to configure some dependencies.
Project-level build.gradle (/build.gradle): means the build.gradle file should be put in the Android folder directly.
    buildscript {
       dependencies {
          // Add this line
          classpath 'com.google.gms:google-services:4.2.0'
       }
    }
App-level build.gradle (//build.gradle): means build.gradle file in Android = > App folder
// Add to the bottom of the file
apply plugin: 'com.google.gms.google-services’
Note
We do not need to add the implementation ‘com.google.firebase:firebase-core:16.0.9’ in dependencies,
- In Step 4, it will try to verify your app. For that, you need to run your app once or you can skip this step.
- Hurray!!! Your Android app has been created.
Step 3
Now, you need to enable the Phone Sign-In method in Firebase. For that, you need to go to the Authentication tab and then, the Sign-in method tab. From there, enable the Phone Sign-in method. Please check the screenshot.

You are all done with Firebase set up. Congratulations!
Step 4
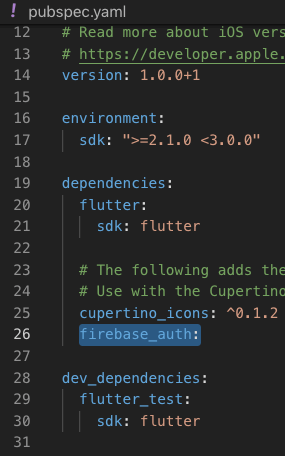
Get back to the project and open the pubspec.yaml file in the root of the project. Pubspec.yaml is used to define all the dependencies and assets of the project.
- Add the below dependencies and save the file.
firebase_auth:
- Please check the below screenshot. You will get more idea where to add the dependency.
-
Run Flutter packages get in terminal OR If you are using Visual Studio Code then after saving file it will automatically run the Flutter packages get command.
-
Now, we are done with all dependency setup at project side as well…. :)
Step 5
Now, we need to programmatically handle OTP Login in Google Firebase. For that, we create 2 pages - main.dart(default) and homepage.dart. I have attached a link of Git repo at the bottom of the article. You can take reference from there. Here, I will just import methods for sending and verifying the OTP. Below is the source code for the dart file.
import 'package:flutter/material.dart';
import 'package:firebase_auth/firebase_auth.dart';
import 'package:flutter/services.dart';
import 'homepage.dart';

void main() => runApp(MyApp());

class MyApp extends StatelessWidget {
    @override
    Widget build(BuildContext context) {
        return MaterialApp(
            title: 'Phone Authentication',
            routes: <String, WidgetBuilder>{
            '/homepage': (BuildContext context) => MyHome(),
            '/loginpage': (BuildContext context) => MyApp(),
            },
            theme: ThemeData(
            primarySwatch: Colors.blue,
            ),
            home: MyAppPage(title: 'Phone Authentication'),
        );
    }
}

class MyAppPage extends StatefulWidget {
    MyAppPage({Key key, this.title}) : super(key: key);
    final String title;

    @override
    _MyAppPageState createState() => _MyAppPageState();
}

class _MyAppPageState extends State<MyAppPage> {
    String phoneNo;
    String smsOTP;
    String verificationId;
    String errorMessage = '';
    FirebaseAuth _auth = FirebaseAuth.instance;

    Future<void> verifyPhone() async {
        final PhoneCodeSent smsOTPSent = (String verId, [int forceCodeResend]) {
            this.verificationId = verId;
            smsOTPDialog(context).then((value) {
            print('sign in');
            });
        };
        try {
            await _auth.verifyPhoneNumber(
                phoneNumber: this.phoneNo, // PHONE NUMBER TO SEND OTP
                codeAutoRetrievalTimeout: (String verId) {
                //Starts the phone number verification process for the given phone number.
                //Either sends an SMS with a 6 digit code to the phone number specified, or sign's the user in and [verificationCompleted] is called.
                this.verificationId = verId;
                },
                codeSent:
                    smsOTPSent, // WHEN CODE SENT THEN WE OPEN DIALOG TO ENTER OTP.
                timeout: const Duration(seconds: 20),
                verificationCompleted: (AuthCredential phoneAuthCredential) {
                print(phoneAuthCredential);
                },
                verificationFailed: (AuthException exceptio) {
                print('${exceptio.message}');
                });
        } catch (e) {
            handleError(e);
        }
    }

    Future<bool> smsOTPDialog(BuildContext context) {
        return showDialog(
            context: context,
            barrierDismissible: false,
            builder: (BuildContext context) {
                return new AlertDialog(
                title: Text('Enter SMS Code'),
                content: Container(
                    height: 85,
                    child: Column(children: [
                    TextField(
                        onChanged: (value) {
                        this.smsOTP = value;
                        },
                    ),
                    (errorMessage != ''
                        ? Text(
                            errorMessage,
                            style: TextStyle(color: Colors.red),
                            )
                        : Container())
                    ]),
                ),
                contentPadding: EdgeInsets.all(10),
                actions: <Widget>[
                    FlatButton(
                    child: Text('Done'),
                    onPressed: () {
                        _auth.currentUser().then((user) {
                        if (user != null) {
                            Navigator.of(context).pop();
                            Navigator.of(context).pushReplacementNamed('/homepage');
                        } else {
                            signIn();
                        }
                        });
                    },
                    )
                ],
                );
        });
    }

    signIn() async {
        try {
            final AuthCredential credential = PhoneAuthProvider.getCredential(
            verificationId: verificationId,
            smsCode: smsOTP,
            );
            final FirebaseUser user = await _auth.signInWithCredential(credential);
            final FirebaseUser currentUser = await _auth.currentUser();
            assert(user.uid == currentUser.uid);
            Navigator.of(context).pop();
            Navigator.of(context).pushReplacementNamed('/homepage');
        } catch (e) {
            handleError(e);
        }
    }

    handleError(PlatformException error) {
        print(error);
        switch (error.code) {
            case 'ERROR_INVALID_VERIFICATION_CODE':
            FocusScope.of(context).requestFocus(new FocusNode());
            setState(() {
                errorMessage = 'Invalid Code';
            });
            Navigator.of(context).pop();
            smsOTPDialog(context).then((value) {
                print('sign in');
            });
            break;
            default:
            setState(() {
                errorMessage = error.message;
            });

            break;
        }
    }

    @override
    Widget build(BuildContext context) {
        return Scaffold(
            appBar: AppBar(
            title: Text(widget.title),
            ),
            body: Center(
            child: Column(
                mainAxisAlignment: MainAxisAlignment.center,
                children: <Widget>[
                Padding(
                    padding: EdgeInsets.all(10),
                    child: TextField(
                    decoration: InputDecoration(
                        hintText: 'Enter Phone Number Eg. +910000000000'),
                    onChanged: (value) {
                        this.phoneNo = value;
                    },
                    ),
                ),
                (errorMessage != ''
                    ? Text(
                        errorMessage,
                        style: TextStyle(color: Colors.red),
                        )
                    : Container()),
                SizedBox(
                    height: 10,
                ),
                RaisedButton(
                    onPressed: () {
                    verifyPhone();
                    },
                    child: Text('Verify'),
                    textColor: Colors.white,
                    elevation: 7,
                    color: Colors.blue,
                )
                ],
            ),
            ),
        );
    }
}
Step 6
When you successfully verify the OTP, you can check that Google Firebase stores the user details on the server. Please check the screenshot below.

Possible Errors
Error
import androidx.annotation.NonNull;
Solution
Put android.useAndroidX=true
android.enableJetifier=true
In android/gradle.properties file
NOTE
Please check the Git repository for the full source code. You need to add your google-services.json file in Android >> Apps folder.
Conclusion
OTP verification becomes one of the most required authentication techniques when security is very important. Google Firebase provides OTP Phone Authentication free starter plan and Flutter provides an easy to set up technique for this.
Flutter Firebase phone authentication tutorial with source code
GitHub: https://github.com/HathTech/flutter-firebase-tutorials
#flutter #firebase #security #mobile-apps