Using IP2Location for Divert Traffic in a Next.js Website
In a world where online commerce has become the norm, we need to build websites that are faster, user friendly and more secure than ever. In this article, you’ll learn how to set up a Node.js powered website that’s capable of directing traffic to relevant landing pages based on a visitor’s country. You’ll also learn how to block anonymous traffic (e.g. Tor) in order to eliminate risks coming from such networks.
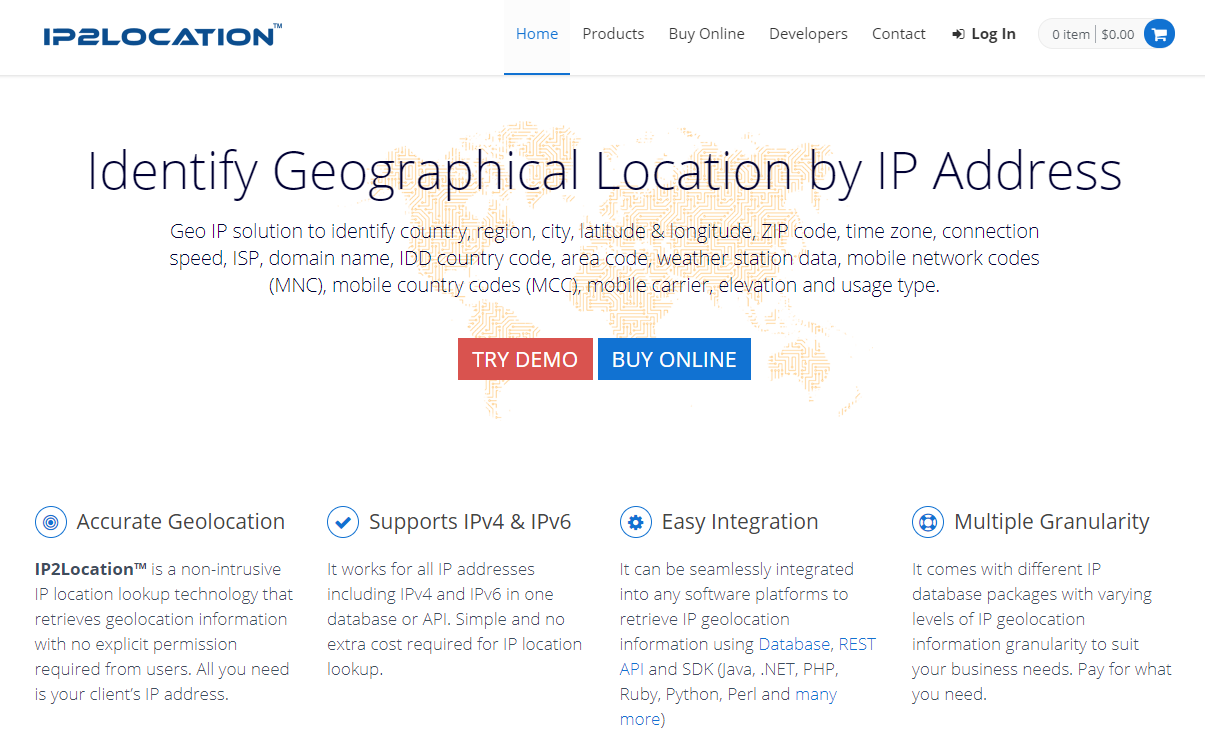
In order to implement these features, we’ll be using the IP2Proxy web service provided by IP2Location, a Geo IP solutions provider. The web service is a REST API that accepts an IP address and responds with geolocation data in JSON format.
Here are some of the fields that we’ll receive:
- countryName
- cityName
- isProxy
- proxyType
- etc.
We’ll use Next.js to build a website containing the following landing pages:
- Home Page: API fetching and redirection will trigger from this page
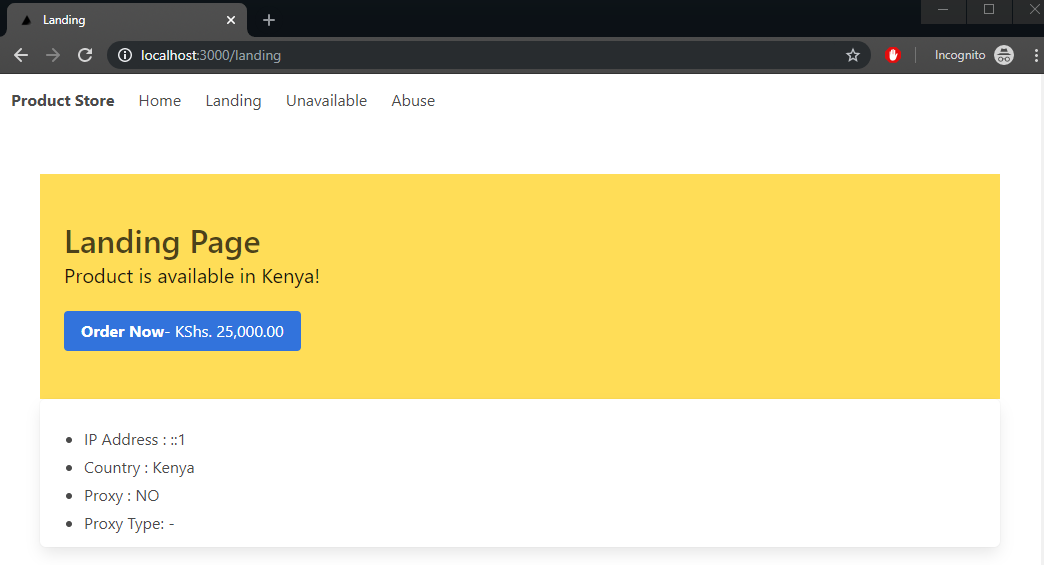
- Landing Page: supported countries will see the product page in their local currency
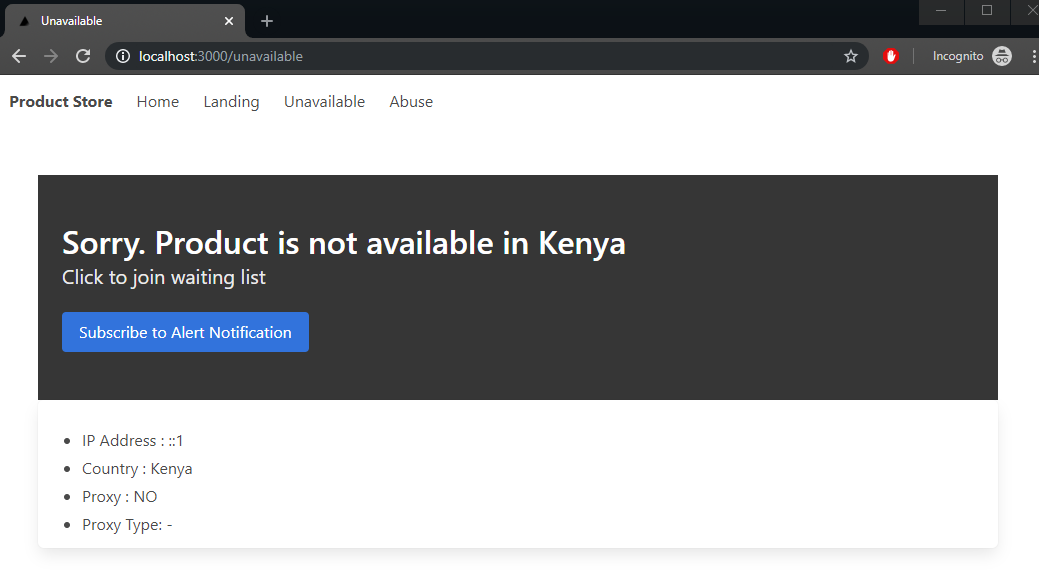
- Unavailable Page: other countries will see this page with an option to join a waiting list
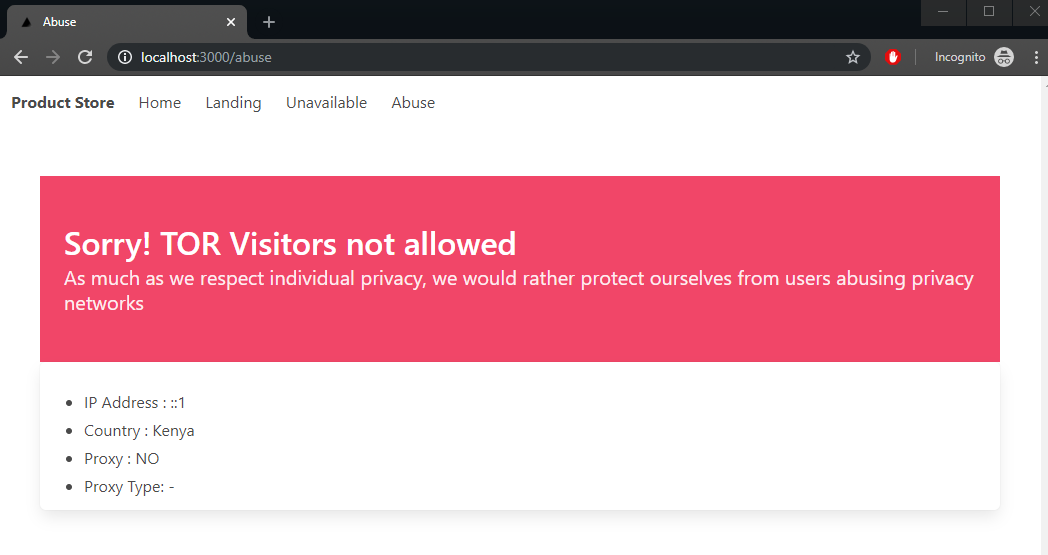
- Abuse Page: visitors using Tor networks will be taken to this page
Now that you’re aware of the project plan, let’s see what you need to get started.
Prerequisites
On your machine, I would highly recommend the following:
- Latest LTS version of Node.js (v12)
- Yarn
An older version of Node.js will do, but the most recent LTS (long-term support) version contains performance and debugging improvements in the area of async code, which we’ll be dealing with. Yarn isn’t necessary, but you’ll benefit from its faster performance if you use it.
As mentioned earlier, we’ll be using Next.js to build our website. If you’re new to it, you can follow their official interactive tutorial to quickly get up to speed.
IP2Location + Next.js Project Walkthrough
Project Setup
To set up the project, simply launch the terminal and navigate to your workspace. Execute the following command:
npx create-next-app
Feel free to give your app any name. I’ve called mine next-ip2location-example. After installation is complete, navigate to the project’s root and execute yarn dev. This will launch the Node.js dev server. If you open your browser and navigate to localhost:3000, you should see a page with the header “Welcome to Next.js”. This should confirm that we have a working app that runs without errors. Stop the app and install the following dependencies:
yarn add yarn add next-compose-plugins dotenv-load next-env @zeit/next-css bulma isomorphic-unfetch
We’ll be using Bulma CSS framework to add out-of-the-box styling for our site. Since we’ll be connecting to an API service, we’ll set up an .env file to store our API key. Do note that this file should not be stored in a repository. Next create the file next.config.js. at the root of the project and add the following code:
const withPlugins = require('next-compose-plugins')
const css = require('@zeit/next-css')
const nextEnv = require('next-env')
const dotenvLoad = require('dotenv-load')

dotenvLoad()

module.exports = withPlugins([
    nextEnv(),
    [css]
])
The above configuration allows our application to read the .env file and load values. Do note that the keys will need to have the prefix NEXT_SERVER_ in order to be loaded in the server environment. Visit the next-env package page for more information. We’ll set the API key in the next section. The above configuration also gives our Next.js app the capability to pre-process CSS code via the zeit/next-css package. This will allow us to use Bulma CSS framework in our application. Do note we’ll need import Bulma CSS code into our Next.js application. I’ll soon show you where to do this.
Obtaining API Key for the I2Proxy Web Service
As mentioned earlier, we’ll need to convert a visitor’s IP address into information we can use to redirect or block traffic. Simply head to the following link and sign up for a free trial key:
Once you sign up, you’ll receive the free API key via email. Create an .env file and place it at the root of your project folder. Copy your API key to the file as follows:
NEXT_SERVER_IP2PROXY_API=<place API key here>
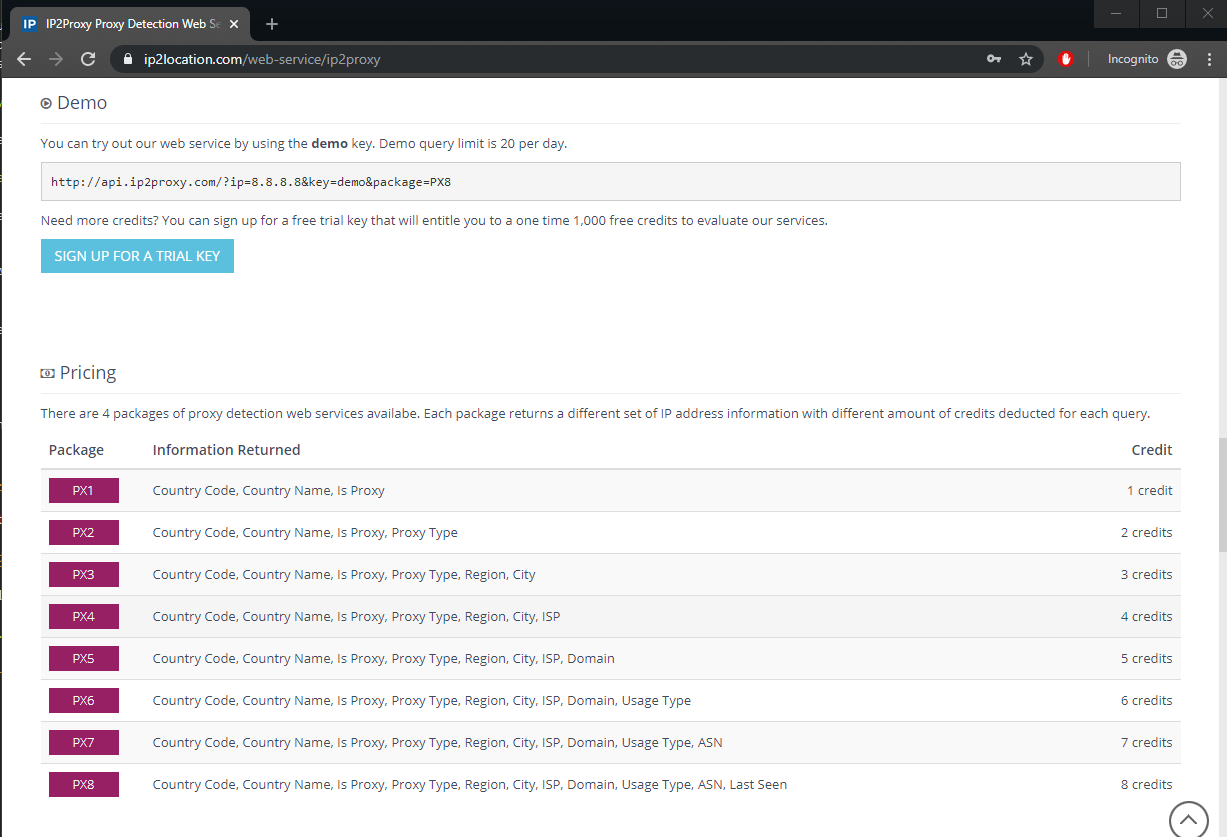
This free key will give you 1,000 free credits. At a minimum, we’ll need the following fields for our application to function:
- countryName
- proxyType
If you look at the pricing section on the IP2Proxy page, you’ll note that the PX2 package will give us the required response. This means each query will costs us two credits. Below is a sample of how the URL should be constructed:
http://api.ip2proxy.com/?ip=8.8.8.8&key=demo&package=PX2
You can also submit the URL query without the IP. The service will use the IP address of the machine that sent the request. We can also use the PX8 package to get all the available fields such as isp and domain in the top-most package of the IP2Proxy Detection Web Service.
http://api.ip2proxy.com/?key=demo&package=PX8
In the next section, we’ll build a simple state management system for storing the proxy data which will be shared among all site pages.
Building Context API in Next.js
Create the file context/proxy-context and insert the following code:
import React, {
    useState,
    useEffect,
    useRef,
    createContext
} from 'react'

export const ProxyContext = createContext()

export const ProxyContextProvider = (props) => {
    const initialState = {
        ipAddress: '0.0.0.0',
        countryName: 'Nowhere',
        isProxy: false,
        proxyType: ''
    }

    // Declare shareable proxy state
    const [proxy, setProxy] = useState(initialState)
    const prev = useRef()

    // Read and Write Proxy State to Local Storage
    useEffect(() => {
        if (proxy.countryName == 'Nowhere') {
            const localState = JSON.parse(localStorage.getItem('ip2proxy'))
            if (localState) {
                console.info('reading local storage')
                prev.current = localState.ipAddress
                setProxy(localState)
            }
        } else if (prev.current !== proxy.ipAddress) {
            console.info('writing local storage')
            localStorage.setItem('ip2proxy', JSON.stringify(proxy))
        }
    }, [proxy])

    return(
        <ProxyContext.Provider value={[ipLocation, setProxy]}>
            {props.children}
        </ProxyContext.Provider>
    )
}
Basically, we’re declaring a sharable state called proxy that will store data retrieved from the IP2Proxy web service. The API fetch query will be implemented in pages/index.js. The information will be used to redirect visitors to the relevant pages. If the visitor tries to refresh the page, the saved state will be lost. To prevent this from happening, we’re going to use the useEffect() hook to persist state in the browser’s local storage. When a user refreshes a particular landing page, the proxy state will be retrieved from the local storage, so there’s no need to perform the query again. Here’s a quick sneak peek of Chrome’s local storage in action:
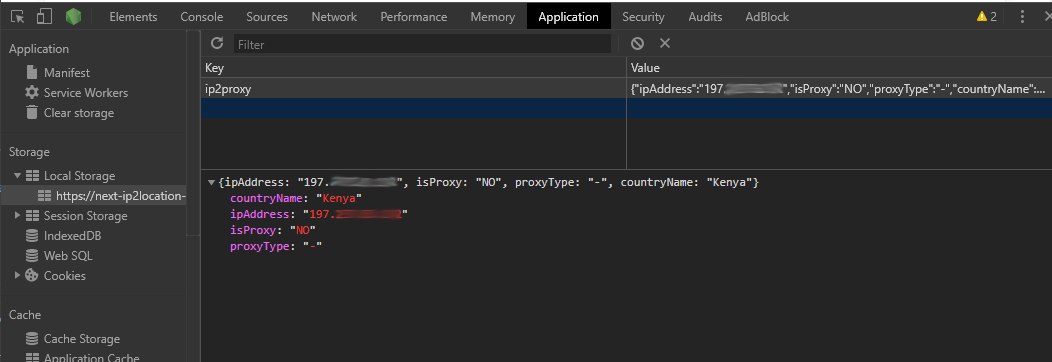
Tip: In case you run into problems further down this tutorial, clearing local storage can help resolve some issues.
Displaying Proxy Information
Create the file components/proxy-view.js and add the following code:
import React, { useContext } from 'react'
import { ProxyContext } from '../context/proxy-context'

const style = {
    padding: 12
}

const ProxyView = () => {
    const [proxy] = useContext(ProxyContext)
    const { ipAddress, countryName, isProxy, proxyType } = proxy

    return (
        <div className="box center" style={style}>
            <div className="content">
                <ul>
                    <li>IP Address : {ipAddress} </li>
                    <li>Country : {countryName} </li>
                    <li>Proxy : {isProxy} </li>
                    <li>Proxy Type: {proxyType} </li>
                </ul>
            </div>
        </div>
    )
}

export default ProxyView
This is simply a display component that we’ll place at the end of each page. We’re only creating this to confirm that our fetch logic and application’s state is working as expected. You should note that the line const [proxy] = useContext(ProxyContext) won’t run until we’ve declared our Context Provider at the root of our application. Let’s do that now in the next section.
Implementing Context API Provider in Next.js App
Create the file pages/_app.js and add the following code:
import React from 'react'
import App from 'next/app'
import 'bulma/css/bulma.css'
import { ProxyContextProvider } from '../context/proxy-context'

export default class MyApp extends App {
  render() {
    const { Component, pageProps } = this.props

    return (
      <ProxyContextProvider>
        <Component {...pageProps} />
      </ProxyContextProvider>
    )
  }
}
The _app.js file is the root component of our Next.js application where we can share global state with the rest of the site pages and child components. Note that this is also where we’re importing CSS for the Bulma framework we installed earlier. With that set up, let’s now build a layout that we’ll use for all our site pages.
Constructing a Layout Template
Create the folder layout at the root of your project. Let’s move the file components/nav.js to layout/nav.js. Replace the current code with this:
import React from 'react'
import Link from 'next/link'

const Nav = () => (
  <nav className="navbar" role="navigation" aria-label="main navigation">
    <div className="navbar-brand">
      <a href="/" className="navbar-item"><strong>Product Store</strong></a>
    </div>
    <div className="navbar-menu">
      <a className="navbar-item" href="/">Home</a>
      <Link href='/landing'>
        <a className="navbar-item">Landing</a>
      </Link>
      <Link href='/unavailable'>
        <a className="navbar-item">Unavailable</a>
      </Link>
      <Link href='/abuse'>
        <a className="navbar-item">Abuse</a>
      </Link>
    </div>
  </nav>
)

export default Nav
Note that this is an incomplete navigation menu, as it’s meant to be fully responsive. Please look into the Navbar documentation to add support for tablet and mobile screens.
I’d also like to point out that the Home link doesn’t use the Link component. I did this intentionally so that when a user clicks on it, it will trigger a server GET request. The rest of the links will only perform client-side navigation.
Next up, create the file layout/layout.js and add the following code:
import Head from 'next/head'
import Nav from './nav'
import ProxyView from '../components/proxy-view'

const Layout = (props) => (
  <div>
    <Head>
      <title>IP2Location Example</title>
      <link rel='icon' href='/favicon.ico' />
    </Head>
    <Nav />
    <section className="section">
      <div className="container">
        {props.children}
        <ProxyView />
      </div>
    </section>
  </div>
)

export default Layout
Now that we have the Layout defined, let’s start to build our site pages, starting with the home page.
Building our Home Page
This is where we’ll perform our API fetch query for the IP2Proxy web service. We’ll save the response received in our ProxyContext state. First, we’ll quickly build just the UI. Open the file pages/index.js and replace the existing code with the following:
import Head from 'next/head'
import Layout from '../layout/layout'

const Home = () => {
  return (
    <Layout>
      <Head>
        <title>Home</title>
      </Head>

      <section className="hero is-light">
        <div className="hero-body">
          <div className="container">
            <h1 className="title">Home</h1>
            <h2 className="subtitle">Checking availability in your country...</h2>
          </div>
        </div>
      </section>
    </Layout>
  )
}

export default Home
Now is a good time to launch the Next.js dev server using the command yarn dev or npm run dev. You should get the following output:
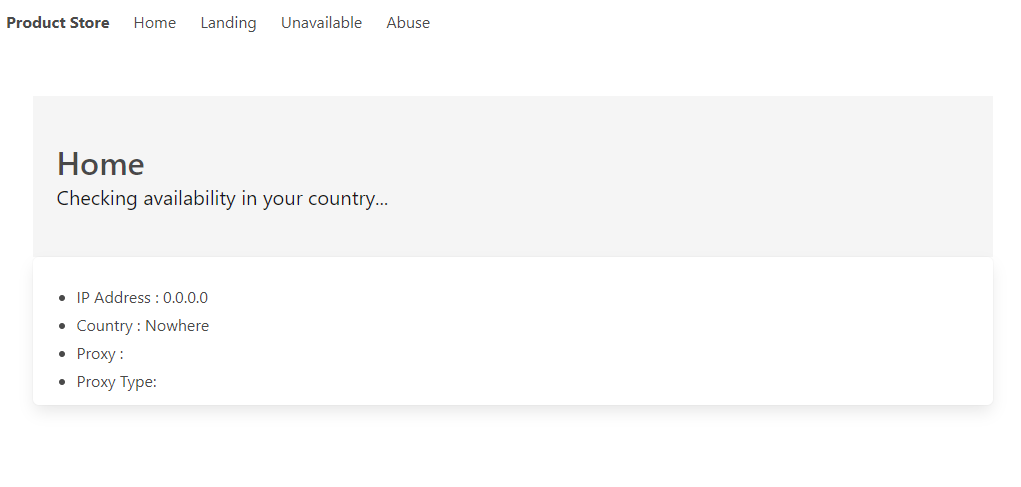
Notice that the ProxyView component is displaying the initial values we set up in the ProxyContextProvider. In the next section, we’ll perform a fetch action and update these values.
Performing a Fetch Query on the IP2Proxy Web Service
In this section, we’ll write an asynchronous function to perform the API fetch query. We’ll do this inside the getInitialProps function. The results will be passed down to the Home component where they’ll be saved to the proxy global state via the ProxyContext. In addition, we’ll use the built-in error page to render errors caught by our code. First, let’s define the getInitialProps function by updating the code in pages/index.js:
import fetch from 'isomorphic-unfetch'

//const Home...{}

Home.getInitialProps = async ({ req }) => {
  if (req) { // This code'll run in server mode
    const api_key = process.env.NEXT_SERVER_IP2PROXY_API || 'demo'
    const ipAddress = req.headers['x-forwarded-for'] || req.connection.remoteAddress
    const localAddresses = ['::1', '127.0.0.1', 'localhost']
    // Construct IP2Proxy web service URL
    let proxyUrl = `https://api.ip2proxy.com/?key=${api_key}&package=PX2`
     // If ipAddress is not localhost, add it to the URL as a parameter
    if (!localAddresses.includes(ipAddress))
      proxyUrl = proxyUrl.concat(`&ip=${ipAddress}`)
    try {
      const response = await fetch(proxyUrl)
      const json = await response.json()
      console.log(json)
      if (json.response != 'OK')
        return { errorCode: 500, errorMessage: json.response }
      const { isProxy, proxyType, countryName } = json
      const newProxy = { ipAddress, isProxy, proxyType, countryName }
      return{ newProxy }
    } catch (error) {
      return { errorCode: error.code, errorMessage: error.message.replace(api_key, 'demo') }
    }
  }
  return { newProxy: null } // This line will run in client mode
}

export default Home
Next, let’s update our Home component:
import React, {
  useContext,
  useEffect,
} from 'react'
import Error from 'next/error'
import { ProxyContext } from '../context/proxy-context'

const Home = ({newProxy, errorCode, errorMessage}) => {

  // Display error messages
  if (errorCode) {
    return <Error statusCode={errorCode} title={errorMessage} />
  }

  // Save new proxy state
  const [proxy, setProxy] = useContext(ProxyContext)
  useEffect(() => {
    let ignore = false
    if(newProxy && !ignore) {
      setProxy(newProxy)
    }
     return () => { ignore = true; }
  }, [newProxy])

  // return (...
}
After you’ve saved the changes, refresh the page. You should now see the fields in ProxyView component update. Take note of the output displayed in the terminal:
{
  response: 'OK',
  countryCode: 'KE',
  countryName: 'Kenya',
  proxyType: '-',
  isProxy: 'NO'
}
The above information should reflect the country you’re in. The next step is to redirect, but let’s first build our missing landing pages.
Building Landing Pages
The landing pages are quite simple to build, as they have minimal logic. Use the navigation menu to confirm each page is rendering properly once you’ve added the code below for each of the files:
pages/landing.js:
import React, { useContext } from 'react'
import Head from 'next/head'
import Layout from '../layout/layout'
import { ProxyContext } from '../context/proxy-context'

const Landing = () => {
    let localPrice = 25000 // Kenyan Shilling
    let exchangeRate = 0;
    let currencySymbol = ''
    const [proxy] = useContext(ProxyContext)
    const { countryName } = proxy

    switch (countryName) {
        case 'Kenya':
            exchangeRate = 1;
            currencySymbol = 'KShs.'
            break;
        case 'United Kingdom':
            currencySymbol = '£'
            exchangeRate = 0.0076;
            break;
        default:
            break;
    }
    // Format localPrice to currency format
    localPrice = (localPrice * exchangeRate).toFixed(2).replace(/\d(?=(\d{3})+\.)/g, '><,')

    return (
        <Layout>
            <Head>
                <title>Landing</title>
            </Head>

            <section className="hero is-warning">
                <div className="hero-body">
                    <div className="container">
                        <h1 className="title">Landing Page</h1>
                        <h2 className="subtitle">Product is available in {countryName}!</h2>
                        <button className="button is-link"><strong>Order Now</strong>  -  {currencySymbol} {localPrice} </button>
                    </div>
                </div>
            </section>
        </Layout>
    )
}

export default Landing
pages/unavailable.js:
import React, { useContext } from 'react'
import Head from 'next/head'
import Layout from '../layout/layout'
import { ProxyContext } from '../context/proxy-context'

const Unavailable = () => {
    const [proxy] = useContext(ProxyContext)
    const { countryName } = proxy

    return (
        <Layout>
            <Head>
                <title>Unavailable</title>
            </Head>

            <section className="hero is-dark">
                <div className="hero-body">
                    <div className="container">
                        <h1 className="title">Sorry. Product is not available in <strong>{countryName}</strong> </h1>
                        <h2 className="subtitle">Click to join waiting list</h2>
                        <button className="button is-link">Subscribe to Alert Notification</button>
                    </div>
                </div>
            </section>
        </Layout>
    )
}

export default Unavailable
pages/abuse.js:
import React from 'react'
import Head from 'next/head'
import Layout from '../layout/layout'

const Abuse = () => (
    <Layout>
        <Head>
            <title>Abuse</title>
        </Head>

        <section className="hero is-danger">
            <div className="hero-body">
                <div className="container">
                    <h1 className="title">Sorry! TOR Visitors not allowed</h1>
                    <h2 className="subtitle">As much as we respect individual privacy, we would rather protect ourselves from users abusing privacy networks </h2>
                </div>
            </div>
        </section>
    </Layout>
)

export default Abuse
Now that we’ve implemented all our landing pages, we need to redirect to them automatically. Head over to the next section.
Diverting Traffic to Relevant Landing Pages
To perform redirection in Next.js, we’ll need to use the useRouter hook from the next/router package in order to access the router component. We’ll use the function router.replace() to perform the redirection. There are two different redirection actions we need to define:
- The first redirection is for blocking Tor traffic and diverting to the “abuse” page.
- The second redirection is for diverting traffic to either the “landing” or the “unavailable” pages.
Open pages/index.js and add the following code:
import { useRouter } from 'next/router'

const Home = ({newProxy, errorCode, errorMessage}) => {
  //...

  // Declare router
  const router = useRouter();

  // Redirect if Proxy Type is TOR
  useEffect(() => {
    if (proxy.proxyType == 'TOR') {
      router.replace('/abuse')
    }
  }, [proxy])

  // Redirect based on visitor's country
  const { countryName } = proxy
  useEffect(() => {
    if (countryName != 'Nowhere' && newProxy.proxyType !== 'TOR') {
      redirectPage(router, countryName)
    }
  }, [proxy]);

  //...
}

const redirectPage = (router, countryName) => {
  let redirectPage;
  switch (countryName) {
    case 'Kenya': // Replace with your country's name
      redirectPage = '/landing'
      break
    case 'United Kingdom':
      redirectPage = '/landing'
      break
    default:
      redirectPage = '/unavailable'
  }
  router.replace(redirectPage)
}
In the redirectPage function, replace “Kenya” with the name of your country. You can add more countries if you like. However, for testing purposes, we need to restrict the number of countries, since there’s a limit to the number of countries supported by a proxy service. Speaking of testing, we need to deploy our application first.
Tip: If you’d like to manually test without deploying, simply assign the ipAddress constant with an IP address from another country. You can also test TOR IP addresses by grabbing one from this list of Tor IPs.
Deploying our Next.js Application
The simplest and fastest way to deploy our Next.js application to a production server is using Zeit’s serverless deployment platform. All you have to do to get started is to install their Now CLI. You’ll only need to verify your email address to use the free service.
If we were to deploy our application now, it would run as expected. However, it will hit the 20 free credit limit, as we’ve designed our app to use the demo key if we haven’t specified an API key. To upload our key now, simply execute the following command:
now secrets add NEXT_SERVER_IP2PROXY_API <ip2proxy api key>
You can learn more about managing environment variables and secrets on the Zeit dashboard here. With that defined, deploying our application is as simple as executing the following command:
now --prod
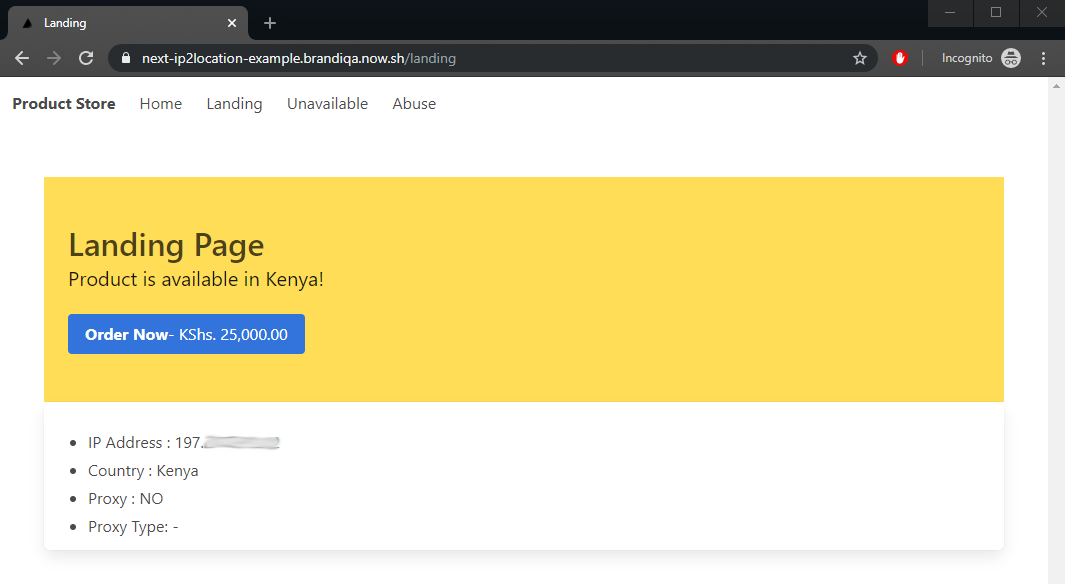
The command will automatically run the build process, then deploy it to Zeit’s servers. The whole process should run under a minute. The production server URL will be automatically copied to your clipboard. Simply open a new tab on your browser and paste the URL. You should see something similar to below:
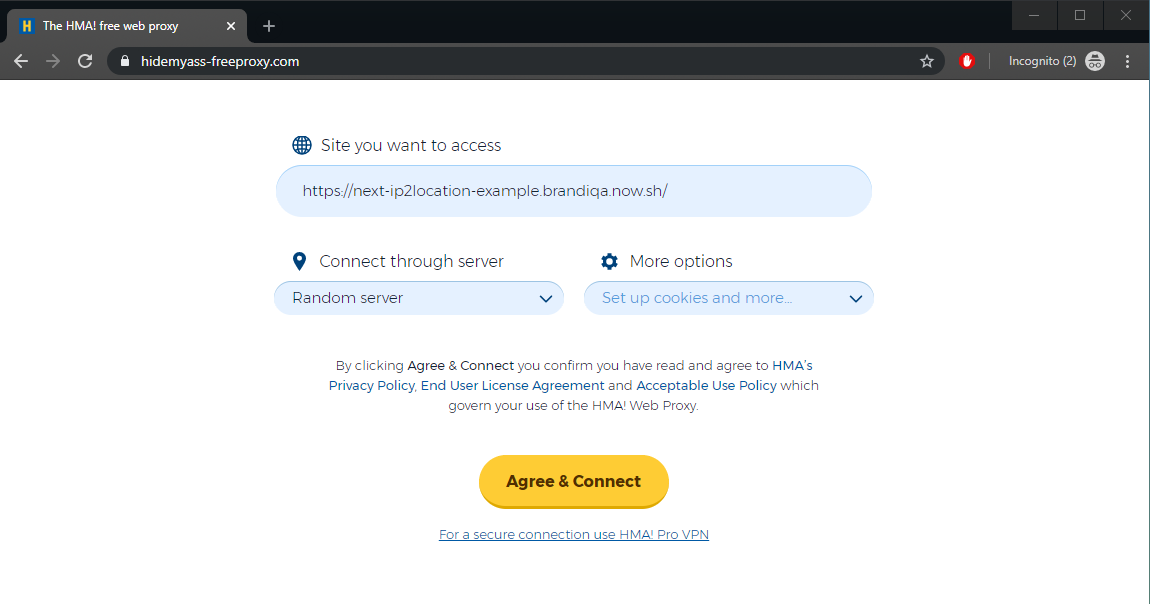
Testing the Site with Free Proxy Services
To confirm that our application can redirect based on the country of origin, we’re going to use a free proxy service to emulate different locations. Simply input your application’s public URL and pick a server, or leave it at random.
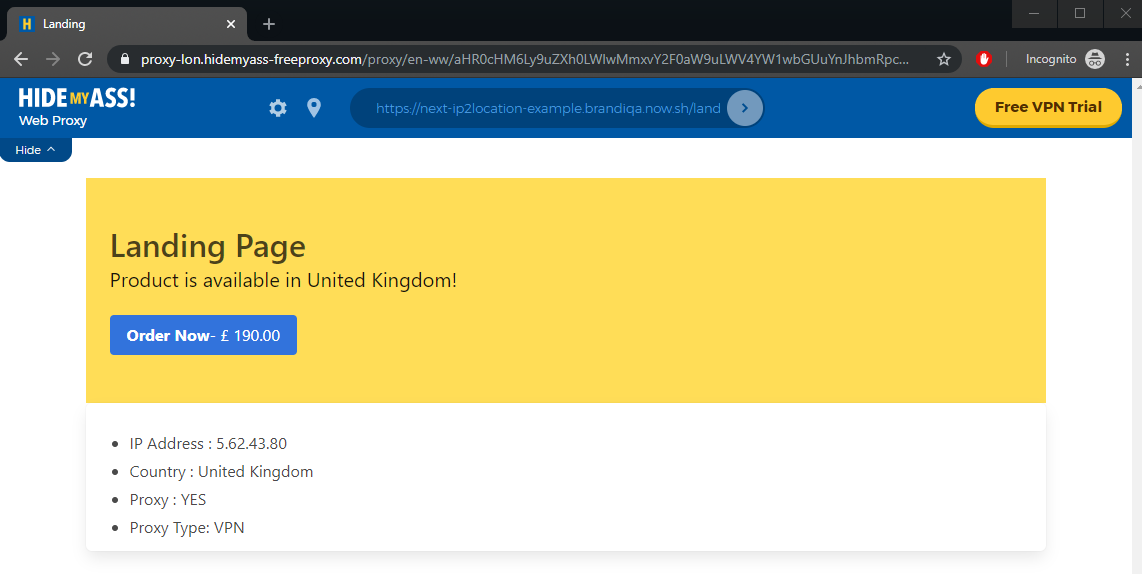
In my case, the countries Kenya and United Kingdom will direct to the landing page.
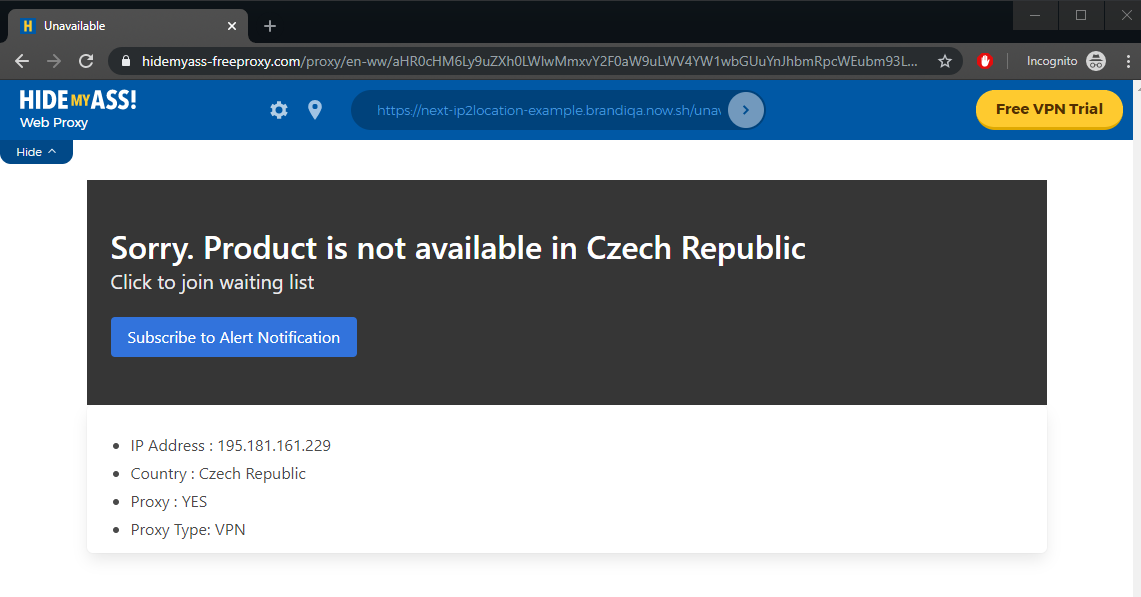
Any other country will redirect to the “unavailable” page.
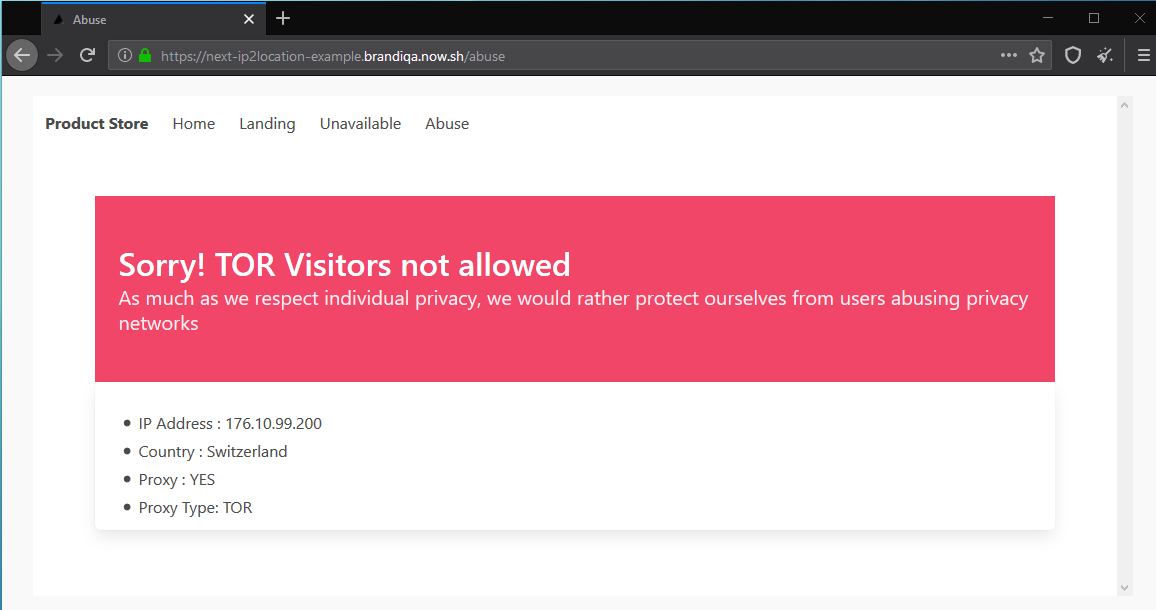
Testing the Site with Tor Browser
Let’s now see if our website can block traffic originating from Tor networks. Simply visit the Tor website and install the Tor browser for your platform. Here’s a screenshot of what the website should look like:
Tip: In case you experience difficulty installing Tor on you computer, you may find it easier installing and running Tor browser on your Android or IOS device.
Local Database Option
Before we end this article, I’d like to mention that IP2Location offers database versions of their web services. It comes in the form of a CSV file which can be imported into any database system you prefer. Instead of querying the remote web service, you can build your own local web service using the database, which should result in a faster response. Do note that when you purchase a database, it gets updated on a daily basis. Hence, you’ll need to automate the process of downloading and importing new data to your local database on a daily basis.
Are you wondering how we’re going to deploy a database in a serverless architecture? It’s quite simple. Deploy your database to a cloud service such as MongoDb or FaunaDb. However, deploying your database on a different server negates the benefits of having a local database. My recommendation is to use Docker containers to package and deploy your application and database within the same server or data center to gain the speed benefits.
Summary
I hope you now have the confidence to build a site that can redirect users to relevant landing pages based on the country they’re browsing from. With the information provided by IP2Location services, you can take your website a few steps further by:
- offering different coupons or offers to different geographic locations
- implementing credit card fraud detection by comparing a visitor’s location with the actual cardholder’s geographic address.
If you look over at IP2Location web service, you’ll notice that it offers a different set of geolocation fields you can use in your application. If you’d like to combine both the IP2Location and IP2Proxy web services in one application, you can look at this project I built earlier that will show you how it’s done.
Originally published by Michael Wanyoike at https://www.sitepoint.com
#nodejs #next #javascript #webdev