Not Hotdog with Keras and TensorFlow.js
In this short tutorial, I’ll walk you through training a Keras model for image classification and then using that model in a web app by utilizing TensorFlow.js. The problem we’ll be solving is Not Hotdog: given an image, our model will have to correctly classify the object as a hotdog or not a hotdog. This classification task is not particularly exciting, but for this tutorial, we’ll be focusing more on the process of using a pre-trained Keras model using Tensorflow.js.
Training a Keras Model
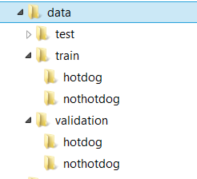
Let’s begin by building our dataset. I used the Google images downloadutility, but you can use whatever you prefer. Instabot is another good option. Just make sure you have a few hundred images for both classes and you split them into training, validation and test sets in the format that Keras expects:
Trending AI Articles:
1. Building a Django POST face-detection API using OpenCV and Haar Cascades> 1. Building a Django POST face-detection API using OpenCV and Haar Cascades> 1. Building a Django POST face-detection API using OpenCV and Haar Cascades> 1. Building a Django POST face-detection API using OpenCV and Haar Cascades
Next, we’ll build a simple deep net to train on the dataset that we have. The neural network I used is composed of 3 chunks of convolutions with ReLU activations and maxpool layers after them. On top, we have two fully connected layers with a ReLU activation, a dropout layer and a sigmoid for binary classification.
model = Sequential()
	model.add(Conv2D(32, (3, 3), input_shape=input_shape))
	model.add(Activation('relu'))
	model.add(MaxPooling2D(pool_size=(2, 2)))


	model.add(Conv2D(32, (3, 3)))
	model.add(Activation('relu'))
	model.add(MaxPooling2D(pool_size=(2, 2)))


	model.add(Conv2D(64, (3, 3)))
	model.add(Activation('relu'))
	model.add(MaxPooling2D(pool_size=(2, 2)))


	model.add(Flatten())
	model.add(Dense(64))
	model.add(Activation('relu'))
	model.add(Dropout(0.5))
	model.add(Dense(1))
	model.add(Activation('sigmoid'))
We’ll use binary cross-entropy as the loss function and use RMSProp as the optimization algorithm. We train for 50 epoch to achieve ~93% accuracy on the validation set, which is good enough for the purposes of this tutorial. To train the model yourself or play around with the code, check out the notebook here. The code is largely based on the first parts of this Keras tutorial.
Once we have a trained model, we need to make sure we save it to disk before we proceed to the next section:
model.save('simplemodel.h5')
Be sure to use the correct method for saving the model. Keras provides
for saving models:
model.save_weights('<filename>')will save just the weights of the model;model.to_json()/model.to_yaml()will save the architecture to json or yaml format;model.save('<filename'>)will save the weights, architecture and even the optimizer state so training can be resumed;
We need to use the last method because, unsurprisingly, TensorFlow.js needs both the weights and architecture of our model before it can utilize it.
Converting a Keras Model into a TensorFlow.js Model
Now that we have the model saved, install the
tensorflowjs
Python package and run the following command:
tensorflowjs --input_format keras <path-to-h5-file> <path-to-dir>
Alternatively, we could have used the tensorflowjs Python API to save the model directly as a TensorFlow.js model:
tensorflowjs.converters.save_keras_model(model, model_dir)
In either case, we should now have several files in our model directory: a model.json file and several weight files in binary format. It’s important to note that these conversions are only supported for standard Keras classes and methods. Custom layers or metrics cannot be safely converted from Python to JavaScript.
Using a Pre-trained Model in TensorFlow.js
Once we have the model converted, let’s use it in a small web application. On the HTML side of the things, we’ll simply have an image_upload file select element, an image element to show the selected image, and a resultdiv to show the model’s classification.
The JavaScript side of things is a bit more complicated. Let’s take a look at the code and then we can step through it:
var wait = ms => new Promise((r, j)=>setTimeout(r, ms));


	async function main() {
	    const model = await tf.loadModel('./model/model.json');


	    document.getElementById('image_upload').onchange = function(ev) {
	        var f = ev.target.files[0];
	        var fr = new FileReader();


	        var makePrediction = async function(img) {
	            // We need to ensure that the image is actually loaded before we proceed.
	            while(!img.complete) {
	                await wait(100);
	            }


	            var tensor = tf.fromPixels(img)
	                           .resizeNearestNeighbor([150,150])
	                           .toFloat().expandDims();


	            const prediction = model.predict(tensor);


	            var data = prediction.dataSync();
	            document.getElementById('result').innerHTML =
	                data[0] == 0 ? "Now, that's a hotdog! :)" : "Not hotdog! :(";


	        }


	        var fileReadComplete = function(ev2) {
	            document.getElementById('image').src = ev2.target.result;
	            var img = new Image();
	            img.src = ev2.target.result;


	            makePrediction(img);
	        };


	        fr.onload = fileReadComplete;


	        fr.readAsDataURL(f);
	    }
	}


	main();
First, we begin by loading our model and we ensure that we actually wait for the operation to finish by using await:
const model = await tf.loadModel('./model/model.json');
Next, we need to set an event handler that responds to the file selector being used. We’ll use the FileReader API by setting another callback when an image is loaded and trigger the actual loading of the image using readAsDataURL(...).
document.getElementById('image_upload').onchange = function(ev) {
    var f = ev.target.files[0];
    var fr = new FileReader();
    var makePrediction = async function(img) { ... };
    var fileReadComplete = function(ev2) { ... };
    fr.onload = fileReadComplete;

    fr.readAsDataURL(f);
}
Once the file has been read, we’ll show the image on our page and then we’ll create an Image object that will be passed to the actual prediction function:
var fileReadComplete = function(ev2) {
    document.getElementById('image').src = ev2.target.result;
    var img = new Image();
    img.src = ev2.target.result;
    makePrediction(img);
};
At this point, we have to ensure that the Image object is ready or the rest of the code will not be happy. That’s why we’ll use the wait lambda that we defined at the top of our code, to ensure that the function waits until the image is ready to be used.
Then, we have to convert our Image object into a tensor with the correct formatting. We’ll use the fromPixels(...) method to transform the image to a tensor, resize it to what our model expect using resizeNearestNeighbor(...), convert it to floating point values using toFloat(), and then use expandDims() to insert another dimension in our tensor so that it fits the batched input format our model was trained on.
var makePrediction = async function(img) {
    while(!img.complete) {
        await wait(100);
    }
    var tensor = tf.fromPixels(img)
                   .resizeNearestNeighbor([150,150])
                   .toFloat().expandDims();
    const prediction = model.predict(tensor);
    var data = prediction.dataSync();
    document.getElementById('result').innerHTML =
       data[0] == 0 ? "Now, that's a hotdog! :)" : "Not hotdog! :(";
}
After we have pre-processed our image, we can pass it into our model using the predict(...) method and get a prediction. In order to get the actual data out of the prediction tensor, we’ll use the dataSync() method. At this point, you can do whatever you need with the prediction. In this case, we’ll add a simple message to our web page that answers the age-old question: “Is this a hotdog?” We truly live in the future.
#tensorflow #machine-learning #deep-learning