Script for Live Bitcoin Price Ticker using Websockets
Websockets are just part of the equation. Executing real-time trades, collecting historical order book snapshots, and managing exchange accounts is all part of the API.
A 5-minute tutorial to connect to cryptocurrency exchange websockets.
Check the time - I have 5 minutes to get you connected to a cryptocurrency exchange’s websocket.
That’s a bold assertion, so let’s not waste any time.
Install Libraries
Before we can write our Python script to connect to exchange websockets, we need to install a library. Yes, exactly one library.
Run the following command to install Shrimpy:
pip install shrimpy-python
1 minute down - already 20% done.
Generate API Keys
After installing the Shrimpy Python Library, register for a Shrimpy Developer API account. This service will be used to access the exchange websockets.
Once you’ve signed up for an account, create a new master key. The master key is how you sign requests and access crypto market data. Save the public and private keys for later use. Make sure to enable “data” permissions on these keys. Some data which is available through the APIs includes candlestick (OHLCV) data, historical order book snapshots, and live trade data.
3 minutes passed - Uh oh, we haven’t even started coding yet.
The Code
Stretch those fingers because we’re about to set a new record for the fastest time anyone has ever connected to a crypto exchange websocket.
Library Import
The Shrimpy library has already been installed, so import it into your script.
import shrimpy
Define Handler
To receive data out of the websocket, we need to create a handler. This handler will simply print the price of each trade which is received through the trade websocket.
Since we can receive multiple trades per message, we will only consider the last trade in the message to be the current ticker price.
def error_handler(err):
    print(err)

def handler(msg):
    ticker = msg['content'][len(msg['content']) - 1]['price']
    print(ticker)
Client Creation
Create a client object by calling into the Shrimpy library. Don’t forget to first get the token which is required to create the client. You can get this client by creating an API client, which is created by passing in your public and private API keys. This will help you manage your websocket connection and subscriptions.
public_key = '6d73c2464a71b94a81aa7b13d...'
private_key = 'e6238b0de3cdf19c7861f8e8f5d137ce7113ac1e884b191a14bbb2...'

api_client = shrimpy.ShrimpyApiClient(public_key, private_key)
raw_token = api_client.get_token()
client = shrimpy.ShrimpyWsClient(error_handler, raw_token['token'])
4 minutes now - it’s going to be close.
Declare Subscribe Data
Before we can subscribe to a websocket stream, we must define the subscription for which we want to connect.
subscribe_data = {
    "type": "subscribe",
    "exchange": "binance",
    "pair": "btc-usdt",
    "channel": "trade"
}
Connect Websocket
Start processing the Shrimpy websocket stream by subscribing to the channel.
client.connect()
client.subscribe(subscribe_data, handler)
… and 5 minutes - game, set, match.
Note: You can subscribe to 100 different channels per client. Shrimpy allows each IP to manage up to 10 clients for a total of 1,000 channels per IP.
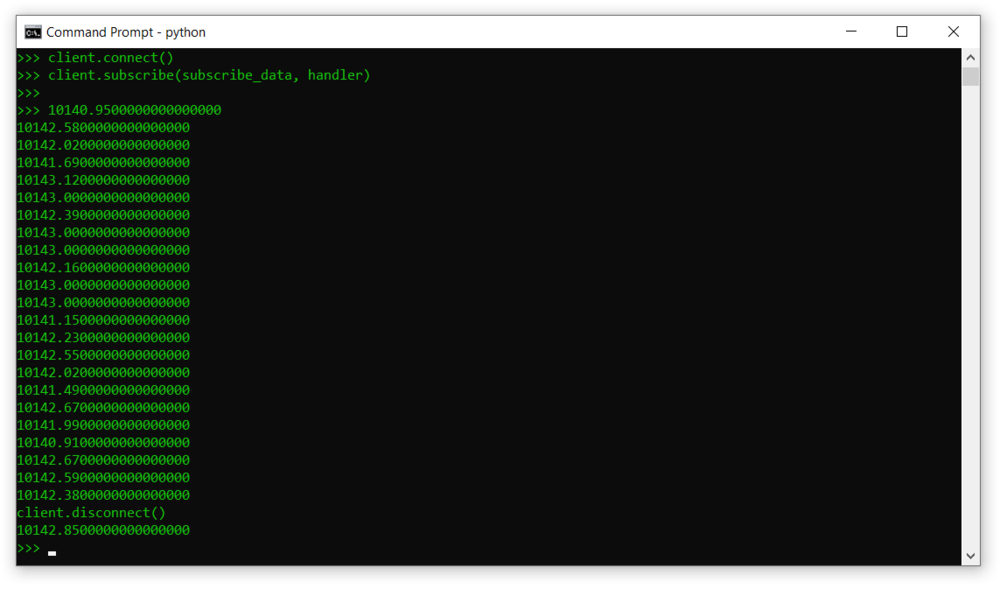
Just like that, you are now live streaming the latest trade data from Binance. In the handler we defined, that data is parsed to only extract the price at which each trade was executed. That allows us to print the tick-by-tick price of the cryptocurrency at this exact moment.
Disconnect Websocket
Once you’ve finished collecting data, disconnect the client.
client.disconnect()

After connecting to the websocket, you will begin to see price data stream in real time.
Putting it all Together
That was quick, so let’s take a moment to regroup and get a full picture of what we just accomplished.
In the last 5 minutes, we leveraged the Shrimpy APIs and connected to the trade websocket for a crypto exchange. This allowed us to get the real-time ticker price for an asset.
# import the Shrimpy library for crypto exchange websockets
import shrimpy

# a sample error handler, it simply prints the incoming error
def error_handler(err):
    print(err)

# define the handler to manage the output stream
def handler(msg):
    # multiple trades can be returned in each message, so take the last one
    ticker = msg['content'][len(msg['content']) - 1]['price']
    print(ticker)

# input your Shrimpy public and private key
public_key = '6d73c2464a71b94a81aa7b13d...'
private_key = 'e6238b0de3cdf19c7861f8e8f5d137ce7113ac1e884b191a14bbb2...'

# create the Shrimpy websocket client
api_client = shrimpy.ShrimpyApiClient(public_key, private_key)
raw_token = api_client.get_token()
client = shrimpy.ShrimpyWsClient(error_handler, raw_token['token'])

# construct the subscription object
subscribe_data = {
    "type": "subscribe",
    "exchange": "binance",
    "pair": "btc-usdt",
    "channel": "trade"
}

# connect to the Shrimpy websocket and subscribe
client.connect()
client.subscribe(subscribe_data, handler)

# disconnect from the websocket once data collection is complete
client.disconnect()
Now, Binance isn’t the only exchange supported by Shrimpy and the btc-usdt pair isn’t the only trading pair.
The Shrimpy APIs support 17 different exchanges and over 1,300 markets. Each of the most prominent exchanges can be accessed through a simple consolidated websocket API.
Not only that, websockets are just part of the equation. Executing real-time trades, collecting historical order book snapshots, and managing exchange accounts is all part of the API. You can find the full documentation here.
End
Users are able to configure a custom cryptocurrency portfolio and implement a passive rebalancing strategy, removing the hassle of having to actively trade crypto. Shrimpy’s Developer Trading API is a unified way to integrating trading functionality across every major exchange. Collect historical market data, access real-time websockets, execute advanced trading strategies, and manage an unlimited number of users.
Thank for reading !
#python #nodejs #Websockets #bitcoin #blockchain
