Originally published by Craig Oda at dzone.com
Although some people view Django as old technology compared to the hot JavaScript framework of the year, Django is mature, stable, easy to use, and better suited for a wide range of business tasks.
I’ll illustrate this point with components for a VR or 360 image management system based on Django that provides the following functionality:
- 360 image capture and camera setting adjustment using the Google Optical Spherical Camera (OSC) open API.
- Network-attached camera management to view and download pictures into Django from multiple cameras on a Wi-Fi network.
- Bulk process hundreds or thousands of images using simple bash or shell commands from Django.
- Sync internal server with a public cloud-based server to view images in 360 degrees.
The example Django site described in this article is available here: https://gallery.theta360.guide/.
What Are 360 Images
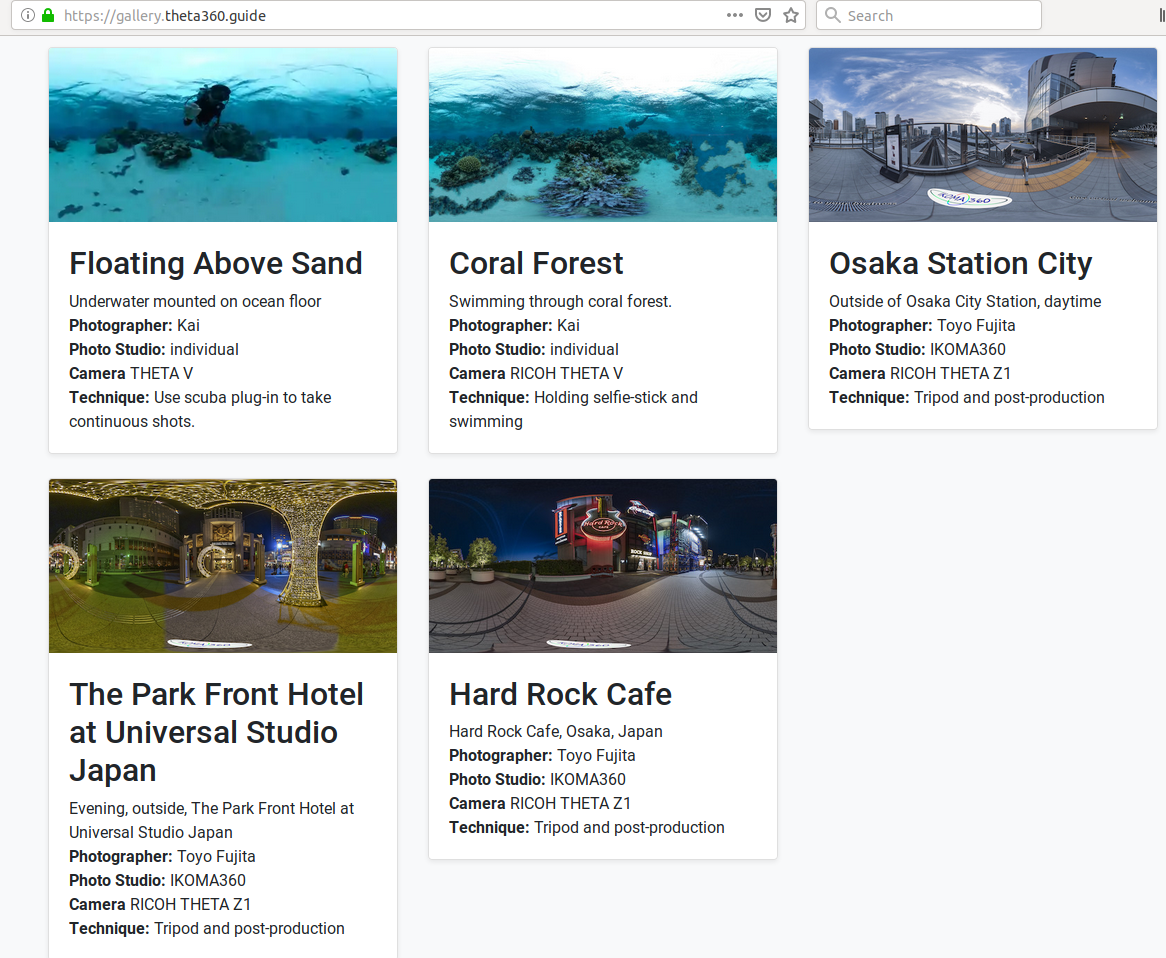
360 image gallery
360 images are standard JPG or PNG files that are presented in equirectangular format. In the image above, the thumbnails are displayed in equirectangular format. The 360 view looks like Google Streetview or Google Maps.

360 image sample
The images are different in a few ways. A single picture from a consumer camera like the RICOH THETA Z1 used in the example above is large. The picture is 6,720 by 3,360 pixels and is eight MB in size. Images from industrial cameras are much larger. Only a portion of the picture is viewable on the page and must be rotated with the mouse or headset.
Another difference is that the metadata attached to the image contains orientation and projection information.
Image Capture and Camera Settings
The Google OSC API is a simple HTTP API that sends GET and POST commands to the camera over Wi-Fi. Although there are different ways to implement the connection, the easiest method to have the DHCP server on your office network is to assign the camera an IP address. If there are restrictions on allowing devices to connect to the same office network, you can isolate the Django management server and the cameras on a separate subnet.

Architecture overview
In this architecture, you can have dozens or even hundreds of cameras connected to the same management server simultaneously. This is useful for businesses such as large-scale used car auctions where the camera is used to take interior shots of the cars. Another use is for factory or retail store traffic optimization where images of different areas are continually taken for later analysis.
Problems With JavaScript Digest Authentication
To send an HTTP command to the RICOH THETA camera used in this example, the client must pass the ID and password of each camera with Digest Authentication. This is straightforward and common to do with Python using the common requests module. This is not as easy with JavaScript, though it appears to be possible.
Several of us tried building this system using Electron and Node prior to switching to Django and Python. While it always seems possible to accomplish the same thing in JavaScript, the reality is that it’s sometimes harder and more problematic to work with JavaScript.
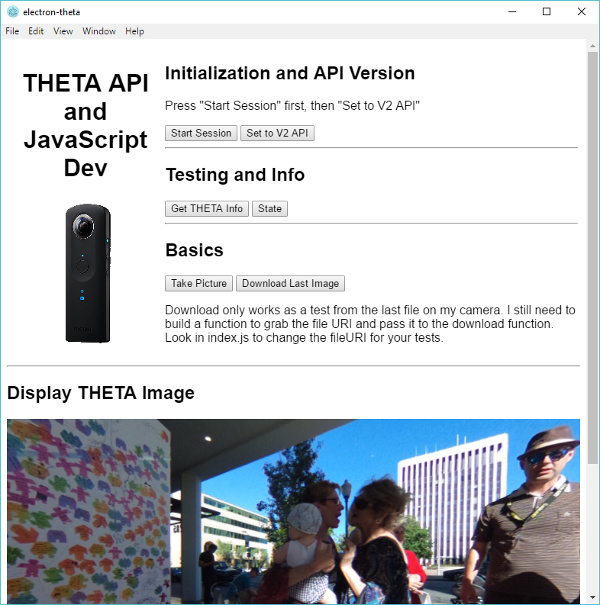
THETA API and JavaScript Dev
Using Python, it took a few hours to build out a decent set of sample camera commands. The Django views.py function to take a picture is shown below.
def take_picture(request):
url = f"{THETA_URL}commands/execute"
    payload = {"name": "camera.takePicture"}
    resp = requests.post(
                        url,
                        json=payload,
                        auth=(HTTPDigestAuth(THETA_ID, THETA_PASSWORD)))
    data = resp.json()
    pprint.pprint(data)
    return render(request, 'commandhome.html', {'data': data})
The digest authentication is accomplished with the requests module HTTPDigestAuth(ID, PASSWORD) .
As I mentioned before, this should work with JavaScript and Node, but we couldn’t get it to work properly. Community members have got Digest Authentication working with the camera using Java, but I found that Java wasn’t as concise as Python.
Listing Images
With the Google OSC API specification, the camera images are accessed from the URL OF each image. You can click on each image link and display it in the web page you generate with Django or download it to the Django file directory for batch processing.
Each image URL looks similar to this:
http://192.168.2.101/files/150100525831424d42079d18e0b6c300/100RICOH/R0010056.JPGThe Django views.py function to list the image URLs in a web page is shown below.
def generate_image_list():
    url = f"{THETA_URL}commands/execute"
    command_string = "camera.listFiles"
    payload = {
                "name": command_string,
                "parameters": {
                    "fileType": "image",
                    "entryCount": 20,
                    "maxThumbSize": 0
                }}
    resp = requests.post(
                        url,
                        json=payload,
                        auth=(HTTPDigestAuth(THETA_ID, THETA_PASSWORD)))
    data = resp.json()
    imageEntries = data["results"]["entries"]
    images = []
    for imageEntry in imageEntries:
        print(imageEntry["fileUrl"])
        images.append(imageEntry["fileUrl"])
    return images
Although the algorithm would be similar in JavaScript, we could not get it working with JavaScript due to the Digest Authentication issue. There were several other cases where a Python module like requests seemed to have more support for a wider range of usage scenarios than the equivalent JavaScript package.
Batch Processing with Bash and Shell Commands
Python is often used in DevOps because it can directly access shell scripts and commands with subprocess. Python can even run bash scripts. Although it’s not as easy to run shell commands as using bash directly, it only takes a few lines of code.
We first looked at using the Python imaging library fork called Pillow. However, to involve a larger group of non-developers in the image processing testing, we switched to the common command line applications ImageMagick and exiftool. Once we had a reasonable work process, we then ran the tools through Django to get feedback from a larger group of people.
In one test, we merged an image an a mask to produce watermarks.
Note: For a Live 360 view of the watermark overlay test, clich here.
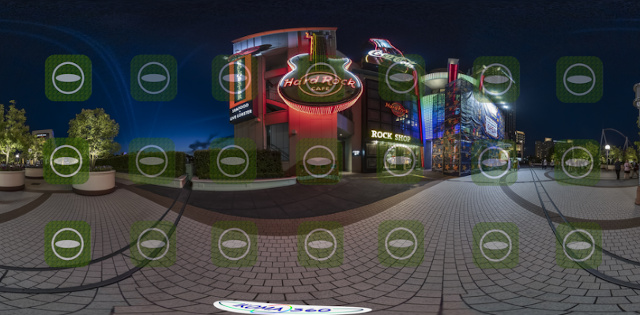
Equirectangular view of image with watermarks
To create a watermarked image using this technique, you first create one watermark mask with the same dimensions as the original and then apply a transparent background. You think combine the two images with ImageMagick composite.

Watermark
You can test this on a command line with:
$ composite -geometry +3000+1600 theta_logo.png toyo-hardrock.jpg new-image.jpg
You can then run it from Django views.py, using subprocess Popen , PIPE , and STDOUT . Here’s a short example that processes an image after it’s downloaded into Django.
from django.shortcuts import render
from subprocess import Popen, PIPE, STDOUT
import requests
import os
PROJECT_MEDIA_DIR = os.getcwd() + "/media/"
def watermark(request):
    # pass in file name after upload for production
    image_file_name = f"{PROJECT_MEDIA_DIR}/toyo-hardrock.jpg"
    logo_file_name = f"{PROJECT_MEDIA_DIR}/theta_logo.png"
    output_file = f"{PROJECT_MEDIA_DIR}/new-image.jpg"
    # composite is part of imagemagick package
    Popen(['composite', '-geometry', '+3000+1600', logo_file_name,
        image_file_name, output_file], stdout=PIPE, stderr=STDOUT)
    return render(request, 'watermark.html', {"output": output_file.split('/')[-1]})
In watermark.html , you can grab the output directly with {{output}} .
 <script src="https://cdnjs.cloudflare.com/ajax/libs/aframe/0.7.1/aframe.min.js"
   crossorigin="anonymous"></script>
    <h1>Watermark</h1>
        <a-scene>
                <a-sky src="/media/{{output}}" rotation="0 -130 0"></a-sky>
          </a-scene>
In another test, we produced 12 versions of the same image with the image dimensions the same, but with different image quality settings. This changed the file size from 8.6MB to 220K for images of the same size. A live site of results is here:
https://gallery.theta360.guide/blog/qualitytuba/

Image quality tests
Managing EXIF Data
As I mentioned earlier, the 360 images contain metadata or EXIF data, including data needed to position the 360 image. This is an example of metadata from an image.
Full Pano Height Pixels : 3584
Full Pano Width Pixels : 7168
Initial Horizontal FOV Degrees : 70.0
Initial View Heading Degrees : 0.0
Initial View Pitch Degrees : 0.0
Initial View Roll Degrees : 0
Pose Heading Degrees : -54.1
Pose Pitch Degrees : 0.0
Pose Roll Degrees : 0.0
Projection Type : equirectangular
Stitching Software : RICOH THETA Stitcher v1.00.4
Use Panorama Viewer : true
Using exiftool , you can grab the metadata from the command line.
$ exiftool filename.jpg
The code below from views.py will get the data into Django for display on a web page below the image.
def exif(request):
    # pass in file name after upload for production
    image_file_name = f"{PROJECT_MEDIA_DIR}/osaka-night.jpg"
    process = Popen(['exiftool', image_file_name], stdout=PIPE, stderr=STDOUT)
    output_byte = process.stdout.read()
    output_list = str(output_byte)[2:-1].strip().split('\\n')
    return render(request, 'exif.html', {"output": output_list, "filename": image_file_name.split('/')[-1]})
Exiftool can also be used to write the data. Keep in mind that Python libraries like Pillow can do the same thing. In production, you probably want to use Python libraries instead of shell commands. The shell commands are great for building something in minutes and putting it on a web site to show colleagues for feedback.
Summary
After a few years of intermittently trying to build a workflow with MEAN, Cordova, and Electron, I decided to try Python and Django. I’m glad I did. Python and Django are old, but I found that they had more support for obscure edge cases. The same functionality was possible but difficult to achieve with JavaScript.
As modern JavaScript or TypeScript projects likely involve a transpiler and bundler, it was refreshing to use the simpler edit-view flow of Python, especially with virtualenv and pip to take care of the requirements and versioning.
It also felt surprisingly good to use the shell directly from Python. To be honest, it felt a bit like cheating and not the correct thing to do, but it was gratifying to see the results of image processing after a few minutes of coding using command line techniques I already knew and didn’t have to look up in the documentation.
The flexibility, maturity, just-get-done features of Python makes Django a framework for more than just a web site. Django can manage and control network-connected devices, batch-edit images, and the same management system can deploy the images to the public. Django is a better choice for this type of workflow management than comparable JavaScript frameworks.
Originally published by Craig Oda at dzone.com
===================================================================
Thanks for reading :heart: If you liked this post, share it with all of your programming buddies! Follow me on Facebook | Twitter
Learn More
☞ Complete Python Bootcamp: Go from zero to hero in Python 3
☞ Python and Django Full Stack Web Developer Bootcamp
☞ Python for Time Series Data Analysis
☞ Python Programming For Beginners From Scratch
☞ Beginner’s guide on Python: Learn python from scratch! (New)
☞ Python for Beginners: Complete Python Programming
☞ Django 2.1 & Python | The Ultimate Web Development Bootcamp
☞ Python eCommerce | Build a Django eCommerce Web Application
☞ Python Django Dev To Deployment
#python #django