How to Share and Reusing Vue Mixins in the Cloud
Before you start
This post is suited for all stages of developers that use Vue JS, and this includes beginners. It is also an introduction to the amazing Vue component sharing tool, Bit. Here are a few prerequisites you should already have before going through this article.
You will need the following:
- Node.js version 10.x and above installed. You can verify if you do by running the command below in your terminal/command prompt:
node -v
- The Node Package Manager 6.7 or above (NPM) also installed.
- A code editor: Visual Studio Code is highly recommended. here’s why
- Bit’s latest version, installed globally on your machine.
npm install bit-bin -g
- Vue’s latest version, installed globally on your machine.
- Vue CLI 3.0 installed on your machine. To do this, uninstall the old CLI version first:
npm uninstall -g vue-cli
then install the new one:
npm install -g @vue/cli
- Download a Vue Mixins starter project here
- Unzip the downloaded project
- Navigate into the unzipped file and run the command to keep all the dependencies up-to-date:
npm install
What are Vue Mixins
Mixins in Vue are basically a chunk of defined logic, stored in a particular prescribed way by Vue, which can be re-used over and over to add functionality to your Vue instances and components. So Vue mixins can be shared between multiple Vue components without the need to repeat code blocks within a project. Anyone who has used the CSS pre-processor called SASS has a good idea of mixins.
Demo
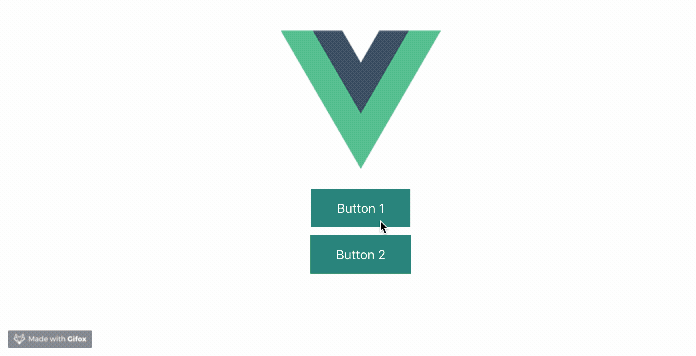
If you followed this post from the start, you must have gotten the Mixins starter app from the GitHub link provided above. Inside the component folder, you will see two components:
// Component 1
// src/components/Test.vue
<template>
  <div>
    <button v-on:click="clicked('you just clicked on button  1')">
      Button 1
    </button>
  </div>
</template>;
export default {
  name: "Test",
  methods: {
    clicked(value) {
      alert(value);
    }
  }
};
The component above displays a button that shows an alert modal when clicked. The second component below does exactly the same thing:
// Component 2
// src/components/Modal.vue
<template>
  <div>
    <button v-on:click="clicked('you just clicked on button  2')">
      Button 2
    </button>
  </div>
</template>;

export default {
  name: "Modal",
  methods: {
    clicked(value) {
      alert(value);
    }
  }
};
So with Vue Mixins, you can simply store a logic you know you will reuse over and over again as a mixin and then just import it into any component you wish to use it in. This component must, however, be in the same project.
4 Stages of Vue Mixins creation
There are four steps to take when creating a Vue mixin:
Creating a Mixin file
Mixin files are just javascript files you can export that contains the logic or functionality you want to re-use. Create a new folder called Mixins inside the src folder and create a file called clickMixin.js file inside it. Paste the code below in it.
// src/mixins/clickMixin.js
export default {
  methods: {
    clicked(value) {
      alert(value);
    }
  }
};
This is the exact functionality we had to use twice, now that we have made it a mixin, it is now reusable.
Importing the Mixin file
Next stage is to import the mixin file to the exact component it is needed in. In our case, it is inside the two components we want to import it. Import the clickMixin inside the two components with the command below:
import clickMixin from ‘../Mixins/clickMixin’
Removing repeated logic
Now that you have imported the mixin file inside your components, you do not need the repeated logic anymore. So, delete the repeated logic from the two components.
// remove this code block and the comma before it.
methods: {
clicked(value){
alert(value);
}
}
Register the Mixin
The final step is to tell Vue that you have a mixin ready to be used by registering it. Mixins in Vue by default are registered as arrays, as seen below:
<script>
import clickMixin from '../Mixins/clickMixin'
export default {
 name: 'Test',
 mixins: [clickMixin]
}
</script>
After adding this mixins option to your two components, go ahead and run your application.
npm run serve
The might find the full article on understanding mixins in Vue JS really helpful.
The Limitations of Vue Mixins
Mixins solve a very big reuse problem we have often while writing code. We have a platform on which we can keep logic in a way we can reuse it and we do no longer have to repeat ourselves. This platform is very easy to use too, but what happens when we want to extend the reach of mixins. What if we want to be able to share mixins across multiple projects, imagine how powerful abstracted logic like mixins can be if it can be shared across multiple projects. Unfortunately, we cannot do this with Vue mixins.
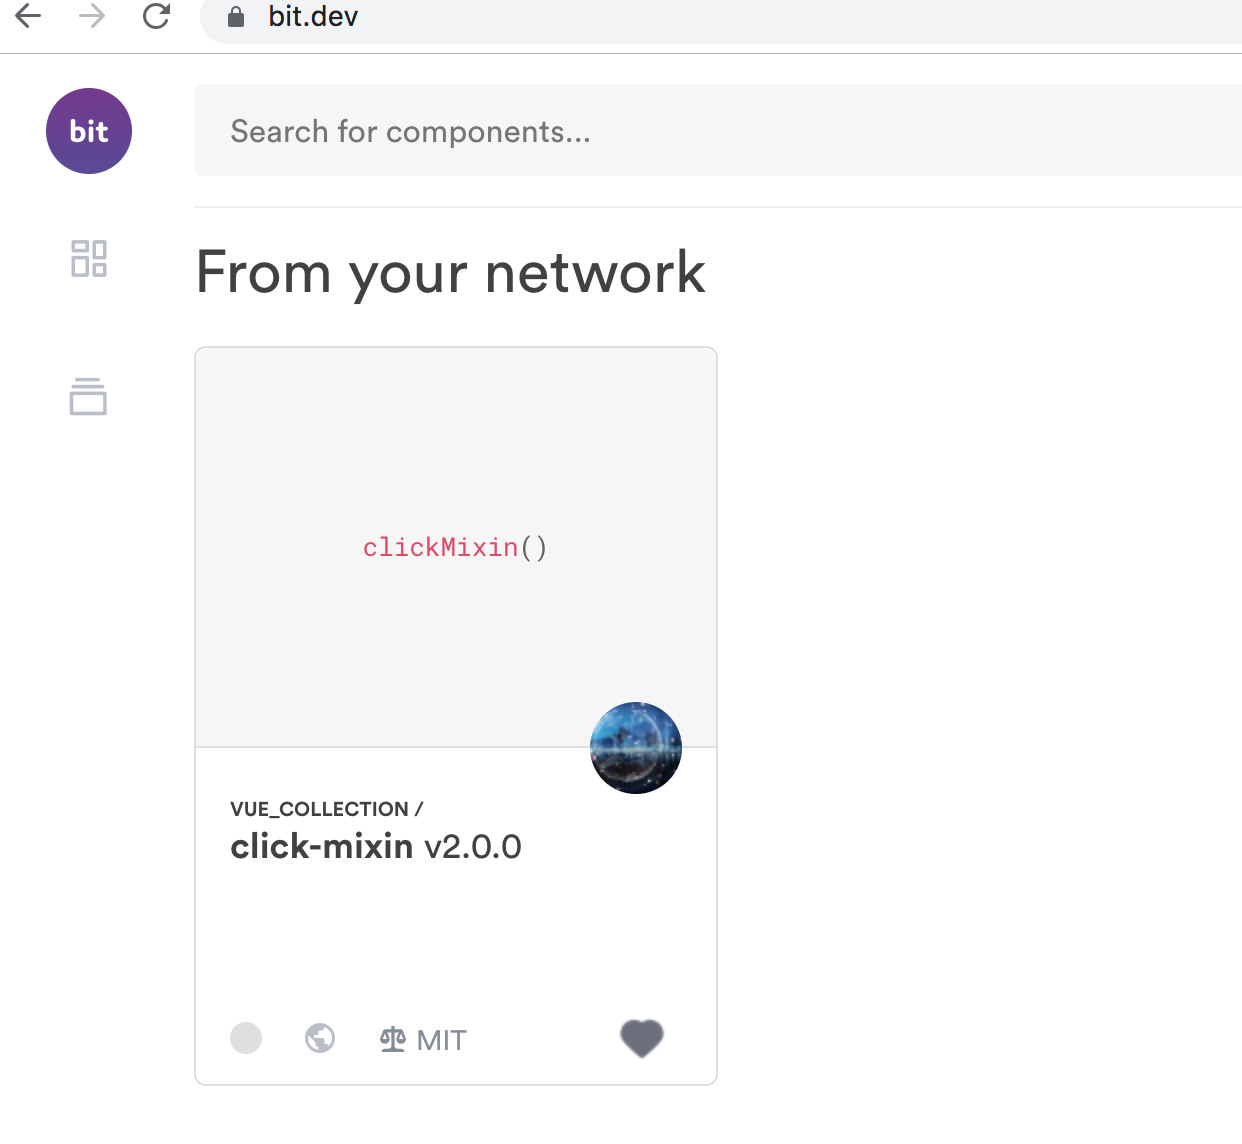
Introducing Bit.dev
Bit is a very powerful and simple-to-use tool that was built to help teams easily share and manage code components in and across projects. We already know how effective code re-use can be when we learned about Mixins. Bit is like an advanced mixin technology in the cloud — think GitHub for components (or better yet, ‘GitHub + NPM’ for components)
Lately, more and more developer teams are getting distributed and as a result, more technologies to power global collaboration are coming on board. Bit is a revolutionary tool that is well positioned as code component sharing tool in the cloud. It helps teams scale shared components to hundreds and even thousands of components while eliminating the overhead around this process. Let us use Bit to share our already created clickMixin across multiple projects.
Getting started
Go to the Bit official webpage and create an account, it is free.
Install Bit globally on your machine:
npm install bit-bin -g
Initializing Bit
Choose an existing repository containing components you’d like to share and reuse, and Initialize a Bit workspace in the project’s directory. In our case, it is the Vue mixin’s folder in your machine. Open a terminal inside VS Code and enter the command below:
bit init
It will ask you if you want to send analytics feedback anonymously to Bit for them to keep improving the project, you can choose yes or no. Then you should see the success message on your prompt
successfully initialized a bit workspace.
Bit commands are so easy and similar to Git commands so you would not have to read any new docs.
Tracking Components
Next step is to track components of your choice with Bit, these can be your whole component folder or any specific component of choice. In our case, we want to track the mixins folder where all your mixins reside. We do this with the bit add command like this:
bit add src/Mixins/*
This does something similar to Git add, for tracking changes. It should show the name of the mixin it is tracking like so:
tracking component click-mixin:
Tagging Component Version
To set a version for your components use the bit tag command.
Bit locks the state of every component’s dependency graph, making its version immutable. When tagging components, Bit first runs the build and test tasks for the components.
You can use the --all flag to tag all the components in the workspace.
bit tag --all 1.0.0
After tagging, you should see a success message like this:
1 component(s) tagged | 1 added, 0 changed, 0 auto-tagged
added components: click-mixin@1.0.0
Export the components
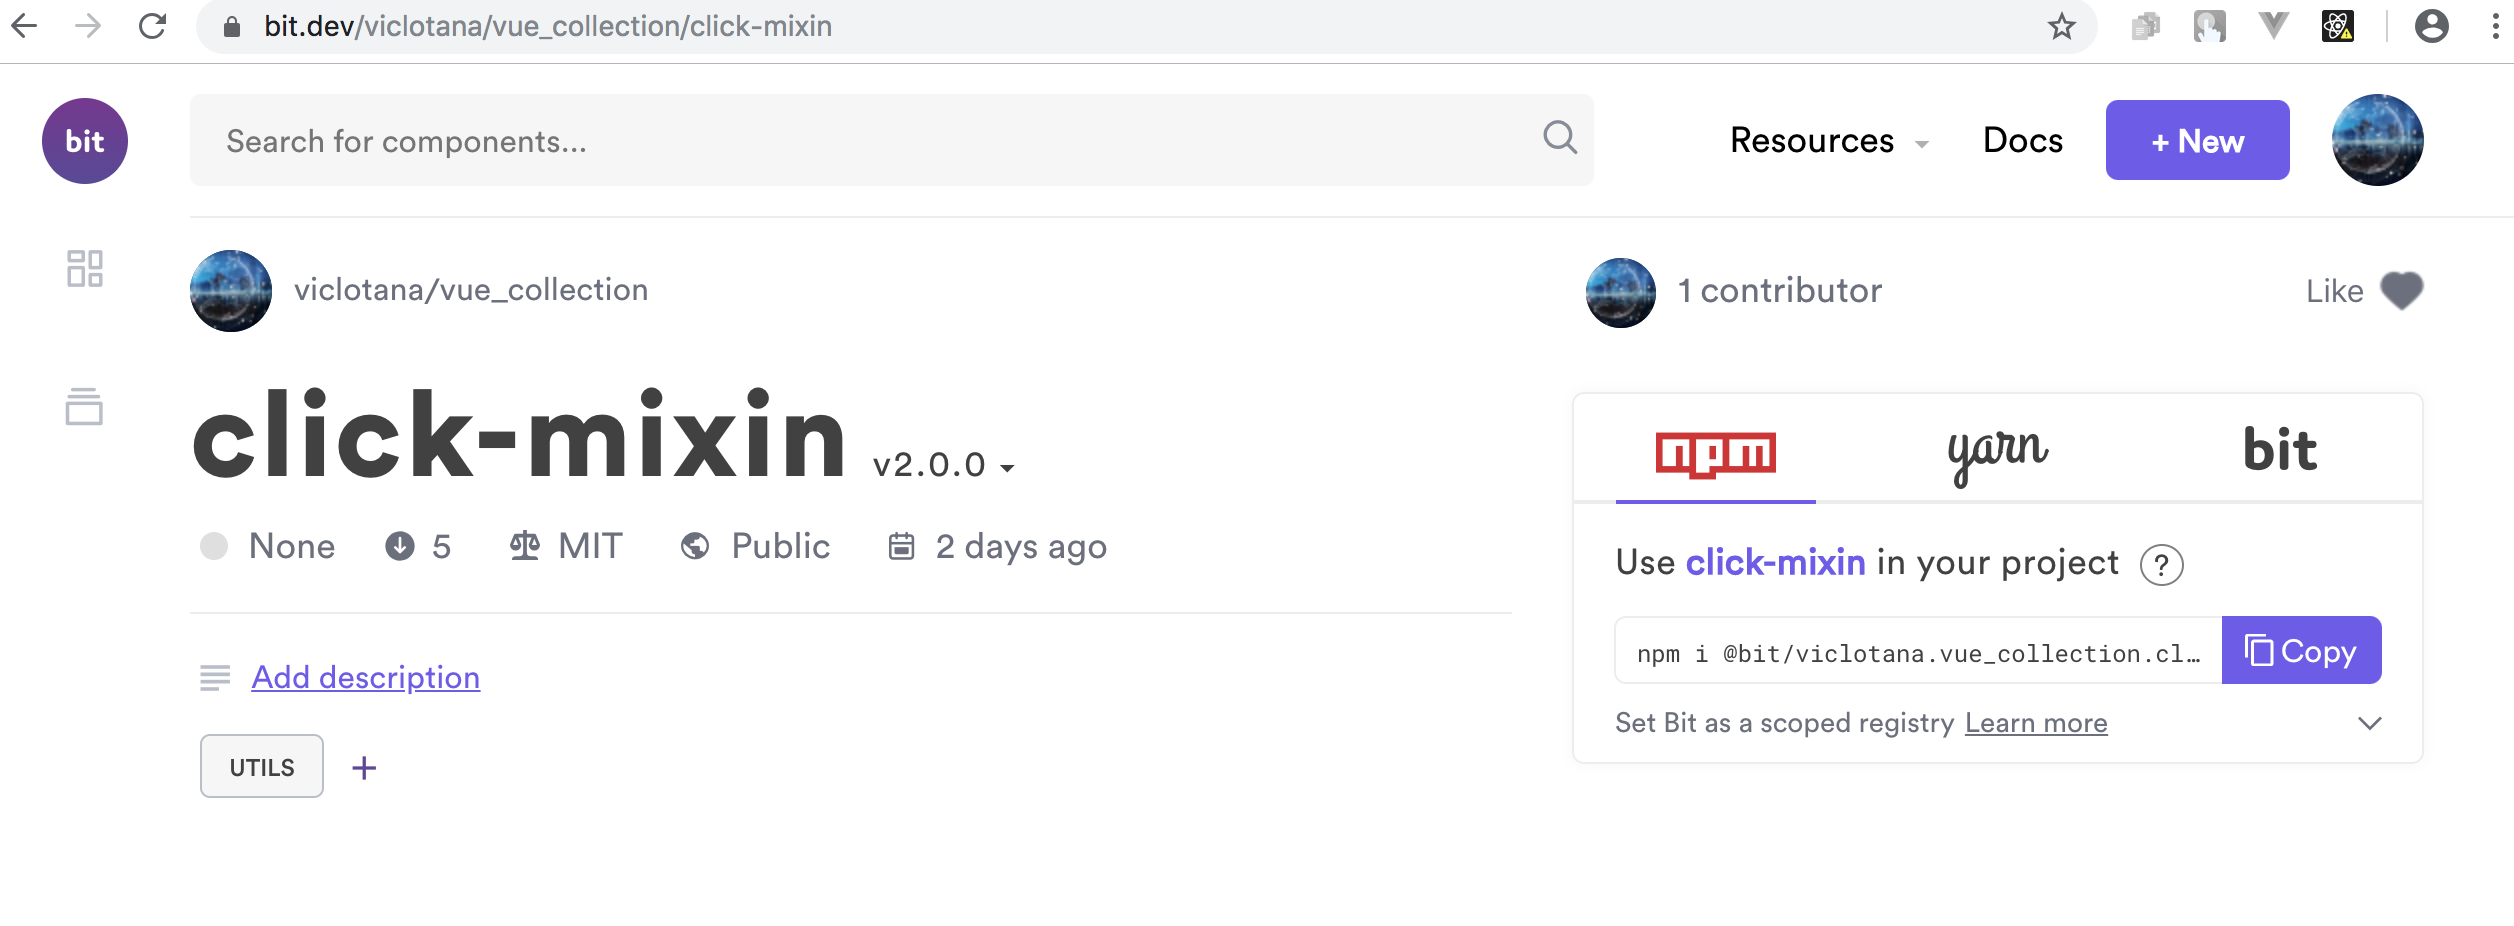
Now that our components are tracked and versioned, export (publish) them to a remote collection. Go to the Bit official homepage and create a collection. A collection is like a repo bucket that hosts and organizes your components.
Use the bit export command to publish the components from your workspace to bit.dev
bit export user-name.collection-name
It will ask for your Bit username and password and after authentication, it will push it to the cloud. You can now head over to bit to view your mixin in your remote collection, which is public (if that is how you set it up) just like public GitHub repos.
Using Mixins in other projects
To use the mixin you have shared in the cloud in any other project:
- Install the mixin inside the desired project.
- Import the mixin in the partcular component you want to use it in.
And the mixin can be used just like it was part of your codebase.
Let us scaffold a new project and add this click mixin to it. Create a new Vue project or download this Vue Mixins starter project
All you need to do is to install the mixins in the cloud inside your project using your favorite package manager, NPM or yarn. Inside your mixin collection (“repo”), Bit has done all the dirty work of packaging and providing the install command.
npm install @bit/viclotana.vue_collection.click-mixin
Now that you have installed the mixin in the new project, you can import the mixin straight from the node modules where the mixin resides. At this stage, go into the two components and copy these inside them:
<template>
<div>
<button v-on:click=”clicked(‘you just clicked on button 2’)”>Button 2</button>
</div>
</template>
<script>
import clickMixin from ‘@bit/viclotana.vue_collection.click-mixin’
export default {
name: ‘Modal’,
mixins: [clickMixin]
}
</script>
When you run the application in your development server you will see it runs exactly like the mixins inside the project.
Conclusion
You have been introduced to Bit as a powerful component sharing tool. You’ve also seen how it can be used to extend the power of Vue mixins in your workflow, when working on multiple projects or when working with teams.
I hope this tutorial will surely help and you if you liked this tutorial, share it with all of your programming buddies!
Originally published on blog.bitsrc.io
#vue-js #javascript #web-development