In the previous articles of this series, we built the bridge that leads us to the best way of migrating our SQL workload to Microsoft Azure, by showing how to create the databases migration strategy that contains a deep study of the current environment and the available options in Azure to replace the on-premises setup, which we tried to make it easier by providing all Azure database services and the workload that fits each service, and finally, we introduced several Microsoft tools and services that can be used to assess the current setup, provide migration guidance steps and migrate the databases to Microsoft Azure services with the minimal downtime.
In this article, we will show how to migrate a SQL Server database from an on-premises server to a SQL Server instance hosted in Azure VM.
Why Azure VM
Although the cost of hosting your SQL Server instance in an Azure VM is higher than using other PaaS services, still can be controlled by the compute and storage size of the VM, it comes with many benefits, include:
- Provides you with full administrative control over the operating system and the SQL Server instance installed in that virtual machine
- Ability to customize high availability, disaster recovery and backup plans
- Supports other SQL Server components that are not supported by the Azure SQL Database, such as SQL Server Transactional Replication, SQL Server Integration Services, SQL Server Analysis Services, SQL Server Reporting Services, Log Shipping and Always On Availability Groups
- Optimized for migrating on-premises SQL Server databases to Azure with the minimal required changes, due to 100% compatibility with all SQL Server versions 2005 and later
- Ability to host multiple databases in the same instance, allowing cross-database transaction execution
Migration Planning
Before migrating your SQL Server databases to a Microsoft Azure VM, you should use the discovery and assessment tools to make the migration process clear and smooth. These tools include the Microsoft Planning and Assessment tool that can be used to discover the on-premises environment configurations and components, the Data Migration Assistant tool that is used to assess the on-premises databases for any blocking or compatibility issue that may affect the migration process and the Database Experimentation Assistant tool that is used to assess the target server for the current workload type.
After assessing the current environment, we should decide which license type we will use for the SQL Server Virtual Machine, where Microsoft supports both the pay-as-you-go (PAYG) model, in which the license cost will be included in the per-second billed cost, and the bring-your-own-license (BYOL) model, in which you can use your own SQL Server license in the Azure VM and billed for the VM usage only.
The next thing to consider here is the size of the virtual machine that will host the SQL Server instance in Microsoft Azure. The size of the machine should consider on-premises workload handling and growing requirements. Take into consideration that the minimum VM size for SQL Server Enterprise editions DS3_v2, and DS2_v2 for the Standard edition. For more information about the VMs sizing in Azure, check the Size for Virtual Machines in Azure.
Prepare a VM on Microsoft Azure
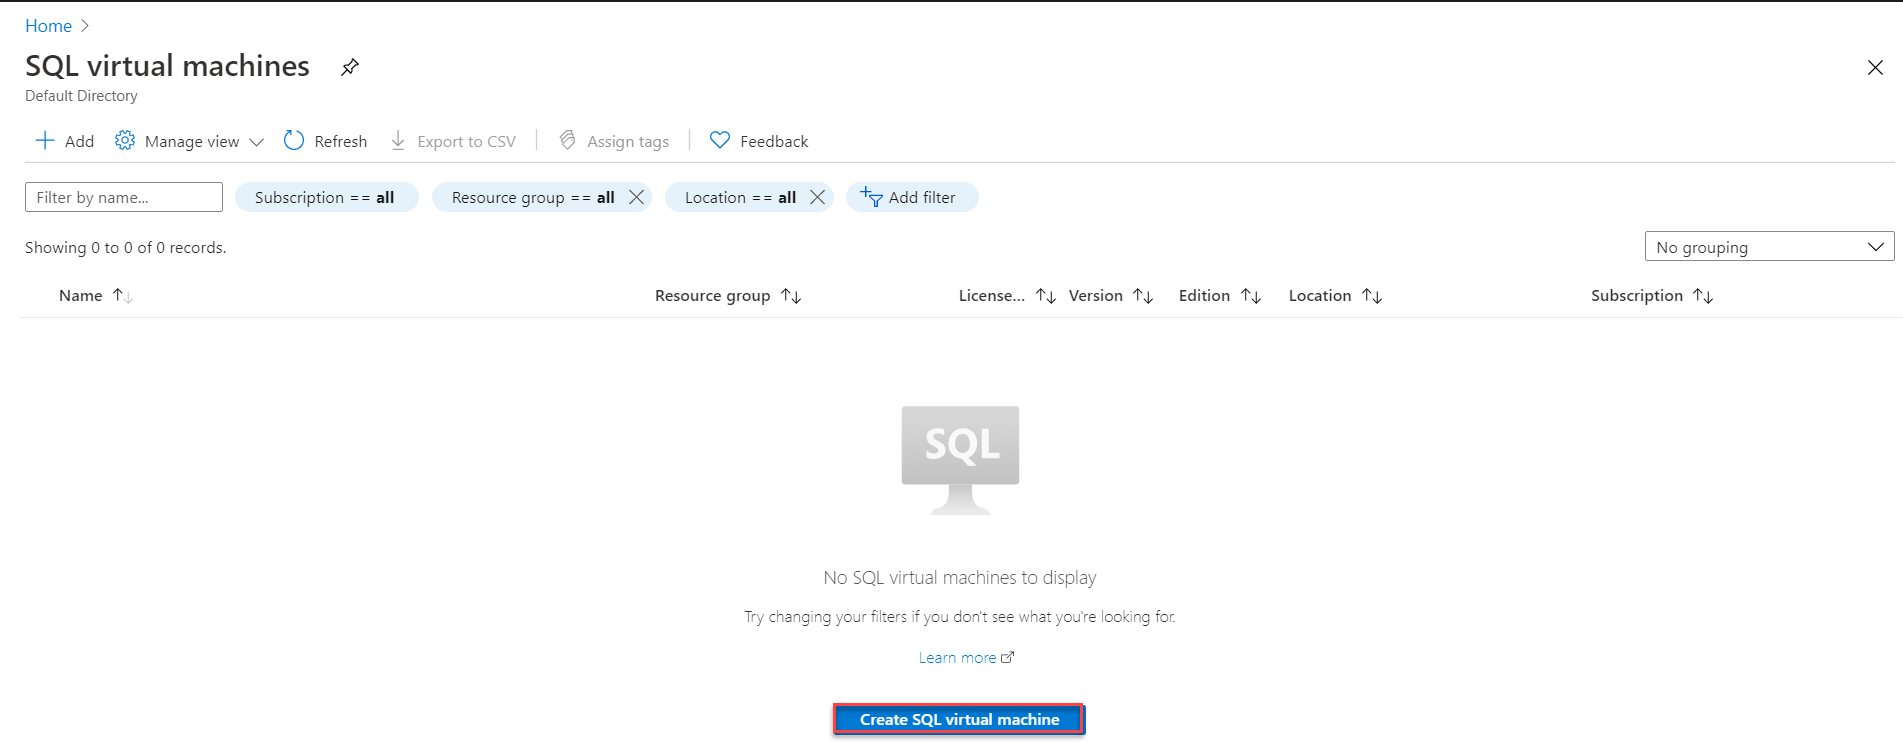
Before we start the migration process, we should prepare the Azure Virtual Machine that will host the target SQL Server instance. To create the SQL Virtual machine, search for SQL Virtual Machines in Azure Portal then click on Create SQL virtual machine, as below:

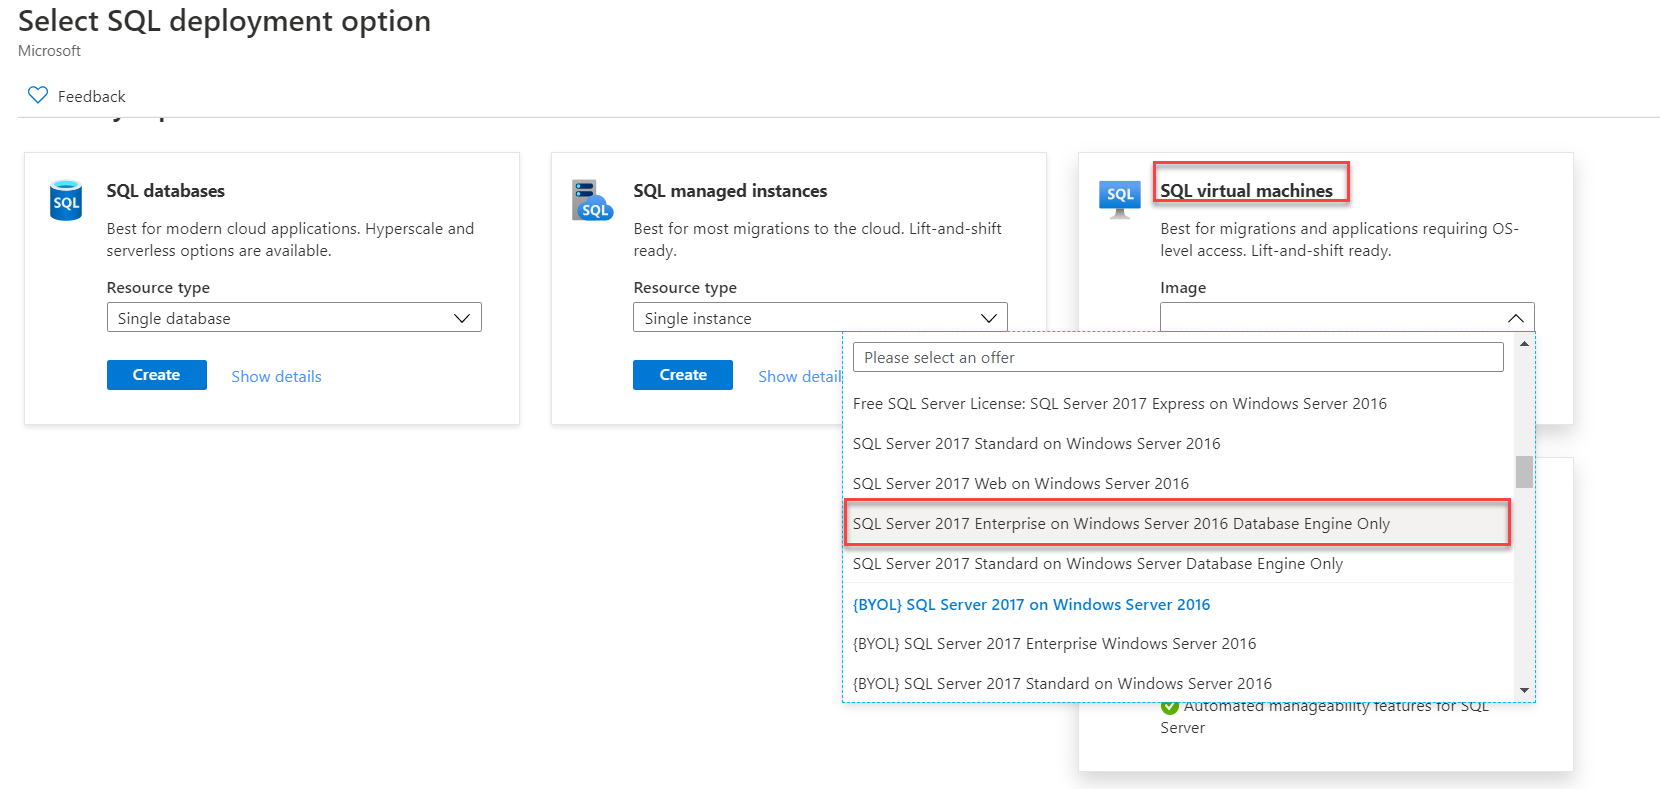
In the “Select SQL deployment option” page, choose the image that will be used to install the Operating System and the SQL Server instance, based on the license and version requirements, then click Create, as below:
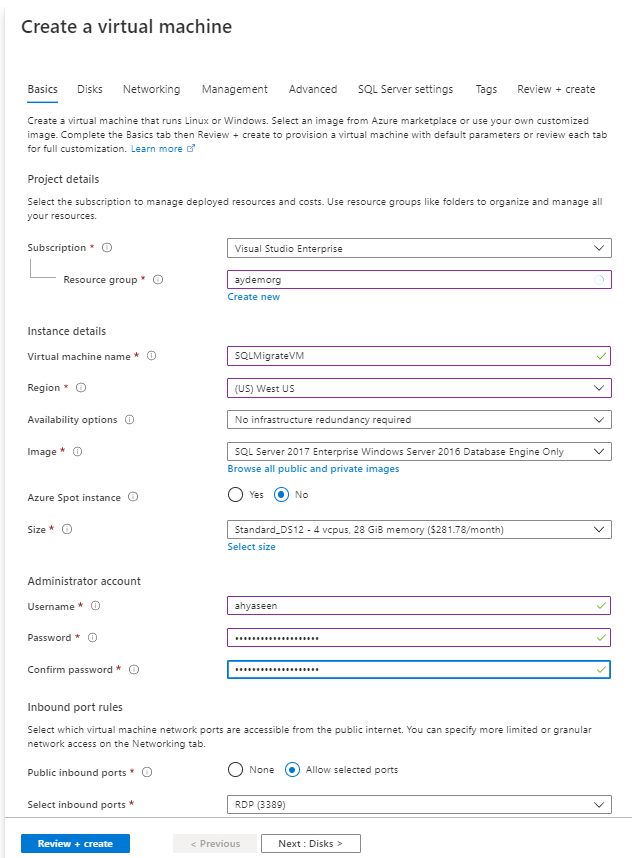
In the Basic page of the Create a Virtual Machine window, provide the resource group under which you will create the VM, the region where the VM will be hosted, a unique name for the VM, the size for the VM and the administrative account that will be used to connect to that VM. After providing the required information, click on Next to configure the SQL Server Settings:
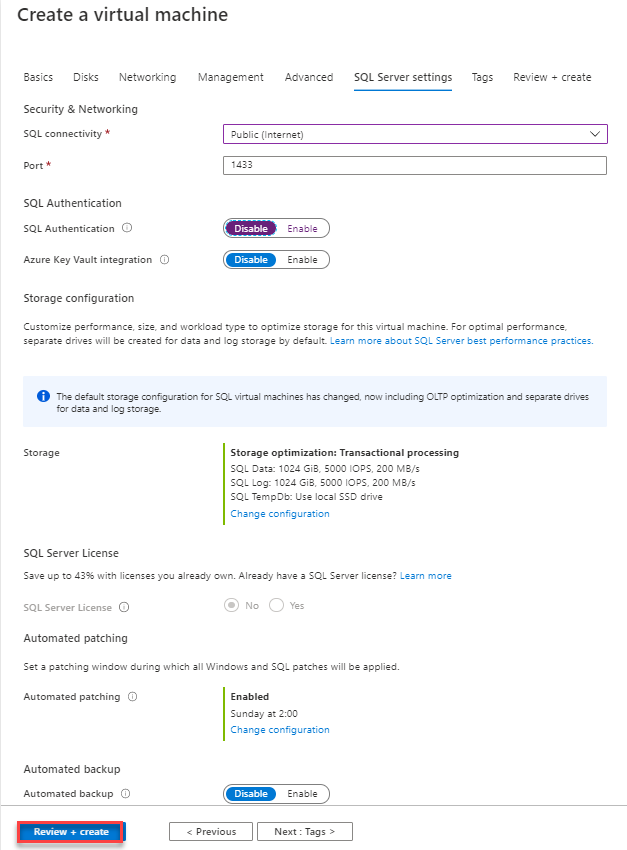
In the SQL Server settings, configure the SQL Connectivity as Public to allow connections to the SQL Server over the internet. Internally, the portal will enable the TCP/IP protocol for the SQL Server, configure a firewall rule to open the configured TCP port, enable the SQL Server Authentication and configures the network security group on that SQL VM to all TCP traffic on the configured TCP port. Click Review + Create to proceed with the VM creation, as below:
#azure #migration #sql-server #sql-azure