“I want to have sensors everywhere!” In this article we’ll show you how to create a wireless sensor node using an inexpensive NodeMCU module.
NodeMCU is a tiny, low-cost WiFi-enabled microcontroller that supports direct connectivity to sensors via SPI, I2C, ADC, GPIO, etc. Programming of the module is made easier with support for the Arduino Integrated Development Environment (IDE). You can build up as many wireless sensor nodes as needed to create your wireless sensor network.
The wireless sensor nodes will send data to the Universal Sensor Hub that we showed you how to build in our prior article. We use the same sensor from the universal hub article, but feel free to experiment with other sensors — gas sensors, door switches, noise detectors, water level, soil moisture level, etc. The Universal Sensor Hub uses Machinechat JEDI One software running on the Raspberry Pi. JEDI One enables you to collect data from all the sensors and display the data on a dashboard accessible from any browser on the network.
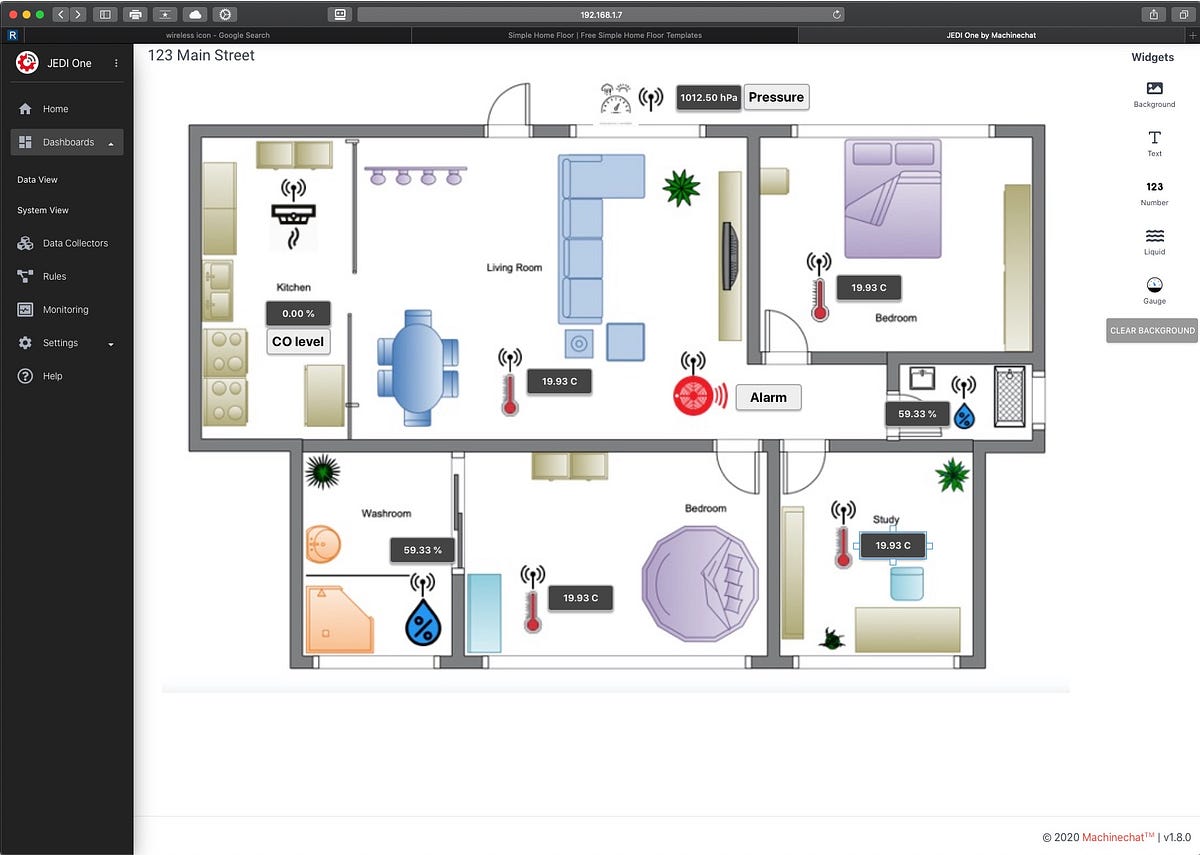
Here is an example of a JEDI One system view of multiple sensors:

We will show you in just 4 steps, how to get a wireless sensor network started. A few items you will need:
- NodeMCU modules — less than $5 each
- BME280 Environmental sensor module w/ wires — $12 This one is used in example below
- Micro USB cable — $5
- Arduino IDE — Free
- Universal Sensor Hub with Machinechat JEDI One installed
#networking #wireless #nodemcu #diy #raspberry-pi #neural networks