This article assumes you already know what GraphQL and Apollo client are and you’re able to build Vue applications with Vue CLI## Why do we need Apollo local state management?
Imagine a Vue application fetching some data from a REST API. Where do you usually store this data? Probably, the answer would be ‘in the local component state’ or, if application is big enough, ‘in the Vuex store with the rest of data’. This answer makes sense, because we can have the single source of truth for our application.
Now imagine an application fetching data from a GraphQL endpoint with Apollo client. By default, Apollo will store this data to Apollo cache. But what if we have some local application state, stored in Vuex? If we copy data from Apollo cache to Vuex, we’re doubling our data. If we leave data from the API in Apollo and local data in Vuex, there will be two sources of truth. What would be a good way to store local data?
Previously there was a library named apollo-link-state to manage local data. But since Apollo 2.5 release, we don’t need it anymore because this functionality is now a part of Apollo core. So, we can simply manage our local state without adding any new dependencies 🎉
What are we going to build
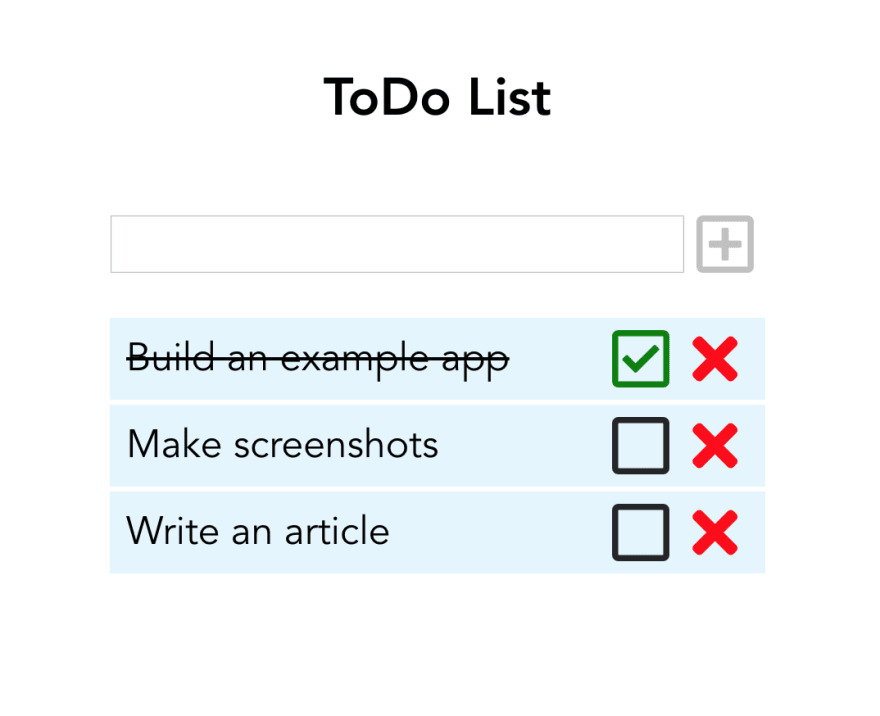
Let’s try to create a simple to-do application with Vue and Apollo client.
I’ve started with a Vue CLI-powered to-do application with some custom styles. You can find its source code here.
Add Apollo to Vue application
First thing we need is to install Apollo client and integrate it to our Vue app. For integration, we will use vue-apollo plugin.
To install everything we need, type the following command in the terminal:
npm install --save vue-apollo graphql apollo-boost
or
yarn add vue-apollo graphql apollo-boost
Then open main.js file and add
// main.js

Vue.use(VueApollo);
This way we’re adding the vue-apollo plugin to our Vue application.
Now we need to configure our Apollo client. First, let’s add an import on the top of main.js file:
// main.js

import ApolloClient from 'apollo-boost';
// rest of imports

Vue.use(VueApollo);
Then, let’s create a client:
// main.js

import ApolloClient from 'apollo-boost';
// rest of imports

Vue.use(VueApollo);

const apolloClient = new ApolloClient({});
Add a provider based on this newly created client and inject it to Vue application instance:
// main.js

const apolloProvider = new VueApollo({
  defaultClient: apolloClient,
});

new Vue({
  render: h => h(App),
  apolloProvider, //here goes your Apollo provider
}).$mount('#app');
Now we’re ready to create an Apollo-powered store.
Initializing an Apollo cache
We’re going to initialize an Apollo cache where we will store our to-do items. Apollo has an InMemoryCache constructor to do this:
// main.js

import ApolloClient from 'apollo-boost';
import { InMemoryCache } from 'apollo-cache-inmemory';

// rest of imports

const cache = new InMemoryCache();
Now we need to add it to our client:
// main.js

const apolloClient = new ApolloClient({
  cache,
});
So far our cache is empty and we’re going to add some data to it. But first let’s create a local schema. This step could be optional, but just like how a schema is the first step toward defining our data model on the server, writing a local schema is the first step we take on the client.
Creating a local schema
Let’s think for a minute: what should our to-do item look like? It definitely needs to have some text but what else? Probably we need some property to define if it’s already done or not and also an ID to distinguish one todo-item from another. So, it should be an object with three properties:
{
  id: 'uniqueId',
  text: 'some text',
  done: false
}
Now we’re ready to add item type to GraphQL local schema.
Let’s create a new file resolvers.js in the src folder and add the following code to it
import gql from 'graphql-tag';

export const typeDefs = gql`
  type Item {
    id: ID!
    text: String!
    done: Boolean!
  }
`;
gql here stands for the JavaScript template literal tag that parses GraphQL query strings.
Awesome! Let’s import typeDefs and add them to our Apollo client:
// main.js

import ApolloClient from 'apollo-boost';
import { InMemoryCache } from 'apollo-cache-inmemory';
import { typeDefs } from './resolvers';
// rest of imports

const apolloClient = new ApolloClient({
  cache,
  typeDefs,
  resolvers: {},
});
Please note the empty resolvers object here: if we don’t assign it to the Apollo client options, it won’t recognize the queries to local state and will try to send a request to remote URL instead
Now we need to add some initial data to our cache. To directly write it here, we will use thewriteQuerymethod:
// main.js

// apollo client code

cache.writeData({
  data: {
    todoItems: [
      {
        __typename: 'Item',
        id: 'dqdBHJGgjgjg',
        text: 'test',
        done: true,
      },
    ],
  },
});

// apollo provider code
We’ve just added an array of todoItems to our cache data and we are saying that every item has a type name of Item (specified in our local schema).
Now we’re ready to query our local data from our Vue component!
Query local data
First, we need to build a GraphQL query to retrieve the data. Let’s create a graphql folder, add a queries.js file to it and import graphql-tag there.
// queries.js

import gql from 'graphql-tag';
Now let’s write a query:
// queries.js

import gql from 'graphql-tag';

export const todoItemsQuery = gql`
  {
    todoItems @client {
      id
      text
      done
    }
  }
`;
So, we defined the name of the query here (todoItems) and we specified that this query should not be executed against remote GraqhQL API. @clientdirective here tells Apollo client it should fetch results in the local data store.
Finally, we’re ready to send the query from the Vue component. To do so, let’s open our App.vue, import the query constant there:
What’s going on here? We call the $apollo.mutate method (provided with vue-apollo plugin) and we pass the mutation we created earlier in queries.js and an id variable (ID is passed from the template where we’re checking the item):
<ListItem
  v-for="(item, index) in todoItems"
  :key="index"
  :content="item"
  @toggleDone="checkItem(item.id)"
  @delete="deleteItem(item.id)"
/>
Now when we’re clicking on the checkbox, we will send a mutation that changes our local state. We can see immediately that our todoItems array is changed with this mutation so checkbox becomes checked/unchecked.
Deleting an item
Now we need the way to delete an item. Let’s start again with creating a deleteItem mutation:
// queries.js

export const deleteItemMutation = gql`
  mutation($id: ID!) {
    deleteItem(id: $id) @client
  }
`;
As you can see, it’s very similar to the previous one: again, we’re passing an ID as a parameter. Now let’s add a resolver for it:
// resolvers.js

deleteItem: (_, { id }, { cache }) => {
  const data = cache.readQuery({ query: todoItemsQuery });
  const currentItem = data.todoItems.find(item => item.id === id);
  data.todoItems.splice(data.todoItems.indexOf(currentItem), 1);
  cache.writeQuery({ query: todoItemsQuery, data });
  return true;
},
Again, we’re reading the todoItemsQuery from the cache as a first step and writing it back later (and we’re simply returning true to show the request was successful). But instead of changing currentItem we’re just removing it from the todoItems array.
Now let’s add this mutation to the App.vue.
Very similar to checkItem, isn’t it?
Adding new item
While the two previous mutations were really similar to each other, addItemwill be different. First of all, we will pass a text, not an ID, and we want to be able to see what is actually added:
// queries.js

export const addItemMutation = gql`
  mutation($text: String!) {
    addItem(text: $text) @client {
      id
      text
      done
    }
  }
`;
You can assume the resolver will be more complex as well: we need to generate a unique ID somehow. For this project we’re going to use shortidlibrary:
npm install shortid
or
yarn add shortid
Now let’s start building our resolver:
// resolvers.js
import shortid from 'shortid';

export const resolvers = {
  Mutation: {
    ...
    addItem: (_, { text }, { cache }) => {
      const data = cache.readQuery({ query: todoItemsQuery });
      const newItem = {
        __typename: 'Item',
        id: shortid.generate(),
        text,
        done: false,
      };
    },
  }
}
As you can see, now we’re taking a text from our mutation arguments and set a newItem text property equal to it. For id we’re generating a new unique ID with shortid.generate method. As for done property, we always set it to false when creating a new todo-item (because obviously it’s not done yet!).
Now we need only to push this newly created item to the todoItems array, write the data back to the cache and return a newItem as a mutation result.
// resolvers.js

addItem: (_, { text }, { cache }) => {
  const data = cache.readQuery({ query: todoItemsQuery });
  const newItem = {
    __typename: 'Item',
    id: shortid.generate(),
    text,
    done: false,
  };
  data.todoItems.push(newItem);
  cache.writeQuery({ query: todoItemsQuery, data });
  return newItem;
},
We’re ready to call our addItem mutation from the component! Let’s import it to App.vue…
…and add it to the addItem method:
  addItem() {
    if (this.newItem) {
      this.$apollo.mutate({
        mutation: addItemMutation,
        variables: { text: this.newItem }
      });
      this.newItem = "";
    }
  },
newItem here represents a string from the input field and we’re going to call a mutation only when we have some actual text to send. Also, after we’ve added a new item, we want to clear an input.
Yay, our application is ready! 🎉
You can find the full application source code here.
#vue-js #graphql #javascript