TX Text Control for Angular requires a backend for the document editor and viewer. This step-by-step walkthrough shows how to create the ASP.NET Core backend.
Prerequisites
In order to create a backend application, TX Text Control .NET Server for ASP.NET must be installed on your machine. When deploying this backend application, refer to the documentation to learn how to install the required TCP Service:
Development and Redistribution
Creating the Project
The following tutorial shows how to create an ASP.NET Core 3 Web Application that can be deployed to Windows machines.
- In Visual Studio 2019 (> 16.5.4), create a new project, select ASP.NET Core Web Application as the project template and continue with Next.
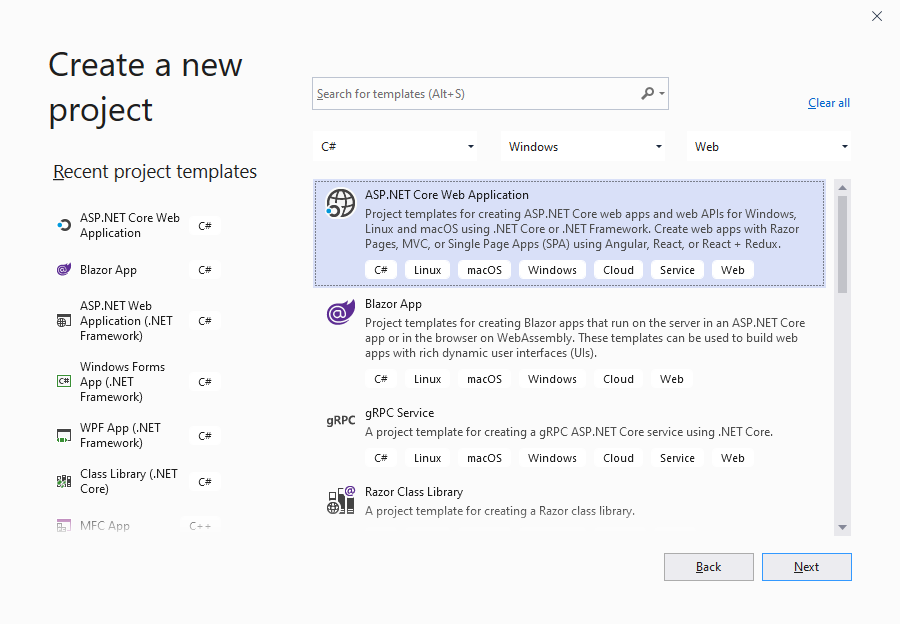
- Select a project name, location and solution name in the next dialog and confirm with Create.
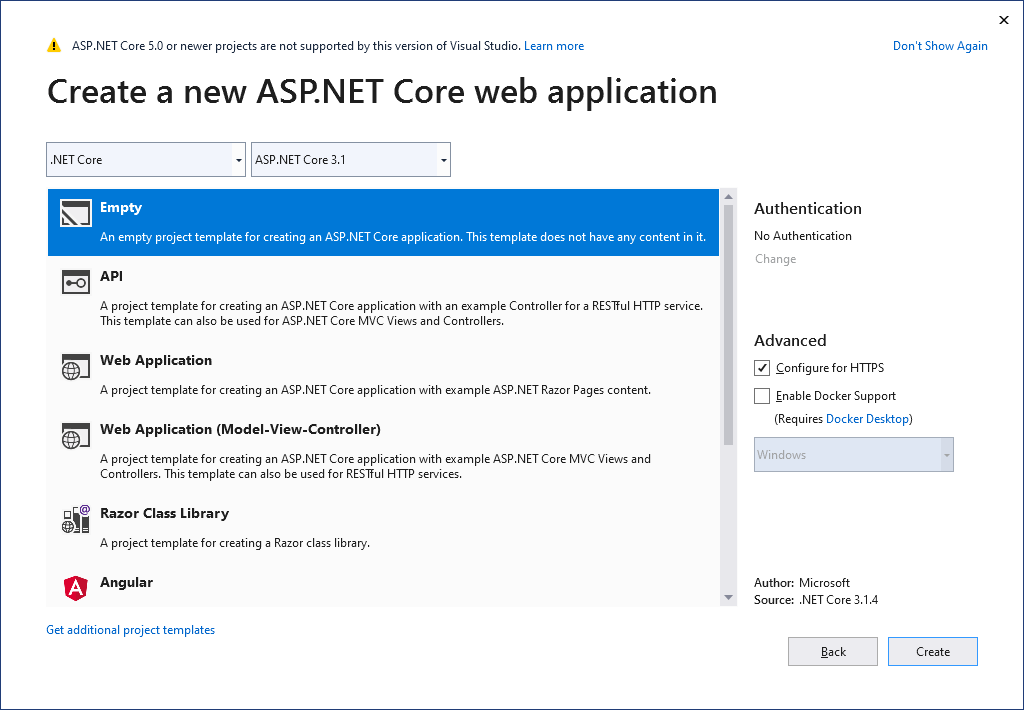
- In the last dialog, select .NET Core and ASP.NET Core 3.1 as the project target, select Empty as the template and confirm with Create.
Adding TX Text Control Assemblies
- While the project is selected in the Solution Explorer, choose Project -> Add Reference… to open the Reference Manager. In the opened dialog, select Browse… to select the required TX Text Control assemblies. Navigate to the installation folder of TX Text Control and select the following assemblies from the Assembly folder:
- TXDocumentServer.dll
- TXTextControl.dll
- TXTextControl.Server.dll
- TXDrawing.dll
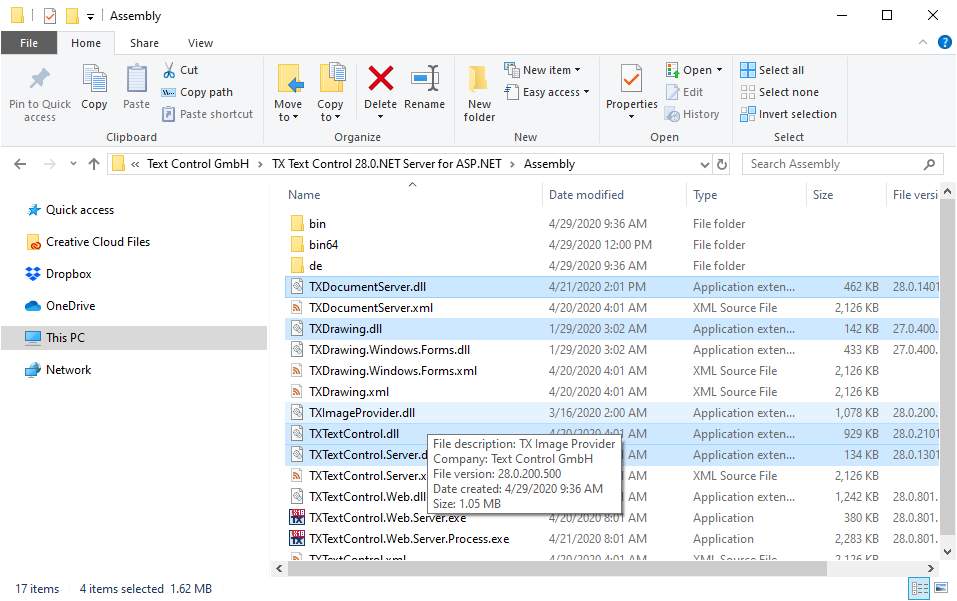
Repeat this step with the following assemblies from the Assembly/bin64 folder:
- txic.dll
- txkernel.dll
- txtools.dll
- txpdf.dll
After selecting these assemblies, close the Reference Manager by confirming with OK.
#angular #aspdotnet #web-development #developer